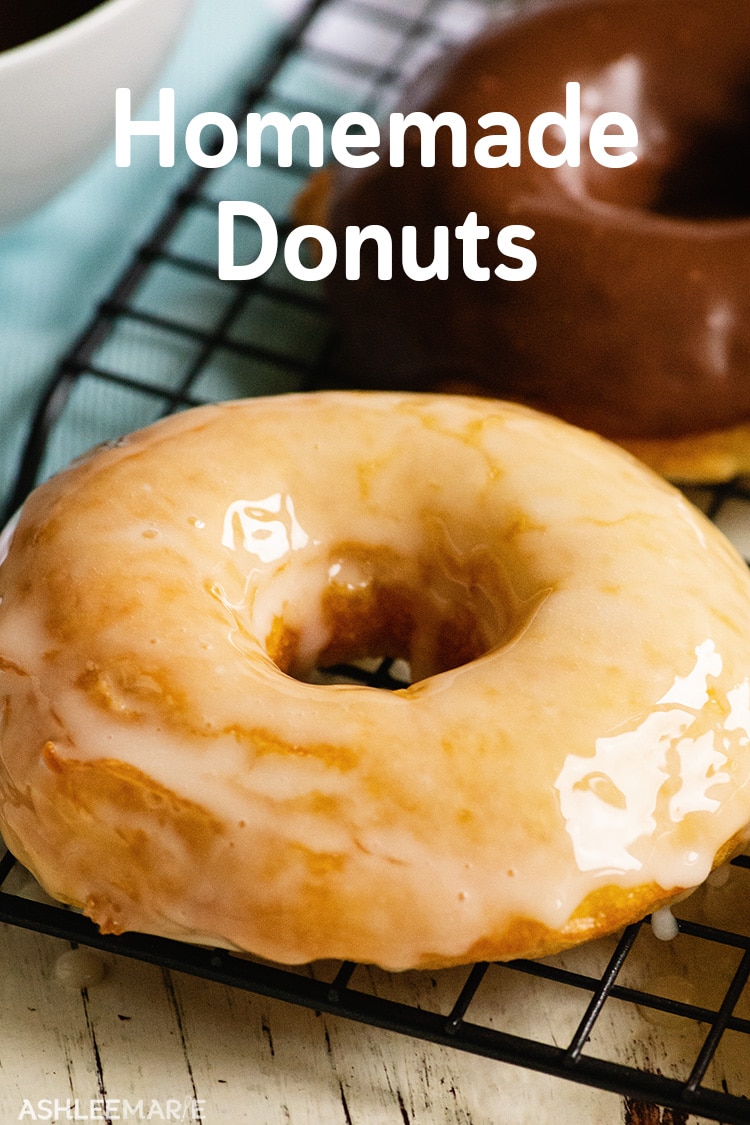
If you’d ever had a fresh donut, you’d understand my obsession with them! This easy homemade donut recipe is a raised donut: soft, light, and fluffier than cake donuts.
How I created this Homemade Donut Recipe
I have always loved donuts. I mean who doesn’t. My family was the type that would camp out for the new krispy kreme locations (back when they were still a novelty and still gave away “hot now” donuts).
A few years ago we were on a family vacation and they had a made to order donut place – it was amazing, you’d order, they’d put your donut in the fryer right then and then dip the warm donut in the glaze and hand it over – it was DIVINE!
Making fresh donuts is only time consuming because of the rising times. The good news is that you can refrigerate the dough during the first rise to slow it down – this way you can make the dough whenever you have time and then pull them out to shape/rise/bake when you want to eat!
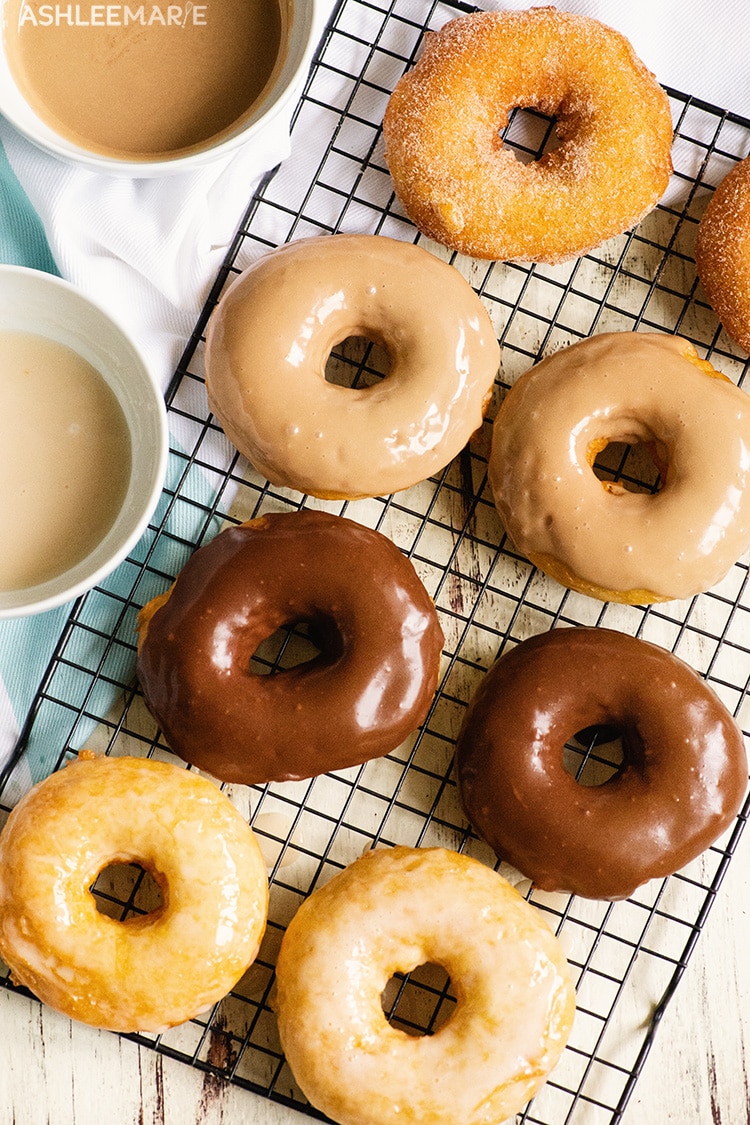
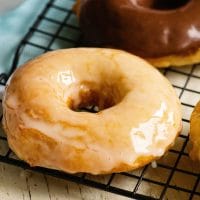
The glazes are also super easy – start with just a little milk and add more as you need to to get the consistency you like – more runny vs thick. I like the classic glaze more runny and the chocolate more thick – personal preference
If you want to add sprinkles/nuts/coconut/bacon just have it ready to go so after glazing you can drip right away. I like to set up a glaze/topping station and let my kid create their own donuts!
Just take me to the Homemade Donut Recipe already!
If you’d rather skip my tips and tricks for homemade donuts, along with links to other sweet recipes and get straight to these delicious raised donuts – simply scroll to the bottom of the page where you can find the printable recipe card.
Is it donuts or doughnuts?
Doughnut is the original and official spelling and donut is an american creation that caught on when “dunkin’ donuts” became popular.
In most official or professional publications they still use doughnut, but looking at google trends online donut is far and away the more popular!
Tips to Fry the Perfect Raised Donut
-Grease the bowl before adding the dough to it for the rise and also grease the plastic wrap
-Getting a deep-fryer is absolutely worth it if you fry often. But an electric skillet works just great for this recipe as you only need about 1 1/2 inches of oil.
-If you don’t want to spend the money on a fryer, you will need a good thermometer and you’ll have to babysit the pot.
-Be sure to pick the right oil. Olive oil is not good for deep frying (too sensitive to heat), but many other oils are good, and their flavor can add to the dish.
-Cut one donut out at a time and take it out of the dough and take out the center – if not it will continue to rise and stick back together!

-As you cut the donut shape out of the dough I immediately put it on a parchment square – this way once the donut has risen enough to fry you don’t have to grab the donut and stretch or deflate it while handling it.
-Spray some plastic wrap with non stick spray and cover the donuts while rising the second time.
-When it’s time to fry just lift the parchment paper and slide the whole thing into the oil – the parchment paper will separate and you can pull it out and toss it.
-Have a wire rack in a jelly roll pan with newspaper and a paper towel ready for the finished fried donuts to drain before you start.
-You can reuse frying oil, just strain it into a container till you want to use it again. And if you fry meat, be sure to keep your meat frying oil and your everything-else frying oil separate. Cross contamination is dangerous.
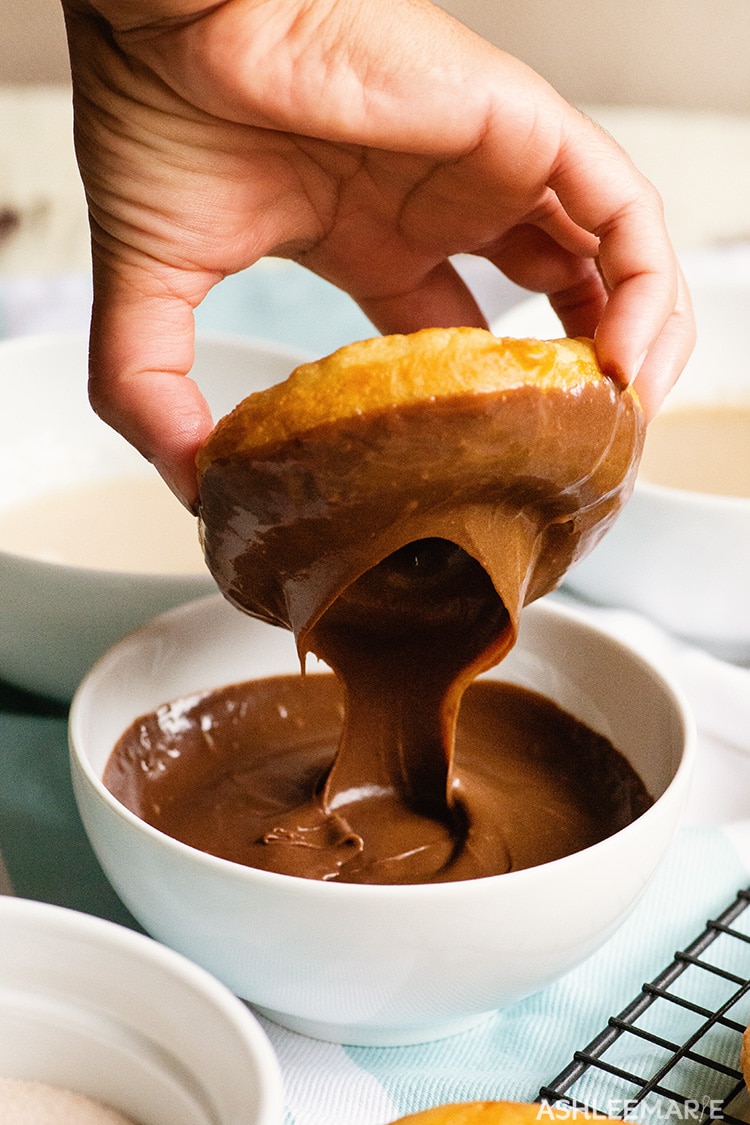
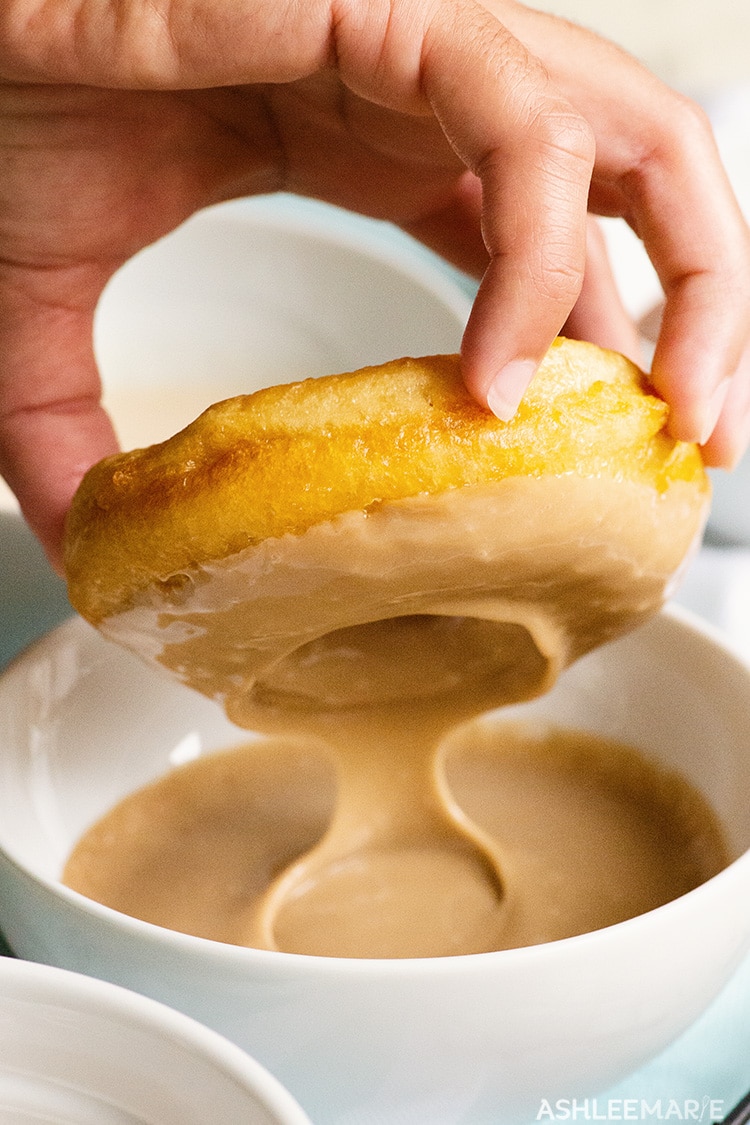
How to easily Glaze a Raised Donut
- Drop the donut in, give it a twist, then pull it up! I use a finger in the center and my thumb on the outside to limit my fingers getting messy.
- Let it drip a bit then flip over quickly to let the glaze settle across the top and down the sides
- The glaze thickness will determine how much the glaze spreads and drips – I like my classic glaze thinner so it gives more coverage like the glaze fountain at krispy cream…
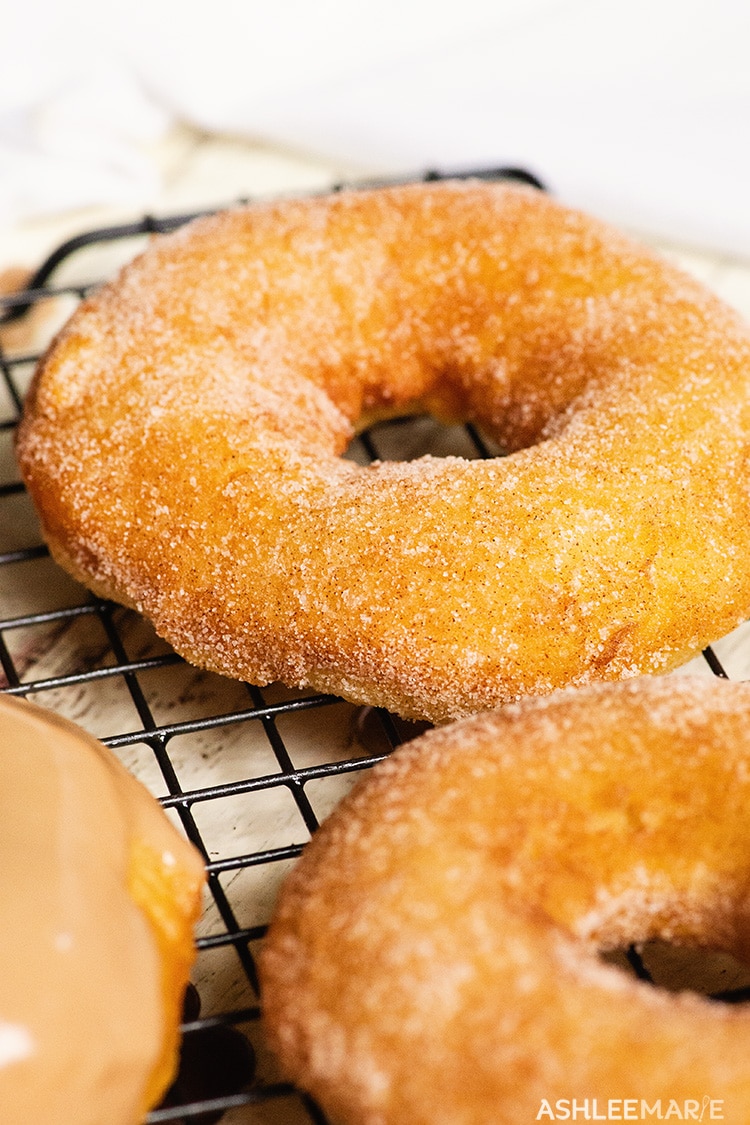
- Cinnamon and sugar sticks to warm donuts, so make sure you coat them fairly quickly if you want a cinnamon and sugar donut.
- It’s up to you how warm or cool the donut is before adding glaze, I like to do it as soon as I can tough the donut without getting burned! But my kids prefer them a little cooler
- Be sure to add any toppings you want while the glaze is still wet, or else the toppings won’t stick.
To make this Homemade Donut Recipe you’ll need
- A mixer for the dough, and dough hooks. (like this one and this one)
- A donut cutter, I like the 3 1/2 inch, but a 3 inch cutter works well too!
- Something to fry the dough in; I love having my own deep-fryer or electric skillet!
- Plastic wrap
- Non stick spray
- Parchment squares
- Wire rack, a jelly roll pan, and paper towels
- Wide slotted flipper
Homemade Donuts
If you love these easy homemade donuts as much as I do, I’d love a 5 star review. Be sure to share on social media and tag me if you make it @ashleemariecakes! If you want to stay updated on new recipes sign up for my newsletter and join my Facebook Group!
If you love Homemade Donuts you’ll love these other sweet recipes!
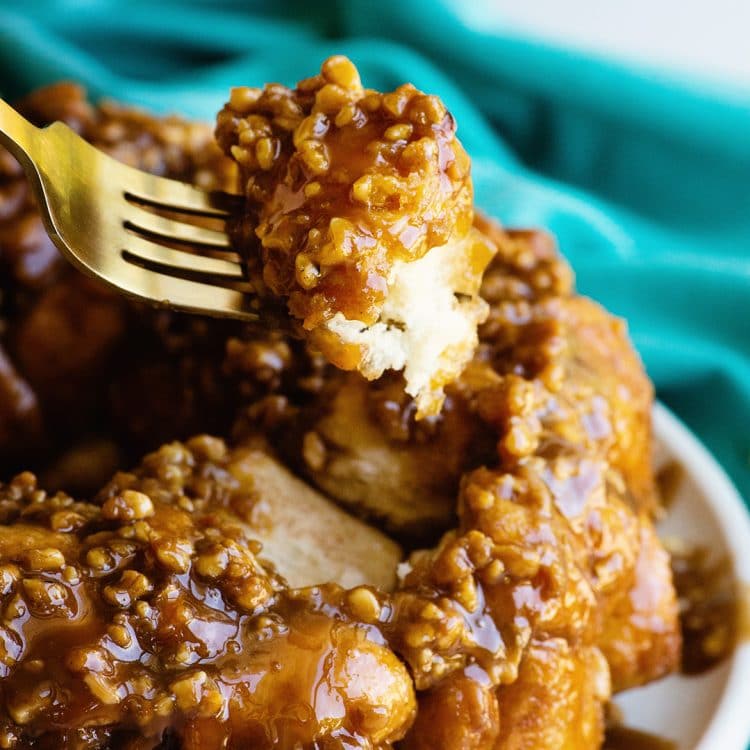
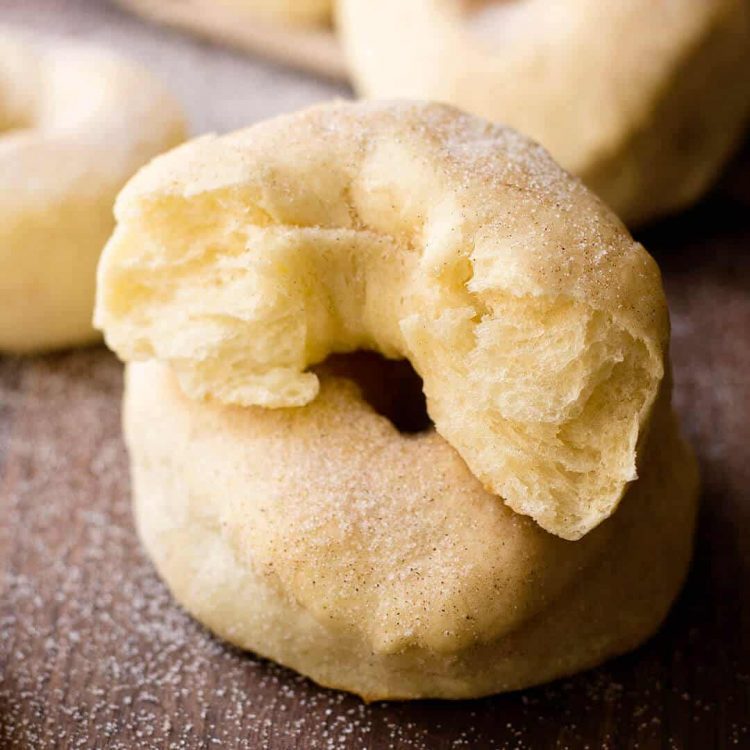
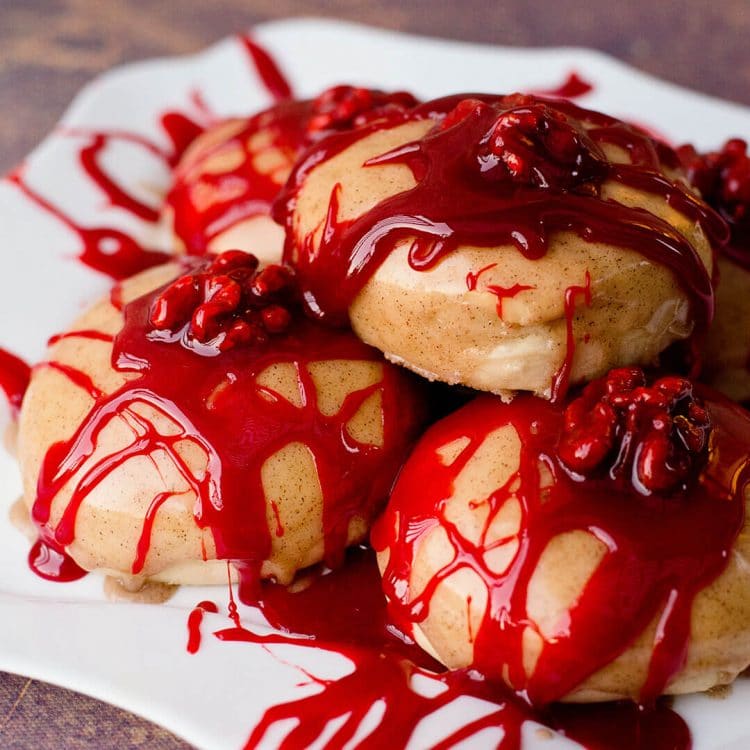
Fast and Easy Monkey Bread | Baked Raised Donut | Bloody Caramel and Cinnamon Apple Baked Donuts
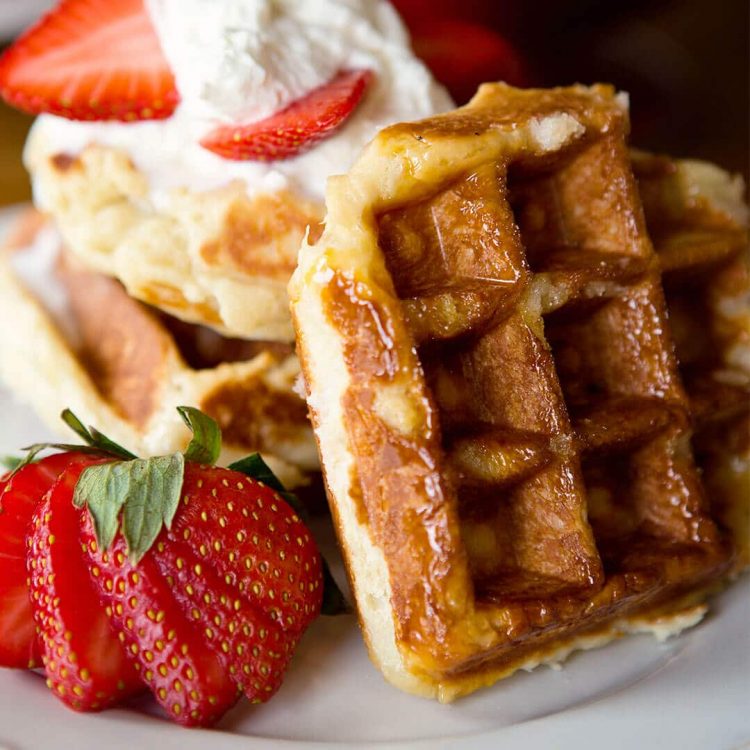
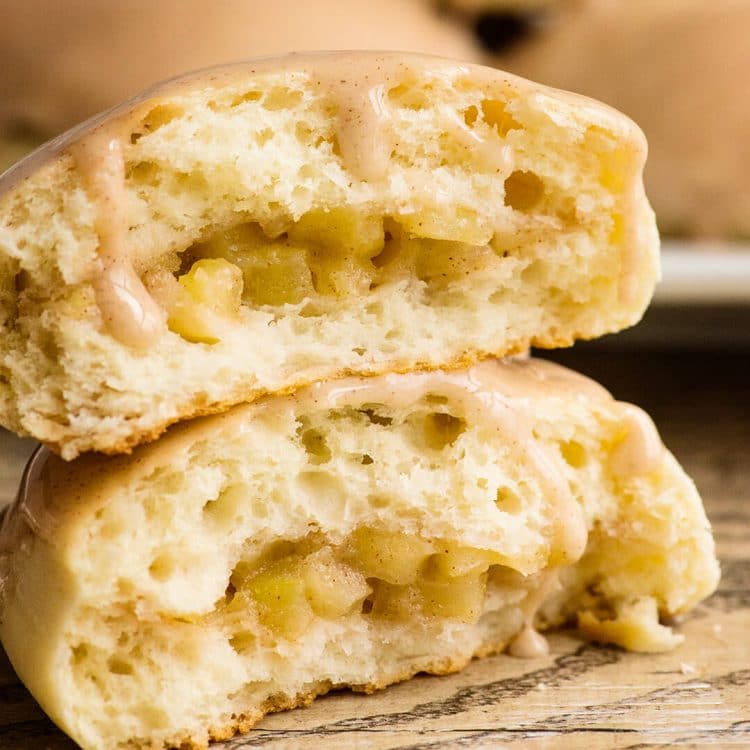
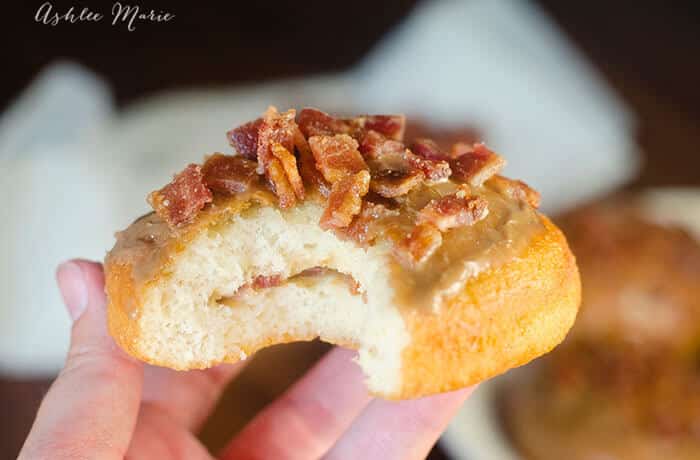
Traditional Belgian Liege Waffles | Lemon Donuts and Raspberry Glaze | Maple Bacon Donuts
Connect with Ashlee Marie Online!
To learn how to make Homemade Donuts play the video in the recipe card. You can find all my cooking show style recipe videos on YouTube, or my short recipe videos on Facebook Watch, or my Facebook Page, or right here on our website with their corresponding recipes.
Homemade Donuts
Ingredients
Donut
- 3 Tbsp active dry yeast
- 2 C whole milk heated to 110 degrees
- 5 C bread flour
- 4 Tbsp granulated sugar
- 1 tsp salt
- 2 tsp vanilla extract
- 2 lrg eggs
- 2 lrg egg yolks
- 1/2 C butter softened
- canola oil for frying
Cinnamon Sugar
- 1 1/2 C sugar
- 2 Tbsp cinnamon
Vanilla Glaze
- 1 ½ C powdered sugar
- 2-4 Tbsp milk
- 2 tsp vanilla
Chocolate Glaze
- 1 ½ C powdered sugar
- 2 oz chocolate
- 2 Tbsp butter
- 3-5 Tbsp milk
- 1 tsp vanilla
Maple Glaze
- 1 ½ C powdered sugar
- 2 Tbsp maple syrup
- 1-2 Tbsp milk
- 1 tsp mapaline or other maple extract
Instructions
Donut
- In your mixer, with your paddles, add the yeast, milk and 2 C flour and mix until smooth.
- Then let it rest, covered, in a warm spot for 20 mins.
- Mix to deflate
- Add the sugar, salt, vanilla, eggs and egg yolks and mix on low until smooth!
- add 1 1/2 more cups flour and mix until smooth
- add the softened butter and mix until incorporated.
- Switch over to a dough hook.
- Now you'll start adding the rest of the flour, 1/2 cup at a time.
- Keep adding flour and mixing on low until the dough pulls away from the sides. It will still be very moist, and a little sticky, but not too much. Keep kneading until the dough can be stretched without breaking
- Put the dough in a greased bowl and cover the dough and refrigerate for at least 1 hour, up to 12.
- Prep some pans by lining them with plastic wrap and spray them down with some no stick spray, like Pam. Or second option is to cut parchment squares
- Start heating 2 inches of oil over medium/high.
- Pull the dough out and place on a lightly floured surface. Flour the top and roll out the dough…
- For traditional donuts you want to roll it out 1/2 inch thick.
- Dip your cutter in flour (do this each time)
- Press the cutter all the way down, the twist a bit, then pull up.
- Place the donuts and the donut holes on the plastic wrap, make sure there is space between each one, or place onto parchment squares.
- Spray some more plastic with pam and cover the donuts, let them proof/rise for 5-20 mins
- You want the oil to be at 360 degrees, for me I maintained 360 between medium and medium/high. I recommend a fryer so it holds the temperature for you.
- Check the dough every 5 mins by pressing a finger into the dough and if it springs back fast it needs more time, springs back slowly and it’s ready!
- Fry for about a min on each side. For me 1 min on the first side and 45 seconds on the second worked best. If your using the parchment squares you can slide the whole square into the oil so you don't stretch out the dough
- Flip to the second side carefully, you don’t want to splash hot oil everywhere, I used a wide slotted flipper.
- Pull out and let drain on a wire rack over paper towels (I like to do it in a jelly roll pan to keep the grease contained.
- And now you're ready for the glaze!
Toppings/glaze
- Mix the cinnamon and sugar and roll the donuts in while hot.
- For the vanilla and maple glazes just mix the ingredients in a bowl
- for the Chocolate glaze melt the chocolate and butter together, then stir in the other ingredients.
")


faridah
you mentioned butter but that ingredient is missing in the method part? does the butter go in the dough?
Ashlee Marie
the butter gets added after half the flour
Midge
The accident of finding this post has brengtehid my day