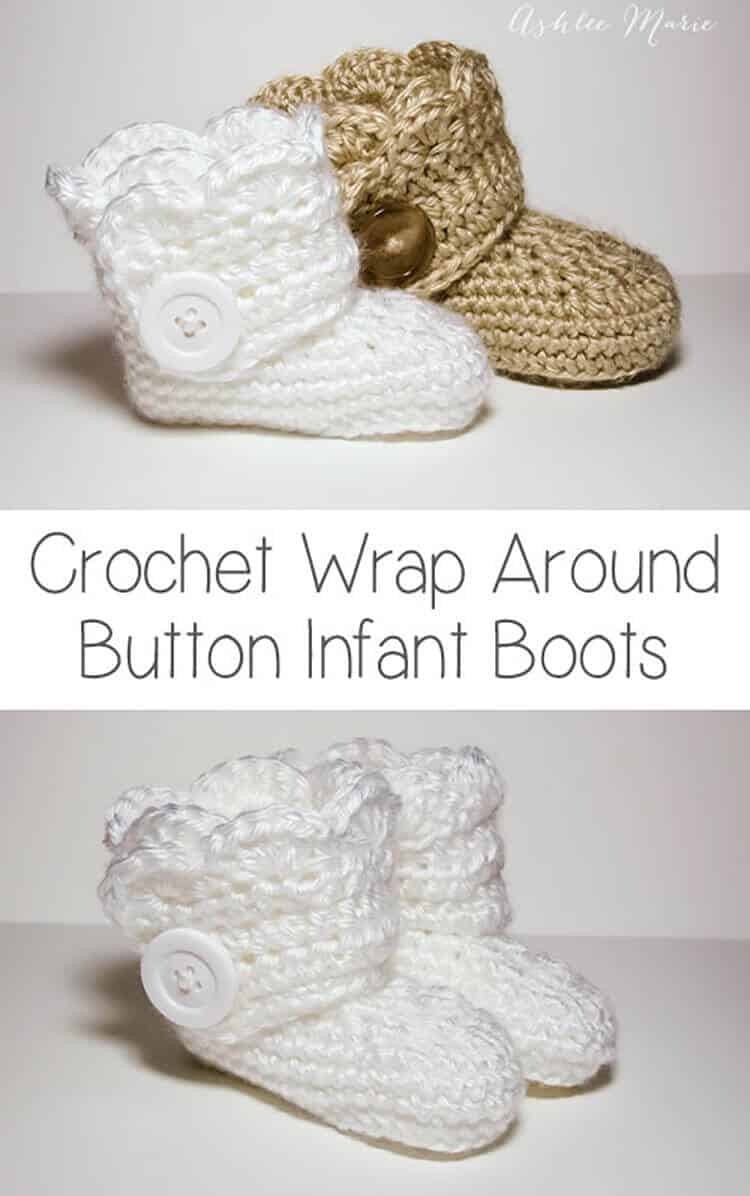
This is an easy to follow pattern to make wrap around infant booties – both for boys and girls.
Okay, after some confusion I’m separating out the patterns. Here is the one for the INFANT size! I realized after making a second set of these that I have two G hooks and they are different sizes???
So for the larger Baby sized shoes I used a G6 – 4mm for these infant shoes I used G6 – 4.25! So if your looking for an infant size 1 (or 0-3 month) boot your in the right place! For a larger (closer to size 4) shoe go to the crochet wrap around button baby boots!
Buy BOTH the Ad-Free pattern pdf’s for both the Baby AND Infant sized discounted here!
The pictures are still the same as before, for the larger size, I’ll try to substitute out smaller pictures when I make another pair!
Buy the Ad-Free pattern pdf for just the infant size here!
Infant wrap around boots
Crochet materials:
caron simply soft yarn
large buttons
G6- 4.25 mm hook (To go up a size use a larger hook, or a larger pattern, to go down a size use an G-4mm hook)
abbreviation:
ch (chain)
sl st (slip stitch)
sc (single crochet)
hdc (half double crochet)
dc (double crochet)
sc2tog (single crochet 2 together)
dc2tog (double crochet 2 together)
dc3tog (double crochet 3 together)

sole:
ch 11
row 1- sc in 2nd ch, sc 5 times, hdc 3 times, 7hdc in last ch, finish the rest of the round working along the back of the chain, hdc 3 times, sc 5 times, 4sc in the last/first ch, sl st to the first sc (28)
row 2- ch1, sc in same sc, sc 7 times, hdc, 2hdc 3 times, 3hdc (in one stitch), 2 hdc 3 times, hdc, sc 8 times, 2sc 3times, sl st to first sc (39)
shoe:
row 3- ch1, working in back loops, sc in same sc, sc around, sl st to first sc (39)
rows 4-5- ch1, sc in same sc,sc around, sl st to first sc (39)
row 6- ch 1, sc in same sc, sc 9 times, sc2tog, dc2tog, dc, dc3tog, dc, dc2tog, sc2tog, sc around, sl st to first sc (33)
row 7- ch 1, sc in same sc, sc 7 times, sc2tog, dc2tog, dc3tog, dc2tog, sc2tog, sc around, sl st to first sc (27)
row 8- ch 1, sc in same sc, sc 5 times, sc2tog, dc, dc3tog, dc, sc2tog, sc around, sl st to first sc, cut yarn weave in ends. (23)

Boot cuff:
for the right boot sl st in the 7th stitch from the seam, for the left boot sl st in the 11th stitch from the seam
ch 12
row 1- hdc in 3rd ch from hook- ch2 counts as hdc, hdc in next 9 ch, hdc in first sc (the same one you sl st in), hdc 19 times (there will be 3 spaces left), skip 2 spaces, sc in last space. (32) **note – some people had a problem with getting two right or two left feet. remember to not cross over the front, work down the inside, around the back and back up the outside, so you’ll work in opposite directions for each bootie, counterclock wise – looking top down, or “wrong” side out for the right booties and clockwise, or “right” side out for the left bootie**
row 2- ch2 (counts as hdc), turn, hdc in first hdc and around 28 times, ch 1 skip one hdc, hdc in last 2 (31- with a ch1 space)
row 3- ch2 (counts as hdc), turn, hdc, hdc in ch1 space, hdc around (32)
row 4 scallops (girls)- turn, 5dc in second hdc, *skip 1hdc, sc in next hdc, skip 1hdc, 5dc in next hdc*, repeat around (8 shells), sc down the side (I fit 5), continuing around sc across the bottom along the original chain (11), sl st, cut yarn and weave in ends

row 4 simple (boys)- ch1, turn, sc across top (32), down the side (5) and across the bottom chain (11), sl st, cut yarn and weave in ends
And both the boys and girl versions (again these are the larger size)
Don’t forget to add a button where ever you like and your done! I placed mine at the bottom of the 5th hdc over from the front- I might go lower next time… or maybe two smaller buttons?
And one final picture, I thought you might want an inside shot so you can see how it wraps a bit… I’m still so very much in love with these boots.


sara
so I’ve now done 3 boots! gotta finish the matching girl pair tomorrow! 🙂 And every single one ends up the same way! It’s not 100% right, cause on the cuff I always end up with 30 instead of 32! It’s a great pattern! Thanks a ton!
Ashlee
what row does your count get off? make sure in row 3 of the cuff to also hdc in the space 1 and go al the way to the END of the row, making sure your count is at 32! Glad you like it!
sara
oh good! I’m not crazy! 🙂
so if I count 7 from the seam…it seemed like it was way too close to the tip of the toe…where the decreasing stitches were. where do you start the strap compared to the decreased stitches? Getting ready to finish my little girl bootie! Thanks for responding so quickly!
I’m hoping to do your mohawk hat too, just need to get some thicker yarn for the hat part.
Ashlee
if you look at my wrap around they are very close to the front, in fact the start of both straps are just a few off of each other just 2 stitches off the center.
Linda Schiller
Thanks for the pattern also. I too hate when I find a pattern I love and then find I have to pay for it. I cannot buy every pattern I love. I’d be broke before nightfall – lol. You mentioned that you had this in other sizes? I was looking for one for a 4 yr old. I volunteer with an organization that sends care packages to soldiers in Afghanistan. When we find out that they are having babies back home we try to send a baby blanket and booties for their newborn (and sometimes a little something for an older child). I think these in camouflage will be adorable. Thanks again!
Ashlee
how great of you do send care packages! I’m glad you like the booties. I made the pattern to fit my baby, and then an infant patter, I don’t have anything larger than that.
Susan
I am very excited to come across your pattern… I have made a santa hat (red with long tail and matching white rim and pom pom and was wanting to do a little boot to match and now I can – thank you.) I am a newborn baby photographer and enjoy making my own props…. can’t wait to get started… thank you all the way from New Zealand
Ashlee
SO adorable! Let me know how it goes and send me a picture of the hat and boots together!
Megan
Although you already have a ton of comments, I thought I’d add mine too. I just finished making a newborn pair in hot pink with a big black button. They are so cute!!! Reminds me of La La Loopsy. Your pattern was great, easy to follow and so beautiful. Thank you so much for sharing it for free!
Ashlee
your so welcome! I’m so glad you like them, and I love love LOVE getting positive comments! Thank you so much!
Megan
These are sooo sweet! Wow! Thank you so much for the free pattern. I’m not an advanced crocheter and I found this pattern SO easy to follow — I’ve followed other patterns that were written very poorly. I’m looking forward to trying others of your patterns because of how well this is written. I’ve done a pair of the larger pattern (although I used a G 4.25 for it so I think they are a bit larger than 3’s and are too big for my daughter who is probably a size 2) and I am going to do a pair of the smaller pattern now, but I think my daughter is in between both size booties, but since Caron Simply Soft stretches a lot, I’m hoping this smaller pattern fits. Can’t wait. 🙂
Ashlee
your so welcome! I’m glad this pattern worked for you! Let me know how the smaller pattern works for you!
Kira C.
I’m in the exact situation as Sarah. I made two soles first, that way I knew they were gonna be the same size as each other before working on the cuffs… well some how I made two left-footed boots (the sole part has the arch indent like a left shoe). I’m guessing Sarah and I both messed up somewhere along the line if the bottom of the soles aren’t suppose to have the arch indents. Any ideas?
Ashlee
again- there is not left or right foot for the soles. they are completely symmetrical, the same number and style of stitches on each side. As you work in a round things tend to get a bit twisted, giving the illusion of a right or left foot, but they are in fact not. you can either take the time to block out the soles, or do what I did, and just keep going. I don’t finish off after the sole, but keep going.
If you did finish off and cut your yarn make sure you start again at the same point, as if you hadn’t cut it, otherwise you’ll have trouble. one reader finished off and started in the center of the back and created a lot of problems.
Ashlee
I added a diagram of the sole, hopefully that will make it more clear that they are symmetrical, so even though they curve it will work itself out as you keep working
Kemi
Hi. Thank you soo much for this. This will be perfect for niece!!!!
Ashlee
your so welcome, I’m so glad you like them!
Eli
I made the sandals! I thought your pattern was great, I think I have a problem with counting, or knowing exactly where to start counting, so I ended up moving my toe hole to make it more centered, but i’m pretty sure that’s me, and not your pattern! Just great, Thank you so much! I also love the way you start your soles on the wrap around booties. I ended up making someone else’s converse pattern, but I ended up modifying it to start with your sole, and I liked it a lot better. 😀
Ashlee
good to know! I we all crochet a bit differently, and I tend to change patterns a bit as I make them myself! I’m glad you liked them!
Ashlee
I added a diagram of the sole, hopefully that will make it more clear
lynsimarie
I’m teaching myself to crochet just so I can make these adorable booties for my baby girl! Thank you SOOO much for sharing your pattern for free, and for all your effort at answering questions in your comments! So I’ve found answers to all of my questions just reading others’ comments and your answers! I’m starting over for the third time (HUGE beginner here!), but I can’t wait to see how my booties turn out! Thanks again!
Ashlee
Good luck!!! Let me know how it goes! I’m working on a FAQ post for the booties, what questions/answers were the most helpful?
jen
Well, I just love these. I have read most of these posts. Your stitches I’m sure are correct or else YOU would not be able to make them! lol However, I am just starting on making things other than afghans. So I kinda suck. I like how it curves though. Anyway, I’m SURE you are doing it right and I’m not, but starting with row three, I end up with like 50 stitches or something instead of a steady DECREASE. It steadily INCREASES. So I end up with a shoe that looks like it got its face ripped off! lol talk about zombie apocolyps! I have tried to look it up online but cant find anything. Here’s the question: Do i skip any stitches at all? like when i do the dc or hdc, do i skip stitches? cuz when i skip them, it matches up and looks cute, but when i do stitches in every stitch so they are warm with no holes, it looks terrible and is asymetrical. and nothing is landing right. Thank you so much. My email is judkinsjenny at the place where you yell in case you want to contact me there. These are sooo cute, to heck with negative people! How do they think you made them if the stitches were wrong? I had to laugh. much love, Jen ps sorry about spelling its late.
Ashlee
sounds like instead of crocheting TOGETHER, dc2tog, your creating INCREASES. Make sure you know how to do a decrease. you do NOT skip stitches.
here is a decrease tutorial http://www.stitchdiva.com/tutorials/crochet/working-stitches-together let me know how it goes!
jen
Never mind, I just kept practicing. This time, no curve to the sole or holes that weren’t supposed to be there! Super cute. Thank you for sharing. I hope you are sharing more.
Ashlee
it’s okay, as you work in the round, like these soles, it’s not unusual for twists, curves and twists to happen. you can choose to block the sole (get it damp, pull and twist it back into shape, OR what I do is just continue on. once your completely done and get it on the baby they pull themselves back into shape with wearing!
Melody
I have done one bootie,a right one. but how do I do the left one? Is there a change that I missed because the sole is definitely shaped for a right foot.
Ashlee
the soles are completely symmetrical. it’s common when working in the round for the piece you working on to get twisted or curved, but there are the same number of stitches on each side, same stitches. you can either just continue on and block at the end or block as you go. Personally I just continued on and blocked when I was done with both booties.
Ashlee
I added a diagram of the sole, hopefully that will make it more clear
Alex
I was wondering if the pattern for the booties on this page is the size 4 or the size 1?? I have an almost 2 month old that I am wanting to crochet these for!
Thanks!
Ashlee
the INFANT size is close to a size one (depending on the hook you use and how tight or loose you crochet) and the OTHER pattern for the BABY size is the size 4 (again depending on the hook and how you crochet!)
DarleneO
Thank you so much for sharing your pattern for FREEEEEE! lol I bought one a couple weeks ago for a cute bootie and drove myself crazy trying to figure it out! Never did gave up! Yours is awesome and easy! Great instructions! My first pair came out so cute now! Thank you again!!!
Ashlee
thank you so much! I’m SO glad it worked for you! I consider myself a amateur pattern designer, I just don’t feel confident enough to ever ask anyone to PAY for it! So I’m glad you liked it!
ashley
THANK YOU SO MUCH!!!!! I have been looking for this pattern for MONTHS!!! So excited to make these!!!
Ashlee
you are so welcome! I hope you like making them!
lynsimarie
So I finished my first pair…they’re so cute! The first one I made is noticeably bigger than the second one…I did much better counting my stitches once I started using stitch markers, because otherwise I can never recognize where a row should start or end. I’m going to make another left booite and see if I can get it to be the same size as my right bootie. 🙂 Here is the info I found most helpful…
“when the number is after the stitch: hdc 3 times, it’s in the next 9 stitches
when the number is BEOFRE the stitch: 7hdc it’s in the SAME stitch”
“you don’t count the sl st as a stitch.”
“they didn’t have dc2tog listed so I googled it for you and found written instructions, picture instructions and a video for it!”
Of course, I’m a complete newbie crocheter with NO experience reading patterns, so I’m sure I struggled more than was really necessary. Once I knew learned how to read a pattern, and learned the stitches I didn’t know yet, it was really super-easy! Thanks again for making this adorable pattern available for free, and for all your patience answering our questions! So, so, SO sweet of you!
Ashlee
thanks so much for letting me know! I’m slowly working on the FAQ post, and hope to have it up soon! It’s nice to know what newbies AND experienced crocheters found helpful, so thanks for getting back to me!
kelly
Love the little booties! So my question may be silly. But as I did the shell stich around the cuff for the right bootie the stitching of the shell is flat but for the left bootie the shell is puffed like the inside of the shell stich of the right shoe. Is that normal or did I stich it wrong. I hope this makes sense. Basically the shell on the right looks right side out and the left shell looks wrong side out.
Thanks!!
kelly
Ashlee
your actually right. The way I wrote the cuffs, to keep it as easy as I could, the rows that are right side out on one foot are wrong side out on the other. no one ever noticed (people looking at my babies booties, crocheters notice when they are working on it of course). If it really bothers you, you can finish off before the shell row of the left bootie, start at the other end and do that last row backwards! does that help?
Ashley
I Really love this pattern But I have the same problem…This was my first try. I’m going to do a DCdec (DC2tog) on row 8 on each corner…that should take me back down to the 23. THANK YOU SO MUCH – MY NIECE WILL LOVE THESE:)
Ashlee
I’m so sorry, but when you say same problem which problem are you referring too? I’d love to help if your hitting a snag!
Emily
How long is the bottom? Is it about 4 in?
Ashlee
sadly I only made one pair and gave them away so I can’t measure them. They fit about a size 1 shoe, the other version, the larger size, fits close to a size 4. changing hook size will help size up or down the booties. Does that help?