• Skip to primary navigation
  • Skip to main content
  • Skip to primary sidebar
  • Skip to footer

Ashlee Marie - real fun with real food

  • Recipes
    • Main Dish
    • Desserts
    • Breakfast
    • Sides
    • Bread
    • Soups & Salads
    • Drinks
    • Food Tutorials
  • Cakes
    • Cake Recipes
    • Cake Tutorials
    • Carved Cakes
    • Wedding Cakes
    • Smash Cakes
    • Party Cakes
    • How to Video Series
  • Parties
    • Complete Parties
    • Party Cakes
    • Party Food
    • Party Crafts & Decorations
    • Printables
    • Invitations
  • Holidays
    • Valentines
    • St. Patricks Day
    • Easter
    • Cinco De Mayo
    • Mothers Day
    • 4th of July
    • Halloween
    • Thanksgiving
    • Christmas
  • Travel
    • Culinary Travel – Cooking Schools
    • Family Travel
    • Disney
    • Universal Studios
    • Blogger Trips
  • Videos
    • Recipe Videos
    • Short Videos
    • Kitchen Tip Videos
    • Video equipment links
  • Crafts
    • How to & Craft Tutorials
    • Crochet & Knit Patterns
    • Decorations
    • Furniture
    • Photoshop
    • Remodel
    • Sewing Projects
  • Shop
    • Video equipment links
    • Baking and Kitchen equipment
  • Navigation Menu: Social Icons

Home » How to & Crafts » Crochet wrap around button infant boots- girls and boys

Crochet wrap around button infant boots- girls and boys

By Ashlee Marie 762 Comments

  • Facebook
  • Twitter
  • Yummly

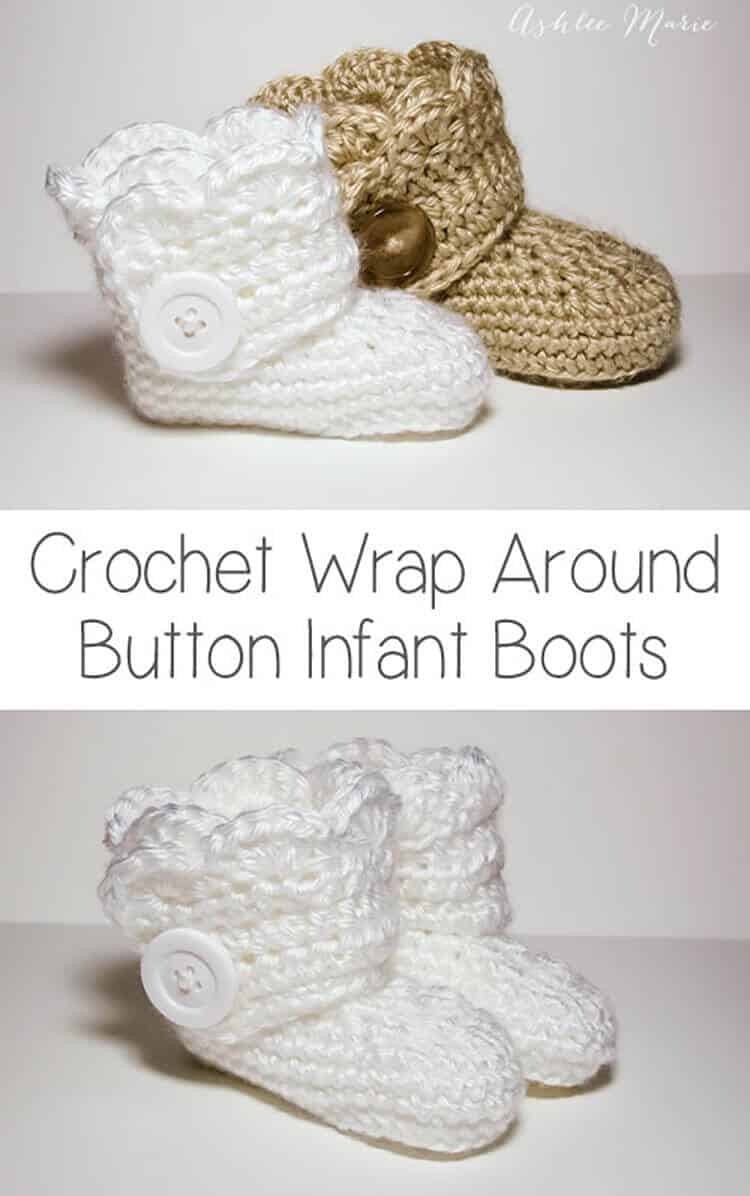
This is an easy to follow pattern to make wrap around infant booties – both for boys and girls.

free crochet pattern from these wrap around button booties, infant sized

Okay, after some confusion I’m separating out the patterns. Here is the one for the INFANT size! I realized after making a second set of these that I have two G hooks and they are different sizes???

So for the larger Baby sized shoes I used a G6 – 4mm for these infant shoes I used G6 – 4.25! So if your looking for an infant size 1 (or 0-3 month) boot your in the right place! For a larger (closer to size 4) shoe go to the crochet wrap around button baby boots!

Buy BOTH the Ad-Free pattern pdf’s for both the Baby AND Infant sized discounted here!

The pictures are still the same as before, for the larger size, I’ll try to substitute out smaller pictures when I make another pair!

Buy the Ad-Free pattern pdf for just the infant size here!

Infant wrap around boots

Crochet materials:

caron simply soft yarn
large buttons
G6- 4.25 mm hook (To go up a size use a larger hook, or a larger pattern, to go down a size use an G-4mm hook)

abbreviation:
ch (chain)
sl st (slip stitch)
sc (single crochet)
hdc (half double crochet)
dc (double crochet)
sc2tog (single crochet 2 together)
dc2tog (double crochet 2 together)
dc3tog (double crochet 3 together)

tutorial for making the sole and shoe of the wrap around baby booties

sole:
ch 11
row 1- sc in 2nd ch, sc 5 times, hdc 3 times, 7hdc in last ch, finish the rest of the round working along the back of the chain, hdc 3 times, sc 5 times, 4sc in the last/first ch, sl st to the first sc (28)

row 2- ch1, sc in same sc, sc 7 times, hdc, 2hdc 3 times, 3hdc (in one stitch), 2 hdc 3 times, hdc, sc 8 times, 2sc 3times, sl st to first sc (39)

shoe:
row 3- ch1, working in back loops, sc in same sc, sc around, sl st to first sc (39)

rows 4-5- ch1, sc in same sc,sc around, sl st to first sc (39)

row 6- ch 1, sc in same sc, sc 9 times, sc2tog, dc2tog, dc, dc3tog, dc, dc2tog, sc2tog, sc around, sl st to first sc (33)

row 7- ch 1, sc in same sc, sc 7 times, sc2tog, dc2tog, dc3tog, dc2tog, sc2tog, sc around, sl st to first sc (27)

row 8- ch 1, sc in same sc, sc 5 times, sc2tog, dc, dc3tog, dc, sc2tog, sc around, sl st to first sc, cut yarn weave in ends. (23)

where to put the cuff and how to make it, free crochet wrap around boot pattern

Boot cuff:
for the right boot sl st in the 7th stitch from the seam, for the left boot sl st in the 11th stitch from the seam

ch 12

row 1- hdc in 3rd ch from hook- ch2 counts as hdc, hdc in next 9 ch, hdc in first sc (the same one you sl st in), hdc 19 times (there will be 3 spaces left), skip 2 spaces, sc in last space. (32) **note – some people had a problem with getting two right or two left feet. remember to not cross over the front, work down the inside, around the back and back up the outside, so you’ll work in opposite directions for each bootie, counterclock wise – looking top down, or “wrong” side out for the right booties and clockwise, or “right” side out for the left bootie**

row 2- ch2 (counts as hdc), turn, hdc in first hdc and around 28 times, ch 1 skip one hdc, hdc in last 2 (31- with a ch1 space)

row 3- ch2 (counts as hdc), turn, hdc, hdc in ch1 space, hdc around (32)

row 4 scallops (girls)- turn, 5dc in second hdc, *skip 1hdc, sc in next hdc, skip 1hdc, 5dc in next hdc*, repeat around (8 shells), sc down the side (I fit 5), continuing around sc across the bottom along the original chain (11), sl st, cut yarn and weave in ends

where to attach the button on these wrap around baby boots

row 4 simple (boys)- ch1, turn, sc across top (32), down the side (5) and across the bottom chain (11), sl st, cut yarn and weave in ends

And both the boys and girl versions (again these are the larger size)

Don’t forget to add a button where ever you like and your done! I placed mine at the bottom of the 5th hdc over from the front- I might go lower next time… or maybe two smaller buttons?

And one final picture, I thought you might want an inside shot so you can see how it wraps a bit… I’m still so very much in love with these boots.

boy and girl finished version, wrap around baby and infant boots, free crochet pattern
  • Author
  • Recent Posts
Ashlee Marie
Follow me
Ashlee Marie
With the right tips and tricks, I believe YOU can make, bake, or create anything. This is what I love to do - make some awesome, teach you how, and give you that boost of culinary confidence you need to rock your own kitchen!
Ashlee Marie
Follow me
Latest posts by Ashlee Marie (see all)
  • The Perfect Steak using Sous Vide - February 2, 2021
  • Pistachio cheesecake with coconut macaroon crust - November 19, 2020
  • 21 Amazing Chocolate chip cookie recipes - November 19, 2020
  • Facebook
  • Twitter
  • Yummly

More From Ashlee Marie!

JOIN MY NEWSLETTER!

Become an insider and receive this FREE Maple Icing Recipe (not seen on the blog!)

You have Successfully Subscribed!

Privacy Policy: We hate spam and promise to keep your email address safe. You'll receive email updates through AshleeMarie.com. You can unsubscribe at anytime.

Filed Under: Crochet & Knit, How To & Craft Tutorial, How to & Crafts

Previous Post: « Crochet wrap around button baby boots- girls and boys
Next Post: Chocolate Peanut Butter Chunk Valentines scones »

Reader Interactions

Comments

  1. Sara

    February 4, 2012 at 8:39 am

    I am thrilled beyond thrilled, to see this tutorial! I have been searching for a good one, and am so excited about yours!! I’m going to start a pair today! 😀 Thanks!!

    Reply
    • Ashlee

      February 17, 2012 at 5:03 pm

      Thank you so much! Thats why I decided to make them, and why I give them away for free. I hate when I find a pattern that I love that I have to pay for! So I figure it out~!! I’m glad you like them!

      Reply
      • Rebeca K

        January 31, 2013 at 8:27 pm

        Thank you so much for the free tutorial. I hate finding something I like and then finding out I have to pay. Thank you for taking the time to write these out for us too.

      • Ashlee

        February 18, 2013 at 9:10 pm

        your very welcome.

      • Terri Halstead

        April 1, 2013 at 11:38 pm

        I made the booties and they are adorable, but I keep getting a right boot and never a left boot I don’t get what I am doing wrong. Do you have a video of yourself on youtube making this booty? If you do it would help me out a ton. Thankyou for the pattern. My son and his wife are expecting triplets and she adores these booties and I would love to make them with a left and a right bootie. Thanks

      • Ashlee

        April 24, 2013 at 12:39 pm

        I don’t have a video, when your doing the other cuff you start further over, ch, and then work down the chain, around the side, back and up the other side, DON’T work across the front,then around. it will be inside/outside/inside for one cuff and outside/inside/outside for the other.

      • Jean

        July 8, 2013 at 9:15 pm

        I can’t figure out how to make the left bootie either. Are you saying that they won’t match when done? I can’t get it to be right, wrong, right, wrong like the right bootie, it ends up opposite, when doing the last row the finished edge is inside not outside. Are they suppose to be different? I’m also left handed so not sure if that is the problem for me. TY The right bootie is very cute.

      • Ashlee

        July 18, 2013 at 3:23 am

        nope, the cuffs each go in different directions. I can’t think of another way to do it, you start on opposite sides, work your way around oppositly (down the ch, around the inside, back then inside then back again. So right side/wrong side/right side and the opposited on the other cuff. No one ever noticed when my little boy was wearing his, only those of us working so closely notice!

      • Kim Thomas

        October 5, 2013 at 12:07 pm

        I have unraveled two booties because I have the same problem! So glad to know it’s not just me.

      • Ashlee

        October 7, 2013 at 9:58 am

        not just you, probably the most common problem people have, I tried to make these as simple as possible. I couldn’t think of a better, less confusing way to create the two cuffs opposite other than to start in the front, chain, and work your way around each side. I hope you finally got them to work after reading the comments!

      • Kim

        August 21, 2013 at 3:24 pm

        I cannot seem to get print button to work to print out pattern. keep getting url msg. can you email me the pattern at [email protected]? Thanks!

      • Ashlee

        August 23, 2013 at 2:12 pm

        I know, I’m working with the plug in guys trying to get it fixed! Sorry for the inconvenience.

      • Samantha

        January 3, 2014 at 6:24 pm

        Can you put a pattern up for a size 5 toddler? I am new to crochet and can’t figure out how to make them bigger.

      • Ashlee

        January 12, 2014 at 3:39 pm

        This is the infant patter, come over to the baby pattern, it made a size 4 for me, so make the sole and see what size your getting (everyne crochets different so if you crochet looser you might get a size 5) or try going up a hook size!

    • Norma Wright

      February 4, 2013 at 3:16 pm

      The booties were tremendously easy. However, I felt that in order to change from right to left you have to add the sole by doing a sc into the front stitch of the previous row…Do you have another way of doing it?

      I also made one pair with a smaller hook for my newborn great granddaughter and put two buttons on them, one straight across and the other closer to the sole,

      Thank you for the pattern. Love them..

      Reply
      • zoey

        February 15, 2013 at 8:20 am

        what size needle did u use? please, wanted to crochet them 4 my baby sister being born in may

      • Ashlee

        February 18, 2013 at 10:51 pm

        ummmm? what? do you mean hook? the hook size is right in the pattern G6- 4.25 mm hook. or am I missing something, is there something else you want?

      • Laura

        December 7, 2014 at 8:25 pm

        At the beginning of the pattern you say size G 4.25 and here in the comments you say G6 -4.25 I am confused Please explain. Is this American sizing and the big boy bootie you say size G4 Is this a typo in the pattern??
        Thank you

      • Ashlee

        February 1, 2015 at 12:43 am

        For some reason I have 2 G6 hooks. One is 4mm and one is 4.25mm. I used the 4.25mm for this pattern, but if you want a slightly smaller size you can use the 4mm. I have NO idea why I have 2 g6 that are different sizes, I’ve picked up hooks all over the place, but all in the USA. I use the mm sizing because I know just saying G6 is different everywhere.

      • Ashlee

        February 18, 2013 at 9:58 pm

        I’m completely confused by your comment…. there is no right or left to the sole, the sole is completely symmetrical. and I make them exactly how they are written, I don’t know what you mean by “doing a sc in to the front stitch of the previous row”.

        I’m glad you like the pattern though.

      • Cheryl

        January 22, 2014 at 12:32 pm

        When I crochet the sole, it clearly looks like a left boot to me so I made this one be the left. When I tried the right one, the sole still looks like a left boot to me. Mine is not symmetrical. I haven’t given up yet…

      • Ashlee

        February 6, 2014 at 1:33 am

        if you look at the graph you can see that they ARE symmetrical, when you crochet in a round it’s TOTALLY normal to twist and go wonky, you just have to block the shoe and it will be fine. I’m thinking about doing a post on bocking these booties I get so many questions about it. or you can just finish making them, put them on the babies feet and let them wear it, they’ll totally work themselves out.

      • nancy

        May 8, 2014 at 8:59 pm

        mine looked like that too but after it was all done it looked o.k. just try to pull and stretch them and they will take the right shape.

      • Ashlee

        June 23, 2014 at 12:32 pm

        you can either block them (get them wet, stuff with paper towels, pull into shape and let dry) OR just put them on the baby and they fix themselves while they are being worn!

      • Ashleigh

        July 12, 2014 at 5:57 pm

        So when I first made the bootie, it was twisted and looked like how people are describing it. I noticed that when I did the dc3tog it wasn’t lining up on the front of the bootie so I tried adding a stitch for rows 6-8. For example, row 6 I did 10 sc, row 7 I did 8 sc and row 8 I did 6 sc before starting the decreasing stitches. This way, every time I did a dc3tog it was completely centered in the front of the bootie. After I increased by 1 stitch for those rows, the bootie came out facing forward. I’m not sure if that helps those that are having the curving problem, but now my booties are completely symmetrical. Super cute pattern!

      • Ashlee

        July 26, 2014 at 1:44 am

        The pattern is written to be completely symmetrical, but because your working in the round it tends to twist (esp if you crochet tight it will be even more twisted) they simply need to be blocked before moving on. And of course we all have our own normal style and sometimes we each have our own way of starting the row that if your don’t start it the same way as I do then you might need to add another stitch (and take one off) like your mentioning. I’m SO glad you found a way to make it work for you, I do that with patterns all the time!

      • Marianne Hayward

        October 17, 2014 at 5:25 pm

        I have tried this pattern and I have trouble as well and have undone it twice now. Maybe the pattern doesn’t work for me (and I see for others as well), because in the diagram you have only chained 10, while in the instructions you say to chain 11. It doesn’t add up.

      • Ashlee

        November 26, 2014 at 11:58 am

        you chain 11, then sc in the second chain, which leaves 9. In the diagram there are 11, the 11th one is up next to the first sc, it’s there for height. If you are working hdc or dc’s you’d do it in the 3rd chain from the hook, it’s STANDARD in any pattern, you need those extra chains for the height of the stitches.

      • Dot Smith

        March 31, 2015 at 10:22 am

        I know exactly what you mean by “two” lefties … but since I did my sole in black, I picked up on this right away. You have to turn over one of the “soles” some way and work on the “opposite” side to get a left sole and a right sole. I am doing mine in camouflage and they are darling. Made a newborn bib and hat to match. This is really an absolute darling “set.”
        Happy Crocheting … and thanks Ashlee for an awesome “free” pattern.

      • Ashlee

        April 7, 2015 at 11:47 pm

        actually they are symmetrical, it’s normal when you work in the round to have your work twist a little, you simply need to block your work. but I’m glad you found a way it worked for you. I’m glad you enjoy the pattern.

      • afka

        January 23, 2014 at 9:36 am

        Mine ended up being curved like a foot would be for me. Maybe that’s what is happening with other people? That’s why I am having a hard time figuring out how to do left and right!

      • Ashlee

        February 6, 2014 at 1:39 am

        it’s totally normal for in the round patterns to get twisted and turn, you just need to finish the shoe part of the bootie and then you can block it (or finish it then block it, or just let it be all twisted and let the baby wear it like I did, it works itself out). I PROMISE mine looked the same way, I just pulled and tugged it into place for pictures so you can see what it WILL look like.

      • Cheryl

        February 6, 2014 at 10:48 am

        What I ended up doing with mine, was turn the sole over so it curved the opposite way so they look like a left and a right. I made the soles of mine a different color from the rest of the boot so they were more noticeable when both soles curved the same way. I will try blocking the soles the next time. I will have to read how to block. I haven’t done that a lot.
        I still love the pattern. I’ve tried other boot patterns and none come out as good as these.

      • Ashlee

        February 20, 2014 at 1:03 am

        I’m planning on doing a post on blocking because I get so many quesions about it, hopefully it will help for your next booties!

      • erika

        October 3, 2013 at 2:08 pm

        Hi, I didn’t realize that the sole was symmetrical until just now, so I would sc into the back half of the loop on one shoe then into the front half of the stitch on the other.

      • Ashlee

        October 7, 2013 at 9:33 am

        so you made one boot inside out? I’m still not quite understanding what your saying (I guess that’s what it feels like to read my pattern for you, huh?) You can totally change the pattern to fit your style, I often change patterns I read. But I did write it exactly the way I created it, so one boot has the seam on the inside heel and one boot the seam is on the outside of the heel. I felt creating them this way would be easier, he cuffs are also opposite, one is right side/wrong side/right side and the other is wrong side/right side/wrong side. feel free to do it your own way, but know I can’t really help if you deviate too much.

    • Donna

      May 31, 2014 at 1:56 pm

      I don’t know what I’m doing wrong but I’ve attempted this 3 times and just can’t get it to look like the pictures by the point of starting the cuff :0(

      Reply
      • Ashlee

        June 23, 2014 at 6:09 pm

        you can send me pictures [email protected]opsyturvy.com, there are so many other things it could be just saying its off at the cuff, isn’t very helpful.

    • Viola

      October 23, 2014 at 6:48 am

      I really enjoy making these but I can never make two the same…..I don’t know what I do wrong but I am going to work at it because I give my hand work away all the time.I will be a great grand ma in the next month or so…..so now you know why I am working so hard to make them perfect……Vi

      Reply
      • Ashlee

        November 26, 2014 at 12:49 pm

        I’m sorry your having trouble matching them up! what exactly are you having difficulty with? I’d love to help

  2. Pam

    February 5, 2012 at 1:39 pm

    Adorable booties! I have need to make several for a plethora of little ones due soon. Thank you so much for the pattern. I’m sure the moms will like them.

    Reply
    • Ashlee

      February 17, 2012 at 5:41 pm

      Thanks so much! I hope they love them as much as I do!

      Reply
  3. Shannon

    February 7, 2012 at 1:15 pm

    Is it safe to assume there isn’t a row 6? It goes from 5 to 7 and I just want to make sure I’m not missing anything. LOVE the pattern!

    Reply
    • Ashlee

      February 17, 2012 at 6:56 pm

      Fixed it!!! Thanks for the heads up!

      Reply
  4. Angie

    February 7, 2012 at 7:17 pm

    Just an FYI – your stitch count starting with Row 1 is wrong. Should be 28, not 26, then row 2 & 3 should be 39, not 37.

    Reply
    • Ashlee

      February 17, 2012 at 6:57 pm

      Fixed! Thanks for the heads up, I worked on the main pattern for weeks, double checking it and all that, then threw together the infant version in a day, so there were bound to be problems- Grrr

      Reply
  5. Aamn

    February 12, 2012 at 10:24 am

    These boots are wonderful…I was looking for something like this for a friend’s twin babies (girl n boy) and I got it…m so happy to find this, can’t express…thanks a ton:-)

    Reply
    • Ashlee

      February 18, 2012 at 11:39 am

      you are so so welcome! I hope you and she love them!

      Reply
  6. YarnSkeink

    February 14, 2012 at 4:58 pm

    Absolutely adorable! Had no trouble following your pattern and my little booties look just like yours in the pictures you provide. Good work!

    Hope you don’t mind but I posted pics of my booties with links back to this page and mentions of you on my blog: http://yarnskeink.blogspot.com/. So glad I found your instructions! : )

    Nancy

    Reply
    • Ashlee

      February 18, 2012 at 12:34 pm

      Thank you SO much! I know it’s common to only comment when people have a problem with the pattern, it makes sense to ask when you don’t understand something but I really really REALLY appreciate the positive ones! I love that you posted pictures! I have no problem with that, the thing I love most about what I do is when someone is inspired and recreates it! I’m tickled that you liked them and hope your friend is happy with the results! I love making the booties foot shaped, even little guys have wider balls and narrow heels…

      And I love that knit house that you found, I would LOVE to do that for all the houses we’ve lived in (10) since we’ve been married, but I doubt I’ll get around to all of that! Super cute though!

      Reply
  7. Angie

    February 18, 2012 at 6:34 am

    Glad I could help. Thank you for the great pattern. I made a pair for a co-worker’s niece and everyone at work just loved them. You pattern was very easy to follow and turned out beautiful. 🙂

    Reply
    • Ashlee

      February 18, 2012 at 2:08 pm

      I’m glad! Since I’m still new to pattern making I always worry when I put a pattern out there, I worked for weeks on the larger pattern, but threw the infant one together so thanks for catching my problem for me so quickly!

      Reply
  8. Lise

    February 18, 2012 at 10:30 pm

    Im a newbie and still figuring out patterns… I don’t quite understand when you start the cuff… “Right boot… Sl st in the 7 stitches from seam” which direction? Sl st in each stitch? Confused…

    Reply
    • Ashlee

      March 3, 2012 at 10:53 am

      nope, you’ve already cut your yarn from the bootie, we’re starting with a brand new strand and you need to sl st it to the work to get started, so depending on what side your starting with you count from the OLD SEAM around towards the front of the bootie to get the right place to start the cuff.

      Reply
      • Adrianna

        August 1, 2014 at 12:27 pm

        I understand this but which direction do we go towards the tip of the bootie? If you are looking down at the bootie do you count counter-clockwise or clockwise?

      • Ashlee

        November 25, 2014 at 11:55 pm

        Clockwise

  9. Kayla

    February 20, 2012 at 12:04 am

    My grandma tried to make the wrap around booties for my daughter and we cant figure out the cuff part. It looked like it was just hanging there. Where do you count the 8 stitches from?

    Reply
    • Ashlee

      March 3, 2012 at 12:03 pm

      it’s hard to help without a better explanation of where you went wrong? just hanging there? The point of the wrap is to have a portion hanging off to wrap around. And when you say count 8 stitches, what part are you talking about? could you tell me which row your having a hard time with? I thought it might be where to attach the yarn to start the cuff, but that’s at 7 and 11 stitches from the old seam not 8 so I’m confused too! I’m sorry I coudn’t be more help? Maybe send me a picture or give me a row number.

      Reply
  10. Brooke

    February 22, 2012 at 1:18 pm

    Thank you so much for the pattern! I have a friend with a baby due in June, so I altered the pattern since booties in June would be too hot! So I ended before I started the cuff and just made slippers, and added ruffles 🙂 I added a picture of them to my blog, with a link back to this pattern of yours! The post is at http://babblingbrookesjewelry.blogspot.com/2012/02/fun-with-yarn.html.

    Just one question tho, I did the one, and the sole curves a bit, which I love, but I can’t get it to curve the other way. Do the soles of yours curve too? I know it’s not a big deal, it’s not really really curved like a real shoe, so it doesn’t matter if baby wears two right foot slippers, but just wondering what yours did 🙂

    Thank you again!

    Reply
    • Ashlee

      March 3, 2012 at 12:14 pm

      depending on how tight or loose you crochet a little twisting and curving in natural. they are designed to be larger at the ball of the foot than the heel, but notice they are symmetrical stitch wise, so while they might twist and turn as you make them a bit they are designed to fit either foot and as the baby’s wear them they naturally adjust and fit just fine.

      Reply
    • Ashlee

      December 30, 2012 at 12:42 pm

      I added a diagram of the sole, so you can see that while it twists a bit they are indeed symmetrical and made for both left and right feet! I hope that helps

      Reply
  11. Jenn

    February 23, 2012 at 3:08 pm

    This pattern is awesome! Thank you for sharing it. I am making a bunch of these and donating them to our local pregnancy center.

    I do have one silly question (I know it is a preference thing in many cases) but I was wondering if you you count your ch ups as a stitch – i.e. you ch at the beginning and then begin your stitching in the next stitch or not count them and begin your stitching in the same stitch you sl in? I hope this makes sense – if not I can clarify… These will work either way I was just wondering how you did it.

    Thanks!

    Reply
    • Ashlee

      March 3, 2012 at 12:20 pm

      I don’t in this pattern. I do sometimes. It just depends, when I do I’ll say “ch1 (this counts as first sc)” but in this pattern, no. In fact for sc’s I usually never count the ch1 as a stitch. BUT in the cuff you’ll see that I DO count the ch2’s as hdc’s…

      Reply
  12. azwana

    February 23, 2012 at 11:20 pm

    Hi…
    i’m from Malaysia. so happy to see a very very good pattern like this. thank you very much to you. can’t wait to try one.

    Reply
    • Ashlee

      March 3, 2012 at 12:25 pm

      I’m so glad, I hope the pattern is clear enough, I know international crocheting varies a bit.

      Reply
  13. Melissa AKA Froggy

    February 24, 2012 at 7:21 am

    Hey there – I’m new to crocheting and I tried my first attempt at making booties from your pattern yesterday. I didn’t do too terribly bad but they weren’t near as nice as yours. I do have a few questions about the pattern – this was the first pattern I’ve ever followed and I’m not so sure I’m fully understanding a few of the steps.

    What do you mean by “sc in same sc”?
    What do you mean “work in back stitches” – is that a type of stitch?
    Lastly, how the heck do I make a left shoe? LOL

    Reply
    • Ashlee

      March 3, 2012 at 12:31 pm

      happy to help, we were all beginners once, not sure I’d have taken on these when I first started so kudos!

      sc in same sc- I’m assuming your referring to the beginning of the rows, you JUST sl st into an sc at the end of the last row, then you did a ch 1, now your going to SC in the SAME SC that you just did the sl st into. As in don’t move to the next sc or you’ll be missing a stitch

      work in back stitches should say back loops http://www.stitchdiva.com/tutorials/crochet/crochet-in-the-front-or-back-loops-of-a-stitch

      at the beginning of the cuff section it says “Boot cuff: for the right boot sl st in the 7 stitches from the seam, for the left boot sl st in the 11 stitches from the seam” after that you work the cuff the same, although the “right” and “wrong” sides are different for each cuff

      Reply
  14. Joanne

    February 24, 2012 at 9:45 am

    Hi there! Love these booties. But I would double check your pattern. Sole _ Row 1 , you have 28 stitches. Row 2, you would need 30 stitches to complete the row. Maybe row 1 is chain 13 not 11. Going to work on these. They are lovely

    Reply
    • Ashlee

      March 3, 2012 at 12:34 pm

      nope it’s right, I think your miss-reading something (everyone writes patterns in a different style so my style might just not read very easily to you), why do you think you need 30 stitches to complete row 2? I’m still reading and counting the 28 needed to complete the row. for my baby bootie pattern you start with 13, but for this infant version you start with 11

      Reply
  15. megan tibbs

    February 24, 2012 at 3:21 pm

    shut the front door. i have been searching everywhere for the perfect baby gift for friends. thank you for saving me from becoming an alcoholic as a result of stress. i LOVE these booties and made one the second i found this pattern from you. i might make enough of them to make a little house out of so i can live in it and be surrounded by soft cuteness. oh my heavens. you. are. amazing. and awesome, and i wish we could be best friends. that is all.

    Reply
    • Ashlee

      March 3, 2012 at 12:43 pm

      aw thanks!!!!! I love such positive comments and I appreciate it. I often think I’d be best friends with some of the bloggers I read! Then I meet them IRL and we often are! I would LOVE to be best friends in our house of baby bootie cuteness!

      Reply
  16. Joanne

    February 24, 2012 at 3:51 pm

    Ok, So I kind of figured out where the pattern went wrong. The stitch count you had previously was the correct one before you changed it. I believe in row 2, you might have put in extra stitches. Here is what I came up with row 2


    Row 1 = 28 st
    Row 2 – Ch1. 1 sc in same st. sc 6 times, 1HDC, 2HDC 3 times, HDC 3 times, 2HDC 3times, 1 HDC, sc 7 times, 2 sc 3 times = 37 st
    Row 3-5 = 37st
    Row 6 = 31st
    Row 7 = 25st
    Row 8 = 21st

    I have not done the cuff yet. For whatever reason, The boot looked curved and twisted, which was what one woman was talking about here 🙂 Super Cute, will post pics on Ravelry. Hope this helps you a bit!

    Reply
    • Ashlee

      March 3, 2012 at 12:49 pm

      No I’m sorry, but my pattern is written just right.
      row2 looks like this
      row 2- ch1, sc in same sc, sc 7 times, 1hdc, 2hdc 3 times, 3hdc, 2 hdc 3 times, 1hdc, sc 8 times, 2sc 3times, sl st to first sc (39)

      you have the toe WAY off, there is 1hdc, then 2hdc three times, then THREE HDC in ONE stitch, the center of the toe, then 2hdc three times again, 1hdc again, then the sc down the side and then the increase along the heel.

      having your toe so off could account for your boot being twisted and stuff when working in rounds like this the pattern is symmetrical and if you just tug and pull it a bit they work out just fine and works for both the right and left foot.

      Reply
  17. Sarah

    February 27, 2012 at 12:28 am

    I absolutely love this pattern! My first bootie took a little longer than expected, but practice makes perfect! I didn’t have any needles/thread/buttons lying around so I created “buttons” out of a different yarn onto the bootie. These were my first try in creating something other than the crotchet basics (beanies, & basic scarfs) so I had a little trouble in making a right bootie. I followed the directions as I did with the first but I was making two left feet booties! Haha I ended up turning it inside out to make a right bootie but the bottom didn’t end up looking the same as the first. Could you please help a newbie at this? I’d love to make lots more but I want to figure this out first.

    Thank you so much and you are so kind to put this up for all to create for free! 🙂 I truly appreciate it

    Reply
    • Ashlee

      March 3, 2012 at 12:57 pm

      your welcome! I’m glad you liked it. The right bootie is made by starting the cuff on the other side, but after that the instructions are the same. You work one starting on the outside facing in and the other starting from the inside facing out. The picture just above the cuff is a good guide. And where to start each cuff is written right into the instructions. good luck next time!

      Reply
  18. Cyndi

    March 1, 2012 at 8:11 am

    Oh so excited to find this pattern~!! 2 new grandbabies in a week’s time has me crocheting lots of hats.. now I finally have a snazzy pair of “boots” to match them.. Thank you so much!!

    Reply
    • Ashlee

      March 3, 2012 at 1:16 pm

      Congrats!!!! new babies in the family are the BEST!

      Reply
  19. Rachel

    March 3, 2012 at 2:51 am

    I love this pattern but I have a question. The first 3 rows of the cuff are done in HDCs but for row 4 it says it do the stitches in the DCs of the previous rows. And your button placement says DCs. Is this a typo in the last part or the first?
    And by the way, thanks so much for the pattern 🙂

    Reply
    • Ashlee

      March 3, 2012 at 1:46 pm

      it was a typo from when I rewrote the pattern from the baby version to the infant version, I fixed it! Thanks so much!

      Reply
  20. Wendy

    March 4, 2012 at 12:57 am

    Heya! This is such a cute pattern, I can’t wait to get started on it! Just have a question about the yarn – what weight/ply yarn did you use? Thanks!

    Reply
    • Ashlee

      March 4, 2012 at 1:29 am

      I used caron simply soft, but any of the baby soft yarn (like red heart soft baby steps)will work. you don’t want it to be at all scratchy and you want to be able to wash it. It’s a medium weight yarn.

      Reply
  21. Joanne

    March 5, 2012 at 6:01 pm

    No, not misreading anything 🙂

    Row 1 you have 28 stitches
    row 2, count your increases, you do not have 11, you have 9 so, there should be 37 total. You have 39 written. Adding the remaining 2 stitches cause the shoe to curve in an unnatural way, and becomes a lefty shoe. Didnt mean to judge your pattern in any way. I love these booties. I am a full time crocheter, i do not have time to think of patterns, so i look for patterns i like. Out of que for me. Too bad 🙁

    Reply
    • Ashlee

      March 5, 2012 at 8:09 pm

      I’m sorry to say that you are indeed misreading something, I’m not sure what though.
      let’s count it out:
      row 2- ch1,
      sc in same sc, (1)
      sc 7 times, (7)
      1hdc, (1)
      2hdc 3 times, (6) 3 increases
      3hdc, (3) 2 increases
      2hdc 3 times, (6) 3 increases
      1hdc, (1)
      sc 8 times, (8)
      2sc 3times, (6) 3 increases
      sl st to first sc
      (1+7=8+1=9+6=15+3=18+6=24+1=25+8=33+6=39)
      there are 11 increases total

      where are you only getting 9 increases, obviously I’m writing something wrong and I’d like to fix it to make my patterns more legible?

      I should add that I often change a pattern I’m reading to fit my style better, if you like it better with only 37 increases then by all means do that. We all crochet at different tightness/looseness and all patterns are open to change. but that doesn’t mean that it’s written wrong, just not what you want. I understand that adding a gauge to my pattern would greatly help full time crocheters like yourself better, but I’m not in any way full time, I’m a mother of 5 children with special needs who crochets, knits and blogs on the side as my break in the evenings. I make all these items for myself and myself alone. I don’t make any money on my patterns or my blog and while I’m happy to share and happy to answer questions I am in no way claiming to be an expert pattern maker, that’s why I don’t sell them, I’m not confident enough for that. I’m just sharing what worked of me and my style of crocheting. Feel free to change it for your own use however you’d like but my pattern is not wrong, it’s the pattern that perfectly fits my son’s feet. I’m very upfront in the fact that he has long, huge fat feet and these booties won’t fit everyone’s children. I’m not making them to be a specific size, just sharing what I created for my own use.

      Reply
      • Christine

        March 5, 2013 at 6:54 pm

        Ashlee your patterns are very well written with very legible instructions. You are a very busy woman looking after 5 children and still seem to find the time to share your talents with us and “free” as well. I don’t think you should be wasting any more of your time on someone who obviously does not appreciate your pattern or the time you have put into them. You have done nothing but write and re-write this pattern for this lady and still doesn’t appear to understand. The spare time that you do have when you have it shouldn’t be wasted on someone who does not appreciate your work. She has done nothing but question your pattern. I totally agree with you on asking her to create her own style or whichever works for her. Thank you so very much for everything you have done and continue to do. Biggest fan!

        Christine

      • Ashlee

        March 27, 2013 at 1:30 am

        ha! Thank you so much for this comment. It made my day, just a few days ago someone wrote a huge long comment on how I’m not writing in the standard format that’s why so many people don’t understand and I need to fix every pattern I write. Thats the main reason I don’t change, because I feel insecure with my pattern writing. So re reading your comment as I’m catching up on reponding was perfect timing!

      • Cindy

        September 26, 2014 at 10:29 pm

        Ashlee – I know it has been a while since you wrote this pattern and had to suffer through such ungrateful comments. I am shocked at the back and forth of some people. You wrote this pattern and shared it out of the kindness of your heart. There are some people that need to be right regardless of what you say or how many ways you try to explain things. You handled this situation like a lady or prefers to stay on the higher road as I would have had a problem doing that. Thumbs up to you. I am just finding this pattern so I do not know if you are still sharing but, if you aren’t I pray it wasn’t because of that person – never allow any one to rob you of your power, your self worth and self-confidence. Always hold your head high as even though this is the first time I have ever had any contact with you, you truly have a good and loving heart. Respectfully and warmly, Cindy F.

      • Ashlee

        November 26, 2014 at 1:31 am

        Thank you so much Cindy! It can get discouraging, and yes sometimes maddening, but I just take a break from comments when I need to and come back refreshed. Since my baby is no longer a baby I’m not feeling quite as inspired to make crochet patterns, but when I AM inspired again I’ll for sure be sharing no matter what. Thank you again for your sweet words of encouragement!

  22. Jo

    March 5, 2012 at 8:12 pm

    These are just about the cutest things I’ve ever seen! I’m a self taught crocheter and not always the best at it but your pattern was so easy to follow! I’ve already made 3 pairs (with no one to give them to…so sad). Thank you for posting these!!

    Reply
    • Ashlee

      March 5, 2012 at 8:20 pm

      Thank you so much! After numerous complaints I’m a bit beaten down right now, your sweet comment came at just the right time! I’m so glad you like them!

      Reply
    • jodee

      March 7, 2013 at 2:18 am

      A good place to give your thoughtful talent to is any facility that loves babies as much as you do! cancer wards, hospital, maternity ward, chelters for women and children, etc…..Lots of babies have little to nothing when they go home…..Just some ideas…

      Reply
      • Ashlee

        March 27, 2013 at 1:36 am

        Great suggestions! thank you!

  23. Joanne

    March 5, 2012 at 9:48 pm

    OK. I see what i did wrong. 3hdc I did 1hdc in the next 3 stitches. My mistake I apologize.

    Reply
    • Ashlee

      March 7, 2012 at 12:24 am

      I’m glad we got to the bottom of the problem. Do you have a suggestion for a better way for me to write it so someone else doesn’t have the same problem. I really do want to become a better pattern writer. Sorry for the confusion and thanks for trying to help.

      Reply
  24. Maryann

    March 8, 2012 at 3:17 pm

    Just wanted to say what an awesome pattern this is and THANK YOU for offering it for free instead of so many etsy-ers who would charge like $5 for it! I made these as part of a set I’m making for my babe due in July as well as 2 cousins who are due around the same time I am. I used lily sugar & cream yarn and they came out perfect. I did use a size f hook to account for the slightly thicker yarn.

    Again, thanks, and a link back has been shared via Facebook 🙂

    Reply
    • Ashlee

      March 8, 2012 at 7:02 pm

      you are SO welcome, and thank you so much for your comment. so often people only post when they have a question or complaint and hearing the success stories and appreciation is incredible! I could kiss you! So thank you for taking the time to let me know!

      Reply
  25. Jo

    March 8, 2012 at 6:32 pm

    So, since my last post I’ve been thinking about these boots a lot! I was wondering if you have thought about felting them? I’ve only ever made one thing felted but I think they would be so cute felted! Or do you think they would be too itchy?? They would have to be made a lot bigger, of course, and I’m not really sure how to go about doing that….
    Wondering your thoughts?

    Reply
    • Ashlee

      March 8, 2012 at 7:06 pm

      Personally I don’t really “get” felting, so I’ve never learned how, and I wouldn’t know if this project is something that could be or not. BUT that said if it CAN be felted (I’m not sure on the requirements for it) then I’d say go for it! It’s always fun to experiment and try something new! At some point I’m sure I WILL try felting, just to try it, but I just haven’t been that motivated yet, and there is always something else I’d like to learn more! Like right now, knitting intarsia in the round… it’s kicking by butt, but I’m loving learning it!

      Reply
  26. Yvonne

    March 10, 2012 at 2:11 am

    I have been crocheting for 34 years. I cannot crochet without a pattern and am self taught. But I have to tell you, as many websites as I have been on and as much work as I have seen done, yours is SPECTACULAR! Your creations are beautiful. Thank you so much for sharing and for the creativity you have and are willing to share. Many creators in the art of crochet do not allow people to re-create, which is a shame. Thank you for your generosity and again sharing your creativity! Hugs!!!

    Reply
    • Ashlee

      March 10, 2012 at 12:53 pm

      why thank you so much! I really REALLY appreciate that! The main reason I blog and share is so that others CAN recreate it themselves! I love it when people make a cake or a crochet or knit piece from one of my tutorials or patterns so thank you so much for commenting, you just totally made my weekend!

      Reply
  27. lauren

    March 10, 2012 at 4:34 pm

    Loove this pattern!! I used the little pattern & altered it a bit for my dd11m.. she’s a little fatty so I can NEVER find boots to fit her!! Bottom of her foot is 4″ & her calves are 7″ around. I added a row to the sole & added a row to the top of the shoe, made the strap & added scallops to the side & bottom

    Reply
    • Ashlee

      March 10, 2012 at 5:54 pm

      Glad you were able to adjust it to fit your needs! I do that all the time with patterns! Glad it wasn’t too hard and that your sweet little hobbit (like mine) has shoes now!

      Reply
  28. Yvonne

    March 11, 2012 at 1:20 am

    I made them today and they are just beautiful. I read a previous blog and I too had a bit of trouble with it being “askew”, However, once the bootie’s were finished and I stuffed it with a paper towel to shape it, it turned out just fine! There is nothing “wrong” with your pattern. 🙂 I also made a newborn sunhat and I did the brim with the shell stitch to match, too cute! I am glad I made your weekend. Your work and generosity need praising. You are very talented. BE PROUD! Hugs.

    Reply
    • Ashlee

      March 13, 2012 at 1:15 am

      Thanks great! I’m glad it worked out so well for you! Thanks so much and I bet the hat looks adorable too!

      Reply
    • Hector Mauricio

      April 20, 2015 at 11:04 pm

      NICE 🙂

      Reply
  29. Angela

    March 12, 2012 at 3:48 pm

    Thank You! I was having problems with row 2 also. I tore it out and reworked it 3 times before I looked at the comments. I think the problem is that the pattern seems to read that the 3 hdc are worked in separate stitches – not all in one at the toe. It was a little confusing to me also.

    Thanks for this pattern! I have been looking everywhere for one just like this that I didn’t have to pay a bunch of money for. And thank you for making it free!

    Well…off to correct and finish making these darn cute little booties!

    Reply
    • Ashlee

      March 13, 2012 at 1:27 am

      I write hdc 3 times, for that and 3hdc for one stitch… that’s how I’ve always read it, but I’m always open to advice for being a better writer. thanks

      Reply
  30. Angela

    March 12, 2012 at 3:51 pm

    In other patterns that I have seen, they usually write it as 3 hdc in next stitch. Hope that helps.

    Reply
    • Ashlee

      March 13, 2012 at 1:26 am

      I added the line, thanks.

      Reply
  31. MrsCharisma

    March 15, 2012 at 6:29 pm

    I DID IT! LOL! 🙂

    I’d left a message on Ravelry because I couldn’t figure it out. But my bootie came out really pretty! I did have an issue after row 8. It didn’t look “closed” like your pic, so I added some more dc2tog and dc3tog and what not to close it up 🙂

    Thanks!!!

    Reply
    • Ashlee

      March 15, 2012 at 11:51 pm

      I wonder why it wasn’t looking as closed? glad you took the initiative and fixed it. I do that all the time with patterns, change it a bit to fit my style, or stitches! I hope they are the right size now and not to big anymore!

      Reply
  32. melissa

    March 16, 2012 at 3:11 pm

    Have you ever consider doing a tutorial on these booties because I am a beginner to crocheting and reading patterns can be tricky for me much easier for me to watch someone do it but I am learning… mostly just from watching videos online. I have started these boots and would love to be able to use as a baby shower gift so fingers crossed they turn out I love them!

    Reply
    • Ashlee

      March 16, 2012 at 11:10 pm

      well this post is a tutorial, there is a picture every few rows to help you along. If you have a trouble at some point just let me know what row and I’ll see if I can help you out! I tried a few videos but no one watches them so I don’t do them any more, esp for something that changes every row. This video would take about an hour!

      Reply
  33. Vikki

    March 30, 2012 at 3:14 pm

    Thank you so much for this pattern! The pics were such a help, for me the pictures help the words make sense. So as a first time bootie maker, thank you thank you!

    Reply
    • Ashlee

      April 23, 2012 at 12:57 am

      Your so welcome! It’s nice to get a compliment that the pattern worked for you! I’m so so SO glad!

      Reply
  34. allison

    April 4, 2012 at 8:38 pm

    So when you say:
    row 1- sc in 2nd ch, sc 5 times, hdc 3 times, 7hdc in last ch, finish the rest of the round working along the back of the chain, hdc 3 times, sc 5 times, 4sc in the last/first ch, sl st to the first sc (28)

    Does that mean sc 5 times in one stitch or sc in the next 5 stitches? Or hdc 3 times, does that mean 3 in one stitch or one in the next 3 stitches?

    Reply
    • Ashlee

      April 23, 2012 at 3:11 am

      when the number is after the stitch: hdc 3 times, it’s in the next 3 stitches
      when the number is BEOFRE the stitch: 7hdc it’s in the SAME stitch

      make sense?

      Reply
    • Ashlee

      December 30, 2012 at 12:39 pm

      I added a diagram of the sole, hopefully that will make it clearer

      Reply
  35. Mel

    April 15, 2012 at 6:01 am

    Thank you so much for this tutorial! I hadn’t made anything but granny rugs before this and after a few attempts, this tute is easy as pie. I’ve made a few sets for my own bub to be and a few for gifts. 🙂

    Reply
    • Ashlee

      April 23, 2012 at 3:50 am

      I’m so glad! People comment a lot when they don’t get something (which is fine) but it’s really REALLY refreshing to hear the positive outcomes as well!

      Reply
  36. Stacie

    April 16, 2012 at 10:41 am

    I got all the way to the boot cuff and I can’t figure out where the seam is to count the 7 or 11 from. Is it in the back or the front? Please help me!:)

    Reply
    • Ashlee

      April 23, 2012 at 4:05 am

      the seam is the seam from the bootie, where you sl st, and ch to move up to the next row, that’s the seam…

      Reply
      • Avy

        November 30, 2013 at 8:24 am

        Thank you! I wasn’t sure what you meant by seam either. Love the pattern!

      • Ashlee

        December 9, 2013 at 7:24 pm

        your welcome!

  37. Kamryn

    April 16, 2012 at 1:23 pm

    I’m fairly new to crocheting and have made other projects (hats and mary janes mostly) but really wanted to tackle these booties. I kept having difficulty with my stitch counts when I would sc in first sc when starting a new round…the only way I could fix it and still have the proper count is to sl st to complete one round, and sc in the next stitch over before starting my 7, 9, etc sc stitches. That’s probably my own error since other people have made these with no problems.
    I have a question about this step:
    row 1- hdc in 3rd ch from hook- ch2 counts as hdc, hdc in next 9 ch, hdc in first sc (the same one you sl st in), hdc 19 times (there will be 3 spaces left), skip 2 spaces, sc in last space. (32)

    The skip two spaces, sc in last space really threw me off. Is there a way to include pictures of that step? Or, in a perfect world, would you ever make a video tutorial? After two full days of attempting to make these, and pulling yarn apart I think 12 or 13 times, I have to semi-bastardized versions of these adorable booties. Thank you so much for your generosity in sharing the pattern for free!

    Reply
    • Ashlee

      April 23, 2012 at 4:36 am

      kay I’m not understanding your first problem, you have too few or too many stitches?

      in the second part the hdc row is sticking up about 1/2 inch and the skip 2 stitches and sc in the last space folds it down and closes the cuff a bit.

      Reply
  38. Erika

    April 18, 2012 at 10:58 am

    Thank you for this pattern! My friend found a pair of booties on Etsy that she loved and wanted me to try to figure out how to make, but these look very similar so I am going to give them a shot!

    Reply
    • Ashlee

      April 23, 2012 at 4:51 am

      Great! I hope you have fun and enjoy making them!

      Reply
  39. Sara Morrell

    April 18, 2012 at 9:42 pm

    Hi, I absolutely love this pattern and am kids a beginner with crochet so it’s not too surprising that I’m having trouble. I’ve only done a few simple things out of a book I have and moving on to patterns from the Internet is a bit confusing. On row one when it reads 7hdc in last chain, I was confused if I was supposed to keep entering my hook into the same loop (the last in the row?) to make a curving line on hdc… Well, I did this and ended up with a hole where the picture shows it should be connected… If possible could you help me out with what I did wrong? Sorry for being troublesome it’s just I would be really interested in making these for a friend who had a baby on Easter. As I said I am somewhat beginner, would you suggest I practice with another project and come back to this later? Thank you for free patterns 🙂

    Reply
    • Ashlee

      April 23, 2012 at 4:54 am

      yes all in the same ch at the end. It will create a hole from all the in and out, but as you keep working it will pull it self back out, just continue to work down the back and that will help pull it closed again.

      Reply
  40. Katherine

    April 24, 2012 at 2:46 am

    Thank you so, so much for sharing. I’ve made 3 pairs of these now. I’m addicted.
    https://crochetlatte.com/2012/04/24/315/

    Reply
    • Ashlee

      April 30, 2012 at 11:34 am

      I’m so glad you like them! It’s time for me to make another pair for my baby as he’s outgrown the first 2 sets!

      Reply
  41. Kamryn

    April 24, 2012 at 2:16 pm

    I have to many stitches, and the opening in my bootie before adding the cuff isn’t as closed as yours was.

    Reply
    • Ashlee

      April 30, 2012 at 11:44 am

      I’m sorry, but over email and comments it’s hard to really help. Which row does your count get off? And can you tell me EXACTLY what your doing?

      Reply
  42. abcrew

    April 25, 2012 at 1:18 pm

    I have been trying to find a pattern for these for almost a year now. Up until now I’ve only found people on Etsy selling the completed booties, which I never would buy since I know how to crochet myself. They are so cute and I am sooo grateful that you are offering the pattern for free. Now my neighbor can get these for her baby as a gift instead of something else.

    Reply
    • Ashlee

      April 30, 2012 at 11:57 am

      your so welcome! I hope you enjoy the pattern!

      Reply
  43. Dawn

    April 26, 2012 at 6:32 am

    Good morning! I just wanted to say THANK YOU!!! I just started crocheting the end of february beginning of march and whizzed right along making ADORABLE creations! I believe this is the *only* shoe/boot pattern I will ever do! I haven’t done them as boots *yet*, but I will!! I’ve been making them into cutsie little shoes!

    and https://www.facebook.com/photo.php?fbid=10150723149918233&set=a.10150668769828233.389900.504183232&type=3&theater
    I’m currently finishing up another Mickey set(with your shoe design), then I’m onto a Minnie set a little later! =D Can’t wait to have them in pink… I’m wondering if there’s a way to add mini “high heel” to make it look more like Minnie’s shoe… hmmmm *::gears going::* Mind if I play around with your pattern a bit to try?? =)

    Reply
    • Ashlee

      April 30, 2012 at 12:04 pm

      how fun! I’d finish the shoe and then sl st into the heel base and sc around the heel and then across the base, the build it up, decreasing every row.

      Reply
  44. AmKrum

    April 26, 2012 at 6:36 am

    adorable!! thank you!!

    Reply
    • Ashlee

      April 30, 2012 at 12:04 pm

      thanks so much! And your so welcome!

      Reply
  45. Elaine

    April 27, 2012 at 9:25 pm

    THANK YOU!!! I love this pattern!! It’s the first real bootie that I’ve liked and made. The only thing is… you got an adult version? 🙂 I want some for me, lol! This is gorgeous! Again, thank you! Great job!

    Reply
    • Ashlee

      April 30, 2012 at 12:33 pm

      HA! I get that question a lot, but personally I’m not a fan of anything on my feet, let alone crochet texture (I have texture issues)

      Reply
  46. Nevi

    April 30, 2012 at 11:03 am

    Hi, these are so cute! Just a quick question what are the dimensions of the final bootie (size 1), just the length of the sole of the finished bootie would be great. The baby im crocheting for has long, thin feet and just want to check that they will fit!

    Reply
    • Ashlee

      April 30, 2012 at 2:08 pm

      ummmmm I actually just gave the infant booties to the gal I made them for! So I don’t have them to measure. They might actually be bigger than a size one, it all depends on how tight or loose you stitch. BUT my babies have narrow feet so I tend to create long narrow shoes. What you want to do it crochet the sole, then hold it up to the babies foot, if you need to make adjustments do it then, BEFORE you do the rest!

      Reply
  47. mayu elizarraraz

    May 2, 2012 at 3:07 pm

    Hello I love this boots.. I have a baby girl of three months and I going to start this today…. I new at this but I like that way you explain it…

    Reply
    • Ashlee

      June 11, 2012 at 2:07 pm

      thank you so so SO much! I get so many questions it’s so sweet and totally makes my day when someone comments just to day they like it! I hope the boots work out easily for you!

      Reply
  48. Amy

    May 3, 2012 at 7:15 am

    I LOVE this pattern. It is so adorable! Thank you so much for posting the pictures, it helps a ton! I have a quick question because I am also a newbe crocheter. When you start Row 3 in the back stitches, is that just for that row or continued through the whole project? Also before that, are you working in the front of the stitch or through whole chain? I hope that question makes sense? My little baby nephew is going to be so styling! Thank you thank you thank you!

    Reply
    • Ashlee

      June 11, 2012 at 2:09 pm

      I’m sorry it’s taken me so long to answer your question! I’m WAY behind on comments! Row 3 is worked in back stitches to help create a sharper corner for the bottom of the booties, but that’s the ONLY row worked in back stitches. Your second question is unclear. before row three your working in the top of the stitches like normal.

      Reply
  49. J. G. Burdette

    May 6, 2012 at 2:10 pm

    They are so adorable. I love them. I’ve searched high and low for something like this!

    Reply
    • Ashlee

      June 11, 2012 at 2:29 pm

      Thanks so much! I hope you get to make them and enjoy them! They were really fun to make!

      Reply
  50. Bonnie

    May 6, 2012 at 11:57 pm

    Thank you so much for this pattern, and for making it available for free! I’m fairly new to reading crochet patterns, but found yours easy to interpret! Thanks again for sharing 🙂

    Reply
    • Ashlee

      June 11, 2012 at 2:32 pm

      your so welcome! And thanks for commenting and sharing your appreciation! So much of the time it’s just complaining and correcting so I really really REALLY appreciate comments like yours just saying thanks!

      Reply
  51. Angie

    May 7, 2012 at 10:41 am

    I’m having trouble with this pattern after row-8. I have 27 sets instead of 23. I can’t figure out what I’m doing wrong… HELP!

    Reply
    • Ashlee

      June 11, 2012 at 2:36 pm

      Are you sure you didn’t miss a row???? row 7 should end with 27 stitches, row 8 should end with 23, so unless you didn’t do any of the decreases I’m thinking you just missed a row!

      Reply
  52. Angie

    May 7, 2012 at 11:41 am

    Not sure what I was doing wrong but I’ve figured it out and the pattern is working beautifully! So excited. Thanks again!

    Reply
    • Ashlee

      June 11, 2012 at 2:37 pm

      AH, I’m catching up on comments and I should have noticed you commented twice! I’m glad you got it all figured out!

      Reply
  53. Rosey

    May 11, 2012 at 3:06 am

    Love this pattern and am currently making a pair for my new baby due in september 🙂

    quick question – is it done in american or english crochet terms as I know they differ slightly?

    Reply
    • Ashlee

      June 11, 2012 at 3:35 pm

      American! (sorry I’m so behind on responding to comments, I hope you already figured it out!)

      Reply
  54. cindy

    May 11, 2012 at 8:56 pm

    thank you for this great pattern. My booties turned out nicely!

    Ik was wondering if you could tell me how you make a sc? Cause yours are perfectly straight above eachother. Mine arent….. Maybee you could email me? Thank you!

    Reply
    • Ashlee

      June 11, 2012 at 4:30 pm

      um… put your hook into the stitch, yo, pull back through, yo and pull through the two stitches on the hook. everyone’s personal style is a bit different, once you find yours you can change patterns as you work to accommodate what you do! I change patterns ALL THE TIME!

      Reply
  55. Kellie Wishart

    May 17, 2012 at 4:02 am

    I have searched high and low for a bootie pattern like this, thank-you muchly much!!! I have completed a pair and found your instructions easy to follow. I don’t know how but I seem to have crocheted one of the cuffs on inside out? Any ideas what I’ve done wrong or is that how they’re meant to be? You can only really tell with the scalloped edge, one has the pretty side outside (the 7 stchs away from seam), the other has the pretty side inside (the 11 stchs away).
    Am I just being pedantic?

    Reply
    • Ashlee

      June 11, 2012 at 4:45 pm

      that’s just the way it is, I was trying to make it as easy as possible for people following the pattern, but if it bothers you you could always finish off the row before then start at the other end for the finishing round.

      Reply
  56. Rhonda Crawley

    May 26, 2012 at 9:20 am

    I love these booties, Im a beginner crocheter and am having a little trouble with your pattern (have started over 9 times so far lol) when you say sc 5 ect is that all in one chain or 5 in a row? thank you for any help you can give me

    Reply
    • Ashlee

      June 11, 2012 at 5:33 pm

      when the number is first, like 2sc, that means 2 sc in one stitch. when the number is after the stitch, sc 5 times, that means sc in the next 5 stitches. if it’s a number first and after, 2sc 5 times, that’s 2 sc in each of the next 5 stitches

      Reply
  57. Brandi

    May 27, 2012 at 9:35 am

    I love these booties. They are very similar to my converse style ones. I love the flap with the button. Thanks for the pattern I can’t wait ti makes these!! Awesome!

    Reply
    • Ashlee

      June 11, 2012 at 5:33 pm

      I also have a converse shoe pattern, but with thread instead of yarn. I hope you like these booties!

      Reply
  58. litta

    May 31, 2012 at 1:47 am

    I see in row 3 , what is different between 1hdc and hdc?

    Reply
    • Ashlee

      June 11, 2012 at 6:42 pm

      I’m missing your question? What row says 1hdc??? (and there wouldn’t be a difference between 1hdc and hdc, but I’m just not seeing it!)

      Reply
  59. Kate

    May 31, 2012 at 7:45 pm

    These are absolutely adorable!! I love them!! Do you by any chance have a pattern for an adult sized version of these?

    Reply
    • Ashlee

      June 11, 2012 at 6:43 pm

      I do not, sorry.

      Reply
  60. Mamadof6

    June 1, 2012 at 7:14 am

    Oh my, you’re so very smart and very talented! I’m going to make for my 1st great grandbaby girl!! It has been a blessing since I’ve been crocheting. Thank u for this adorable pattern, and i copied it from my phone, no computer.

    Reply
    • Ashlee

      June 11, 2012 at 6:44 pm

      thank you so much! and congrats on your first grandbaby girl! I hope it’s legible on the phone!

      Reply
  61. ivy

    June 5, 2012 at 10:44 am

    WOW i just ♥ your site, thank you so much for all the work you put into it. i work lots better with pic tutorials together with written, as i am a very visual learner..

    Reply
    • Ashlee

      June 11, 2012 at 6:50 pm

      your so welcome! thanks for taking the time to write such a sweet comment! I really REALLY appreciate it!

      Reply
  62. Nevi

    June 7, 2012 at 4:21 pm

    HI, how do you do a dc3tog, everywhere i look gives me a completely different method!

    Reply
    • Ashlee

      June 11, 2012 at 7:03 pm

      it’s a decrease, your double crocheting 3 stitches together, so you do half of the dc in each stitch, then do the final yo and pull through all 4 loops on your hook to create one stitch~

      Reply
  63. Gloriousaffinity

    June 8, 2012 at 5:35 am

    This is what my pattern did also! I’ve finished one as I thought it was meant to happen, as it kinda makes it look like a shoe with a curved ball of foot area, but then when I went to make the second one, I was thinking uh oh. I don’t want to undo the other bootie but I think the pattern should be counting the the first sc as number one, instead of then doing 9. Maybe there should one be 9 in total on round 2, as this is where I am finding the problem.

    Reply
    • Ashlee

      June 11, 2012 at 7:11 pm

      nope the pattern is written just right. You are more than welcome to change it to fit your style of crocheting, I do it all the time when I read patterns, but it’s written just right. the soles are symmetrical and getting rid of one stitch would throw it all off. But we all crochet differently, tight, loose, crooked, etc… so feel free to make it your own, and do what you need to make it work for you, but please don’t confuse other readers. I can’t figure out if the tight crocheting or the loose crocheting is causing it to curl over (I wish I could watch someone crochet it to tell). But if you just block it out (or tug it into place like I do- I don’t have the patience for blocking) it should go right into place. I should really draw out a chart so people can see it better maybe?

      Reply
  64. Anna

    June 10, 2012 at 10:44 pm

    I am a bit confused, what do you mean sc/dc 2 together? I originally thought you meant two in the same stitch, but that definitely does not make the shoe close like that.

    Reply
    • Ashlee

      June 11, 2012 at 7:14 pm

      dc2tog is a decrease, you’ll dc (or sc) two stitches into one

      Reply
  65. Laura Wild

    June 15, 2012 at 11:43 pm

    Hey there 🙂 I am absolutely in LOVE with these booties. Although I am not a beginner, I am still at a novice level. I have a really stupid question for you. What is my old seam? Or maybe where is my old seam? I have one bootie made and I just decided to wing it on my placement of the wrap. It looks okay, but I am a bit of a perfectionist so I want it to look just like yours. Also, do you think it would be possible to add the wrap without finishing off the boot first? Thanks a million for the fantastic tutorial. My girlfriend and her husband just had twin boys 3 days ago and were completely unprepared, so I know they will love these too.

    Reply
    • Ashlee

      July 10, 2012 at 1:30 am

      you can add the wrap without finishing off for one foot, by sl st over, but it just doesn’t look right… I hate finishing off and restarting, but when it’s right it’t right! The seam is the seam from the foot part- where you sl st at the end and ch up, is there any other kind of seam, should I call it something else? I’m still totally new to writing patterns, and I write what makes sense to me, sorry if it’s too confusing! The booties are HUGE, so hopefully they’ll fit them in the winter!

      Reply
  66. Courtney

    June 29, 2012 at 2:10 am

    I have to start by saying that I absolutely loved this pattern. I tried for months, actual months to make my first pair of booties and it wasnt until I found this pattern that I was able to do it, and I’m a fairly good crocheter. On my third pair, I realized an error I was making that someone else also mentioned about the booties not looking as closed as yours.. this happens in row 1 of the boot cuff if you dont sc in the right place. The cuff ends up not closed and looks more like a shoe than a boot. I think it may be helpful to add a picture showing that that sc is placed across almost to the beginning at the other side. When you miss this step, it makes the decreased rows not look as neat also. Thanks for sharing this great pattern!

    Reply
    • Ashlee

      July 10, 2012 at 2:21 am

      the picture above that row actually has the picture after the sc in the last spot, but because I don’t have anyone helping me take pictures at 2 am the hook kept falling over so it’s hard to see, if I make another pair I’ll try to get a better picture. glad you were able to figure it out!

      Reply
  67. JaviValdesM

    June 30, 2012 at 8:26 pm

    thanks for the pattern, I was looking for this long time ago!!
    It was really easy to follow, but i have a doubt because the sole looks like they were both right foot or I’m wrong :S jijijiji
    kisses and sorry if a wrote the words wrong my native lenguage it’s not english, I’m from Chile so I speak spanish

    Reply
    • Ashlee

      July 10, 2012 at 2:29 am

      the sole is symmetrical so they are both left or right feet! when you first crochet them they sometimes twist a little, but just pull them back into place and it will be fine!

      Reply
    • Ashlee

      December 30, 2012 at 12:15 pm

      I added a diagram of the sole, hopefully it will help show how symmetrical the soles are

      Reply
  68. RACH

    July 2, 2012 at 11:32 am

    Hey! I really love this pattern, and I was wondering. Can we sell what we make, or would you prefer we just use them for our own personal use? Thanks! I have looked at all of your patterns and love them all! Great job!

    Reply
    • Ashlee

      July 10, 2012 at 2:32 am

      you can totally sell what you make, please link back to my pattern and give me design credit. then people who want to make them can, and people who don’t want to make them have something to buy- best of both worlds! good luck!

      Reply
  69. Krissy

    July 8, 2012 at 8:23 pm

    Thank you so much for this cute pattern! The booties are absolutely adorable and I can’t wait to see them on my son who’s due later this year!

    Reply
    • Ashlee

      July 10, 2012 at 3:04 am

      congrats on expecting!!! I love being pregnant, and having babies, and nursing, and raising them, etc… I love it all! I loved crocheting things for the baby during my last few months of my pregnancies, imagining what my baby is going to be like, and how great it’s going to be! So have fun and enjoy it all!

      Reply
  70. Morgan

    July 17, 2012 at 1:11 pm

    Ok. I am new to crocheting. I did exactly what your pattern said and it was amazing! I impressed myself so much! Thank you very much! It was very easy to follow! I only have one question! No one laugh!!! HOW DO I MAKE THE OTHER FOOT!? I’ve been trying different things and have absolutely no idea where to start! Please help because unless my neice only has one foot (God forbid) , I’ll need both!

    Reply
    • Ashlee

      July 24, 2012 at 3:32 pm

      like the patterns says, the bottom portion of the booties are the same for both feet, the only change is when you add the cuff,

      Boot cuff:
      for the right boot sl st in the 7th stitch from the seam, for the left boot sl st in the 11th stitch from the seam

      Reply
  71. Jules

    July 18, 2012 at 3:06 am

    Hi Ashlee, I just wanted to say thank you & let you know this is a wonderful pattern I have just finished the first bootee and I found your instructions to be very clear. You are so patience when answering all the questions posted to your blog. You are very generous with your time & knowledge, your kindness shines through your words. I found by reading your replies all my questions were answered. You are very creative keep up the good job! Sincerely, Jules.

    Reply
    • Ashlee

      July 24, 2012 at 3:34 pm

      your so welcome! I’m glad you were able to find your answers in the comments! I hope you didn’t have too many questions!

      Reply
  72. Kristy

    July 19, 2012 at 7:12 pm

    THANK YOUUUUUUUUUU : ) Love these booties and I have even made them without the cuff of the boot for little ballet slippers. The instructions are simple and easy to follow. Well done and thanks so much for sharing : )

    Reply
    • Ashlee

      July 24, 2012 at 4:04 pm

      your so welcome! I’m glad you like them!

      Reply
  73. Donna

    July 20, 2012 at 6:43 am

    These booties are absolutely adorable. I knit most of my booties mainly because I havent really found many crocheted bootie patterns that I liked. This one …… I LIKE! No … I LOVE! Thank you for sharing.

    Reply
    • Ashlee

      July 24, 2012 at 4:14 pm

      your so welcome!!! And knitting booties? That must take forever, but look amazing!

      Reply
  74. Becky J.

    July 26, 2012 at 8:54 am

    I just finished my first pair of these!!! Thank you SO much for the seriously darling pattern… of course it took a few tries for me to get it to work for me (and a safety pin in my first sc so I could keep my stitches straight!) but now I have such a cute gift to give at baby showers… and my hubby will be happy because now I won’t feel like I have to crochet an entire blanket to give to my friends, and that gives me more time with him! These are much quicker, even with all my detours 😉 and now that I’ve figured it out, it will be much smoother. Anyhow, you are very talented and I love your family pictures, that place is right around the corner from me. Thanks again 🙂 Becky

    Reply
    • Ashlee

      August 3, 2012 at 4:16 am

      using a stitch marker is a great idea! I usually use a piece of off colored thread when I’m working on a piece that I have trouble keeping track of the first stitch with!. And much faster than a full blanket!

      Reply
  75. cindy

    July 28, 2012 at 4:44 pm

    I know how to make a sc 🙂 But there was a picture where yours are straight above eachother. Mine are always like the other pictures. Ive seen it before with someone else but she wouldn’t tell me how she did it. There has to be a way haha! But thanks anyway!

    Reply
    • Ashlee

      August 3, 2012 at 4:24 am

      I honestly have no idea, it’s just how I crochet, not trick to it! We all crochet so differently, tight, loose, etc… feel free to alter the pattern to fit who you crochet!

      Reply
  76. Tamara

    July 30, 2012 at 9:39 am

    Love these! Such a great tutorial too. I linked to this pattern on my blog this morning for a booties roundup, at http://www.mooglyblog.com – thanks for sharing this pattern for free!

    Reply
    • Ashlee

      August 3, 2012 at 4:20 am

      your welcome! and thanks for linking back to me and giving me credit!

      Reply
  77. Kristin

    August 4, 2012 at 9:05 pm

    Hi Ashlee,
    Thanks so much for sharing your pattern — and then for following up to the comments with such clear and generous answers. I’m a novice crocheter and this is the first item I’ve made that isn’t a toy (and therefore the first thing I’ve made where the stitch count *really* mattered). It took me a few tries to get the stitches right for the first shoe but I found all the answers to my questions within the comments here and now I have a FANTASTIC pair of booties for my friend’s little boy (due later this month). These have been hugely satisfying to make and I love how structured the final pieces are. If I ever have another baby of my own, s/he will have many, many pairs of these. 🙂
    All the best, Kristin

    Reply
    • Ashlee

      August 5, 2012 at 8:20 pm

      your so welcome! Thank you so much for your sweet comments! I am so glad your questions were answered easily!

      Reply
  78. Aliah

    August 12, 2012 at 11:44 am

    OMG i absolutely love these they are super adorable :), are we allowed to sell the finished products giving you credit ofcourse??

    Reply
    • Ashlee

      August 14, 2012 at 8:07 pm

      Yes, you can sell your finished products, and please give my pattern credit and a link back so people who would rather make their own instead of buying it can find the pattern!

      Reply
  79. Jackie

    August 14, 2012 at 3:14 pm

    Hey! I love these! I made a pink pair of the girl version and put a cute little white rabbit button on them for my best friend`s baby! She loved them. 🙂 Great pattern and really helpful pictures. 🙂

    Reply
    • Ashlee

      August 14, 2012 at 8:45 pm

      How cute! Pink with rabbit buttons? adorable! I’m glad you liked the patterns

      Reply
  80. Aliah

    August 15, 2012 at 11:27 am

    yes deffinately 🙂 thank you so much

    Reply
    • Ashlee

      August 15, 2012 at 4:03 pm

      your so welcome!

      Reply
  81. Anna

    August 21, 2012 at 5:03 pm

    Thank you for posting this pattern for free and it even has a phototutorial! I’ve finished my first pair and will be starting a second one..all for my soon to pop-out baby girl. Now, I’ll be able to dress her up for the winter in these stylish booties. Might try my hand on the top hat too. Thanks again. = )

    Reply
    • Ashlee

      August 28, 2012 at 1:10 am

      your so welcome! I love the top hat too! Good luck with your soon to pop-out baby girl!!!! Eeek! I love new babies, I can’t believe my little guy is already 10 months, it goes so fast!

      Reply
  82. Barb Boran

    August 21, 2012 at 8:57 pm

    First thank you for such a cute bootie pattern and then free besides! I am havig trouble with the second bootie making the wrap go the right way. I kno u count to 11 for the second bootie but after u work the hdc on the chain do you work toward the front of the boot or the back? When I work the cuff do I sl st and work around from the right side for one and then the wrong side for the other bootie. Thanks so much!

    Reply
    • Ashlee

      August 28, 2012 at 1:15 am

      after the chain you hdc down the chain, then around the BACK on both booties. so right side first row for one, wrong side first row on the other!

      Reply
  83. Barbara Kennedy

    August 22, 2012 at 8:09 am

    I love this pattern. I am crocheting this for my first great grandbaby.

    Reply
    • Ashlee

      August 28, 2012 at 1:19 am

      congrats on the great grandbaby! I hope you enjoy this pattern!

      Reply
  84. Sarah

    August 26, 2012 at 8:10 pm

    Thank you so much for posting this for free! A friend and my sister are both about to have a little girl and I have been searching everywhere for a good pattern. Thanks!

    Reply
    • Ashlee

      August 28, 2012 at 2:05 am

      your so welcome! I hope they like the booties!

      Reply
  85. Nancy Firstiant

    August 28, 2012 at 1:38 am

    I have been dreaming to make a pair of baby crochet shoes, because one day I wanna give ’em to my daughter’s baby.. but looking at the step by step pics above, I think I missed the very first step, I mean I don’t know how to make the sole.. would you please help me.. I hope you have pictures about the :
    ch (chain)
    sl st (slip stitch)
    sc (single crochet)
    hdc (half double crochet)
    dc (double crochet)
    etc.
    I know a bit crocheting, I’ve made a crochet blanket.. but I don’t know the name of the single work of the needle.
    Thanx a lot

    Reply
    • Ashlee

      August 28, 2012 at 2:17 am

      I’m not sure what your question is? There is no picture of the abbreviation list, it’s just a list of the stitches and the abbreviations used in the pattern.

      let me know if you have any other questions! I’m happy to help, this is NOT a beginner pattern so it might take a few tries, don’t give up!

      you used the word needle, rather than hook, are you thinking of Knitting???

      Reply
  86. Nancy Firstiant

    August 28, 2012 at 3:12 am

    Thanx for the reply
    I was wandering through Pinterest just now, and I got the picture although no word explanation except the steps.. I think it’s quite understandable.. so I can follow the Pinterest steps to make the sole then.
    Yeahh.. it’s an intermediate-advanced I think, but I understand the steps of your pattern. I just know the straight crochet ^^
    I don’t know the tool’s name in English (I’m Indonesian), I have one exactly like on your pic.
    I wanna make a cute baby hat too.. if you have one. Thanx ^^

    Reply
    • Ashlee

      August 30, 2012 at 10:22 pm

      I’m not sure what you mean by pinterest steps, could you send me the pin you saw?? pictures and no words? that doesn’t make any sense? my post is full of the pattern, written tutorial AND pictures.

      What is straight crochet? I think the first thing you need to find is an English to Indonesian crochet stitch guide. I tried to find one online, I tried for about half an hour! but I couldn’t even find an Indonesian stitch guide so it’s hard to help when you don’t recognize my stitch instructions. I’d love to help you make them.

      all my free crochet patterns are on my blog

      Reply
  87. Trista Morgan

    August 29, 2012 at 8:30 am

    I have question about this. line 2hdc 3 times, 3hdc (in one stitch), 2 hdc 3 times does this mean that 2hdc in the same stitch for a increase 3x than increase 3 hdc in the next stitch. I also have question about sc2tog, dc2tog, dc3tog, dc2tog, sc2tog, I don’t think I understand what that means exactly I am not great at reading patterns. sorry. I just wanna make sure I have understanding. I love these little boots.

    Reply
    • Ashlee

      August 30, 2012 at 10:58 pm

      when the number is before the stitch eg 2hdc it means 2 half double crochets in the next stitch. when the number comes AFTER the stitch, eg 3 times, it means do it in the next 3 stitches. so 2hdc 3 times means 2 half double crochet in EACH of the next 3 stitches. then 3 half double crochets in the next stitch and 2 half double crochets in the next three sitches. so your going from 7 stitches to 15 stitches.

      the stitch abbreviation guide is at the top of the pattern
      abbreviation:
      sc2tog (single crochet 2 together)
      dc2tog (double crochet 2 together)
      dc3tog (double crochet 3 together)

      I don’t blog about the basic stitches. there are a ton of blogs out there that do though, so finding instructions is luckily super easy. href=”http://www.lionbrand.com/cgi-bin/faq-search.cgi?store=/stores/eyarn&dictionaryOfAbbreviations=1&utm_source=Learning-Center&utm_medium=Abbreviations&utm_campaign=TopNav”>Lion Brand yarn has a great basic list, click on any abbreviation and it will take you to written instructions

      they didn’t have dc2tog listed so I googled it for you and found written instructions, picture instructions and a video for it!

      the dc3tog is the same thing but adding a third before the final pull through. I hope this all helps! Good luck and I hope the rest of the patterns goes better for you, but remember it is a more advanced pattern, so just be patient!

      Reply
  88. Eli

    August 30, 2012 at 1:32 pm

    So, I had found a bunch of these wonderfully cute patterns online, and I only now just figured out that they were all yours! You are wonderful! Thank you so much for putting your patterns out into the world and sharing!

    Reply
    • Ashlee

      August 30, 2012 at 11:09 pm

      thank you so much! I’m so glad you found them and like them! Which ones have you made?

      Reply
  89. Eli

    August 30, 2012 at 1:34 pm

    Also, just to let you know, I gave your credit for the pattern on all the pictures of the stuff I’ve made! Thanks again, everyone loves them!

    Reply
    • Ashlee

      August 30, 2012 at 11:05 pm

      Thank you SO much, I really appreciate that! So many people don’t think to credit these days, I really really appreciate it.

      Reply
  90. Nancy Firstiant

    September 1, 2012 at 1:12 am

    This is the original site liveinternet.ru/users/sovit-2010/post183873888/ , i got it from pinterest. i just started to make it for i can make the sole, but i got mine ruffled after some steps.. i think i have to modify it, make it flat.. then i do your booties pattern above.
    I supposed trying the easiest pattern first i think..
    hmm .. your baby sandals pattern looks easy, need to try.. they’re cute, thanx ^^

    Reply
    • Ashlee

      September 1, 2012 at 2:21 am

      I’m SO sorry, but your comment totally confused me? Why did you link to that ruffle tutorial? and what does it have to do with my pattern? That would not work for a sole at all, the whole point of that pattern is to create a ruffle, it has NOTHING to do with a shoe. Also the sandal pattern uses the same sole tutorial as my booties, and I’d say the sandals are a bit trickier than the booties, IMO.

      Reply
    • Ashlee

      December 30, 2012 at 12:07 pm

      I added a diagram of the sole, hopefully that will make it more clear

      Reply
  91. Eli

    September 4, 2012 at 6:08 pm

    I made 3 pairs of the wrap around booties, took me awhile to get the hang of the descending stitches, because I was doing them wrong, but they still came out cute! I am about to give the baby sandals a try. I love the colors you chose! I am also thinking about the top hats, and the baby converse! 😀

    Reply
    • Ashlee

      September 10, 2012 at 12:54 am

      I’m so glad you go them right and were able to make some pairs! Good luck with the sandals, they are a bit tricky… I tend to just play around and make them, and then try to figure out the best way to explain how I made them… I’m afraid it doesn’t always make sense to everyone else! let me know what you think about the other patterns!

      Reply
  92. Crafty Lady

    September 6, 2012 at 1:49 pm

    I absolutely love these boots!! I am currently attempting to make a pair but am having a hard time starting the cuff part. I have the cuff for the one that buttons on the left but cant figure out how to do the other one so that it opens on the opposite side….

    Reply
    • Ashlee

      September 10, 2012 at 12:58 am

      it’s the same cuff, but started a few stitches over. Te difference is the right side/wrong sides are opposite! so chain, then hdc down the chain down the side, around the back and up the other side. does that help?

      Reply
  93. Vivian

    September 6, 2012 at 7:45 pm

    Hi, so cool that you’re sharing this pattern. I guess you can say I’m somewhat a beginner… I’ve made a few things here and ther but have never tried shoes. I’m having trouble with the sole… when I get to the toe area and do the 2hdc in 3, I get somewhat of “holes” as the toe curves. There’s one big one in the center and then 8 smaller holes. I used a 4mm hook and some fine baby soft, yarn. Ive tried using a bigger hook & that just made everything looser. If I tried tighter stitches, the sole will be fit for a mouse! Any tips to get the stitches close together? Could it possibly be to fine of a yarn?
    Here’s my sole:
    https://www.dropbox.com/s/4ivdu8wt2gtqna1/2012-09-06%2018.17.19.jpg

    Reply
    • Ashlee

      September 10, 2012 at 12:59 am

      it looks like your beginning ch’s are too loose. try doing the original ch on a smaller hook, then switch back to the normal hook and do row 1. we all crochet a bit different, and knowing how you crochet, tight/loose will help you change up patterns to fit your style. I don’t think I’ve ever followed a pattern without changing something.

      Reply
    • Ashlee

      December 30, 2012 at 12:05 pm

      I added a diagram of the sole, hopefully that will help!

      Reply
  94. Hannah

    September 7, 2012 at 11:09 am

    Can you please explain what 7hdc in last ch means?

    Reply
    • Ashlee

      September 10, 2012 at 1:03 am

      it means to 7hdc in the last ch, long hand: seven half double crochet in the last chain

      Reply
  95. Anna

    September 7, 2012 at 4:11 pm

    OMG! I love these and they were super easy to make! I wish I could find a pattern like this for adult sizes lol I want a pair for myself! 🙂 Thanks for sharing! They’re great!

    Reply
    • Ashlee

      September 10, 2012 at 1:13 am

      your SO welcome! Thank you so much for taking the time to leave positive feedback! I really really REALLY appreciate it!

      Reply
  96. Linda

    September 8, 2012 at 4:47 am

    Thank you so much for posting this, especially with such easy to follow instructions. I love them. I made a pair for a baby shower a bit ago and everyone just loved them. I am now making another pair for another baby shower, i am going to try to make a color change on the top of the boot to match an outfit i am making. I very much appreciate people such as yourself who love the craft and don’t require money to share your expertise, or your beautiful patterns. It makes it so helpful for others. Before finding your pattern i think i surfed the internet from one end to the other for just the right bootie, yours are just perfect. Thank you very, very much!!!

    Reply
    • Ashlee

      September 10, 2012 at 1:19 am

      your so welcome, thank you for taking the time to comment! Three nice comments in a row today! I’m on a roll. It totally tickles me! I usually get question after question after question for my patterns, which is expected for patterns and totally fine, but sometimes it gets to be so much I wonder if I just wrote a dud! so getting such sweet comments letting me know it went well just makes my day!

      Reply
  97. Danielle Story

    September 9, 2012 at 11:08 am

    I Love this pattern!!!
    It works up exactly right, comes together perfectly, and with a size E hook they fit my preemie perfectly!
    Thank you thank you for sharing!

    Reply
    • Ashlee

      September 10, 2012 at 1:20 am

      you are so so SO welcome! I’m so glad the smaller hook worked so well for you!

      Reply
  98. Stephanie

    September 9, 2012 at 4:30 pm

    I was taught to crochet years ago and the only thing I made was a simple beenie. I am trying to teach myself again, but having trouble. I think you should make a youtube video of you doing this. 🙂 I am going through videos relearning how to do this, but none of them have any booties as cute as these.

    Reply
    • Ashlee

      September 10, 2012 at 1:22 am

      thanks for the request, I have a lot of requests for patterns, videos, etc… it’s just not really my thing. but I’ll add it to the video request list if i ever get around to it. the best thing to do is watch videos of STITCHES, then read a pattern and make it! if I was to do a video it would be under 5 mins and just be highlights of the pattern, no one wants to watch a few hours of me making booties!

      Reply
  99. Candace

    September 13, 2012 at 8:50 pm

    I LOVE your pattern for the booties! I have tried to make them several times and I am doing something terribly wrong – I’m sure it’s user error. Which row begins the toe portion? My toe portion always ends up lopsided to the right of center by about an inch. I’m sure I’m just reading the pattern wrong so can you clarify which row starts the toe please. I can send you a picture if you like.

    Reply
    • Ashlee

      September 14, 2012 at 10:25 am

      There isn’t a ROW for the toes. there is the sole, the under part of the shoe, then the shoe rows is when it starts climbing up the sides- so the toes/heels everything. so I’m confused by your problems. go ahead and send me a picture and I’ll see what I can answer for you!

      Reply
  100. Jackie

    September 16, 2012 at 12:51 am

    Thank you so much for this pattern. I have a granddaughter being born next Friday (2nd c-section) and my daughter has shown me other boot patterns that she likes. These are by far the cutest! The directions are very clear and the pictures help a bunch. I wish more people would have pictures to help us “newbies” figure out what to do!

    Reply
    • Ashlee

      September 18, 2012 at 1:46 am

      Your SO welcome! Thanks for the super sweet comment! And congrats on the upcoming Granddaughter!

      Reply
  101. dawnhouston

    September 16, 2012 at 11:03 pm

    i need your help with your pattern row one and 2 crochet wrap around button

    Reply
    • Ashlee

      September 18, 2012 at 1:47 am

      I believe we’ve been facebooking, right? Sorry I couldn’t answer your questions better.

      Reply
  102. Kim

    September 17, 2012 at 8:13 am

    Love the pattern. I’ve been trying it with various yarns and they all give a different look and size bootie, which I love. I didn’t have any issues with the pattern and found it easy to follow, but I’m wondering if you have any tricks or tips for how you get your seam to look so great? My seam often has small gaps and doesn’t look taut and symmetrical like yours. Any suggestions?

    Reply
    • Ashlee

      September 18, 2012 at 1:50 am

      I’m SO glad! For every person that has a question or complains, or gives up I feel a bit like maybe I should quite sharing patterns. So the sweet comments like yours, that let me know I’m not a complete failure at pattern writing, it gives me a boost to keep trying!

      As for your seam… I really don’t know, I think it comes down to the way we crochet, tight, loose, etc… I always take my personal crocheting into my thought process as I read other patterns, I often change parts that don’t work with my style, so if there is a better way to close each row try that. you MIGHT be sl st in the chain on accident rather than the top of the sc? after you sl st, put it taunt before you ch and then sc… I hope something I just rambled about helps!

      Reply
  103. Steph

    September 17, 2012 at 12:24 pm

    I made these over the weekend for my daughter whom I am expecting in December. They are super cute and were easy to make. I made one mistake and had to start over on the cuff the first time (I crocheted the wrong direction so my cuff went around the back–whoops! But in no time I had my two booties finished, added a button to each and they’re done! Thank you so much for sharing your pattern! I hope to make my baby girls more booties soon!

    Reply
    • Ashlee

      September 18, 2012 at 1:51 am

      I couldn’t think of a better way to explain the cuff’s, but it is totally easy to get that one wrong the first time! Glad it was an easy fix for you and your welcome!

      Reply
  104. Loretta

    September 17, 2012 at 8:46 pm

    Thank you so much for posting this pattern. I have made 3 pairs in past 2 days and I love them! Very well explained and posted. Keep up the good work!

    Reply
    • Ashlee

      September 18, 2012 at 1:53 am

      I’m SO glad to hear that you were able to make them, love them, and make them so easily and fast! I’m back to crocheting the past few days and I’m working on a new pattern!

      Reply
  105. Steph

    September 18, 2012 at 9:45 am

    I thought I posted before with my reply. But here is my blog: http://mypersonalblogger-steph.blogspot.com, still a work in progress. But I did take a picture of my booties I made following your pattern and linked them back to your blog! Thanks again!!

    Reply
    • Ashlee

      September 23, 2012 at 10:12 am

      they look GREAT! And congrats on the upcoming baby!

      Reply
  106. Amigurumi Torino

    September 18, 2012 at 4:49 pm

    Wow, this booties are super cute! Just what I was looking for my friend’s newborn. Months ago I looked for a pattern for baby boots and I couldn’t understand a thing (I was barely a beginner), but with your tutorial I think I’ll be able to crochet them. You have also given me entertainment for a looong night at the airport 🙂

    Reply
    • Ashlee

      September 23, 2012 at 10:13 am

      your so welcome! I hope you enjoy making them as much as I did!

      Reply
  107. Belen

    September 19, 2012 at 3:47 am

    Great pattern! Just one bit of information, more or less how much yarn does it need?

    Reply
    • Ashlee

      September 23, 2012 at 10:16 am

      ummmm I have no idea. I made quite a few pairs and didn’t come close to using an entire skein. Certainly not enough yarn that I felt it was necessary to measure- I’m so sorry! I’m still super new to sharing the patterns I make up! I’ve never bothered with how much yarn or gauge or any of it, so I’m trying! I’ll keep better track next time!

      Reply
  108. Sara

    September 20, 2012 at 12:01 pm

    These are great! I had to search the internet for booties that are modern and practical, and here theynare!!
    Mine actually came out looking just like the picture! Woo hoo! Although somehow I ended up with two right feet! It’s not like they take forever, so I’ll just make another one and save the extra for the next baby that comes along. This pattern is so cute, thank you! I want the adult pattern. They look comfortable!

    Reply
    • Ashlee

      September 23, 2012 at 11:25 am

      for the left bootie you just start the cuff a few stitches over. Remember when you come down the ch with the HDC’s continue to hdc around the side and back and other side, don’t hdc across the front.

      Reply
  109. Megan

    September 21, 2012 at 3:06 pm

    I can’t get it to work for me 🙁 so disappointed with myself :/ lol Mine just keeps coming out like a twisted peanut 🙁 Idk what I’m doing wrong. In row 2 it says chain 1 sc in the same sc then sc 7 times so is that a total of 8 sc before the first hdc?

    Reply
    • Ashlee

      September 23, 2012 at 11:40 am

      yup, you sc in the same sc that you just sl st in the row before, and yes that adds up to 8 sc. just keep going, mine twists a bit too (you might just be crocheting tighter than I do) just keep going and once your done block it (pull and twist it into shape.)

      Reply
    • Ashlee

      December 30, 2012 at 12:01 pm

      I added a diagram of the sole, hopefully that will make the sole more clear, and you can see how symmetrical it’s supposed to be, even if it twists keep going!

      Reply
  110. Megan

    September 21, 2012 at 3:40 pm

    On the row where it begins to decrease I have 9 sc before the decreases but 17 after the decreases. Is that right? Because I’m sure that is why mine look so twisted up.

    Reply
    • Ashlee

      September 23, 2012 at 11:40 am

      yep, that’s right. The seam is up the side so you have the 9 sc on one side, then the decreases, then 9 sc down the side and 8 sc around the heel!

      Reply
  111. Samantha

    September 23, 2012 at 7:36 pm

    hello, first off I just love this pattern it’s simple to follow and these are to adorable. you’ve done a great job explaining on what to do and the pictures help out a lot also. But I do have a question. I’m making these for a friend who’s baby is due in Jan. however she wants a matching set for her older daughter. She said that her daughter is a size 7. Now I tried and tried and tried and finally I gave in and have to ask. HOW can I turn these in to size 7 lol. I get the bottom of the sole just about where I need it, but it ends up being around 80 to 82 stitches. Then going on from there I fail miserably each time. Can you please give me some advice on what I can do or how to match this pattern to that size I need. Example since it’s a bigger size once I sc around in the back stitch do I need to add a few more rows of sc around. Then if so how do I decrease once I get to that point with out them looking horrible. Any help or advice would be appreciated thank you.

    Reply
    • Ashlee

      September 24, 2012 at 1:54 pm

      no idea! I’ve never made anything larger than baby size! Honestly I’m not into crochet booties in larger sizes… I only create patterns with my model close at hand. So I’d start the sole size, measuring it against the daughter. Then the sides and decreases the same way, I took apart and re put together my booties a few dozen times til I got it right! Have fun!

      Reply
  112. Stacie

    September 23, 2012 at 8:36 pm

    Thank-you so much for this pattern I love it! your directions are so easy to follow and I love the stitch count at the end so helpful! one question though….my finished boot cuff, for the girls boot on one of my boots the “wrong side” is facing out and for the other boot the “right side” is facing out….is that how they are supposed to be or did I mess something up?

    Reply
    • Ashlee

      September 24, 2012 at 1:55 pm

      each row of the cuff is a different direction, “right” “wrong” “right” or “wrong” “right” “wrong” they are opposite, you did that right~!

      Reply
  113. Annie

    September 24, 2012 at 5:01 am

    Thanks for the free pattern Ashlee, I had too many stitches on the 2nd row. Do I count the slip stitch as a stitch? I’m a beginner so I’m sure it’s my mistake and nothing to do with the accuracy of your pattern. I finished it out anyway – I think I had 2 extra stitches all the way up. They still look lovely 🙂 Thanks again, Annie

    Reply
    • Ashlee

      September 24, 2012 at 1:56 pm

      you don’t count the sl st as a stitch. Your welcome

      Reply
  114. Mallory

    September 24, 2012 at 4:15 pm

    I am OBSESSED with these!!! Would you ever consider selling a pair to somebody?! Like…me?!

    Reply
    • Ashlee

      September 24, 2012 at 11:48 pm

      Nope, sorry! i tried having a store, I hated every second of it. I like creating and I share my patterns so others can do the same. There are people on etsy using my pattern to sell items, or boots similar to mine. https://www.etsy.com/search?q=baby%20boots&view_type=gallery&ship_to=ZZ&min=0&max=0

      Reply
  115. Kaylynn

    September 24, 2012 at 9:36 pm

    I am attempting this for the third time now and I am having trouble on row 6. I’m assuming that the dc3tg should be in the middle front of the pitied but everyone it isn’t for me. I’m sure I’m making some stitch count mistake but I can’t get it to line up. Any suggestions? Have you ever had this problem?

    Reply
    • Ashlee

      September 29, 2012 at 10:57 am

      Are you sure it isn’t in the middle? As your crocheting the booties tend to curl a little bit, nothing blocking won’t take care of. mark the center stitches of the previous rows to make sure it isn’t centered. It doesn’t look centered as your making it but once your finished and block it it worked out fine for me.

      Reply
  116. Nevi

    September 25, 2012 at 10:18 am

    HI, Im really stuck on rows 6, 7 and 8. I always end up with big gaps at the front of the shoe!
    What am I doing wrong??

    Reply
    • Ashlee

      September 29, 2012 at 11:01 am

      I need more details to help, just saying your stuck on three rows is a bit broad, can you narrow it down for me? WHAT exactly are you having trouble understanding? Or is the problem just that you have gaps? if that’s the only issue try crocheting those decreased a bit tighter, or even using a smaller hook for those stitches (but not for the whole round)

      Reply
  117. Tiffany Kelly

    September 25, 2012 at 11:13 am

    Hiya!! This question may have been answered already, so sorry to be redundant, but when I’m ch1 in row 4&5 of the sole, is that counted as the first sc that I sl st into when I’m all done? Thanks!!!!

    Reply
    • Ashlee

      September 29, 2012 at 11:02 am

      the ch is not counted as the first sc. You only count a ch as a stitch when the pattern specifically says so, like “ch 1 (this counts as the first sc here and throughout” Only in that case would it ever count. in this patterns case it does NOT count.

      Reply
  118. Samantha

    September 26, 2012 at 10:29 pm

    Thanks, I have been trying think I’m just gonna have to wing it a bit and hope I can get it some what close. Thank you again though and again I really do love these.

    Reply
    • Ashlee

      September 29, 2012 at 11:05 am

      your welcome. Let me know if you have any questions about the pattern.

      Reply
  119. Kimberly Lopez

    September 30, 2012 at 10:52 am

    Thank you so much for this pattern! I was looking for something like this but most places charge for the pattern. I love that you posted this for free! So easy to work up and just adorable!

    Reply
    • Ashlee

      September 30, 2012 at 9:49 pm

      you are SO welcome! I enjoy doing it!

      Reply
  120. sara

    September 30, 2012 at 8:37 pm

    I got one boy boot done… and instead of doing a matching boot, I decided to try the girl boot! 🙂 I’ll match them up later! 🙂

    Just a quick question.. somehow my seam always ends up on the side of the shoe, instead of at the very back. Maybe 3 stitches from the very back. All the stitch numbers add up, I’m just not joining at the very back of the shoe. It’s not a big deal until the round where you slip stitch 7 sc from the seam! instead of using my seam, I just folded the shoe and did it from the back.

    But I’d love for my seam to be in the right spot! LOL any idea what I’m doing wrong?!

    Reply
    • Ashlee

      September 30, 2012 at 9:53 pm

      the seam is designed to be on the side, that’s where mine is, and when I say to count 7 over I mean from the side, that’s why it says 7 over then 11 over, if the seam was centered I’d say count 10 from the left or 10 from the right for the different starts of the cuffs. The seam is on the side cause when your making the sole it’s easier to write it doing one side, then the toes, the other side, then the heel, it’s hard to create the soles from the center of the heel and keep it that way. So the only thing you did wrong was counting only 4 rather than 7.

      Reply
  121. sara

    September 30, 2012 at 10:56 pm

    so I’ve now done 3 boots! gotta finish the matching girl pair tomorrow! 🙂 And every single one ends up the same way! It’s not 100% right, cause on the cuff I always end up with 30 instead of 32! It’s a great pattern! Thanks a ton!

    Reply
    • Ashlee

      October 22, 2012 at 12:13 pm

      what row does your count get off? make sure in row 3 of the cuff to also hdc in the space 1 and go al the way to the END of the row, making sure your count is at 32! Glad you like it!

      Reply
  122. sara

    October 1, 2012 at 5:59 am

    oh good! I’m not crazy! 🙂

    so if I count 7 from the seam…it seemed like it was way too close to the tip of the toe…where the decreasing stitches were. where do you start the strap compared to the decreased stitches? Getting ready to finish my little girl bootie! Thanks for responding so quickly!

    I’m hoping to do your mohawk hat too, just need to get some thicker yarn for the hat part.

    Reply
    • Ashlee

      October 22, 2012 at 12:16 pm

      if you look at my wrap around they are very close to the front, in fact the start of both straps are just a few off of each other just 2 stitches off the center.

      Reply
  123. Linda Schiller

    October 2, 2012 at 6:03 pm

    Thanks for the pattern also. I too hate when I find a pattern I love and then find I have to pay for it. I cannot buy every pattern I love. I’d be broke before nightfall – lol. You mentioned that you had this in other sizes? I was looking for one for a 4 yr old. I volunteer with an organization that sends care packages to soldiers in Afghanistan. When we find out that they are having babies back home we try to send a baby blanket and booties for their newborn (and sometimes a little something for an older child). I think these in camouflage will be adorable. Thanks again!

    Reply
    • Ashlee

      October 22, 2012 at 12:56 pm

      how great of you do send care packages! I’m glad you like the booties. I made the pattern to fit my baby, and then an infant patter, I don’t have anything larger than that.

      Reply
  124. Susan

    October 9, 2012 at 5:05 pm

    I am very excited to come across your pattern… I have made a santa hat (red with long tail and matching white rim and pom pom and was wanting to do a little boot to match and now I can – thank you.) I am a newborn baby photographer and enjoy making my own props…. can’t wait to get started… thank you all the way from New Zealand

    Reply
    • Ashlee

      October 22, 2012 at 1:17 pm

      SO adorable! Let me know how it goes and send me a picture of the hat and boots together!

      Reply
  125. Megan

    October 10, 2012 at 1:29 am

    Although you already have a ton of comments, I thought I’d add mine too. I just finished making a newborn pair in hot pink with a big black button. They are so cute!!! Reminds me of La La Loopsy. Your pattern was great, easy to follow and so beautiful. Thank you so much for sharing it for free!

    Reply
    • Ashlee

      October 22, 2012 at 1:17 pm

      your so welcome! I’m so glad you like them, and I love love LOVE getting positive comments! Thank you so much!

      Reply
  126. Megan

    October 10, 2012 at 7:58 am

    These are sooo sweet! Wow! Thank you so much for the free pattern. I’m not an advanced crocheter and I found this pattern SO easy to follow — I’ve followed other patterns that were written very poorly. I’m looking forward to trying others of your patterns because of how well this is written. I’ve done a pair of the larger pattern (although I used a G 4.25 for it so I think they are a bit larger than 3’s and are too big for my daughter who is probably a size 2) and I am going to do a pair of the smaller pattern now, but I think my daughter is in between both size booties, but since Caron Simply Soft stretches a lot, I’m hoping this smaller pattern fits. Can’t wait. 🙂

    Reply
    • Ashlee

      October 22, 2012 at 1:18 pm

      your so welcome! I’m glad this pattern worked for you! Let me know how the smaller pattern works for you!

      Reply
  127. Kira C.

    October 13, 2012 at 9:31 am

    I’m in the exact situation as Sarah. I made two soles first, that way I knew they were gonna be the same size as each other before working on the cuffs… well some how I made two left-footed boots (the sole part has the arch indent like a left shoe). I’m guessing Sarah and I both messed up somewhere along the line if the bottom of the soles aren’t suppose to have the arch indents. Any ideas?

    Reply
    • Ashlee

      October 22, 2012 at 1:31 pm

      again- there is not left or right foot for the soles. they are completely symmetrical, the same number and style of stitches on each side. As you work in a round things tend to get a bit twisted, giving the illusion of a right or left foot, but they are in fact not. you can either take the time to block out the soles, or do what I did, and just keep going. I don’t finish off after the sole, but keep going.

      If you did finish off and cut your yarn make sure you start again at the same point, as if you hadn’t cut it, otherwise you’ll have trouble. one reader finished off and started in the center of the back and created a lot of problems.

      Reply
    • Ashlee

      December 30, 2012 at 11:59 am

      I added a diagram of the sole, hopefully that will make it more clear that they are symmetrical, so even though they curve it will work itself out as you keep working

      Reply
  128. Kemi

    October 14, 2012 at 6:40 am

    Hi. Thank you soo much for this. This will be perfect for niece!!!!

    Reply
    • Ashlee

      October 22, 2012 at 1:34 pm

      your so welcome, I’m so glad you like them!

      Reply
  129. Eli

    October 14, 2012 at 5:49 pm

    I made the sandals! I thought your pattern was great, I think I have a problem with counting, or knowing exactly where to start counting, so I ended up moving my toe hole to make it more centered, but i’m pretty sure that’s me, and not your pattern! Just great, Thank you so much! I also love the way you start your soles on the wrap around booties. I ended up making someone else’s converse pattern, but I ended up modifying it to start with your sole, and I liked it a lot better. 😀

    Reply
    • Ashlee

      October 22, 2012 at 1:54 pm

      good to know! I we all crochet a bit differently, and I tend to change patterns a bit as I make them myself! I’m glad you liked them!

      Reply
    • Ashlee

      December 30, 2012 at 11:58 am

      I added a diagram of the sole, hopefully that will make it more clear

      Reply
  130. lynsimarie

    October 19, 2012 at 7:24 pm

    I’m teaching myself to crochet just so I can make these adorable booties for my baby girl! Thank you SOOO much for sharing your pattern for free, and for all your effort at answering questions in your comments! So I’ve found answers to all of my questions just reading others’ comments and your answers! I’m starting over for the third time (HUGE beginner here!), but I can’t wait to see how my booties turn out! Thanks again!

    Reply
    • Ashlee

      October 22, 2012 at 2:18 pm

      Good luck!!! Let me know how it goes! I’m working on a FAQ post for the booties, what questions/answers were the most helpful?

      Reply
  131. jen

    October 19, 2012 at 11:47 pm

    Well, I just love these. I have read most of these posts. Your stitches I’m sure are correct or else YOU would not be able to make them! lol However, I am just starting on making things other than afghans. So I kinda suck. I like how it curves though. Anyway, I’m SURE you are doing it right and I’m not, but starting with row three, I end up with like 50 stitches or something instead of a steady DECREASE. It steadily INCREASES. So I end up with a shoe that looks like it got its face ripped off! lol talk about zombie apocolyps! I have tried to look it up online but cant find anything. Here’s the question: Do i skip any stitches at all? like when i do the dc or hdc, do i skip stitches? cuz when i skip them, it matches up and looks cute, but when i do stitches in every stitch so they are warm with no holes, it looks terrible and is asymetrical. and nothing is landing right. Thank you so much. My email is judkinsjenny at the place where you yell in case you want to contact me there. These are sooo cute, to heck with negative people! How do they think you made them if the stitches were wrong? I had to laugh. much love, Jen ps sorry about spelling its late.

    Reply
    • Ashlee

      October 22, 2012 at 2:23 pm

      sounds like instead of crocheting TOGETHER, dc2tog, your creating INCREASES. Make sure you know how to do a decrease. you do NOT skip stitches.

      here is a decrease tutorial http://www.stitchdiva.com/tutorials/crochet/working-stitches-together let me know how it goes!

      Reply
  132. jen

    October 20, 2012 at 2:58 pm

    Never mind, I just kept practicing. This time, no curve to the sole or holes that weren’t supposed to be there! Super cute. Thank you for sharing. I hope you are sharing more.

    Reply
    • Ashlee

      October 22, 2012 at 2:25 pm

      it’s okay, as you work in the round, like these soles, it’s not unusual for twists, curves and twists to happen. you can choose to block the sole (get it damp, pull and twist it back into shape, OR what I do is just continue on. once your completely done and get it on the baby they pull themselves back into shape with wearing!

      Reply
  133. Melody

    October 21, 2012 at 10:24 am

    I have done one bootie,a right one. but how do I do the left one? Is there a change that I missed because the sole is definitely shaped for a right foot.

    Reply
    • Ashlee

      October 22, 2012 at 2:27 pm

      the soles are completely symmetrical. it’s common when working in the round for the piece you working on to get twisted or curved, but there are the same number of stitches on each side, same stitches. you can either just continue on and block at the end or block as you go. Personally I just continued on and blocked when I was done with both booties.

      Reply
    • Ashlee

      December 30, 2012 at 11:57 am

      I added a diagram of the sole, hopefully that will make it more clear

      Reply
  134. Alex

    October 21, 2012 at 7:19 pm

    I was wondering if the pattern for the booties on this page is the size 4 or the size 1?? I have an almost 2 month old that I am wanting to crochet these for!
    Thanks!

    Reply
    • Ashlee

      October 22, 2012 at 2:30 pm

      the INFANT size is close to a size one (depending on the hook you use and how tight or loose you crochet) and the OTHER pattern for the BABY size is the size 4 (again depending on the hook and how you crochet!)

      Reply
  135. DarleneO

    October 22, 2012 at 3:43 pm

    Thank you so much for sharing your pattern for FREEEEEE! lol I bought one a couple weeks ago for a cute bootie and drove myself crazy trying to figure it out! Never did gave up! Yours is awesome and easy! Great instructions! My first pair came out so cute now! Thank you again!!!

    Reply
    • Ashlee

      October 28, 2012 at 1:59 pm

      thank you so much! I’m SO glad it worked for you! I consider myself a amateur pattern designer, I just don’t feel confident enough to ever ask anyone to PAY for it! So I’m glad you liked it!

      Reply
  136. ashley

    October 22, 2012 at 9:33 pm

    THANK YOU SO MUCH!!!!! I have been looking for this pattern for MONTHS!!! So excited to make these!!!

    Reply
    • Ashlee

      October 28, 2012 at 2:17 pm

      you are so welcome! I hope you like making them!

      Reply
  137. lynsimarie

    October 23, 2012 at 3:35 pm

    So I finished my first pair…they’re so cute! The first one I made is noticeably bigger than the second one…I did much better counting my stitches once I started using stitch markers, because otherwise I can never recognize where a row should start or end. I’m going to make another left booite and see if I can get it to be the same size as my right bootie. 🙂 Here is the info I found most helpful…

    “when the number is after the stitch: hdc 3 times, it’s in the next 9 stitches
    when the number is BEOFRE the stitch: 7hdc it’s in the SAME stitch”
    “you don’t count the sl st as a stitch.”
    “they didn’t have dc2tog listed so I googled it for you and found written instructions, picture instructions and a video for it!”
    Of course, I’m a complete newbie crocheter with NO experience reading patterns, so I’m sure I struggled more than was really necessary. Once I knew learned how to read a pattern, and learned the stitches I didn’t know yet, it was really super-easy! Thanks again for making this adorable pattern available for free, and for all your patience answering our questions! So, so, SO sweet of you!

    Reply
    • Ashlee

      October 28, 2012 at 2:19 pm

      thanks so much for letting me know! I’m slowly working on the FAQ post, and hope to have it up soon! It’s nice to know what newbies AND experienced crocheters found helpful, so thanks for getting back to me!

      Reply
  138. kelly

    October 26, 2012 at 7:13 pm

    Love the little booties! So my question may be silly. But as I did the shell stich around the cuff for the right bootie the stitching of the shell is flat but for the left bootie the shell is puffed like the inside of the shell stich of the right shoe. Is that normal or did I stich it wrong. I hope this makes sense. Basically the shell on the right looks right side out and the left shell looks wrong side out.

    Thanks!!
    kelly

    Reply
    • Ashlee

      October 28, 2012 at 2:41 pm

      your actually right. The way I wrote the cuffs, to keep it as easy as I could, the rows that are right side out on one foot are wrong side out on the other. no one ever noticed (people looking at my babies booties, crocheters notice when they are working on it of course). If it really bothers you, you can finish off before the shell row of the left bootie, start at the other end and do that last row backwards! does that help?

      Reply
  139. Ashley

    October 26, 2012 at 10:32 pm

    I Really love this pattern But I have the same problem…This was my first try. I’m going to do a DCdec (DC2tog) on row 8 on each corner…that should take me back down to the 23. THANK YOU SO MUCH – MY NIECE WILL LOVE THESE:)

    Reply
    • Ashlee

      October 28, 2012 at 2:44 pm

      I’m so sorry, but when you say same problem which problem are you referring too? I’d love to help if your hitting a snag!

      Reply
  140. Emily

    October 28, 2012 at 2:14 pm

    How long is the bottom? Is it about 4 in?

    Reply
    • Ashlee

      October 28, 2012 at 2:47 pm

      sadly I only made one pair and gave them away so I can’t measure them. They fit about a size 1 shoe, the other version, the larger size, fits close to a size 4. changing hook size will help size up or down the booties. Does that help?

      Reply
  141. Claire

    October 30, 2012 at 2:39 pm

    I.LOVE.THESE. They make me feel the same way I do when I see that fabric softener teddy bear! <3

    Come visit us over at http://www.thesitsgirls.com!

    Reply
    • Ashlee

      November 23, 2012 at 5:33 pm

      thanks so much! They make me pretty happy too!

      Reply
  142. Maggie

    November 4, 2012 at 4:49 am

    Thanks for sharing the boot pattern

    Reply
    • Ashlee

      November 23, 2012 at 8:36 pm

      Your so welcome! I hope you enjoy it!

      Reply
  143. nicola

    November 6, 2012 at 8:28 am

    hi can i use dk yarn or does it have to be aran my baby is 3 months old will they fit her x these are absolutely fabulous lil booties

    Reply
    • Ashlee

      November 23, 2012 at 8:44 pm

      you can use any yarn you want, just know it will change it a bit. i like using soft, specific to baby, yarn for anything I make for babies, so it’s not scratchy. If you go up or down in yarn or hook size you’ll get a slightly different size in the booties.

      Reply
  144. Hannah

    November 7, 2012 at 2:36 am

    Thank you for sharing your pattern so freely. I have now made two pairs and am very pleased with how cute they are. I used loop stitch on the cuff and made them a little taller, but I did little else as your pattern was so clear.
    All the best

    Reply
    • Ashlee

      November 23, 2012 at 8:46 pm

      thank you so much! I’m so glad the pattern was clear for you, sometimes I get so many questions or complaints I wonder if I just shouldn’t share! So I love hearing positive feedback!

      Reply
  145. kay

    November 7, 2012 at 12:42 pm

    Thank you so so much for this pattern! You are brilliant and so kind to share! I’ve made a couple pairs of these, tweaking one into little rain booties 🙂 So sweet! Again, thanks.

    Reply
    • Ashlee

      November 23, 2012 at 8:46 pm

      CUTE! I want to see the rain booties! what a fun idea!

      Reply
  146. Olivia

    November 8, 2012 at 4:14 pm

    my seem on the side seems to be going slanting toward the toe instead of straight up. I’m not sure how I am adding stitches. when you count the stitches after you have slip stitched into the first sc do you count the stich the loop on your hook is coming out of? or just the one after it around to the one before it? thanks so much!

    Reply
    • Ashlee

      November 23, 2012 at 8:50 pm

      its totally normal for it to look a bit twisted in the direction youve been crocheting, it will work itself out (but get worse before it get’s better), just keep going! and when I say sc in the same sc that is the one you just sl st into, thus the SAME sc your already working in.

      Reply
  147. Janie

    November 10, 2012 at 12:04 am

    I added two sc at the beginning of row 6,7 & 8. this fixed the twisting problem.

    Reply
    • Ashlee

      November 23, 2012 at 8:52 pm

      I’m glad you found something that works for you, but the soles are written symmetrically, if you add stitches to one side it will end up throwing the whole shoe off later.

      Reply
  148. Schaara

    November 11, 2012 at 8:46 am

    Love, love, love this pattern! I just finished making a pair for a friend that is due next month. I’m due in February and will definitely be making a pair (or two or three 🙂 for my little boy.

    Thank you so much for posting a great tutorial and pattern. I’ve been looking everywhere for something like this!

    Reply
    • Ashlee

      November 23, 2012 at 8:59 pm

      your so welcome! I hope your friend likes them and that you baby does too!

      Reply
  149. Karen Jenkins

    November 11, 2012 at 9:43 am

    I would love to make these boots but don’t find a print pattern option,I don’t want to print over 200 comments along with the pattern,could you please help with this?

    Reply
    • Ashlee

      November 23, 2012 at 9:00 pm

      I’m sorry, I’ve been looking in to a print it plug in, but I can’t get any of them to work for me. I’ve emailed bloggers that have the feature that I like and they won’t respond! I’m not getting any answers, so I’ll keep trying. But for now what I always do with blogs that don’t have that feature is highlight the text from the blog, paste it into an emtpy word document and delete the pictures. it should end up just a few pages.

      Reply
  150. rikie chevelle stanley

    November 14, 2012 at 11:45 am

    this is beutiful. im on my 2dn

    Reply
    • Ashlee

      November 23, 2012 at 9:18 pm

      thank you so much! I’m so glad you liked them.

      Reply
  151. rikie chevelle stanley

    November 15, 2012 at 12:57 pm

    these are beutiful. how do you do an adult pair.

    Reply
    • Ashlee

      November 23, 2012 at 9:21 pm

      I don’t know. I hate having things on my feet, I don’t even own socks, and yarn on my dry cracked heels would probably kill me… 😉 I have not, and will not create adult booties. Sorry.

      Reply
  152. Pilar

    November 15, 2012 at 10:54 pm

    Hi! Loved your bootie pattern so much I already started my project for a baby girl. I just finished one that was supposed to be the right bootie, but the strap wraps around to the left side, so it’s actually the left one. I’m afraid to start on the right one because I don’t know how to make it turn the other way. I know the pattern says sl st in the 11th st but how do I make it go the other way? THanks so much!!

    Reply
    • Ashlee

      November 23, 2012 at 9:28 pm

      after you sl st and do the chain out and hdc down the chain you need to go down the side and around the back, NOT across the front. if you cross the front your shoe will wrap the wrong way. Hope that helps.

      Reply
  153. Emily

    November 21, 2012 at 7:24 am

    Thanks so much for sharing your pattern! I have a question though… How do you make the left foot? I noticed that the sole has a curve making it the right foot. Please email me back the answer if possible, thanks!!!! Emily

    Reply
    • Ashlee

      November 23, 2012 at 9:45 pm

      the sole is symmetrical, same number of stitches on each side, it tends to curve in the direction you are crocheting but just keep going, it will work itself out in the end. after your all finished just block the shoes (OR just put them straight on the baby, it works itself out)

      Reply
    • Ashlee

      December 30, 2012 at 11:56 am

      I added a diagram of the sole, hopefully that will make it more clear

      Reply
  154. Alise

    November 21, 2012 at 5:55 pm

    Do you sell these? I don’t know how to knit but I’d love to get some for my niece. Thanks!

    Alise

    Reply
    • Ashlee

      November 23, 2012 at 9:48 pm

      I do not, but quite a few people on Etsy sell them using my pattern. Feel free to buy from one of them. But it’s crochet, not knit, so when doing a search try searching for CROCHET baby booties. Good luck!

      Reply
  155. MrsHMG

    November 21, 2012 at 7:57 pm

    Whew! Thank you so much for this tutorial. These are adorable boots! I must admit this took me several attempts over the last two days, but I am very pleased with my final product. I did make a few adjustments, but I think I was only misreading the pattern. I would say that I was a beginner (with most of my experience in knitting, not crocheting), but now I believe I am well on my way to being a moderate crocheter. Thanks

    Reply
    • Ashlee

      November 23, 2012 at 9:48 pm

      I’m glad your happy with it!

      Reply
  156. Valarie Rogers

    November 27, 2012 at 8:22 am

    I just found this (and pinned it, naturally). I’m making a set for my niece who is expecting in about a month from now. The set I’m making is in DK yarn. Now, my opinion of Caron Simply Soft is that it’s more of a 3.5 weight, as I often use Vanna’s Choice which is thicker than CSS, though both are classified as 4. The yarn I’m using for this set is 3. So if I’m using DK weight with this very cute pattern, what would you suggest, size H hook? Size I?

    I’m almost finished with the blanket, still have booties and dress to make, all in this same yarn.

    Reply
    • Ashlee

      November 27, 2012 at 11:03 am

      I’d try the G 4.25 and just do the sole. the sole doesn’t take much time and can tell you alot about your sizing. If it seems to large or open, or to small and tight adjust after that. She’s a lucky girl!!!

      another option if when you make a practice sole it’s too small or too loose you could make the larger BABY version of this with a smaller hook to still get a small size. does that make ANY sense?

      Reply
  157. Caryn

    November 27, 2012 at 11:37 am

    Hi! I have had these booties “pinned” on pinterest for awhile now, just waiting for someone to have a baby! I now have a niece on the way and am working on these for a christmas gift 🙂
    I’m just having a little bit of a problem with the scallops for the girls version:
    (Row 4 scallops (girls)- turn, 5dc in second hdc, *skip 1dc, sc in next hdc) – I have the 5dc in second hdc, but what is the “*skip 1 dc” – because we are crocheting on the hdc layer. For my first pair, I just skipped over the “*skip 1 dc” but wound up with too many scallops and a “flaired” effect. Can you help??

    Reply
    • Ashlee

      November 28, 2012 at 8:46 am

      fixed it, it should be skip 1 hdc sc in next skip 1 hdc, scallop…

      Reply
  158. Jolee

    November 27, 2012 at 10:18 pm

    I have really enjoyed this pattern. Slightly confusing at first just because it is written a littel different but for the most part makes sense!
    Just a thought-I was confused when making the cuff of the 2nd booty and for some reason kept messing it up! You could do it on the opposite side but if you forget and put it where you did the other one, just turn it inside out when you done! VOILA! Now yes the back loop stitches you did are not quite as prominent but it looks good otherwise.
    Thanks! Happy Crocheting everyone

    Reply
    • Ashlee

      November 28, 2012 at 8:50 am

      sorry you had trouble with the cuff. let me know if I can answer any questions

      Reply
  159. Courtney

    November 28, 2012 at 8:59 pm

    Hi there! These are adorable! I managed to successfully make a pair for my baby. However, I am a novice crocheter and it took me a few tries to get them right. Well as right as I think they are anyways. I have a few questions: do you work into the same stitch that you chain 1 in in each row? Do you count your slip stitch as part of your row count? My slip stitch seam ends up crooked and its supposed to be straight im assuming, meaning that you slip stitch in the same spot in each row which would cause a vertical seam right? Mine tends to be crooked/diagonal which mean I am messing up with slip stitching into the correct stitch and the starting the row in the correct stitch. Help please, I love these and am trying to make another pair as a gift. I have gotten sooooo many compliments on the pair I made for my son. Also, is the cuff supposed to overlap over the front of the show cause mine sort of looked like mary janes once they were buttoned? It is unclear to me where exactly to starts the strap, didn’t know what seam you were referring to to count from? I hope you can help me, thank you so much for sharing this patterns for free!

    Reply
    • Ashlee

      December 2, 2012 at 1:58 pm

      a sl st does not count, when I ch 1 and sc in same sc that’s working the stitch in the same stitch you just sl st in. other wise the seam will twist badly. my seam is straight but a little twisting is okay, too much means your not working in the right stitches.

      and the seam I’m referring to when counting out where to start the cuffs is the only seam on the booties, where you end your rows and start a new one, the seam you just called a seam in your question, 😉 if you don’t want to finish off and count you could always sl st 8 /12 times to get to where you want to start your ch, but I don’t like the bulk that adds to the booties. if you look at the picture you can see that where you start is just off center for both cuffs.

      does that help? let me know if it’s still unclear!

      Reply
  160. KrochetKenda

    November 30, 2012 at 3:06 pm

    I absolutely LOVE this boot!!!! If this isn’t the cutest pair of footwear I’ve seen for a baby, I don’t know what is! Thank you very much for this FREE PATTERN!!!

    Reply
    • Ashlee

      December 2, 2012 at 2:03 pm

      thank you so much!!! I think they are pretty darn adorable myself!!! I can’t wait to see what you do with them!

      Reply
  161. Briana

    December 7, 2012 at 5:23 am

    I think that these are just adorable. 🙂 I’m going to try and make these for my niece. But, I was wondering if you have a pattern for adults? Thanks.

    Reply
    • Ashlee

      December 11, 2012 at 1:10 pm

      I don’t have an adult pattern. And I won’t be making one. I just do this for fun, and only create patterns for items I want, and I have not interest in an adult size, I’m so sorry! If I end up getting a book deal I’ll TOTALLY create one for that 😉

      Reply
  162. nichole

    December 11, 2012 at 4:01 pm

    I’ve tried to make this pattern and when I got to the dc2tog parts I started to realize that part doesn’t looks straight it is off to the side is it suppose to be like this? I also got confused on the part where you said to backstich did you mean that for that just one row or the rest of the pattern?

    Reply
    • Ashlee

      December 20, 2012 at 10:48 am

      working in the back loop is just for one row, is your seam still off on the side? I once had a reader finish off after the sole and restart the next row from the center of the heel, this would, of course, make the decreases off to one side. if you follow the pattern the decreases will be centered on top of the sole increases.

      Reply
  163. Ashley

    December 11, 2012 at 10:31 pm

    I had found this on Pinterest and finally got the courage to make them yesterday! I will have to buy some buttons, but thank you for this awesome tutorial!My pending arrival will have warm feet when he gets here:) You can see a picture of it on my blog http://diyelizagrace.blogspot.com/2012/12/yarn-work.html

    Reply
    • Ashlee

      December 20, 2012 at 10:51 am

      nicely done! thanks for the link back

      Reply
  164. Yessennia

    December 12, 2012 at 2:04 pm

    Im doing these booties for my 7month baby girl. im just stuck on the sole part. can you help me please.?
    what does this mean?
    2hdc 3 times, 3hdc, 2 hdc 3 times, 2sc 3times
    and what about this one?
    *2hdc, 1hdc* 7 times
    im having trouble on the sole patern.

    Reply
    • Ashlee

      December 20, 2012 at 11:00 am

      if the number is before the stitch it’s the number of times you do that in a single stitch
      if the number is after the stitch it’s the number of times you repeat it across the last row

      Reply
    • Ashlee

      December 30, 2012 at 11:55 am

      I added a diagram of the sole, hopefully that will make it more clear (also they might be too small for your 7 month old, you might want to try the larger size) the BABY size

      Reply
  165. Caryn

    December 16, 2012 at 6:48 pm

    Ohhh!! Got it now… thanks!!

    Reply
    • Ashlee

      December 20, 2012 at 11:25 am

      your welcome!

      Reply
  166. Shell Crites

    December 16, 2012 at 7:31 pm

    I was wondering if you have a tutorial for this pattern? I’ve tried this pattern at least 50x (stopped counting after that lol) I understand what your doing but for some reason I can’t get it it 🙁 I guess I’m a dink when it comes to reading patterns but when I watch someone do it I get it every time and I would LOVE to have these for my daughter (it’s hard finding boots to fit her…long skinny feet and legs) anyways Thank you for sharing these, hopefully I’m not being to picky 😀

    Reply
    • Ashlee

      December 20, 2012 at 11:29 am

      what do you mean? this is a tutorial and pattern? there are tons of pictures. If you mean a video? no, I don’t do videos. sometimes you just need to keep going, sometimes it doesn’t look right, but sometimes you just need to push through a few rows. if you have a specific question, a row or stitch I’m happy to answer

      Reply
  167. Jessica

    December 17, 2012 at 8:28 am

    I may have done something wrong… When I get to where we start reducing stitches my boot twists. I’ve gone thru to row 8 and my whole shoe seems off center. The reductions aren’t in the front as pictured, they are off to the side… My numbers are correct tho. Any suggestions? Love this pattern btw!!!

    Reply
    • Ashlee

      December 20, 2012 at 11:32 am

      is the seam still on the side? how off centered are we talking about here? as long as the center decrease is directly above the center increase of the sole you should be just fine. it twists slightly while your crocheting, but will work itself out by the end.

      Reply
  168. Angel

    December 18, 2012 at 10:26 am

    Hey! I looked everywhere for a pattern to make these and i’m so excited to try I want to make pairs for friends babies i’m slightly new at crocheting so we’ll see how they turn out haha. Have you thought about making a video tutorial? I always seem to learn better from watching it be done.

    Reply
    • Ashlee

      December 20, 2012 at 11:34 am

      sorry, video’s are not my specialty, maybe in the future, but at this time I don’t have the equipment it would take.

      Reply
  169. Brittany

    December 19, 2012 at 1:12 am

    to other Thank you so much for having this pattern for free I absolutely love it. I just finished one for my daughter still have to do the right one but it was simple and your pattern was easy to read. And the stuff that I would have questions about I found in your reply to other people’s questions it was very helpful that you answered everyone thanks again 🙂

    Reply
    • Ashlee

      December 20, 2012 at 11:37 am

      your so welcome! Thanks for taking the time to leave such a nice comment!

      Reply
  170. jessica

    December 28, 2012 at 10:52 am

    It did twist. They look great tho!! Thanks so much for sharing this pattern!

    Reply
    • Ashlee

      December 28, 2012 at 4:29 pm

      your welcome!

      Reply
  171. Mallory

    December 29, 2012 at 2:14 pm

    I love this infant pattern!!! I am now looking for the older size pattern…..can anyone tell me where to find it?

    Reply
    • Ashlee

      December 29, 2012 at 8:01 pm

      the link is in the first paragraph of the post http://ashleemarie.com/crochet-wrap-button-baby-boots-girls-boys/

      Reply
  172. Jennifer Crow

    December 29, 2012 at 9:18 pm

    These have to be the cutest booties EVER!! Thank you so much for the pattern! You rock! 🙂

    Reply
    • Ashlee

      December 30, 2012 at 11:14 am

      your so welcome!

      Reply
  173. Donna

    December 30, 2012 at 11:05 pm

    I love these! I am working on crocheted Easter animals for the local pediatric ward and I don’t want to leave the babies out. These are awesome!!!

    Reply
    • Ashlee

      December 30, 2012 at 11:50 pm

      I’m so glad you like them, and how wonderful of you to make handmade items for the pediatric ward!

      Reply
  174. Rhi

    January 1, 2013 at 11:07 pm

    Hello there, this is such an adorable bootie! I am pregnant with twins and know that they will be smaller than the average newborn. Could you give me an idea as to how to make these even a tad smaller for a premie/newborn? I’m not very good at adjusting patterns but would really love to make a smaller set. Thank you so much for this free pattern!!

    Reply
    • Ashlee

      January 6, 2013 at 3:16 am

      try going down a hook size, make the soles. if you still think it’s too big decide if it’s too wide, too long, etc.. and from there we can make a few other changes for you. Let me know and I can help!

      Reply
  175. alicia

    January 7, 2013 at 12:08 pm

    hi there i am wanting to make these for my two girls. my oldest is 3 years old and a toddler size 8/9 and my little one i can just follow the pattern printed here….adorable by the way…

    my question is do you have any size chart for making them bigger? something i can use as a guide to make the slipper fit my oldest….

    Reply
    • Ashlee

      January 27, 2013 at 12:54 am

      there is the baby pattern, that is larger than the infant one. but I don’t have anything bigger than that. If you go up a hook size that does make it quite a bit larger, if you go up a second hook size you’d want to also go up a yarn weight.

      Reply
  176. Amanda

    January 8, 2013 at 11:06 am

    These are SO cute! I’m just a beginner but REALLY want to make these! I’m due with my 2nd baby (1st little girl!) on Feb 24th and we live in a part of Canada that gets freezing cold winters so I hope I can manage these!! I searched my house high and low last night for my “G” hook but couldn’t find it!! Hoping I can find one for sale in our tiny little town!! If not, would it make a huge difference to use a “H” ? I’m wanting them to be the newborn size. Thanks for your help and thanks for free patterns!!

    Reply
    • Ashlee

      January 27, 2013 at 1:09 am

      a hook size change makes a HUGE difference, esp on small things. my advice is to make the sole and see what you think before finishing the rest.

      Reply
  177. Estrella

    January 10, 2013 at 2:35 am

    Thanks for this pattern! I had to find a gift for a baby boy and your directions and pictures came very very handy. In the end the baby already had like a ton of baby shoes but making them myself meant so much for the parents 🙂

    Reply
    • Ashlee

      January 27, 2013 at 1:34 am

      My babies weren’t given a lot of shoes, but my sisters babies have more than me!!! Handmade is always so much fun!

      Reply
  178. paulygirl

    January 16, 2013 at 11:27 am

    Thank you SO much for offering this pattern for free and with great pics too! I’m a foster mom who takes in infants only, and am currently waiting for my next baby to come. We only take one at a time, so when that baby leaves I have some extra time in between and I love to make cutie things for them to wear! I so much appreciate you offering it at no cost, and I can’t wait to make a bunch! God Bless You!

    Reply
    • Ashlee

      January 27, 2013 at 2:25 am

      you are so welcome! What an amazing and yet difficult job you have. I hope you enjoy my patterns for the babies you take in.

      Reply
  179. Ranjitha

    January 18, 2013 at 3:44 am

    Hi Ashley,
    Thank you sooooo much for the free pattern. I loved your booties. And I feel disappointed too when I’ve to pay for a pattern I love. I have made the booties for my cousin’s baby and planning to make infant booties for a friend who’s expecting soon 🙂 Thank you very much again!

    Reply
    • Ashlee

      January 27, 2013 at 2:40 am

      you are so welcome. I enjoy doing it, and it makes me happy when people enjoy them!

      Reply
  180. Tawnya

    January 20, 2013 at 11:48 am

    Just finished making the boys version of these boots (well I need to add the buttons still, but otherwise done). They are adorable. I have a 2 week old & have found that none of the socks that we have will stay on, so I wanted to make something that would. I’m hoping these boots are the solution. Thanks so much for sharing this pattern & especially for free! I found it very easy to follow & love the way they turned out. I used a F hook & they turned out about 3 & 1/2 long (I often have to use a smaller hook, so that’s why I tried that), I think they’re a bit big for my little guy, but they should last longer that way I guess. Thanks again.

    Reply
    • Ashlee

      January 27, 2013 at 2:54 am

      you can always go down another hook size, or yarn size to try smaller! Good luck, and congrats.

      Reply
  181. Rachel

    January 22, 2013 at 5:02 pm

    Thank you so much for this pattern! I have been trying to find one for months! You are awesome for sharing this for free.

    Reply
    • Ashlee

      January 27, 2013 at 2:57 am

      you are so welcome. I hope you enjoy making it. I had a blast designing them.

      Reply
  182. Tiana

    January 26, 2013 at 11:31 pm

    Having some trouble with the toe area, specifically row 6 starting at sc2tog. Instead of pulling the tip of the bootie together it just all ends up on one side. How many ch do I skip between sc2tog and dc2tog?

    Reply
    • Ashlee

      January 27, 2013 at 3:14 am

      there are no skips, if there was I would say “skip the next stitch”. if you look at the stitch diagram you can see that where you start the decreases is where the toes start, and the center decrease is over the center of the front of the toes.

      Reply
  183. Jessie

    January 27, 2013 at 5:28 pm

    Hi there, I so very much love this pattern. I am kind of a beginner, this is my first deviation from hats/scarves/blankets. I feel like I followed the pattern to the letter, however, I used regular worsted weight acrylic yarn (red heart super saver) and a size H hook. I didn’t have a G hook. My finished product is cute, except that when you lie the cuff around nicely, the button hole is on the back of the heel instead of the side of the foot! I’m so sad, I don’t know how to fix it or what to do different. Do you have any idea what the problem is? Also, the top of the shoe isn’t as nice and neat as yours, I had lots of trouble with the dc3tog, I couldn’t find a video anywhere for that one!

    Thanks for any light you can shed on my problem, and again, LOVE the pattern!
    Jessie

    Reply
    • Ashlee

      February 18, 2013 at 8:45 pm

      I believe when you came down the chain of the cuff you went the wrong direction, instead of continuing down the side, around the back and up the other side, you instead went across the front THEN down the side, around the back and up the other side, so the opening is offset instead of the front. Just a guess

      Reply
  184. Tawnya

    January 28, 2013 at 10:10 am

    I think I just need to make the cuff shorter, the rest of the boot fits pretty well, so if I go down another hook size it will be too small. Unless I just do a smaller hook size just for that part. Thanks.

    Reply
    • Ashlee

      February 18, 2013 at 8:47 pm

      feel free to make whatever changes you need to get the look you want.

      Reply
  185. Jessie

    January 29, 2013 at 9:13 am

    I figured out the problem! What I did was when I chained 12 for the cuff, and hdc’ed down the chain, I went the wrong direction around the shoe. This created a cuff that folded over in the wrong direction, making it appear to be too long – and then the opening for the foot was on the side of the shoe rather than in the middle. I bought a G hook, and started over completely, fixing this mistake. It turned out perfect! The smaller hook helped a lot with the top of the shoe too. 🙂

    Thanks again for the pattern!

    Reply
    • Ashlee

      February 18, 2013 at 8:52 pm

      your so welcome, sorry it’s taking me so long to get back to responding to comments, I get so many I set aside one day a month to play catch up!

      Reply
  186. Vera

    January 29, 2013 at 5:18 pm

    May I have it translated on russian how to make a booties, please.

    Reply
    • Ashlee

      February 18, 2013 at 9:05 pm

      I only speak english

      Reply
  187. Elisabeth

    January 29, 2013 at 8:45 pm

    Thank you so much for sharing this pattern. I am very new to crocheting and have been looking for patterns for my 7 m.o. daughter, and LOVED this pattern as soon as I saw it. I was even more grateful that it was free, since I am still “experimenting” with my crochet ability. And for being new and self taught, I could follow along pretty well with only a few hiccups, and I am so excited to make some more for her (and maybe some her friends that will be arriving soon!). I’ll be posting on my blog with links back to this site, since this is so great. Thank you, thank you!

    Reply
    • Ashlee

      February 18, 2013 at 9:06 pm

      your welcome, I’m so glad you enjoyed the pattern.

      Reply
  188. Claire kelly

    February 2, 2013 at 7:58 am

    Hi, I just wanted to say thank you for posting this wonderful pattern for the boots. My cousin is expecting later this month and I have crocheted her a pair of them in a lovely mink colour pure new wool so they look like they are suitable for boy or girl. I live in Northern Ireland and our crochet terminology is different to the US. I just wanted to say that I copied your pattern and then retyped it in British terminology so that I could share it with some of the ladies in my crochet group. I would be delighted to send it to you so that you could have it available to any other guests who might like it. I am just not sure how to get it to you as I am not a tech expert. I can either save it in Word or pdf. If you want to contact me then I would happily email it to you or follow instructions how to get it to you
    Kind regards and again many thanks, Claire K

    Reply
    • Ashlee

      February 18, 2013 at 9:17 pm

      I’d love it, thank you, you can email me a word or pdf [email protected]

      Reply
  189. Marlene Newell

    February 2, 2013 at 9:53 pm

    I hope you are still checking for comments on this project. I’m making these booties for the first time for a friend having her first baby and am having trouble following the pattern. I check my stitch count through 4 and 5 and I am right on. But row 6 does not work for me — If I do ch1, sc in same sc, then 9 sc and then start the decreases, the toe portion is off-center. As I count them, only 13 stitches are accounted for in the decreases in a row that starts with 39 stitches, leaving 26 stitches for single crochets, 13 on each side. In your photo, it looks like there are 13 stitches on the side, which is what seems like it should be. Since other people have successfully completed these, I’m sure I’m missing something. A second question, do you at some point start working on the outside of the bootie instead on the inside? If you do, when do you make the transition.

    Reply
    • Ashlee

      February 18, 2013 at 9:42 pm

      I’n not sure what you mean by working on the outside of the bootie instead of the inside? the pattern is written working on the outside, outside of the sole, outside of teh shoe, your never working on the inside until you switch from working in rounds to working in rows for the cuffs.

      also remember your already on one side when you start each row, the first sc and the next 9 take you to the 10th stitch, which will be over the 2nd hdc from row 2, the perfect place to start the decreases. I maybe the mistake you made was maybe finishing off after the sole and restarting in the center of the heel, but if your following directions I never say to finish off, or start over at the heel. I make the entire sole and shoe in one. I only finish off and restart for the cuffs.

      row 6- ch 1,
      sc in same sc, (1)
      sc 9 times, (9)
      sc2tog, (1)
      dc2tog, (1)
      dc, (1)
      dc3tog, (1- this is the CENTER)
      dc, (1)
      dc2tog, (1)
      sc2tog, (1)
      sc around, (you go down the side AROUND THE HEEL and end up back where you started on the side- 16)
      sl st to first sc (33)

      Reply
  190. Laetitia

    February 11, 2013 at 3:13 am

    Hello, sorry I speak french, je voulais savoir si des personnes on réussi a faire le modele, si oui s’il était possible d’avoir des explications en français, le modele me plait mais je debute tout juste au crochet, je ne connais pas encore les points, un tuto vidéo serai le bien venue pour moi lol
    Merci a vous

    Reply
    • Ashlee

      February 18, 2013 at 10:35 pm

      sorry, I don’t have a video, if I ever make one I’ll let you know.

      Reply
  191. Leona W

    February 15, 2013 at 12:20 pm

    Awesome pattern thanks so much!

    Reply
    • Ashlee

      February 18, 2013 at 10:53 pm

      your so welcome, I’m so glad you like it.

      Reply
  192. Danielle

    February 15, 2013 at 7:28 pm

    These are so adorable I had to make a pair for a baby shower! I love them 🙂 Thanks for the pattern, I posted a link back to this page with my photos:
    http://thewayicrochet.blogspot.ca/2013/02/crochet-baby-ugg-booties.html

    Reply
    • Ashlee

      February 18, 2013 at 10:54 pm

      very cute and nicely done, I love those large wooden buttons.

      Reply
  193. amandamarie

    February 16, 2013 at 2:09 am

    I would like to say like all the other comments on here, a big thank you for posting your pattern, I am always crocheting baby gifts for anyone I know having a baby and its so nice to have such an easy readable pattern, I am blown away by the amount of comments and questions you have on this site….well done you!!

    Reply
    • Ashlee

      February 18, 2013 at 10:56 pm

      thank! the amount of comments on this pattern (and the baby size as well) I find crazy as well! I’m glad you like the pattern.

      Reply
  194. Shala

    February 19, 2013 at 7:41 pm

    You are so awesome! I am so in love with these. Freaking everyone in my family is pregnant or just had a baby and these are adorable. I’ve skimmed through your blog and decided we should be best friends. (I really hope that’s not weird. Maybe I should have saved that for, oh, 10 – 20 comments down the road?) Anywho, thanks so much for this pattern. Super easy to follow, especially with the pictures. I’m amazed at the dedication you have to put together a blog as in depth as this. I only have one kid and often can’t find the time to pick my nose.

    Thanks again!

    Reply
    • Ashlee

      February 19, 2013 at 9:24 pm

      not TOO weird… And the fact that you said “pick your nose” you won me over a bit 😉

      Reply
      • Shala

        February 20, 2013 at 5:14 pm

        Ha ha, glad you liked that.

      • Ashlee

        March 27, 2013 at 12:07 am

        what can I say, I’m easy 😉

  195. Lauren

    February 23, 2013 at 6:05 pm

    I’m newish to crocheting, and I know all of the basics and have even moved on to more difficult patterns, but there is one thing confusing me, because by the time I get to row 7 mine is all curved and horrible looking. When you say 2hdc 3 times, do you mean 2 hdc in the same stitch 3 times? Something is not lining up in mine at all. When I make the sole it curves and is obviously made for the right foot.

    Reply
    • Ashlee

      March 27, 2013 at 12:21 am

      2hdc 3 times is 2 hdc in each of the next 3 stitches. if you look at the stitch diagram you can see that the booties are indeed symetrical, and not right or left footed. it’s totally normal for crochet this small, curved and tight to curl. you can block the soles before moving on, but I dont bother, I just make the whole thing then block it.

      Reply
  196. Myha

    February 26, 2013 at 8:49 pm

    I absolutely LOVE these booties! 🙂 I can’t wait to actually make a pair. After seeing someone post their FO on Reddit, I immediately picked up a bit of leftover Caron Simply Soft yarn and made a trial bootie.

    It was pretty cute but it didn’t look as good as yours, so I frogged it and tried again. Same thing happened and it wasn’t until my third try that I figured out that it was my tension that was causing the bootie to be super tiny and left-footed. I think that’s one of the problems that an earlier commenter also had, so people should make note of their tension if they start producing only left-footed booties!

    Anyway, I just wanted to say thank you and keep up the great work! 🙂 This pattern was very detailed and stylish. Thanks for providing it for free, too!

    Reply
    • Ashlee

      March 27, 2013 at 12:32 am

      you can go up a hook size if your tension is a problem, but it’s natural for rounds like this to curl and curve. if it bothers you you can block it, but I just put it on the babies feet and it worked itself out!

      glad you like it!

      Reply
  197. Corrina

    February 28, 2013 at 11:20 pm

    Hi- can I buy these booties somewhere
    I’m in love with them!

    Reply
    • Ashlee

      March 27, 2013 at 12:40 am

      I don’t sell my designs, I can’t stand making something more than once or twice. BUT I allow people to make and sell items from my patterns. So try Etsy, I know a few sellers use my designs there! like these! https://www.etsy.com/listing/98981263/crochet-baby-booties

      Reply
  198. Martina

    March 3, 2013 at 4:04 pm

    These are the coolest, easiest and most fabulous booties out there!! I LOVE this pattern. It hooks up really easily and is the perfect project for a quick plane flight 😉
    I particularly love that the upscaled version is in a separate pattern sheet – much less confusion for this ‘bear or little brain’.
    Thanks so much for posting it, Ashlee.

    Reply
    • Martina

      March 3, 2013 at 4:05 pm

      ‘bear OF little brain’, that is…

      Reply
      • Ashlee

        March 27, 2013 at 1:02 am

        HA! i got it!

    • Ashlee

      March 27, 2013 at 1:02 am

      you are SO welcome! I tried them in the same pattern and it just didn’t work… way too confusing! I’m so so SO happy to recieve happy comments! Thank you

      Reply
  199. Gabrielle

    March 4, 2013 at 10:12 am

    Hi! I love this pattern and obviously.. i want to create it for an adult. I know you won’t do it as i read you ansers in the comments.
    I would like to know if you’d be offended if i tried to adapt yours. Of course l’d share my version with you ! You can write an email to me at gdgermain @ gmail.com 🙂

    THANK you for this wounderfull pattern. Can’t wait to try it!

    Reply
    • Ashlee

      March 27, 2013 at 1:09 am

      not at ALL! I think you could easily adapt it, with a good footie base, then use the same idea for the cuff! easy peasy (but it makes my feet twitch just thinking about yarn on my FEET *shudder*) let me know how it goes!

      Reply
  200. Hanna A.

    March 4, 2013 at 4:55 pm

    Thank you so much for this pattern! I tried it a while ago, but at that time it was too hard for me since I had just picked up crocheting again. Today I wanted to give it another try. Now I just finished my second boot. Thank you for the little drawing of the sole and all your advise along the instructions. So much fun! I also read a bit through your blog. You are very talented and inspiring! Blessings to you and your family!

    Reply
    • Ashlee

      March 27, 2013 at 1:14 am

      I’m so glad you came back and tried it again! and that you were able to get it this time. AWESOME! I love hearing that. Way to go!

      Reply
  201. Toni

    March 12, 2013 at 10:46 pm

    OMG! Love this pattern! I had to go up to a H hook bc I crochet tightly… but it still looks AMAZING! I love it! now off to make the matching one! lol. I only got one finished but had to tell you THANKS and I <3 this pattern! This will be my new go to boot/bootie pattern!

    Reply
    • Ashlee

      March 27, 2013 at 1:40 am

      I totally do that when I crochet, change the hook size to fit my crocheting style! I’m so glad you like them! And kudos that you know so much about your own gauge! not everyone does!

      Reply
  202. Veronica

    March 17, 2013 at 6:54 pm

    For Rows 4-5 are we still suppose to be working in the back loops?

    Reply
    • Ashlee

      March 27, 2013 at 1:56 am

      Just the row that says work in back loops, row 3.

      Reply
  203. Divya

    March 22, 2013 at 2:12 am

    Hi Ashlee,

    Just loved the booties you made :). I am a begineer and I am following your pattern. I am stuck at one point and need your help. I am not sure what you mean by this “Boot cuff: for the right boot sl st in the 7 stitches from the seam, for the left boot sl st in the 11 stitches from the seam”

    Which is the seam??

    Can you guide me here, that will help me proceed with my booties :).

    Your pattern is very easy to follow 🙂 thanks for the sharing.

    Divya

    Reply
    • Ashlee

      March 27, 2013 at 2:18 am

      the seam is where your row ends and you sl st then ch up to the next row.

      Reply
      • Divya

        March 27, 2013 at 3:04 am

        Thank you Ashlee 🙂

      • Ashlee

        April 24, 2013 at 12:02 pm

        your so welcome! Glad to help!

      • Divya

        April 25, 2013 at 1:23 am

        I have made 3 booties using your pattern and they look sooooo cute 🙂 love your pattern. Simple and easy to understand 🙂

      • Ashlee

        April 26, 2013 at 12:25 pm

        Thank you! I love hearing that. I’m so glad you like them!

  204. Kristen

    April 10, 2013 at 4:34 am

    I hope this makes sense; should i be workig from the inside of my boot or the outside? I love this pattern, thank you!

    Reply
    • Ashlee

      April 24, 2013 at 1:02 pm

      for the sole and foot your working on the inside, the cuff changes every row, with one foot’s cuff being inside outside inside, and the other cuff being outisde inside outside.

      Reply
  205. Elizabeth M

    April 10, 2013 at 8:54 am

    Thank you so much for the awesome pattern! I can’t wait to try it out! I’m going to to be making these for a 6 month old little boy. Your directions show the hook size and says to go up or down depending on size. What size does the G6 hook make to start with so I know what size hook to use to get to the right size? Thanks so much!

    Reply
    • Ashlee

      April 24, 2013 at 1:04 pm

      your so welcome! it all depends on how tight or loose you crochet, so my advice is to make the sole and see what size your getting. just one sole, it’s pretty easy to gofrom there, up or down. Mine made a size 4, but other readers have gotten totally different results

      Reply
  206. Kathleen

    April 13, 2013 at 12:01 pm

    Cute! I am the same way. I won’t buy a pattern either unless it’s a adult sweater for knitting. I think I got the furrylicious booties figured out. 🙂 will be posting the pattern for free when it’s done.

    Reply
    • Ashlee

      April 24, 2013 at 1:15 pm

      AWESOME! my sister wants a pair of those for her little girl!

      Reply
  207. Dawn

    April 30, 2013 at 7:42 pm

    Love the pattern. It is very well written. I cheat and sl st over to the beginning of the cuff. I’m doing some for my friends little girl to be and its hard to believe her little feet will be that big in a year. Having fun though!

    Keep up the good work… but is it really work when its so fun to create?! 😉

    Reply
    • Ashlee

      May 6, 2013 at 8:17 pm

      I “cheated” and sl st over the left bootie, but it made it a bit too stiff right there so I didn’t do it for the right. I don’t like finishing off and restarting if I don’t have to! and thank you so much!

      Reply
  208. Brigitte

    May 8, 2013 at 1:30 pm

    Hi there..i just love these booties..but for some reason im struggling to make it like in your pictures..dont know what im doing wrong..would realy be great if you could put a video up on how to make them..coz ive tried a few times and failed.feel so silly reading how some people tried making it for the first time and did it perfectly..please please please reconsider putting up a video of this… love these booties

    Reply
    • Ashlee

      May 10, 2013 at 1:10 pm

      It’s on the “someday” list, but honestly it’s a VERY long list and without help videoing would be hard to do.

      Reply
  209. astitchintwine

    May 20, 2013 at 5:50 am

    I’m loving this pattern. Adorable boot! I have a couple of questions. 1. Do you know if my Hero G hook is 4 or 4.25? I can’t find that info online anywhere! I’m having a little trouble when starting the cuffs, lol I keep coming up with two of the same boots. Reading through the comments I know its my error…Im going to try again before I try to explain what Im doing and see if you can help me!

    Reply
    • Ashlee

      June 8, 2013 at 7:05 pm

      I have no idea, My hooks not only have the letters, but also the MM so they both say 4.0 or 4.25. as for the cuff, your just working it down the wrong side, for booties you work down the chain then when you get to the shoe part work down the inside around the back then the outside of each shoe, one show will be right side out/wrong side out/right side out… the other will be wrong side out/right side out/wrong side out… does that help?

      Reply
    • Nicki

      June 19, 2013 at 7:58 pm

      http://www.crochethooksyou.com/crochet-hook-conversion-chart/ try this for hook comparisons. I tend to crochet tightly so I used a 4.5mm hook which turns out perfect for 0-3 months size!

      Reply
      • Ashlee

        June 20, 2013 at 1:28 pm

        thank you so much! when I first started writing patterns I just did it for fun (still do) I’m totally not a professional and I feel bad when something I wrote isn’t clear!

  210. Liz W

    June 14, 2013 at 6:49 am

    I love this pattern so much, and am working on my 3rd set! So far they have all measured differently, and I was wondering if you have measurements for them? lol Just so I know I’m not making them too big and unusable with a matching 0-3m hat. Thank you!!!

    Reply
    • Ashlee

      June 20, 2013 at 1:08 pm

      it totally depends on if you crochet tight or loose, the yarn and if you go up or down a hook size. The only time I made the exact same size I used the same yarn, just in a different color, even a slight change changed the sizes for me!

      Reply
  211. Nicki

    June 19, 2013 at 7:34 am

    Great pattern, thank you so much. It was very easy to follow and very fast to work up! I will post them on my facebook page for all to see hopefully tomorrow, of course linking back to your blog 🙂

    Reply
    • Ashlee

      June 20, 2013 at 1:26 pm

      thank you so much! I appreciate the link back love!

      Reply
  212. Keri

    June 25, 2013 at 10:51 pm

    Hey, Just wanted to say thank you for the fabulous pattern!! As a crochet newby, I thought your pattern was really easy to understand. I did the right foot incredibly fast, so I was super excited. The left boot took me 3 tries, but it was my issue, not the pattern. The first one, I didn’t get my decreases right, but thought it would fix itself when I started the cuff, so I fastened off. I was wrong. (I have tension issues, since I am still pretty new at this)The right side/wrong side was bugging me, so on my second try, I ripped out the cuff twice. I tried to reverse sc the 4th row, but the stitches were too loose, so I ended up fastening off and tying on, to make the last row match the first boot. I LOVE your pattern and will definitely do these again. This pair is for my grandson who will be here in August, I will make him some more in different colors for winter.

    Thank you again for sharing the pattern with all of us. You are a blessing.

    Reply
    • Ashlee

      July 1, 2013 at 2:59 am

      thank you for your kind comment! I really appreciate it! I’m glad you like the pattern. I’m not a professional, but I do enjoy sharing hoping others can enjoy them as much as I do.

      Reply
  213. Kimie

    July 28, 2013 at 10:06 am

    Hi. Your boots are too cute. I’m having trouble with mine, it just don’t look like yours. I must be doing something very wrong, but I will keep on trying. I am confused on “working on the back loops” . I’m not familiar with this term. Can you describe what that means? Thank you for posting the instructions.

    Reply
    • Ashlee

      August 7, 2013 at 12:03 am

      when your doing normal crocheting your working in two loops, a front loop and a back loop. When your working in back loops only your going to end with a crisper edge. I like how that works out for shoes best. does this help http://www.stitchdiva.com/tutorials/crochet/crochet-in-the-front-or-back-loops-of-a-stitch

      Reply
  214. Heather

    August 5, 2013 at 10:53 pm

    Hi! Thank you for posting this pattern! It’s adorable! I have found your size 1 and size 4 pattern…do u by chance have a pattern for a size in between?

    Reply
    • Ashlee

      August 7, 2013 at 12:27 am

      to get the in between sizes just change your hook size! It’s pretty easy! using a different weight yarn will also change it a bit. start by doing a sole, measure it up and go from there.

      Reply
  215. Kristin

    August 8, 2013 at 8:03 pm

    The finished product looks very cute and I’m looking forward to trying a pair of these for my newest addition (#9, expected mid-November). Can’t wait to see how they turn out! 🙂

    I thought you’d like to know that the “print this” button is not working. I’ll just copy and paste to a pages document so I can have a printout so no worries, but if it were my page I’d like to know it wasn’t working. 😉

    Looking forward to checking out the rest of your blog…

    ~k

    Reply
    • Ashlee

      August 23, 2013 at 12:50 pm

      #9!!! i love you! I always wanted 8-10 kids, but I barely got 5 out of my husband… Yay you! I know the print this isn’t working, I’ve been hopging they would fix the plug in before I take the time to re do every single recipe and patters post. I guess it’s time to give in and fix it.

      Reply
  216. Micki

    August 21, 2013 at 8:27 pm

    First off, I have to say thank you SO much for posting this pattern! I’m in love with these booties and determined to make them. Also, I have to say thank you for donating your time and effort and posting the pattern free of charge as well as taking the time to read and answer all these comments!
    I have a couple of suggestions (sorta):
    (1) everyone seems to be hung up on what you’re saying when you’re trying to say to do the same stitch x number of times in one stitch. Well, my two cents is that in a lot of the patterns I’ve read, they put into parentheses or brackets what they want performed in a single stitch. For example, row 2 would read: ch1, sc in same st, 7sc, hdc, (2hdc) 3 times, (3hdc), (2hdc) 3 times, hdc, 8sc, (2sc) 3 times, sl st to first sc. This may or may not help cut down on the questions/complaints. I understood what you meant just fine, so I don’t care. It was just something that I thought might make your life a little easier.
    (2) in regards to the cuff, (I could be totally off base as I haven’t even gotten that far) some seem to be sensitive to one of them being “inside out” and I thought a solution might be to chain x number of stitches then attach to the boot, thus working around from the opposite direction and making the two match. If this sounds feasible to you, I’ll give it a try when I get to that point.

    Now, I have a question. I’ve seen several others post with this same issue and I can’t tell what I’m doing wrong. I get my soles done just fine and work r3 alright, too. But, that’s when it all goes kinda wonky. Starting with r4, I sc around, counting to 39 (not counting the first ch1) and still finish 2 or three stitches short of the first sc. I’ve tried to keep plugging along, but by the time I finish r6, the toe seems to be off to one side of center (still requiring more sts than indicated to complete the row). I’ve even used stitch markers in the first stitch in hopes of finding where I’ve gone wrong. Can you or anyone else help me with this? I’m so tired of frogging for 2 days but not willing to throw in the towel. Thank you so much in advance. 🙂

    Reply
    • Ashlee

      August 23, 2013 at 2:20 pm

      feel free to change the pattern for your own use however you want! I didn’t do the cuff that way because joining pieces on such a small project make it too bulky or stiff in my opinion.

      as for row 3 and 4 your just working in the stitches already there, so if row 2 and row 3 have 39 stitches then row 4 should too. as long as your stitch count is right just keep going, then when your done you can either just let the baby wear it, or you can block it.

      Reply
  217. ashley

    August 25, 2013 at 12:34 pm

    I love your pattern. It’s amazing and super simple to follow. I’ve followed several of your other patterns and I love how you write!
    I am having a problem with the first two rows of the cuff though. I know I’m missing something but I’m not quite sure.

    row 1- hdc in 3rd ch from hook- ch2 counts as hdc, hdc in next 9 ch, hdc in first sc (the same one you sl st in), hdc 19 times (there will be 3 spaces left), skip 2 spaces, sc in last space. (32)

    row 2- ch2 (counts as hdc), turn, hdc in first hdc and around 28 times, ch 1 skip one hdc, hdc in last 2 (31- with a ch1 space)

    The ch2 is supposed to be stitched into during round two correct? So what is this ch1 skip? Is it supposed to be on the other side of the boot? I looked at the picture and my hole is at the bottom of the strap, not the top.

    Reply
    • Ashlee

      August 25, 2013 at 9:54 pm

      when I say “ch 2 counts as hdc” in row one I’m talking about the 2 chains at the end. when you hdc in the 3rd ch from the hook, those 2 chains you skiped to do the hdc are the ch 2 i’m talking about. don’t chain two more, or your you’ll get a huge hole. and then when you come back around you want to make sure you do an hdc in that ch 2 (on the other side of the first hdc) does that help? the ch1 and skipped stitch is the button hole.

      Reply
  218. Ellen M

    August 28, 2013 at 3:05 pm

    Hello everyone,

    So, was going along swimmingly (I thought!); I, too, have a pair of booties where both wrap to the left. Been trying to piece together comments to correct this.

    So…after creating the strap (chain … hdc back down to the slip); do I need to go in one direction (back) for the left bootie and forward (right?) for the right bootie? Or???

    Luckily I did practice cuffs and they are not attached! Shower is coming up soon!

    Appreciate anyone’s instruction.

    Thanks.

    Reply
    • Ashlee

      September 9, 2013 at 7:43 pm

      yep, one direction for one, one direction for the other, go down the chain, down the inside, around the back up the outside and then back the other way.

      Reply
  219. Sarah Godden

    September 7, 2013 at 5:17 am

    I absolutely love these boots! I made them about a year ago when I was new to crocheting and they were the second pattern id followed. you made it so easy to follow, they turned out perfect and ive now come back to your pattern to make them for a friend who’s expecting. Thank you so much 🙂

    Reply
    • Ashlee

      September 9, 2013 at 10:33 pm

      Thank you SO much! you have no idea how much I love hearing that! I sometimes wonder if I’m the worst pattern maker of all time with some of the complaints I get. so thank you thank you thank you!

      Reply
  220. Krissy Houston

    September 7, 2013 at 4:39 pm

    I am having some trouble with round 2 where it says in one stitch is that the 7 sc and hdc all in one stitch of do i do 7 sc in one stitch?

    Reply
    • Ashlee

      September 9, 2013 at 10:37 pm

      if the number is after the stitch, like sc 7 times, you do that stitch that many times around. You can see in the diagram. If the number is BEFORE the stitch, like 3hdc that that many stitches in ONE. when it has both, like 2 hdc 3 times your doing to do two hdc in each of the next three stitches.

      Reply
  221. Wendy

    September 9, 2013 at 4:25 pm

    Hello 🙂 i love your pattern! Only wondering if i have to use the front, back, or both loops when making the sole???

    Reply
    • Ashlee

      September 9, 2013 at 11:08 pm

      ever row is totally normal except the ONE that says work in back loops. when it doesn’t say it means normal.

      Reply
  222. Amelia

    September 11, 2013 at 10:22 am

    I have never made booties before, but I tried your pattern and it worked GREAT for me! I thought it was incredibly easy, especially after I finished the first and went on to the second. Will be making lots of these for my little girl due in November!

    Reply
    • Ashlee

      September 13, 2013 at 12:07 am

      awww thanks! I’m so glad, I’m glad you like them.

      Reply
  223. Diane

    September 16, 2013 at 7:11 pm

    Thank you! Thank you! Thank you!! I have been looking for a pair of high tops with buttons and everything is buy it and the instructions I got were translated to English so didn’t make much sense. Your pattern is clear and concise and JUST what I’ve been looking for! Love it!!!!

    Reply
    • Ashlee

      September 18, 2013 at 2:53 pm

      thank you so much! I’m so glad it was clear for you. I hope it goes really smooth for you!

      Reply
  224. Melissa S

    September 20, 2013 at 3:32 pm

    Help! I’ve made the base of a boot (everything except the wrap), and it’s so crooked!

    I followed the pattern, and I’ve tried stretching the right side, but it still won’t straighten up. I think there *is* something wrong with the pattern …

    (link has photo)

    Reply
    • Ashlee

      September 23, 2013 at 11:17 am

      after you finished the sole did you keep going from where you ended up (the correct way – off to the side) or did you finish off and restart in the center of the heel (wrong way)? the only other thing I can think of is that maybe your sole is off, does it look like the diagram with the 3hdc in the CENTER of the 7hdc of the first row? that would mean it’s getting off on that first stitch somehow. Do either of those suggestions make sense or help?

      Reply
      • Melissa S

        September 24, 2013 at 5:25 pm

        I. followed. the. pattern = I did not restart or deviate from the directions.

      • Ashlee

        September 27, 2013 at 12:15 pm

        Whoa, no need to get upset! I was simply starting by asking about the two most common mistakes people make, people who think they are following the pattern perfectly. I start asking about the common issues and if that’s not it work from there. you didn’t answer my other question: is the 3hdc in the CENTER of the 7hdc of the first row? because it looks like it might be off one stitch each row. everyone writes patters a bit different so the way each row ends and begins is sometimes the place where people get off. and if that continues around you end up with your top way off. and finally it could simply be that you crochet tighter than I do. If your stitches are all in the right place (the center increase and center decrease all on top of each other then it might just need to be blocked.

  225. Tammy

    September 21, 2013 at 3:21 am

    These are awesome!!!!
    Thank you so much for sharing the pattern.
    They look great and everyone who sees them thinks I’m amazing and are in awe of them. None of them crochet so they think I’m magical or something lol

    Reply
    • Ashlee

      September 23, 2013 at 11:33 am

      your are so welcome! I’m so glad you like them and that you are getting so many compliments! Always a super fun thing!

      Reply
  226. Barbara Kessler

    September 21, 2013 at 9:31 pm

    Just found this pattern and I really like it for my GB 2 B. What is your gauge on these booties? I’m using a worsted wool alpaca blend that are leftovers from the sweater I just knitted. When I make one it came out HUGE. I couldn’t find where the gauge is mentioned.

    Thanks

    Reply
    • Ashlee

      September 27, 2013 at 12:04 pm

      Sorry, I am not a professional pattern writer by any stretch of the imagination, these are just what I made for my baby and I shared for anyone interested. I didn’t create a gauge, I wouldn’t know how to begin to make one for this pattern. I used baby soft, so it’s prob MUCH thinner than the alpaca your using, all I can say is try a thinner yarn and smaller hook. Try doing just the sole and see if it’s the size you want before going on to the whole shoe.

      Reply
  227. Nina

    October 15, 2013 at 4:35 pm

    Hi! So happy I found this pattern as I’ve been searching extensively. I’m making my first bootie and am at row 6 and I’m doing something wrong. I have the 39 stiches on row 5 as explained; however, with the stiches given, I don’t see the decrease of 6 stitches. My together stitches don’t end up exactly at the toe and I’m still at 39 plus the extra together stiches. What am I doing wrong?

    Reply
    • Ashlee

      October 21, 2013 at 6:27 pm

      the sc2tog, dc2tog and dc3tog are all decreases. does that help?

      Reply
  228. Miriam

    October 31, 2013 at 4:11 pm

    Thank you for a simple yet very effective pattern, i have tried 3 baby bootie patterns this evening and been very disappointed with them all, this was a pleasant find, and free too, double bonus. Thank you once again.

    Reply
    • Ashlee

      November 15, 2013 at 10:58 pm

      you are so welcome! and thank you for taking the time to comment! It makes my day to get positive comments on these patterns!

      Reply
  229. MLJ

    November 2, 2013 at 6:30 am

    I’ve already made two pairs of these for our babe due in 9 days, but I’m wanting to make one more size and now having trouble with my stitch counts. Wondering if you are counting the chains or sl sts in your stitch count in parentheses for each round. Thanks much. They are adorable!

    Reply
    • Ashlee

      November 15, 2013 at 11:17 pm

      no I’m not. I’ve never heard of a pattern counting sl st’s and unless a pattern says “count this chain as a stitch” they don’t ever count. so since i don’t say that it’s not counted in my pattern.

      Reply
      • Megan

        November 17, 2013 at 5:53 pm

        ok. thanks. that’s always confused me and this helps. I was able to match the pattern better and our little girl is home wearing the booties! thanks again.

      • Ashlee

        November 17, 2013 at 7:52 pm

        I hope it helped a little. I’ve had trouble when translating patterens from other languages too, since they have their own “rules” that the rest of us don’t always know! Glad you figured it out

  230. Kendra Julian

    November 3, 2013 at 7:38 pm

    I am new to crochet. I have learned so much from your pattern. I have also learned lots from the questions and answers. I do have one question about rows 4,5 and six. In row 4, I did the following: ch1, sc around, sl st to first sc sc. Does this mean in row 5 (after the sl st) I should sc in the first sc and then ch 1? Then for row 6, do I (after the sl st) sc sc and also ch 1, AND sc in same sc?
    Thank you very much for the pattern AND your help!

    Reply
    • Ashlee

      November 15, 2013 at 11:22 pm

      nope that was a typo, just sl st to the first sc, then move onto the next row.

      Reply
  231. Jessica

    November 4, 2013 at 4:41 pm

    Hey just a quick question I’m new to this and I’m sorry if you said it beforeI didn’t read all the comments, so manybut when you posted the pictures of the duties with the pictures from the bigger size or the infant size?mine just don’t look the same size no matter how many times I’ve made them.

    Reply
    • Ashlee

      November 15, 2013 at 11:27 pm

      the pictures are of the larger size, but the principles of each row are the same so i used the same images.

      Reply
  232. Catrinel

    November 5, 2013 at 4:15 am

    Thank you so much!!!! You are grate! Hugs from Romania.

    Reply
    • Ashlee

      November 15, 2013 at 11:28 pm

      You are so welcome! I’m so glad you enjoyed the pattern and took the time to comment, totally makes me feel so great when I hear such sweet words!

      Reply
  233. Laura

    November 5, 2013 at 2:15 pm

    I went online to find booties to buy and the image in my mind were these booties. I do not know how to crochet and wish I did because these are absolutely amazing!!! You have inspired me to lean a new craft. I just hope I can get it down before her feet get too big 🙂 Thank you for the inspiration and the generosity you have to share this with everyone.

    Reply
    • Ashlee

      November 15, 2013 at 11:31 pm

      you are so welcome! i sure hope you figure it out before she get’s too big! their is also a larger size pattern for the same booties just in case. Also a few of my readers use my pattern to make and sell on etsy if you decide you can’t wait!

      Reply
  234. Lauren

    November 11, 2013 at 1:24 pm

    Hi. I am soo in love with these boots! I have attempted to make them numerous times and have had them all twisty. I think I have figured out the problem as I have seen a few comments to the same effect. In row one, you start with 6(8) side stitches. We curve the toe w a come back with 5(7) side stitches. The diagram you made shows both sides with 6(8) stitches.I have not finished my newest boot, but I think that may be the problem with the twisted sole? Because you start with sc in same sc, then 5(7) stitches. And then before the toe you end with 5(7) stitches leaving one side shorter.Please advis ewhich is right.

    Reply
    • Ashlee

      November 15, 2013 at 11:53 pm

      nope, its written right

      row 1- sc in 2nd ch, (first sc, and part of the heel, not part of “6”)
      sc 5 times, (5 sc)
      hdc 3 times,
      7hdc in last ch, finish the rest of the round working along the back of the chain,
      hdc 3 times,
      sc 5 times, (5 on the other side)
      4sc in the last/first ch, (i think the 4 in the first ch are messing you up, I think your counting the first of these 4 as part of the side 6 when it’s actually part of the 5 stitches in the first chain)
      sl st to the first sc (28)

      the sides are perfectly even, it twists because of people crocheting tight or loose, those 7 in the toe tend to push the one side over more, but as you keep working, and as the baby wears them they work themselves out just fine.

      Reply
  235. natasha

    November 11, 2013 at 2:50 pm

    Hi, I just wanted to say thanks for this free pattern! I’v just made my first pair (for twins so have one more set to go) and they have turned out well! Easy to follow pattern too which was good because I’m only a beginner! Thanks again! Tasha (England)

    Reply
    • Ashlee

      November 15, 2013 at 11:53 pm

      I’m so glad that you found them easy! I start to get worried as the negative comments start coming in, so I treasure the nice ones like yours. thank you thank you!

      Reply
  236. Emma

    November 12, 2013 at 9:54 am

    Hi! I love these boots! Thank you for posting!!! I’m having a problem though. For rows 4 & 5, it says “sl st to first sc sc”. After I sc around & sl st to the first sc, am I supposed to sc into the same sc or is it a typo? Thank you so much!

    Reply
    • Ashlee

      November 15, 2013 at 11:53 pm

      typo, fixed now, thanks!

      Reply
  237. Andie Cavanaugh

    November 16, 2013 at 2:45 pm

    I am just starting to work on trying this pattern starting with row 3 you state to work with the back loops my question is at row 6 are you still working in just the back loops?

    Reply
    • Ashlee

      November 17, 2013 at 12:08 pm

      it only says to work in the back looks on row three, so it’s the ONLY row you do it for, it’s just to give a sharp edge to the bottom of the booties. It would say “from now on” if it was an every time thing, or “work in back loops” for each row you are supposed to use it.

      Reply
  238. Pam

    November 16, 2013 at 6:12 pm

    Absolutely beautiful and so easy to make! Thank you so much for sharing.

    Reply
    • Ashlee

      November 17, 2013 at 12:08 pm

      thank you so much! I’m so glad you like the pattern.

      Reply
  239. Dell Bodden

    November 17, 2013 at 5:04 pm

    How do you do sc2tog? two in the same chain?

    Reply
    • Ashlee

      November 17, 2013 at 7:49 pm

      it’s a decrease stitch, your decreasing two stitches into one using a sc, thus sc 2 together (sc2tog)

      Reply
  240. cindy salas

    November 17, 2013 at 6:21 pm

    Hello,
    Thank you for sharing this pattern. Didn’t run into problems with it. Almost done with the first boot, just need a little help with row 4 of the cuff. The very last part (sc down the side (1 fit 5), continue around the bottom along the original chain 11. Question how should I dc down the side and around and what does (1fit 5) mean?

    I was hoping someone else asked this question so I wouldn’t have to bother you. Again thank you for the free pattern God bless.

    Reply
    • Ashlee

      November 17, 2013 at 7:53 pm

      It’s not 1 fit 5, it’s I (as in me), I fit 5 sc down the side. When doing sc’s down the sides sometimes it’s hard to know how many you can fit down, some people only do 4, some do 6, I fit 5!

      Reply
  241. Sammy

    November 20, 2013 at 12:43 pm

    This pattern is so great! Question…on row 3,4 and 5, do you use the slip stitch from the previous row as your last space to single crochet in for the row you are working on? I normally don’t crochet in the slip stitch when I’m doing the next row but I have taught myself a lot of crocheting so I’m not sure if I do it right 🙂 thanks!

    Reply
    • Ashlee

      December 9, 2013 at 5:58 pm

      no, I don’t count the sl st as a stitch. In all the years I’ve been doing crochet you never use the sl st, it’s not a stitch, it’s just to connect stitches. you also don’t count the ch at the beginning of the row.

      Reply
  242. Jessi

    November 25, 2013 at 7:02 pm

    Super cute boots! Great pattern! Didn’t have trouble outside of my own mistakes. Thanks so much for sharing — much appreciated!

    Reply
    • Ashlee

      December 9, 2013 at 6:26 pm

      I’m so glad! Thank you so much for taking the time to comment and tell me that you were able to make it! I get so many questions that sometimes I wonder if i just should take them all down! So I live for sweet comments like yours! Thank you!

      Reply
  243. Jessi

    December 4, 2013 at 10:55 am

    Love these booties and I appreciate you posting the pattern! Thank you so much!

    I made the infant size and unfortunately determined they’d be too small for my niece, but the size 4 pattern is definitely too large. She is in between a size 2 and 3 for the winter… can anyone suggest which would be better, using a smaller hook on the size 4 pattern or using a larger hook on the size 1pattern? I would greatly appreciate some input!

    Reply
    • Ashlee

      December 9, 2013 at 9:22 pm

      I’d try both, just making the soles, and decide from there. The sole doesn’t take too much time but you’ll be able to tell which one will fit better!

      Reply
  244. Erika

    December 5, 2013 at 11:43 pm

    Hi. These booties are adorable. Just curious if anyone else got two left boots too…it’s not too noticeable, but I noticed.

    Reply
    • Ashlee

      December 9, 2013 at 9:30 pm

      The boots are the same, only the cuffs are different. you can make it with the seam on the other side, but it’s much more complicated and trying to teach it in a free pattern is a bit challenging. You can attempt to do it yourself, you just do the end of each row (the heel) at the begining, so you do heel, side toe side instead of side, tow side heel. Does that make any sense?

      Reply
  245. Stephanie s

    December 9, 2013 at 12:08 pm

    Can someone send me a free pattern for these girl boot slippers, Thank you.

    Reply
    • Ashlee

      December 9, 2013 at 10:23 pm

      I’m not sure why your asking this, the full pattern is right in this post, there isn’t anything more. And you can print or email the pattern yourself from this page, the green “print email” button (just click on the images and paragraphs you don’t want before printing)

      Reply
  246. Megan

    December 10, 2013 at 9:36 pm

    Wish i was good at crocheting so i can make these, but I’m clueless to this stuff. You should make them and sell them.

    Reply
    • Ashlee

      January 11, 2014 at 3:12 am

      Thanks so much, I have no interest in making and selling items, I tried it for awhile, it just wasn’t for me. But because I don’t I allow other people to make and sell from my pattern, I’ve given permission to prob a dozen sellers, so if you check out Etsy I’m sure there are a few sellers that are using this pattern to make some.

      Reply
  247. Jennifer

    December 12, 2013 at 8:26 pm

    I am in awe of the strong and giving woman you are…5 children, special needs and you share your amazing talents with us…During this xmas season I want to wish you and your family a wonderful holiday and thank you for sharing a little bit of yourself with me.
    ….Oh yeah…..I love this pattern….You have explained and written it beautifully….

    Reply
    • Ashlee

      January 11, 2014 at 3:17 am

      thank you SO much! Tis the time of year when I get a lot of activities on these patterns, it’s so nice to have such a sweet comment to wake up to!

      Reply
  248. Lauren

    December 26, 2013 at 1:43 am

    Thanks so much for the amazing free pattern. I just learned to crochet yesterday and was able to make these following your tutorial. The photos were very helpful! I used a 5.00 mm hook with worsted weight yarn and it produced a size 2 bootie, if anyone is looking for a size between the two you’ve made. I did have to add an extra row at the top of the foot to make it look right though; I think it was sc 5, sc2tog, dc3tog, sc2tog, sc around. Thanks again!

    Reply
    • Ashlee

      January 12, 2014 at 2:36 pm

      you are so welcome! Thanks so much for the sweet comment.

      Reply
  249. Shelly

    December 27, 2013 at 1:01 pm

    I’m having difficulty with rows 6-8, am I suppose to skip some stitches. If row 5 is 39 stitched and I’m increasing won’t I get more than 33 stitched in row 6?

    Reply
    • Ashlee

      January 12, 2014 at 2:45 pm

      rows 6-8 are DECREASE rows, not sure why you would want to increase, we’re trying to close the shoe up in those rows.

      Reply
    • Ashley

      January 12, 2014 at 4:37 pm

      This is the part I’m stuck on as well. I keep getting more stitches than 33 and the end of row 6 and I can’t figure it out. Don’t have a clue where I’m going wrong.

      Reply
      • Ashlee

        January 12, 2014 at 4:40 pm

        So you end row 5 with 39 stitches
        row 6- ch 1, sc in same sc, sc 9 times,
        sc2tog, (this is a decrease so you go down by 1)
        dc2tog, (this is a decrease so you go down by 1)
        dc,
        dc3tog, (this is a double decrease so you go down by 2)
        dc,
        dc2tog, (this is a decrease so you go down by 1)
        sc2tog, (this is a decrease so you go down by 1)
        sc around, sl st to first sc (33- so there are your 6 stitches of decreases)

      • Ashley

        January 12, 2014 at 8:00 pm

        Thank you for the fast response! I am doing them as decreases which is why I’m so confused! Lol I will double check the stitches I have in row 5 again. Then just keep trying until I get it right! Lol love this pattern though!

      • Ashlee

        February 6, 2014 at 12:47 am

        So did you ever figure it out???

      • Teresa

        January 31, 2014 at 9:04 pm

        I’m confused also. I can see that you are terribly patient and I am a beginner. If you are putting 2 or 3 stitches together in one stitch, then it seems that you are adding, not decreasing. You will end up with more on the next row. Please help me understand this. My thinking is obviously backwards ): Thanks

      • Ashlee

        February 6, 2014 at 2:24 am

        your turning what WAS 2 stitches into just one stitch, so taking away a stitch. It is a DECREASE not increase stitch. An increase stitch would be, 2hdc, putting 2 stitches in ONE, not taking 2 and making one. Does that help at all?

  250. Dawn

    January 8, 2014 at 7:53 am

    This is my go – to baby boot pattern! I’ve made them several times and I LOVE them!

    To make the tops of my boots the same I follow the pattern as written for the left boot. For the right boot, I cut off after row 3 of the cuff. I attach the yarn at the base of the strap and then work row 4 in reverse. Easy peasy!

    Thanks so much for this great pattern!

    I kind of hate to saythis, but it appears that someone is selling your pattern on etsy at https://www.etsy.com/shop/EmmeCole

    Reply
    • Ashlee

      January 12, 2014 at 4:18 pm

      thank you so much, and that is totally a way to get the cuff the other direction. And thank you so much for looking out for me. that’s actually the booties that my cousin sent me asking me to make (her pattern is older than mine) BUT I don’t pay for patterns, EVER, so I sat down and created my own based on her picture. I’m sure our patterns are different, but i’ve never actually bought and tried hers, just inspired by the image.

      Reply
      • Dawn

        January 14, 2014 at 11:39 am

        I’m really glad that they are 2 different patterns! I never ever pay for patterns either, so I, too, have created my own pattern from a picture!

        Thanks again for this pattern! I’m getting ready to make a pair with the simple cuff for the first time!

      • Ashlee

        February 6, 2014 at 12:50 am

        your so welcome, I hope you enjoy the pattern!

    • Lizzie

      January 21, 2014 at 7:19 pm

      thanks for that idea! Was trying to figure out how to make it the same since I might be a little bit of a perfectionist when it comes to my crafts 🙂

      Reply
  251. Sheri

    January 8, 2014 at 9:10 am

    This may have already been answered in the comments, but I didn’t read through all of them to find out. How long are these booties made as written? My granddaughter’s feet are 3″ long and I’d like to know if they’re going to fit before making them. Thanks!

    Reply
    • Ashlee

      January 12, 2014 at 4:20 pm

      I don’t include measurements like that because then I get a ton of complaints when they aren’t exact (because different yarns, and tight or loose crocheting will change it). I suggest making just one sole, it whips up really fast, and measuring your own stitching, that way you can tell if it’s going to fit the way you work or not. If you need it just a tad big bigger move up a hook size or yarn size. and if it needs to be much bigger try the larger pattern.

      Reply
  252. Suzanne

    January 8, 2014 at 11:33 am

    Thank you for the pattern on the booties! I just made my first pair for my 1 yr. old Grand daughter and will make more different sizes. They are so cute! And Free!
    I want a pair for myself!
    Thank you again and keep up the good work!

    Reply
    • Ashlee

      January 12, 2014 at 4:20 pm

      Thank you so much! and I’m so glad you like the pattern!

      Reply
  253. Brittany Boozer

    January 8, 2014 at 9:15 pm

    I absolutely loved this pattern! I am working on some gifts for my godson that is due next month including a blanket, hat, bib, and booties, and I tried a bootie pattern that was really similar to yours a few days ago. After trying it three or four times without success, I finally looked for a new pattern to try and ran across yours! I loved it!!! So easy to follow. Thanks so much for your free patterns.

    Reply
    • Ashlee

      January 12, 2014 at 4:25 pm

      YAY! you just made my day, that makes me so happy that you found my pattern easy to use! Congrats on the upcoming godson!

      Reply
      • Teresa

        January 29, 2014 at 6:27 pm

        Row 3 says “do in back stitches”. Are Rows 4 & 5 also done in the back stitches??? I’m new to crochet also. LOVE these but get confused easily. Thanks!

      • Ashlee

        February 6, 2014 at 2:13 am

        nope, just the row that says too. It would say it every row or say “do this every row” if you are supposed to repeat things like that. It’s just to create a sharp edge between the soles and sides. does that help?

  254. Lauren Wright

    January 14, 2014 at 8:20 pm

    Hi! I’m trying to make these and I don’t think it’s looking like it should. Reading patterns is new for me so that’s probably why I’m having problems. I do have some questions though. What are the numbers in parentheses for? On row 3, for example, does it mean I need to sc 39 sc’s? I can’t figure out where my rows need to end and begin. Any help you can give would be very much appreciated!! 🙂

    Reply
    • Jackie

      January 15, 2014 at 11:10 pm

      That is correct. The numbers in parentheses are the total number of stitches you need in that round. On the cuff, when she includes the chain 2 as one of the hdc, you would count that as one stitch in the round. If the patrern doesn’t say that a chain stitch counts as anything, don’t include it in your count. Hope that helps and good luck!

      Reply
    • Ashlee

      February 6, 2014 at 12:51 am

      the parentheses at the end are the number of stitches you should have in that row, it helps you stay on track!

      Reply
  255. Jackie

    January 15, 2014 at 11:06 pm

    I love this pattern! I have made one pair according to the pattern and several others with variations, doing a full cuff instead of the wrap around style. They are so quick to whip up! While the inside and outside of crochet look different, for the people that are having issues getting the directions for how to make a left and right, they could just turn the booties inside out. 🙂

    Reply
    • Ashlee

      February 6, 2014 at 1:06 am

      actually you can’t. because in row three, your working in the back stitches to create a sharp edge of the sole, if you flip it inside out you’ll end up with a really weird edge, that would look way more pronounced and awkward than the “wrong” side edge of the cuff. ALSO if you do that the the entire shoe portion of the bootie would be inside out, which I think would be way more obvious. Personally I don’t get it, no one has ever thought my booties looked right side wrong side before, who gets that close? BUT I also believe people should feel free to make patterns work for THEM!

      Reply
  256. Hope

    January 21, 2014 at 3:09 pm

    This is a GREAT pattern I love it THANK YOU SO MUCH I will defintly be making these for my little sister Faith who is due in may, THANK YOU THANK YOU THANK YOU 🙂

    Reply
    • Ashlee

      February 6, 2014 at 1:23 am

      Awww thank you! and I hope you enjoy making them! I bet your sister will love it so much.

      Reply
  257. Lizzie

    January 21, 2014 at 7:13 pm

    Firstly, thank you for this pattern! fell in love with it as soon as I saw it. Had a few struggles getting the first one done but I think that was mostly due to being left handed and trying to figure it out (I had to use the front loops instead of back to get it to stand up :)) but now I have lovely booties for a gift.
    My only question is, since it sounds like you have made these for a baby, does the button really need to be functional? found adorable ones that match perfectly but are too big for the size of the buttonhole that is in the cuff. Any guidance/opinion would be helpful!
    Thanks again for cute pattern!

    Reply
    • Ashlee

      February 6, 2014 at 1:26 am

      I’m glad you figured it out! I’d definitely make the cuff button functional for a baby, the reason for that is that you want to open it up to easily get their feet in, then button it TIGHT so they can’t kick them off. If they can slip on then they can slip off easily… then get lost. Does that make sense?

      Reply
  258. Ayesha

    January 29, 2014 at 2:57 pm

    Dear Ashlee!
    Thanks for posting all these wonderful patterns for free! Its great encouragement for all us novice crocheters out there. Recently I was asked to make a pair of Wrap-around booties.
    I tried to, but the pattern didnt seem to be put together properly. I then did some troubleshooting, and came across your ORIGINAL pattern! I was shocked at the prospect of someone copying your pattern and doing so while making glaring errors (row 2-3 of the cuffs are missing), and you are not given any credit! I hope you are able to sort out matters with this blogger who has stolen your work.
    I also hope it does not deter you, or all those other kindly and helpful crocheters who share their hard work with the world.
    Hope this post was helpful!
    Ayesha.

    Reply
    • Ashlee

      February 6, 2014 at 2:12 am

      Thank you so much for letting me know, I reached out to the blogger and she took the pattern down. I appreciate you letting me know! Glad it worked out for you!

      Reply
  259. Marny CA

    February 2, 2014 at 4:58 am

    These are sooooo adorable! My question is: do the soles look alike or do they have the left/right look??

    I’d love to try these for charity – and get the rest of the group to make these, too. Everything our group makes, whether knit, crochet, or loom is for different charities.

    Reply
    • Katja Sch.

      February 3, 2014 at 12:26 am

      They have a left look! That’s why I’m asking for the right one…

      Reply
    • Ashlee

      February 6, 2014 at 2:29 am

      because your working in the round it will twist and look left and turned as you work, just keep going, it’s normal I promise, once your done you can block it and straighten them out! (or just put them on the baby and it will work itself out, I’m too lazy to block when I’m making for my own baby, I do block when I’m giving them as gifts though.)

      Reply
  260. Katja Sch.

    February 2, 2014 at 1:25 pm

    Thank you so much for the great tutorial!!
    I finished boot #1 – the left one. No other option because the sole said so. ;)) My question: How can I make the right one, that the sole turnes to the other side? Do you know what I mean? My English is not that good…

    Best regards from cold Germany…

    Reply
    • Ashlee

      February 6, 2014 at 2:33 am

      the sole is symmetrical, I promise, there is no left or right. It looks that way because you are working in the round and working like that twists the sole, when you finish the bootie it will still look twisted, just wait until you finish the booties and block them to straighten them out. mine did the same thing, all booties worked this way do, they all work themselves out!

      Reply
  261. Nicalaine Brown

    February 6, 2014 at 1:08 pm

    I cannot figure out the 19 stitches in the second row of the cuff….Do I crochet around the cuff or the boot part? Can,t figure out how to get 19 st out of it……
    Such a cute bootie and I want to get it done!

    Reply
    • Ashlee

      February 20, 2014 at 1:29 am

      do you mean row 1? as you can see in the picture right above row 1 you hdc down the chain you made then continue around the shoe part, that’s creating the cuff/boot

      Reply
  262. Liz

    February 6, 2014 at 3:44 pm

    I must be the odd man out because I can’t follow these directions, they are unlike any I have seen. You wrote in 2012, ”when the number is after the stitch: hdc 3 times, it’s in the next 9 stitches…” How does that work? The way it is written indicates that one should do hdc in the next three stitches – how do you get to 9? If you need to do hdc in the next 9 sc, then that’s what it should say. Makes no sense at all.

    Reply
    • Ashlee

      February 20, 2014 at 1:31 am

      it was just a typo

      Reply
  263. Christina

    February 7, 2014 at 10:15 am

    For anyone having difficulty with the hole in the first row with the 7 hdc: take your tail, which will be at the slipknot right there, thread it through the base of the stitches and give a nice tug. It closes it up nice and neatly. I was unsure about progressing further when it occurred to me how easy it was to fix it.

    This pattern is awesome so far and I hope to make several pairs. 🙂

    Reply
    • Ashlee

      February 20, 2014 at 1:33 am

      hole? I am not sure what hole you are talking about and I haven’t had anyone else say anything about a hole? now I’m worried!

      Reply
    • bri

      March 22, 2014 at 7:08 pm

      Thanks! I have been having issues with a hole appearing at that 7 hdc area too.
      I have used this pattern many times!

      Reply
      • Ashlee

        April 15, 2014 at 2:17 am

        huh, I never had that problem, but everyone crochet’s differently! I bet I have gaps in places other people don’t. hopefully Christina’s tip worked for you!

  264. Rachel

    February 9, 2014 at 4:39 pm

    Hello, I LOVE this pattern, but my daughter is a toddler and feet a bit bigger then this pattern and was wondering how would I make it into say a size 6ish toddler? Thank you!!!:)

    Reply
    • Ashlee

      February 20, 2014 at 1:37 am

      there is a larger pattern the baby pattern, instead of this infant one, and while it makes a size 4-5 for me (everyone crochet’s different so it’s hard to know for sure) when I went up a hook size I got around a 6 so try that. Just start by making the sole and see if it fits before doing the entire bootie

      Reply
  265. Cynthia

    February 11, 2014 at 9:04 pm

    This is the easiest bootie pattern I’ve seen so far! And I’ve tried four or five other patterns.
    I was struggling with the cuffs, so I got creative and made them separately (ch 33, single stitched a row, ch 2, double stitched a row, ch 2, and double stitched another row) then slip stitched them to the shoe. Both side turned out identical. I wish I could post a pic here.
    Thanks! 🙂

    Reply
    • Ashlee

      February 20, 2014 at 2:07 am

      I’m sorry you had issues but glad you liked the overall pattern!

      Reply
  266. Lyric

    February 12, 2014 at 8:49 am

    Ms. A,

    Thank you SO MUCH for sharing this pattern with us. I stumbled upon it yesterday and today I am going to print it out to make for my upcoming lovely grannette. . . a litle girl due in June. 😉

    Cheers,

    Lyric

    Reply
    • Ashlee

      February 20, 2014 at 2:11 am

      awww congrats on the future grandbaby!!!! babies are the BEST (and they don’t draw all over your couch/floor/table/walls with a sharpie like 2 year olds do)

      Reply
  267. Katrina

    February 15, 2014 at 11:45 am

    I made these booties for my niece, I figured out the left and right, i was confused at first but sometimes you just have to reread. They are so cute and i am so glad to be able to get a free pattern. I am a grandmother and just like to make baby things, knit and crochet. and these are adorable!

    Reply
    • Ashlee

      February 20, 2014 at 2:42 am

      you are so welcome! I’m glad you figured it out. I couldn’t figure out any other way to explain it any better!

      Reply
  268. Teresa

    February 15, 2014 at 5:02 pm

    Ashlee,

    Please help. I am lost with this instruction:

    Boot cuff:
    for the right boot sl st in the 7th stitch from the seam,

    I have crocheted without problem till this. There is no SEAM……what in the world do you mean when you say seam? I want the placement of the wrap around correct so I don’t want to make guesses. Please advise.

    Thanks for your help,

    Teresa

    Reply
    • Ashlee

      February 20, 2014 at 2:57 am

      the seam is the section where you chain and move up to start the next row, sorry I don’t know what else to call it

      Reply
  269. Sadie Long

    February 25, 2014 at 9:51 pm

    Hey, so I have tried this pattern like 4 times today trying to get it right but I cannot. I am self taught so I definitely don’t know everything but I know the basics and all the general stitches. Everything works out wonderful till I get to the shoe part. I follow the instructions.. I think.. it just does not work, the round part above the toes does not form right.. Any words of wisdom you can offer would be greatly appreciated. Or A video tutorial could also solve many problems, yet i understand its a lot of work.

    Reply
    • Ashlee

      April 14, 2014 at 11:37 pm

      I’m not sure what you mean by the round part above the toes? are you talking about the decreases? and when you say its not working what do you mean? it’s not closing? it’s twisted? it’s off center? I need more exact details before I can help, sorry

      Reply
  270. shan

    February 27, 2014 at 10:40 am

    I am completely confused on a step that not many people seem to be confused on… Somewhere along the line, the center of the top of the toe ends up being wonky and over 5 stitches (or close to it) from being centered. Is there supposed to be turns after each step of making the toe, so it goes back and forth and evens out? I have read almost all of the comments above, and am not finding the answer. My stitch count is exact, and can’t seem to get it figured out! I am about to give up, but really don’t want to since these are soo cute! I have tried multiple times, so any help is appreciated!

    Reply
    • Mary

      March 12, 2014 at 4:21 pm

      I actually have the same problem, and we’re not the only ones… there are several people who commented on this before. Believing I made a mistake in stitch count or something similar, I even made the bootie 3 times before finally giving up on it. After three times, I don’t think I will manage any better on my own…

      Reply
      • Ashlee

        April 15, 2014 at 1:10 am

        I’m sorry to hear your having a hard time with it, but as you can see from the diagram the rows are centered, it’s easy to get a little twisted when working in the round, but as long as you follow the diagram and your stitches are in the right place it will right itself as you block the booties.

    • Ashlee

      April 14, 2014 at 11:51 pm

      nope, you work in the round, no turning involved. I included the diagram so you can see where all the stitches go, are you maybe skipping the first stitch? That’s all i can think of, sorry I can’t be more helpful than that.

      Reply
  271. jessica

    March 1, 2014 at 11:48 am

    Do you have the finished width measurement of the sole. It seems way to narrow with only 2 rows

    Reply
    • Ashlee

      April 14, 2014 at 11:56 pm

      these were a gift for a friend so after I made them i shipped them right off. remember babies feet are pretty darn small. if anything they were a little big for the gal I made them for.

      Reply
  272. carmen

    March 15, 2014 at 8:37 am

    Hi :

    I just had to give u koodles for the baby bootie i made following ur instructions it came out very well, i got one bootie done the left one, now i am trying to do the right foot, wish me luck.

    P.S
    I think you are so creative, i learn a little crocheting and knitting when i was 10 by my godmother. Now i am 52 and trying to do a little more crocheting for my new gran baby girl coming in two months. If you have more simple patterns for me to do, about baby or infant things let me know i subscribed to ur page. Good luck in life and love,, Thank you soooooooooooo much

    Reply
    • Ashlee

      April 15, 2014 at 1:24 am

      I’m glad you like the booties! I hope you’ve been able to enjoy the other crochet stuff I’ve had on the blog in the past! Since my baby isn’t really a baby anymore I don’t really do as much as i used to, it’s hard without a model!

      Reply
  273. Jillian Post

    April 3, 2014 at 7:38 pm

    Hi, LOVE your site! I just made my first pair of these and they are darling! I am in Nebraska and have had a lot of people ask me to sell them to them. I would love to but I want to make sure I give credit to your amazing design skills. How do I go about that? Do I just add your website on my little label? Thank you so much for your beautiful designs! Love Them! – Jillian Post

    Reply
    • Ashlee

      April 15, 2014 at 2:55 am

      I totally allow people to sell what they make from my patterns as long as they use their own pictures and include a link to my pattern so that people who want to make their own can find the pattern! good luck!

      Reply
  274. Mary Metz

    April 10, 2014 at 9:50 am

    Thank you so very much for your effort in working and sharing your baby booties. Your work is impeccable. I made a different top for the girl booties and it looks wonderful. You did a fabulous job.
    Mary

    Reply
    • Ashlee

      April 15, 2014 at 3:12 am

      you are so welcome, and I’m glad you enjoyed making them and added your own top!

      Reply
  275. Sharlene beatty

    April 17, 2014 at 10:20 pm

    I am also having trouble. After row 3, mine goes all wrong. I was all the way to row 8 & I got no boot toe. I had a mess so I took it out all the way back to row 3 & started over. I still can’t get the toe of the boot. I don’t count the stitches in the row, I just follow the directions to the letter, & still, the toe ends up on the side of the shoe. I’m a beginner, but I can’t be this stupid. Why won’t mine come out right? I am following the directions.

    Reply
    • Ashlee

      June 23, 2014 at 4:33 am

      without pictures it’s hard to say, feel free to email them to me. I will say that it’s totally normal for booties to be all twisted until you block them, but they should still be centered.

      Reply
  276. Sharlene beatty

    April 18, 2014 at 6:47 pm

    Guess what!!! Your comment on Aug 20th, 2012 told me what I was doing wrong. I’m so happy I could cry! Turns out I’m not stupid, just terribly inexperienced. I am at row 4, but I need to take it out back to row 1. When it said 2 hdc 3 times, I wasn’t putting 2 in each of the next 3 stitches. My brain just didn’t get it. Thank you for reading all these comments and answering all these questions. I dearly love to crochet but I have so much to learn. I am so greatful you take the time to post these patterns and explain everything. I don’t have anybody to help me, just you. Crocheting is anti-stress therapy for me, and you are wonderful!!!

    Reply
    • Ashlee

      June 23, 2014 at 4:36 am

      awww yay! I’m glad you figured it out. I only answer comments and emails every other month these days so I don’t always get to these in a timely manner.

      Reply
  277. Sharlene beatty

    April 18, 2014 at 10:51 pm

    I just found out something else I was doing wrong. In row 6, we start seeing those mystery sc2tog things. I thought it meant 2 single crochet in same stitch. I read some more on the Aug 30,2012 and googled those stitches. I found a cool site called “crochetparfait.blogs”. they have a drop down box and you can choose from a whole list of stitches. It gives you the words of how to do it, and a picture. For beginners like me, you really need to check this out. The bootie comes to life when you do each row correctly. And don’t assume you understand a stitch if you’ve not seen it before like I did. I am learning so much and enjoying this. I have some books but I don’t know if any of the ” tog” stitches are in them. You can always look for a reference book of crochet stitches at the library too if you prefer. I am loving the crochet parfait blog.

    Reply
    • Ashlee

      June 23, 2014 at 4:38 am

      I’m glad you found a place to get the answers you need for this more advanced pattern! I hope the rest of the booties went well!

      Reply
  278. Sheria

    May 6, 2014 at 1:01 pm

    I am missing something lol Why did you use a 4mm hook to crochet the regular booties and a 4.25mm hook to crochet the infant booties? Isn’t a 4.25 bigger than the 4? Great Pattern Btw!

    Reply
    • Ashlee

      June 23, 2014 at 12:26 pm

      when I used the 4.25 on the baby it made it HUGE, and using the 4.0 on the infant made it too small. sometimes it just works that way! the infant pattern starts with no only less chains but also only 2 rows not three for the sole, so a larger hook was a better fit.

      Reply
  279. stephanie

    May 12, 2014 at 10:58 am

    Wauw, i love those boots! i would lvoe to make them!! how much yarn would i need?

    thank you

    Reply
    • Ashlee

      June 23, 2014 at 1:06 pm

      I used leftovers from another project on these, not even half a skein.

      Reply
  280. francesca Bowman

    May 12, 2014 at 10:34 pm

    After reading all the comments here I would like to say Thank you. This pattern is well written and explained with pictures. I just made a pink pair in 2 hours with distractions and I am just starting a brown pair. I will block them as I do all baby booties. Thank you for sharing it with us for free

    Reply
    • Ashlee

      June 23, 2014 at 1:13 pm

      you are SO welcome! Thank you taking the time to say thank you! I’m glad you found it easy to make, and that you knew to block them!

      Reply
  281. Jenna

    July 10, 2014 at 7:49 pm

    Hi! I have had your pattern queued on Ravelry for some time now, but I just looked more closely at it tonight. I read quite a few of the insane number of comments, and I just wanted to tell you that I admire your patience with everyone more than I can say! All the repeat questions would have probably done me in if I were the one that had to answer them. I just wanted you to know that the fact that you responded to every question over the last two years (well, all the ones I saw, I didn’t actually look at all 600+ of them) has not gone unnoticed or unappreciated. Anyway, thank you for the pattern! I’m off to make a pair for my niece who will be arriving in November!

    Reply
    • Ashlee

      July 26, 2014 at 1:34 am

      Awww thank you so much! I only answer comments once a month so I wait until I’m in a nice calm state before I get started. I really need to do a FAQ post (but people probably still wouldn’t click over… good luck!!!

      Reply
  282. Tash

    July 21, 2014 at 10:36 pm

    I just wanted to say I love these booties! This is my third ever crochet project, and first pair of booties. They are awesome. It took me a wee while to figure out how the wrap around part went, until I figured you go around the back of the bootie not the front….. And followed going 7 stitches or 11 from the seam to make left and right easily! the only problem I had was that I ended up with two holes at the end of the tab! I’m not sure how but it must have something to do with end where you chain two in the first row. I did what I thought was right but it doesn’t seem to be! they are gorgeous anyway! and I’m sure that hole will be hidden by a button haha.

    Reply
    • Ashlee

      July 26, 2014 at 2:14 am

      I’m so glad you stuck with it and figured it out!!! sorry about the double hole though! you could always use two smaller buttons!

      Reply
      • Tash

        July 27, 2014 at 4:41 pm

        I figured out where i went wrong when i made a second pair. When it says ‘row 1- hdc in 3rd ch from hook- ch2 counts as hdc, ‘ i read it as a new instruction to ch2….. so ended up with a chain2 there and it made another hole. Solved haha.

        Second pair look gorgeous, i made them girly and they are so cute 🙂

      • Ashlee

        November 25, 2014 at 11:15 pm

        I’m so glad you figured it out! We all make silly mistakes like that when we read in a hurry, I still do it, even reading my own recipes after having not made something in awhile! GAH.

  283. Amanda Broyles

    July 22, 2014 at 2:11 pm

    Thank you so much for sharing this pattern! My friends are having twins and I worked so hard all week to make several pairs of adorable baby sandals (0-3 month) only to realize the day of the baby shower, that she’s due is OCTOBER! *facepalm* These so cute and I know she’ll love them. I’m excited to see what else you’re site has to offer. 🙂

    Reply
    • Ashlee

      July 26, 2014 at 2:22 am

      Thank you so much! And how fun! I hope she enjoys these!

      Reply
  284. Miranda

    July 23, 2014 at 1:27 pm

    I haven’t read all of the comments, but I noticed within the first few that people are having trouble making opposite foot soles, one right and one left, and keep ending up with two of the same instead.

    To fix this problem for myself, when I make the second sole, I ch 11, and then go into the second stitch from the hook but from the back side. So you go the opposite way around the original chain. Makes for a sole that curves the opposite direction! Hope this helps!

    Reply
    • Ashlee

      July 26, 2014 at 2:39 am

      the soles are actually symmetrical, there is not left or right, they just twist because your working in the round, they simply need to be blocked.

      Reply
  285. debbie

    August 2, 2014 at 1:07 pm

    I got to the boot cuff & chained 12 then hdc the 9 & know I’m lost??? Not sure how to finish

    Reply
    • Ashlee

      November 25, 2014 at 11:59 pm

      after you hdc down the chain you do an hdc in the same st as the sl st, then keep doing hdc’s around (down the outside, around the back and up the other side – so it’s “right” side out for right boot and “wrong” side out for the left bootie. does that help?

      Reply
  286. Brittany

    August 5, 2014 at 3:16 pm

    Hi! Oh my word! I love these booties so much!! I just made a pair for my nephew.
    Funny question…but any chance you have a larger pattern? Like maybe for an adult? I would really like to make myself a pair now too!

    Reply
    • Ashlee

      November 26, 2014 at 12:04 am

      sorry, I don’t personally like yarn on my feet so I simply haven’t been interest in making an adult version

      Reply
  287. Sheri Richardson

    August 6, 2014 at 2:26 pm

    I’m having a major problem with the boot cuff. On the instructions on row 1, it says to hdc 19 times, (there will be 3 spaces left)……….where do I hdc 19 times? On the flap or around the bootie? I have tried both ways and it doesn’t look right either way. Please help me!

    Love this pattern!

    Reply
    • Ashlee

      November 26, 2014 at 12:07 am

      after you hdc down the chain your going to do the 19 hdc around the cuff.

      Reply
  288. Christina

    September 11, 2014 at 5:53 pm

    How can I make these for ladies size 7 shoes? How would you recommend increasing them?
    Thank you. I love this pattern.

    Reply
    • Ashlee

      November 26, 2014 at 1:15 am

      I’d suggest starting with an adult slipper or bootie pattern you like and add a cuff in the same style that I did this one, start with a sl st, a chain and then work down and around until your happy with it.

      Reply
  289. TINe

    September 15, 2014 at 3:24 am

    I’ve found these lovely booties on Pinterest and I’ve just completed them. Thank you very much for the pattern 🙂

    Reply
    • Ashlee

      November 26, 2014 at 1:19 am

      you are so welcome! I’m so glad you liked them!

      Reply
  290. Barbara G

    September 17, 2014 at 5:22 pm

    I love this pattern. My favorite thing about them is the *free* part. I have not had one problem making these boots up in many different sizes and yarn brands. I can make a pair in less then 2 hours! Thank you so much for doing this!

    Reply
    • Ashlee

      November 26, 2014 at 1:21 am

      thank YOU for taking the time to comment, it makes my day when I hear success stories! I’m so glad your enjoying them so much!

      Reply
  291. Wendy J

    October 5, 2014 at 7:00 pm

    I love this pattern!! I’ve been trying to find one for booties that is easy enough to crochet, but also pretty. Most of the ones I’ve found are..well, just not right. I’ve only done one so far, but I’ve found the booties I’ll be making to go with my afghans & hats. Thank you so much for posting this beautiful pattern! I also love that it can be made for girls or boys. (I have crocheted for years, and never knew there were 2 sizes of “G” hooks. I have 2 that I use. The bamboo handled one is marked. The other one, same brand, is only marked as a G hook.)

    Reply
    • Wendy J

      October 7, 2014 at 7:57 am

      This is written quite some time after the rest of the comments, and I’m not sure if this ‘line’ is still active… I guess this isn’t a reply, as much as a p.s. This is not a criticism of your lovely pattern; it is a suggestion for folks like me, who just didn’t think the first time around. I “get” the idea of the starting spaces for the left and right bootie cuffs. The problem is, that I continued to crochet in the same direction, so I still ended up with two right foot booties, only the cuffs were in different positions. I didn’t think until afterward, when I was trying to figure what I had done wrong, that I should have faced the bootie the other way. Would it be possible to add wording to tell us non-thinkers to begin the chain away from the front, or middle? I’ve tried to write some of my patterns, and I definitely don’t mean to insult you! It’s hard to do, and your pattern makes a difficult-looking bootie easy to crochet.

      Reply
      • Ashlee

        November 26, 2014 at 10:42 am

        added a note, I hope that helps

    • Ashlee

      November 26, 2014 at 2:53 am

      I wouldn’t have known either, I just happen to have both sizes, and used one for the pattern! I’m so glad you like the pattern!

      Reply
  292. Grandma Cyndie

    October 15, 2014 at 12:45 pm

    I love these! I have a knit pattern for baby uggs that I have been using for years and can’t wait to try the crochet pattern. Thank you for sharing! 🙂

    Reply
    • Ashlee

      November 26, 2014 at 11:17 am

      I love knit patterns too! But I’m faster at crochet so I tend to go that way first

      Reply
  293. Rebecca Gourley

    October 15, 2014 at 11:28 pm

    Hi! I am a beginner at crocheting. I started to make these for my friend who is expecting in a few months. They are so adorable! However, I think I made a mistake somewhere because I ended up with about 4 or 5 more stitches than I was supposed to at around row 3 or 4. They look like ballet flats, which are still adorable. Oddly enough, if I turn them inside out, they resemble more of a boot shape…

    My question is: What do you mean by “single crochet in the same single crochet”? I think that’s where I messed up. It sounds self-explanatory but to a novice crocheter, it was perplexing.

    Reply
    • Karin

      November 13, 2014 at 6:33 pm

      You can see a video on YouTube if you just search for “sc in same sc”. Once you see it everything will make sense! Good luck!!

      Reply
      • Ashlee

        November 26, 2014 at 1:40 pm

        thx

    • Ashlee

      November 26, 2014 at 11:23 am

      sc in same sc – it’s pretty standard. some patterns have you skip the sc you JUST sl st into to close the last row, and then they have you finish the rowk working in that sl st, but that ends with a twisted “seam”. I prefer doing the sc in same sc, and ending with a sc in the last sc, rather than the sl st, the seam stays straighter that way. make sure you count your stitches EVERY row to see where you are getting off, don’t wait until the end.

      Reply
  294. BrieAnna

    October 16, 2014 at 4:47 pm

    What are you meaning by sc in same sc

    Reply
    • Ashlee

      November 26, 2014 at 11:38 am

      it means sc in the same sc that you just worked in (doing the sl st to close off the previous row) if you don’t say it people tend to skip that stitch, the count gets off and the seam twists. Does that help?

      Reply
  295. Ruth

    October 17, 2014 at 9:28 am

    I’m so glad I read the comments about the left and right bootie, because I too would have ended up with 2 left booties. But everything turned out great and soooo CUTE.

    Reply
    • Ashlee

      November 26, 2014 at 11:43 am

      I’m so glad! I added a note, hoping that makes it more clear for everyone!

      Reply
  296. Deni

    October 21, 2014 at 3:04 pm

    Hi there! Thank you for sharing this pattern for free! I did have some trouble navigating this pattern. I am just a beginner though, so I could be doing something wrong somewhere along the way. I paid close attention to where I was starting each row, and used a place marker to make sure I was counting up to, and from the correct place each time, but my number of stitches kept being off, somewhere and I couldn’t for the life of me figure it out! I still managed to make it work, and have completed one bootie, sans button. If you shoot me an email, I can reply with a photo of it! Again, thank you for sharing, and I’m not saying your pattern is wrong, but it just must be user error. It was driving me batty! 🙂

    Reply
    • Ashlee

      November 26, 2014 at 12:44 pm

      if you kept track of your stitch count each row you’ll know which row you got off with? is it an extra stitch EACH row? or is it inconsistent? Sometimes people add a stitch at the end of each row maybe?

      Reply
  297. Heather G.

    November 13, 2014 at 5:31 pm

    Hi! In round 3 you say to work in the back loop only. On round 4-5 and beyond, am I supposed to keep working in back loop only or switch back to both? Thanks!

    Reply
    • Ashlee

      November 26, 2014 at 1:38 pm

      nope just the one row that it says to work in back loops.

      Reply
  298. Karin

    November 13, 2014 at 6:38 pm

    I too am having a problem with the stitch count! I have ripped the first bootie out and started over three time. I’ve used a stitch marker to mark the beginning and counted the stitches several times and still come out with too many. I’m not a beginner and have never had a problem like this before. Usually if I’m off in my count I can go back and find my error but not this time!
    Help!!!

    Reply
    • Ashlee

      November 26, 2014 at 1:41 pm

      i need more details, just saying your count is off doesn’t help me help you. are you 1 off every row? or more? EVERY row? or just every other row?

      Reply
  299. Kimberly Clark

    November 23, 2014 at 11:59 am

    I would absolutely love to make these but not sure I could follow the written instructions. Would it be possible to get a video?

    Reply
  300. Tina

    December 2, 2014 at 9:44 pm

    I don’t have a 4.25 hook, but would a 4.00 still be ok or will that be too small for an infant? I’m making these as a gift and I have no idea how big infant’s feet are.

    Reply
    • Ashlee

      January 31, 2015 at 11:45 pm

      it’s AMAZING how much a slight amt of change in hook size it can make. If you make an effort to crochet loose it prob won’t be an issue. And since no two babies feet are alike it’s all just guessing anyway! My babies came out size 2 feet, so these never would have fit any of mine! I usually make the sole then measure it against the baby (or at least a baby shoe) before moving on! has the recipient had other babies before that can help you with a guess on the infant size? (maybe a hook size up if her babies, like mine, have huge feet)

      Reply
  301. Nick

    December 8, 2014 at 10:16 pm

    In winter, I don’t leave the house without my Bailey Button’s or my Maylin’s.! Tehy’re always temperature right on the cold days and the super cold days! I love them, all 5 pairs which I now own!

    Reply
  302. fawzia raza

    December 16, 2014 at 2:19 pm

    These booties are so beautiful. Are these for boys too? I want togift these to my niece who is pregnant and due in January. I love the way you have done the tutorial. Thank you for all the trouble to make cochet easy for us.

    Reply
    • Ashlee

      February 1, 2015 at 2:12 am

      Yes, the scalloped one is more for girls, and the non scalloped one is for boys

      Reply
  303. fawzia raza

    December 16, 2014 at 2:27 pm

    Thank you for this beautiful booties tutorial. Can I gift them to a newborn boy?

    Reply
    • Ashlee

      February 1, 2015 at 2:13 am

      Yes that’s not a problem!

      Reply
  304. Nicole

    December 19, 2014 at 9:16 am

    On the sole…what do you mean 2 hdc 3 times? Is that 6 hdc? I’m so confused.

    Reply
    • Ashlee

      February 1, 2015 at 2:25 am

      if the number is before the stitch name it’s the number of times you are going to do it in ONE stitch space. If the number is AFTER the stitch name it’s the number of times you are going to repeat it across the next stitch spaces. SO 2hdc 3times means you’ll be doing 2hdc in the next 3 stitches

      Reply
  305. Sheila

    December 28, 2014 at 5:58 pm

    Do you have a pattern for adult sizes? I would love to make these for my daugher..

    Reply
    • Ashlee

      February 1, 2015 at 2:37 am

      I don’t, only the baby and infant.

      Reply
  306. Jillian Mitchell

    December 28, 2014 at 8:31 pm

    I found your blog this morning and the little boot pattern. A coworker of mine just had a baby girl last week so I made some for her! So excited to give them to her, I love how they turned out! Thanks for the pattern.

    Reply
    • Ashlee

      February 1, 2015 at 2:39 am

      I’m so glad you like the pattern and I hope your co worker loves them too!

      Reply
  307. Lindsay

    January 1, 2015 at 11:09 pm

    I LOVE your pattern! I’ve already made four pairs! So excited to see my first niece wear them, once she hurries up with the being born part! Thank you SO much!!

    Reply
    • Ashlee

      February 1, 2015 at 3:02 am

      How exciting! congrats on getting a new neice and I’m so glad you liked the pattern.

      Reply
  308. carolyn

    January 9, 2015 at 8:09 am

    Would you be able to tell me how to make these booties in an adult size 6 women. Thanks

    Reply
    • Ashlee

      February 1, 2015 at 3:19 am

      I only have made these two sizes. You could try making your favorite adult bootie pattern and add a cuff in this same style.

      Reply
  309. Laurie

    February 2, 2015 at 9:01 am

    I still cant understand how to make the “other” boot. Where is the sream? In the back of the boot? I was counting from the front of the boot. The one I did make looks o cute but I’m so stuck now.

    Reply
    • Ashlee

      March 19, 2015 at 1:14 am

      the seam is where you’re chaining 2 and working up to the next row.

      Reply
  310. Laurie

    February 3, 2015 at 8:27 am

    Please tell me why the one boot I made wraps around the back and I can’t get the other boot to wrap around at all. I know it’s something very minor and I feel so stupid! Is there someone I can face-time with or see an actual tutorial? Please! I love these boots so much!

    Reply
    • Ashlee

      April 7, 2015 at 8:24 pm

      do you want to send me a picture of where it’s going wrong for you? the wraps both start just barely off center, and you need to remember to go down the sides (not across the front) so that they wrap in opposite directions (so one will be right side/wrong side/right side while the other will be wrong side/right side/wrong side) I hope that helps

      Reply
  311. Tracy

    February 12, 2015 at 6:48 pm

    I was so excited to find this pattern! Since I found it like two days ago I have finished three pairs of booties with a little modification, I extended the cuff higher so that I could put on two buttons. Here is the link to what I made. Thank you again for the pattern!!!! I already have a lot of people asking me to make them.

    Reply
    • Ashlee

      April 7, 2015 at 9:01 pm

      that’s awesome! I love seeing different variations and modifications! glad you liked the pattern and the taller cuff looks great!

      Reply
  312. Melanie

    February 28, 2015 at 9:23 pm

    I love this pattern! I had no trouble with the right or left bootie. The soles were symmetrical and needed no blocking. But then, I have been crocheting for 40 years and have crocheted with everything from crochet thread with tiny metal hooks to strips of fabric with large plastic hooks. These are the cutest and easiest booties I’ve ever made. Love, love, LOVE them! I’m working on some layettes for a set of twin girls to be born in the spring. These booties are a great addition to my gift! Thank you for sharing!

    Reply
    • Ashlee

      April 7, 2015 at 10:46 pm

      THANK YOU!!!! esp for taking the time to comment, so often I only hear about the problems so I really appreciate it! glad it worked up so easily for you!

      Reply
      • Melanie

        April 9, 2015 at 1:05 am

        ed to add…after reading some of the other comments regarding “wrong side out”…I’m a stickler for wanting my “pairs” to be “matchy / matchy”…so what I did was slip stich to where I wanted to begin the cuff for the second bootie, instead of finishing off and re-attaching. Then once I had my strap made and was ready for the shells, I finished off and re attached, working the shell design so it would face the right side. They turned out beautifully!

      • Ashlee

        May 26, 2015 at 5:56 pm

        I’m a little OCD myself, I do that myself, but when writing for others I try to keep it simpler. I know that people picky enough to want it matchy will be advanced enough to know how! Glad you liked the design! thx for leaving such a sweet comment!

  313. Lori Shields

    March 16, 2015 at 4:07 pm

    I love these booties! I just made a pair and I had no problem figuring out the left and right! I used a baby blue pearl wool and they are just goreous….thank you so much for sharing!

    Reply
    • Ashlee

      April 7, 2015 at 11:15 pm

      I’m so glad! thank you so much for taking the time to leave such a sweet comment! I really appreciate it so very much.

      Reply
  314. colette grimard

    April 6, 2015 at 10:06 pm

    i m happy to find your site .ill by aboul to do these boots thanks you very much.

    Reply
    • Ashlee

      April 7, 2015 at 11:52 pm

      I hope you enjoy them! let me know what you think!

      Reply
  315. lynette Kingipotiki

    June 4, 2015 at 4:11 pm

    I live in New Zealand and would like to thank you for the pattern. I am crocheting them for my grand babies, epecially for this cold cold wheather. thank you again

    Reply
    • Ashlee

      June 5, 2015 at 11:12 am

      you are SO welcome! I hope they keep your grandbabies warm!

      Reply
  316. Marcela

    June 10, 2015 at 12:28 pm

    Ashley, thanks a lot for the pattern. My doubt is that I don\t know where to start counting to begin the cuff. Please help me. Thanks

    Reply
    • Ashlee

      July 15, 2015 at 8:41 pm

      you start counting from the seam, where each row stopped and started, the seam. count towards the front

      Reply
    • Tea

      August 10, 2015 at 11:50 pm

      I didn’t weave in my ends at this point and counted from my yarn tie-off. 🙂

      Reply
  317. Alyssa

    July 13, 2015 at 5:01 am

    Hey! I was wondering what ply wool you used. I used 8ply and a 4.5mm hook for my first pair, and they turned out to be preemie size, or maybe smaller. <3 the pattern though! The boots are very cute.:)

    Reply
    • Ashlee

      July 16, 2015 at 12:33 am

      I used caron simply soft yarn, so it’s weight catagory 4. If your using the same yarn and it’s coming out too small it means your a very tight crocheter, so you can either make the larger pattern or try a larger hook. Rather than make the full boot just try the soles both ways to decide which one you want to move forward with! Have fun!

      Reply
  318. Amanda

    July 23, 2015 at 11:08 pm

    Hello, I love this pattern! I also am one who does not like to pay for patterns and these will be great for a baby shower I’m throwing coming up. I just have one question, and I read all the other comments and I think I am missing something cause no one else seemed to have a problem LOL. When I get to the cuff, and I finish the first row, it says to skip 2 spaces, sc in last space. I did so, but when I did the next row, I came up short. When I counted the stitches on the first row, I got 30, (10 hdc from the strap, 19 hdc following, and the sc on the end.) But I am supposed to have 32? How do I count the 2 skipped? Do I chain and count it that way? Or am I missing something on the skip 2 spaces…I’m pretty confused. Thanks!

    Reply
    • Tea

      August 10, 2015 at 11:49 pm

      I ended up with more space between my stitches and where they were supposed to be. I ended up having a stitch a couple more HDC’s to match where I was supposed to be. IDK if this will help you or not, but that is what I did with mine.

      Reply
    • Ashlee

      November 15, 2015 at 1:25 am

      it the last row of the show, row 8, you should have ended up with 23, so skipping two stitches would leave you with 21, not 19, so you should have the 10 from the strap, 21 from the shoe and that ch2 at the beginning counts as one to, so 32.

      Reply
  319. Kate

    July 27, 2015 at 1:04 am

    Hi I was wondering if you have done a YouTube video for these yet? I seem to be not so quick on the uptake as everyone else and cannot for the life of me figure out how to do the cuff. I’ve unravelled about 5 times so far trying to figure it out and I don’t class myself as a slouch when it comes to crochet. :/

    Reply
    • Ashlee

      October 1, 2015 at 9:39 am

      not yet, sorry, I’ve been focusing on my recipe/cake channel, but I’m hoping to get ahead soon and get this made asap, I’ll be sure to email when I do.

      Reply
  320. Tea

    August 10, 2015 at 11:47 pm

    Hey, so I found this on youtube and it was really helpful! I was having trouble even making one boot until I watched this video. Idk if you want to add it to your site or not, but I thought I would share it anyway. She shows the sole in the first video. Part 2 is the shoe, and part 3 she shows how to stitch the left wrap-around.

    Reply
    • Ashlee

      November 15, 2015 at 2:42 am

      no, I don’t allow people to make videos from my pattern so I won’t be sharing this video

      Reply
  321. Darlene

    August 17, 2015 at 7:33 pm

    I made my first bootie today and yay!! The pattern worked perfectly. I am a new to crocheting and it looks so adorable. Thank you!!!

    Reply
    • Ashlee

      November 15, 2015 at 3:04 am

      YAY! I’m so glad! Glad you enjoyed the pattern!

      Reply
  322. Lior

    September 5, 2015 at 9:41 am

    I am working with Lion Brand Organic COtton Medium Yarn, with a size J hook. I am trying to make the booties to fit a sole 5.5-6inches. I tried the larger pattern and it came out to 7.5 inches. Do you think this smaller pattern will work with the yarn i am using? I am very new to crochet and can’t do any adjustments on my own.
    Thanks.

    Reply
    • Ashlee

      November 15, 2015 at 3:33 am

      I always just suggest start by making the sole’s whichever one is closer to the size you are going for start with that pattern, then try going down or up a hook size.

      Reply
  323. Cherilyn

    September 18, 2015 at 9:36 pm

    I just made this for a baby girl to go with a layette set I just completed. It’s a conglomeration of so many different patterns from different sites. Your design was absolutely perfect and the cherry on top. I made a few additions and it turned out awesome. I am so grateful you offered these for free and so is the family who will be receiving them. THANKS A MILLION!!!!

    Reply
    • Ashlee

      November 15, 2015 at 5:29 pm

      you are so welcome! I’m so glad you enjoyed the booties!

      Reply
  324. Amanda

    October 27, 2015 at 1:20 am

    These are adorable, any chance of getting the pattern for adults?

    Reply
  325. Dolly

    January 20, 2016 at 5:42 am

    These are adorable. How do you get the free pattern with out printing off all the comments. I know the pattern isn’t 142 pages long. Please advise.

    Reply
    • Ashlee

      February 5, 2016 at 10:40 pm

      I offer a printable PDF for a $1 convenience fee here https://te270.infusionsoft.com/app/manageCart/addProduct?productId=40.

      Reply
  326. LAG_Z

    February 5, 2016 at 8:18 am

    It says for the right boot I must sl st into the 7th stitch from the seam. Is the seam where I fastened off? If it is, must it be seven stitches on the left or right of shoe?

    Reply
    • Ashlee

      February 5, 2016 at 11:58 pm

      yes that’s the seam and you go towards the front of the boot in both cases, so left

      Reply
  327. Cindy

    December 8, 2016 at 8:04 pm

    Hi Ashlee. Thanks so much for this pattern that makes such adorable little boots! I just finished making them for my husband’s coworker who’s having a little girl soon. I didn’t have any trouble with the pattern, but it did take a little brain power when looking at the boot, reading the pattern and making sure I was going the right direction. Luckily I didn’t have to pull any of it out due to going the wrong direction. .😊 Merry Christmas to you and your family!

    Reply
    • Ashlee

      January 25, 2017 at 9:47 pm

      yeah the cuff is a hard one to explain but once you get it your golden

      Reply
  328. silkbutterfli64 0394780

    January 24, 2017 at 4:12 pm

    I have made many pairs of both this bootie and other patterns. My daughter has asked for some more of this bootie but wants something to make it more stable and durable on the bottom. What would you recommend using for the insole? It has to be durable and waterproof.
    Thank you.

    Reply
    • Ashlee

      January 25, 2017 at 10:18 am

      sounds like she’s looking for real shoes… crochet will never be waterproof – even if you cut some leather and added holes around the edge (classic sole for crochet slippers) and just started crocheting at the sides of the booties they still wouldn’t be waterproof. But they would be durable

      Reply
  329. Valerie

    January 27, 2017 at 4:55 pm

    I just finished a pair of girls booties, in white! just added the button! 🙂 I am so tickled, they are so adorable!! thank you so much for the pattern!!! 🙂

    Reply
    • Ashlee

      January 29, 2017 at 12:44 am

      YAY! so happy to hear that! you are so welcome!

      Reply
  330. Melinda Smith

    September 2, 2017 at 11:29 am

    Thank you for this pattern! I’ve made four pair so far! I, too, had the same problem with having the booties curving to the same direction even though your pattern is symmetrical; therefore, I replaced some of the sc with hdc on the sole where it was curving. This worked great! I have made these in multicolor (7 colors on each bootie) to match a hat and blanket I made, made them taller with two buttons, and varied the stiches on the top to match the hat. I love this pattern! I’d post a photo of the multicolor booties, but I don’t see how to include a photo. Thank you again for such a cute pattern!

    Reply
    • Ashlee

      November 3, 2017 at 2:57 pm

      it curves for me too, I just block them and it fixes the problem.

      Reply
  331. Michelle

    September 23, 2017 at 6:16 pm

    I just made my first set for a baby girl. I used white yarn and light pink decorative buttons. I love they way it turns out. Thank you for sharing this pattern for free. This is my new go to pattern for baby booties.

    Reply
    • Ashlee

      October 29, 2017 at 12:29 am

      you are so very welcome, I’m so glad you like the booties!

      Reply
  332. Janice

    October 27, 2017 at 10:52 pm

    I don’t see a print button…. Would love to try to make these while sitting in the car waiting for my daughter’s practice.

    Reply
    • Ashlee

      October 28, 2017 at 10:12 pm

      I offer a printable PDF for $1 (the red download button) or you can keeping getting the pattern for free staying on my site.

      Reply

Leave a Reply Cancel reply

Your email address will not be published. Required fields are marked *

Recipe Rating


This site uses Akismet to reduce spam. Learn how your comment data is processed.

Primary Sidebar

about Ashlee Marie image
youtube facebook instagram twitter pinterest email rss

You have Successfully Subscribed!

Privacy Policy: We hate spam and promise to keep your email address safe. You'll receive email updates through AshleeMarie.com. You can unsubscribe at anytime.

Popular Posts

Homemade deep-fried monte cristo sandwich
homemade choco taco
one pot loaded baked potato soup
tamatoa cake - moana - disney
I love these candied strawberries, like a candied apple, a glorious crunch with a ripe strawberry center!

Footer

SEEN ON

as seen on
  • TV and Media
  • Privacy Policy

COPYRIGHT © 2007–2021 Ashlee Marie - Real Fun with Real Food

ashlee marie lets make some awesome
  • Recipes
    • Main Dish
    • Desserts
    • Breakfast
    • Sides
    • Bread
    • Soups & Salads
    • Drinks
    • Food Tutorials
    • Back
  • Cakes
    • Cake Recipes
    • Cake Tutorials
    • Carved Cakes
    • Wedding Cakes
    • Smash Cakes
    • Party Cakes
    • How to Video Series
    • Back
  • Parties
    • Complete Parties
    • Party Cakes
    • Party Food
    • Party Crafts & Decorations
    • Printables
    • Invitations
    • Back
  • Holidays
    • Valentines
    • St. Patricks Day
    • Easter
    • Cinco De Mayo
    • Mothers Day
    • 4th of July
    • Halloween
    • Thanksgiving
    • Christmas
    • Back
  • Travel
    • Culinary Travel – Cooking Schools
    • Family Travel
    • Disney
    • Universal Studios
    • Blogger Trips
    • Back
  • Videos