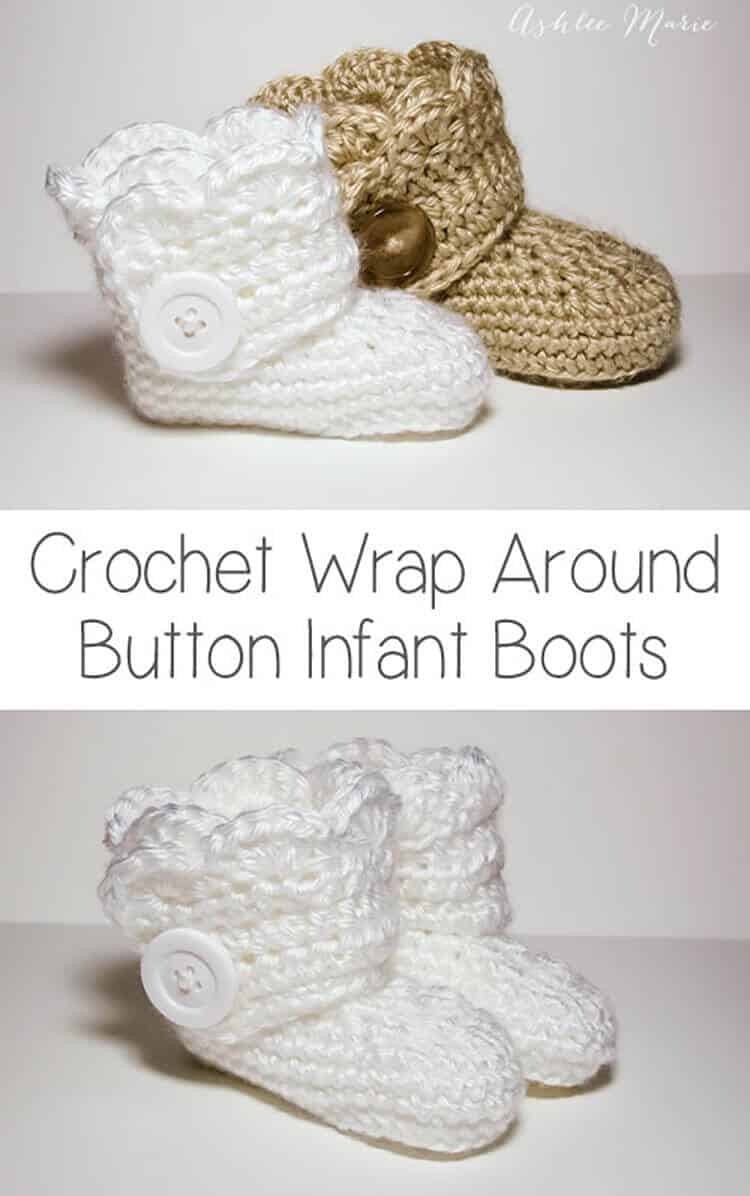
This is an easy to follow pattern to make wrap around infant booties – both for boys and girls.
Okay, after some confusion I’m separating out the patterns. Here is the one for the INFANT size! I realized after making a second set of these that I have two G hooks and they are different sizes???
So for the larger Baby sized shoes I used a G6 – 4mm for these infant shoes I used G6 – 4.25! So if your looking for an infant size 1 (or 0-3 month) boot your in the right place! For a larger (closer to size 4) shoe go to the crochet wrap around button baby boots!
Buy BOTH the Ad-Free pattern pdf’s for both the Baby AND Infant sized discounted here!
The pictures are still the same as before, for the larger size, I’ll try to substitute out smaller pictures when I make another pair!
Buy the Ad-Free pattern pdf for just the infant size here!
Infant wrap around boots
Crochet materials:
caron simply soft yarn
large buttons
G6- 4.25 mm hook (To go up a size use a larger hook, or a larger pattern, to go down a size use an G-4mm hook)
abbreviation:
ch (chain)
sl st (slip stitch)
sc (single crochet)
hdc (half double crochet)
dc (double crochet)
sc2tog (single crochet 2 together)
dc2tog (double crochet 2 together)
dc3tog (double crochet 3 together)

sole:
ch 11
row 1- sc in 2nd ch, sc 5 times, hdc 3 times, 7hdc in last ch, finish the rest of the round working along the back of the chain, hdc 3 times, sc 5 times, 4sc in the last/first ch, sl st to the first sc (28)
row 2- ch1, sc in same sc, sc 7 times, hdc, 2hdc 3 times, 3hdc (in one stitch), 2 hdc 3 times, hdc, sc 8 times, 2sc 3times, sl st to first sc (39)
shoe:
row 3- ch1, working in back loops, sc in same sc, sc around, sl st to first sc (39)
rows 4-5- ch1, sc in same sc,sc around, sl st to first sc (39)
row 6- ch 1, sc in same sc, sc 9 times, sc2tog, dc2tog, dc, dc3tog, dc, dc2tog, sc2tog, sc around, sl st to first sc (33)
row 7- ch 1, sc in same sc, sc 7 times, sc2tog, dc2tog, dc3tog, dc2tog, sc2tog, sc around, sl st to first sc (27)
row 8- ch 1, sc in same sc, sc 5 times, sc2tog, dc, dc3tog, dc, sc2tog, sc around, sl st to first sc, cut yarn weave in ends. (23)

Boot cuff:
for the right boot sl st in the 7th stitch from the seam, for the left boot sl st in the 11th stitch from the seam
ch 12
row 1- hdc in 3rd ch from hook- ch2 counts as hdc, hdc in next 9 ch, hdc in first sc (the same one you sl st in), hdc 19 times (there will be 3 spaces left), skip 2 spaces, sc in last space. (32) **note – some people had a problem with getting two right or two left feet. remember to not cross over the front, work down the inside, around the back and back up the outside, so you’ll work in opposite directions for each bootie, counterclock wise – looking top down, or “wrong” side out for the right booties and clockwise, or “right” side out for the left bootie**
row 2- ch2 (counts as hdc), turn, hdc in first hdc and around 28 times, ch 1 skip one hdc, hdc in last 2 (31- with a ch1 space)
row 3- ch2 (counts as hdc), turn, hdc, hdc in ch1 space, hdc around (32)
row 4 scallops (girls)- turn, 5dc in second hdc, *skip 1hdc, sc in next hdc, skip 1hdc, 5dc in next hdc*, repeat around (8 shells), sc down the side (I fit 5), continuing around sc across the bottom along the original chain (11), sl st, cut yarn and weave in ends

row 4 simple (boys)- ch1, turn, sc across top (32), down the side (5) and across the bottom chain (11), sl st, cut yarn and weave in ends
And both the boys and girl versions (again these are the larger size)
Don’t forget to add a button where ever you like and your done! I placed mine at the bottom of the 5th hdc over from the front- I might go lower next time… or maybe two smaller buttons?
And one final picture, I thought you might want an inside shot so you can see how it wraps a bit… I’m still so very much in love with these boots.


Claire
I.LOVE.THESE. They make me feel the same way I do when I see that fabric softener teddy bear! <3
Come visit us over at http://www.thesitsgirls.com!
Ashlee
thanks so much! They make me pretty happy too!
Maggie
Thanks for sharing the boot pattern
Ashlee
Your so welcome! I hope you enjoy it!
nicola
hi can i use dk yarn or does it have to be aran my baby is 3 months old will they fit her x these are absolutely fabulous lil booties
Ashlee
you can use any yarn you want, just know it will change it a bit. i like using soft, specific to baby, yarn for anything I make for babies, so it’s not scratchy. If you go up or down in yarn or hook size you’ll get a slightly different size in the booties.
Hannah
Thank you for sharing your pattern so freely. I have now made two pairs and am very pleased with how cute they are. I used loop stitch on the cuff and made them a little taller, but I did little else as your pattern was so clear.
All the best
Ashlee
thank you so much! I’m so glad the pattern was clear for you, sometimes I get so many questions or complaints I wonder if I just shouldn’t share! So I love hearing positive feedback!
kay
Thank you so so much for this pattern! You are brilliant and so kind to share! I’ve made a couple pairs of these, tweaking one into little rain booties 🙂 So sweet! Again, thanks.
Ashlee
CUTE! I want to see the rain booties! what a fun idea!
Olivia
my seem on the side seems to be going slanting toward the toe instead of straight up. I’m not sure how I am adding stitches. when you count the stitches after you have slip stitched into the first sc do you count the stich the loop on your hook is coming out of? or just the one after it around to the one before it? thanks so much!
Ashlee
its totally normal for it to look a bit twisted in the direction youve been crocheting, it will work itself out (but get worse before it get’s better), just keep going! and when I say sc in the same sc that is the one you just sl st into, thus the SAME sc your already working in.
Janie
I added two sc at the beginning of row 6,7 & 8. this fixed the twisting problem.
Ashlee
I’m glad you found something that works for you, but the soles are written symmetrically, if you add stitches to one side it will end up throwing the whole shoe off later.
Schaara
Love, love, love this pattern! I just finished making a pair for a friend that is due next month. I’m due in February and will definitely be making a pair (or two or three 🙂 for my little boy.
Thank you so much for posting a great tutorial and pattern. I’ve been looking everywhere for something like this!
Ashlee
your so welcome! I hope your friend likes them and that you baby does too!
Karen Jenkins
I would love to make these boots but don’t find a print pattern option,I don’t want to print over 200 comments along with the pattern,could you please help with this?
Ashlee
I’m sorry, I’ve been looking in to a print it plug in, but I can’t get any of them to work for me. I’ve emailed bloggers that have the feature that I like and they won’t respond! I’m not getting any answers, so I’ll keep trying. But for now what I always do with blogs that don’t have that feature is highlight the text from the blog, paste it into an emtpy word document and delete the pictures. it should end up just a few pages.
rikie chevelle stanley
this is beutiful. im on my 2dn
Ashlee
thank you so much! I’m so glad you liked them.
rikie chevelle stanley
these are beutiful. how do you do an adult pair.
Ashlee
I don’t know. I hate having things on my feet, I don’t even own socks, and yarn on my dry cracked heels would probably kill me… 😉 I have not, and will not create adult booties. Sorry.
Pilar
Hi! Loved your bootie pattern so much I already started my project for a baby girl. I just finished one that was supposed to be the right bootie, but the strap wraps around to the left side, so it’s actually the left one. I’m afraid to start on the right one because I don’t know how to make it turn the other way. I know the pattern says sl st in the 11th st but how do I make it go the other way? THanks so much!!
Ashlee
after you sl st and do the chain out and hdc down the chain you need to go down the side and around the back, NOT across the front. if you cross the front your shoe will wrap the wrong way. Hope that helps.
Emily
Thanks so much for sharing your pattern! I have a question though… How do you make the left foot? I noticed that the sole has a curve making it the right foot. Please email me back the answer if possible, thanks!!!! Emily
Ashlee
the sole is symmetrical, same number of stitches on each side, it tends to curve in the direction you are crocheting but just keep going, it will work itself out in the end. after your all finished just block the shoes (OR just put them straight on the baby, it works itself out)
Ashlee
I added a diagram of the sole, hopefully that will make it more clear
Alise
Do you sell these? I don’t know how to knit but I’d love to get some for my niece. Thanks!
Alise
Ashlee
I do not, but quite a few people on Etsy sell them using my pattern. Feel free to buy from one of them. But it’s crochet, not knit, so when doing a search try searching for CROCHET baby booties. Good luck!
MrsHMG
Whew! Thank you so much for this tutorial. These are adorable boots! I must admit this took me several attempts over the last two days, but I am very pleased with my final product. I did make a few adjustments, but I think I was only misreading the pattern. I would say that I was a beginner (with most of my experience in knitting, not crocheting), but now I believe I am well on my way to being a moderate crocheter. Thanks
Ashlee
I’m glad your happy with it!
Valarie Rogers
I just found this (and pinned it, naturally). I’m making a set for my niece who is expecting in about a month from now. The set I’m making is in DK yarn. Now, my opinion of Caron Simply Soft is that it’s more of a 3.5 weight, as I often use Vanna’s Choice which is thicker than CSS, though both are classified as 4. The yarn I’m using for this set is 3. So if I’m using DK weight with this very cute pattern, what would you suggest, size H hook? Size I?
I’m almost finished with the blanket, still have booties and dress to make, all in this same yarn.
Ashlee
I’d try the G 4.25 and just do the sole. the sole doesn’t take much time and can tell you alot about your sizing. If it seems to large or open, or to small and tight adjust after that. She’s a lucky girl!!!
another option if when you make a practice sole it’s too small or too loose you could make the larger BABY version of this with a smaller hook to still get a small size. does that make ANY sense?
Caryn
Hi! I have had these booties “pinned” on pinterest for awhile now, just waiting for someone to have a baby! I now have a niece on the way and am working on these for a christmas gift 🙂
I’m just having a little bit of a problem with the scallops for the girls version:
(Row 4 scallops (girls)- turn, 5dc in second hdc, *skip 1dc, sc in next hdc) – I have the 5dc in second hdc, but what is the “*skip 1 dc” – because we are crocheting on the hdc layer. For my first pair, I just skipped over the “*skip 1 dc” but wound up with too many scallops and a “flaired” effect. Can you help??
Ashlee
fixed it, it should be skip 1 hdc sc in next skip 1 hdc, scallop…
Jolee
I have really enjoyed this pattern. Slightly confusing at first just because it is written a littel different but for the most part makes sense!
Just a thought-I was confused when making the cuff of the 2nd booty and for some reason kept messing it up! You could do it on the opposite side but if you forget and put it where you did the other one, just turn it inside out when you done! VOILA! Now yes the back loop stitches you did are not quite as prominent but it looks good otherwise.
Thanks! Happy Crocheting everyone
Ashlee
sorry you had trouble with the cuff. let me know if I can answer any questions
Courtney
Hi there! These are adorable! I managed to successfully make a pair for my baby. However, I am a novice crocheter and it took me a few tries to get them right. Well as right as I think they are anyways. I have a few questions: do you work into the same stitch that you chain 1 in in each row? Do you count your slip stitch as part of your row count? My slip stitch seam ends up crooked and its supposed to be straight im assuming, meaning that you slip stitch in the same spot in each row which would cause a vertical seam right? Mine tends to be crooked/diagonal which mean I am messing up with slip stitching into the correct stitch and the starting the row in the correct stitch. Help please, I love these and am trying to make another pair as a gift. I have gotten sooooo many compliments on the pair I made for my son. Also, is the cuff supposed to overlap over the front of the show cause mine sort of looked like mary janes once they were buttoned? It is unclear to me where exactly to starts the strap, didn’t know what seam you were referring to to count from? I hope you can help me, thank you so much for sharing this patterns for free!
Ashlee
a sl st does not count, when I ch 1 and sc in same sc that’s working the stitch in the same stitch you just sl st in. other wise the seam will twist badly. my seam is straight but a little twisting is okay, too much means your not working in the right stitches.
and the seam I’m referring to when counting out where to start the cuffs is the only seam on the booties, where you end your rows and start a new one, the seam you just called a seam in your question, 😉 if you don’t want to finish off and count you could always sl st 8 /12 times to get to where you want to start your ch, but I don’t like the bulk that adds to the booties. if you look at the picture you can see that where you start is just off center for both cuffs.
does that help? let me know if it’s still unclear!
KrochetKenda
I absolutely LOVE this boot!!!! If this isn’t the cutest pair of footwear I’ve seen for a baby, I don’t know what is! Thank you very much for this FREE PATTERN!!!
Ashlee
thank you so much!!! I think they are pretty darn adorable myself!!! I can’t wait to see what you do with them!