One of the reasons I wanted to get a silhouette was so I could use it with fondant. Now the silhouette machine isn’t approved by the FDA to use with food. But I have NO doubt it will be soon. It’s fantastic. And because it’s the silhouette you get all the same benefits. Use your own font’s, images, create your own images, etc…
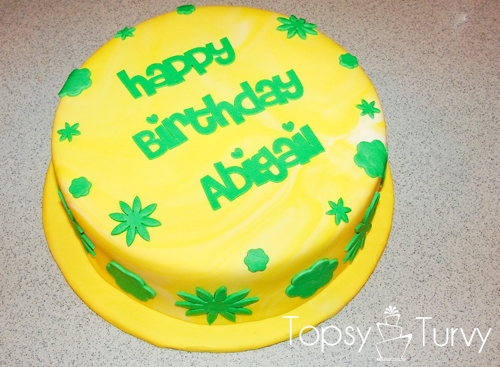
For this trial cake I used the brightest colors I had on hand so you could see it better. To begin with you want to use a different blade that what comes with the normal silhouette. I bought this blade and kit from Linda McClure. Just getting the blade is worthwhile, but she also has great instructions, tips, tricks, etc… Including a recipe for making your own gumpaste (which I haven’t tried yet, but it looks easy enough).
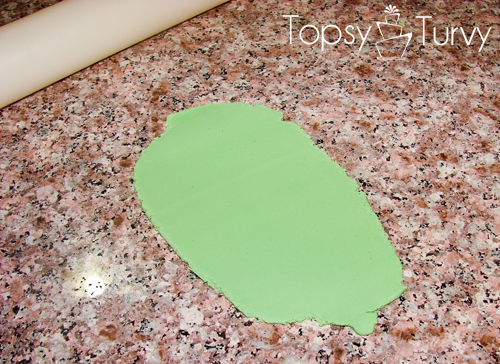
I ended up having to remix my fondant so it changes colors halfway through the tutorial. I didn’t want to bother with gumpaste this time. So I used my fondant and added some gumpaste powder to give it strength. This is important because it will allow you to roll out the fondant super thin and stay strong. It does make it very tough, so don’t add TOO much.
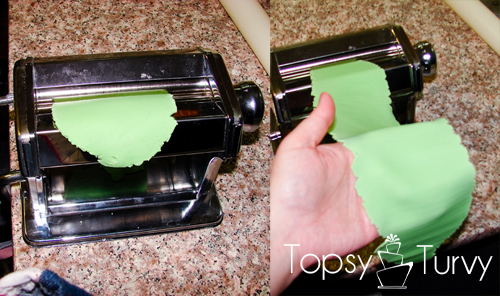
I rolled it out the best I could then I used my pasta maker to roll it out even more. I didn’t go to the thinest, but the second thinnest I could get it.
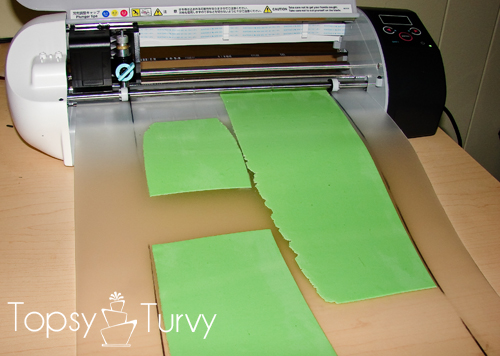
Linda shares what she uses for a mat, and how she makes/creates it too. I’m assuming you could use a cricut cake mat, but I just followed her great instructions. It took some trial and error to get large enough sheets the right size to work with.
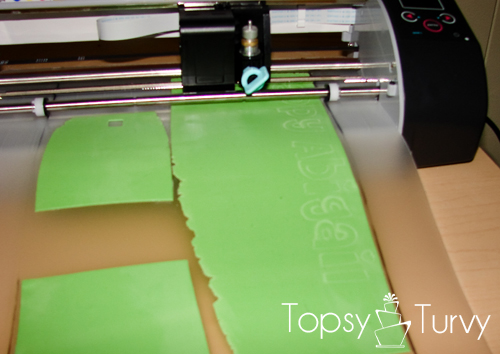
It also took quite a bit of trial and error to get the cutting just right. Lucky the silhouette software has a great test cut feature! First I had to adjust the blade itself correctly, THEN I had to adjust the thickness in the silhouette software. Linda teaches you using her favorite software, but I personally enjoyed using the silhouette software.
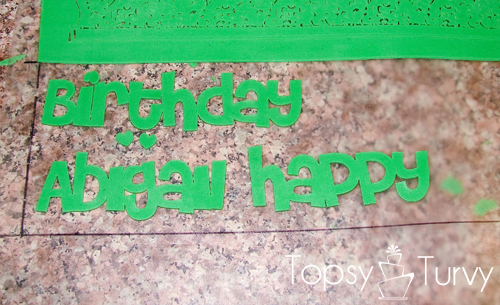
Here you can see that the font and writing worked great, but if you look JUST above it the more detailed design I wanted didn’t work out too well. it was TOO detailed for the soft fondant. It might’ve worked with gumpaste, but honestly I think I needed to make the design simpler.
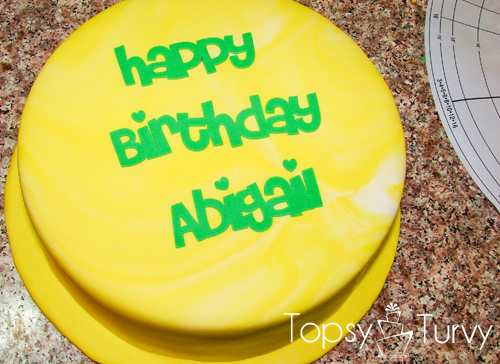
I just used clear vanilla to attach the writing. I ended up going with flowers instead of the detailed grass/flowers I wanted. Anyway, it was a great trial run, and I can’t wait to play with it some more!
I BOUGHT my very silhouette kit from Dessert Designs. I am in no way affiliated with them, and they don’t even know I wrote this post. I just think she has a great product (the special blade) and good ideas and instructions.


Christine
That is totally cool! I had no idea the Silhouette could do that. Is there anything that great machine can’t do?
Ashlee
Isn’t it! I figured people started using the criciut for this before the criciut cake came out so I could use the silhouette for it as well. But you really do need this other blade. None of the blades the silhouette comes with will cut the thicker fondant, let alone be food safe.
Jessica
Where do you get the blades from?
Ashlee
I bought my blade kit from here http://www.deseretdesigns.com/custom.html
Laura Khouri
Hi Ashlee, i clicked on the link and the whole package came up. how can i just buy the food grade blade>
regards
Laura 0400 33 11 93
Ashlee
I just bought the whole package (not the machine just the package) I don’t think they sell it any other way. you can’t just buy the blade part you have to have the special cartridge that holds the blade, that’s where the expense comes in. and the DVD she sends with it goes over way more than I covered here and is totally worth it.
Danielle {Whipperberry}
OH MY WORD!!! That is great Ashlee.
Ashlee
Thank you so much Danielle! That means a lot coming from you! I’m so glad you liked it.
Rebecca@RootsAndWingsCo
Love it! What is the cutting board that you used made out of?
Thanks,
Rebecca@RootsAndWingsCo
Ashlee
Just the dollar store flexible cutting mats!
Mariëlle
Do I understand this right, you did use the normal Silhouette, not the one the made for food?
Ashlee
There actually ISN’T a food silhouette yet. Only the cricut has that. But people started using the cricut for this before they had the cricut food as well, and with the silhouette you get so many more options of designs since you aren’t pinned down with cartridges. So I figured why not go for it! I would bet they are working on getting FDA approval so they’ll have their own food version soon enough. Or hopefully just a blade and mat option
Mariëlle
Thanks so much for sharing this. I am going to order the set. This is so great,
Ashlee
That’s great! It was totally worth it. I haven’t tried her print and cut yet, don’t want to invest in edible ink and a 2nd printer!
Randi
That is amazing!! I can’t believe you can do that. When I get brave enough, I’m definitely trying it!
Ashlee
Thanks! Give yourself a lot of time the first time. It took me a while of playing to get it right, but it was all fun!
Stephanie
Just another reason why I am glad I broke down and bought a silhouette. Thanks for the tutorial.
Ashlee
exactly!! I just couldn’t see getting the type of machine that needed a ton of expensive cartridges all the time. So the silhouette was just brilliant! love love LOVE it already!
Sommer
This is FANTASTIC! I had no idea my machine could do this lol. I have the older version. It’s not the SD, does that matter? My birthdy is in two weeks and I’m going to ask the hubs for her kit =)
Ashlee
It doesn’t matter at all! You’ll be able to use it with the original machine too! I can’t wait to see what you do with it! Her tutorials are great, let me know if you have any questions! I used fondant with gumpaste powder, but her recipe for gumpaste is super easy too!
Sue
Did you cut the dollar tree mats or just use them as is and mark the cutting area? It looks like your mats are wider than the Silhouette mats.
Thanks
Ashlee
i did cut them to fit into the opening, but they ARE larger than the silhouette mats, I drew the lines on (the back side) to match the silhouette mat so it matches where it can actually cut.
Jessica
Can you help me? I am using my silhouette to cut gum paste per Linda’s instructions but I cannot use the MTC that she likes to use (I have a mac) and I have let my gum paste rest overnight already rolled out but when I cut my design it just tears up the gum paste. I have adjusted the special blade 20 times and can’t get it right as well as the custom settings in the SS software for thickness. What did you do and what paper setting in the SS software did you use? Thanks so much for any help or advice you can give!!! 🙂
Ashlee
I use the silhouette software myself. and I don’t use a paper setting I created my own setting. I set the speed slow, like 3, and the thickness thick, like 24. I left those settings alone and then played with the blade adjustment. I actually rolled out the fondant (I used fondant with a bit of gum paste powder added to it) and cut it right away actually. I didn’t do it frozen or cold or having set out. When I had the blade too short it cut up my fondant, or when I tried to small or detailed of a project it also tore it up. play with a simple thick design. Oh… Also I didn’t go quite as thin as she did with her pasta maker. I think my pasta maker is different from her’s. In the end my fondant is the thickness of a penny and my blade sticks out about the thickness of a nickel. I hope that helps a little???
Angie
Love this. I have a digital cutter too and I think I might try it. Thanks for sharing.
Ashlee
It works with all digital cutters, and The website I got my blade from has blades for all the different machines with great tips on getting started! Good luck!
Nike@ChooseToThrive
No. freakin’. way. This is incredible! I’m so excited you gave this a try and helped troubleshoot for the rest of us!
Ashlee
Pretty darn awesome huh? I’m still getting the hang of using it, I keep having to reroll out the fondant and tweak here and there. But so worth it.
Leslie
I never thought of doing this before, and now I can’t wait to try it out…thanks so much for the great tips!
Ashlee
I’m still getting used to it, I tend to scrap the first few attempts and get it right the third time. But it’s worth it and I get better every time I try it! Let me know how it goes when you try it!
Jordan (Wayward Girls' Crafts)
Turned out beautiful!
Ashlee
Thank you so much! It’s so much fun to play with, I’m going to master it one of these days!
Vivienne @ The V Spot
Stop it! Are you kidding me!? This is genius!
Ashlee
Thanks! I get better every time, and there are so many possibilities for it. I really need to play with it more!
Laura
THANK YOU for this. I have been wondering how to use my silhouette to cut fondant.
Ashlee
I hope it helps you! I’m so glad I ordered the kit, the blade and tips make such a difference. I think a few more cakes and I’ll have a better handle on it!
Kara
Now that is cool!!! Cannot wait to get the blade! Thanks for the tips 🙂
Ashlee
The blade and her video in the kit is so so SO worth it, but be patient, it still takes playing around with it quite a bit. Hope you enjoy it as much as I do!
The Outlaw Mom
So totally awesome. No other way to describe this idea! Now I really can’t can’t can’t can’t wait to get a Silhouette for my birthday. Only a few more months! Thanks for sharing 🙂
Ashlee
ohhhh and you’ll get the larger silhouette, the Cameo! If only I’d waited 6 more months… JEALOUS! You’ll have so so SO much fun with it.
Allison @ House of Hepworths
I featured you this week at my Hookin Up with HoH party!
Feel free to stop by and grab a button if you’d like!
xoxo
Allison @ House of Hepworths
Ashlee
Wow! Thanks so much! I’m tickled that you like my tutorial! I’m still mastering the technique but it really is SO much fun!
Beth @ Free Stylin'
Oh my gosh!! This is so awesome!! Thanks for the great tip!
Ashlee
Thanks! Having the right blade makes all the difference, after working with it I an see how it just couldn’t be done with the reg blade!