• Skip to primary navigation
  • Skip to main content
  • Skip to primary sidebar
  • Skip to footer

Ashlee Marie - real fun with real food

  • Recipes
    • Main Dish
    • Desserts
    • Breakfast
    • Sides
    • Bread
    • Soups & Salads
    • Drinks
    • Food Tutorials
  • Cakes
    • Cake Recipes
    • Cake Tutorials
    • Carved Cakes
    • Wedding Cakes
    • Smash Cakes
    • Party Cakes
    • How to Video Series
  • Parties
    • Complete Parties
    • Party Cakes
    • Party Food
    • Party Crafts & Decorations
    • Printables
    • Invitations
  • Holidays
    • Valentines
    • St. Patricks Day
    • Easter
    • Cinco De Mayo
    • Mothers Day
    • 4th of July
    • Halloween
    • Thanksgiving
    • Christmas
  • Travel
    • Culinary Travel – Cooking Schools
    • Family Travel
    • Disney
    • Universal Studios
    • Blogger Trips
  • Videos
    • Recipe Videos
    • Short Videos
    • Kitchen Tip Videos
    • Video equipment links
  • Crafts
    • How to & Craft Tutorials
    • Crochet & Knit Patterns
    • Decorations
    • Photoshop
    • Sewing Projects
  • Shop
    • Video equipment links
    • Baking and Kitchen equipment
Home » Cakes » cake tutorial

Using my Silhouette to cut Gum paste

Published: June 1, 2011 | Updated: November 12, 2019 | By Ashlee

  • Facebook
  • Twitter
  • Yummly

One of the reasons I wanted to get a silhouette was so I could use it with fondant.  Now the silhouette machine isn’t approved by the FDA to use with food.  But I have NO doubt it will be soon.  It’s fantastic.  And because it’s the silhouette you get all the same benefits.  Use your own font’s, images, create your own images, etc…

using-silhouette-machine-cut-fondant

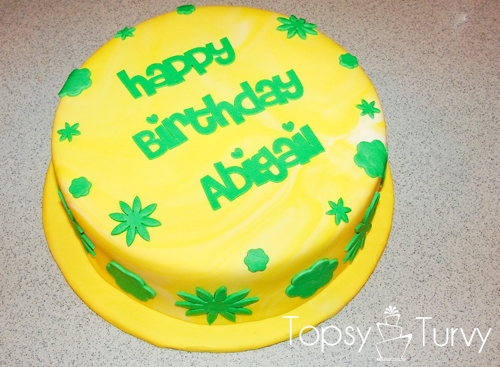
For this trial cake I used the brightest colors I had on hand so you could see it better.  To begin with you want to use a different blade that what comes with the normal silhouette.  I bought this blade and kit from Linda McClure.  Just getting the blade is worthwhile, but she also has great instructions, tips, tricks, etc…   Including a recipe for making your own gumpaste (which I haven’t tried yet, but it looks easy enough).

using-silhouette-machine-cut-fondant

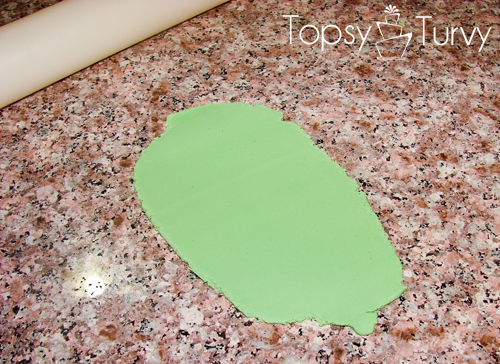
I ended up having to remix my fondant so it changes colors halfway through the tutorial.  I didn’t want to bother with gumpaste this time.  So I used my fondant and added some gumpaste powder to give it strength.  This is important because it will allow you to roll out the fondant super thin and stay strong. It does make it very tough, so don’t add TOO much.

using-silhouette-machine-cut-fondant-pasta-maker

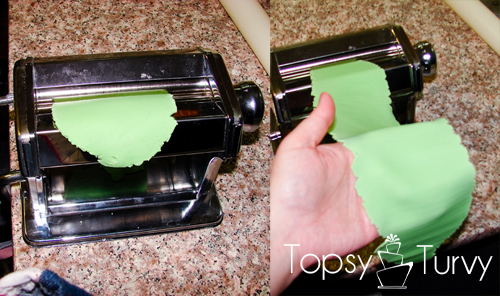
I rolled it out the best I could then I used my pasta maker to roll it out even more.  I didn’t go to the thinest, but the second thinnest I could get it.

using-silhouette-machine-cut-fondant

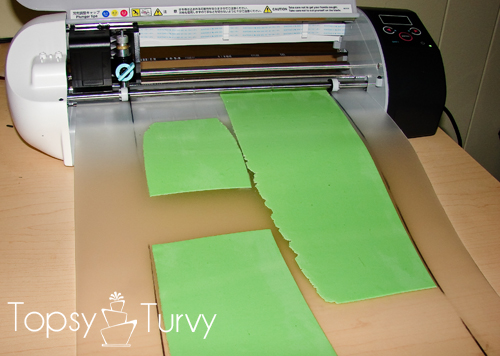
Linda shares what she uses for a mat, and how she makes/creates it too.  I’m assuming you could use a cricut cake mat, but I just followed her great instructions.  It took some trial and error to get large enough sheets the right size to work with.

using-silhouette-machine-cut-fondant

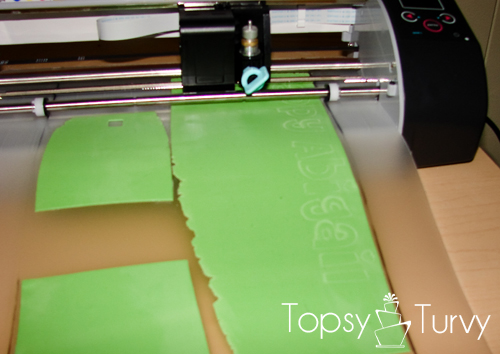
It also took quite a bit of trial and error to get the cutting just right.  Lucky the silhouette software has a great test cut feature!  First I had to adjust the blade itself correctly, THEN I had to adjust the thickness in the silhouette software.  Linda teaches you using her favorite software, but I personally enjoyed using the silhouette software.

using-silhouette-machine-cut-fondant

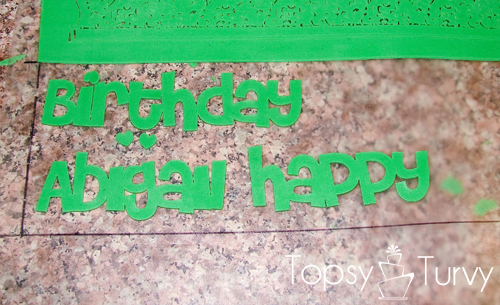
Here you can see that the font and writing worked great, but if you look JUST above it the more detailed design I wanted didn’t work out too well.  it was TOO detailed for the soft fondant.  It might’ve worked with gumpaste, but honestly I think I needed to make the design simpler.

using-silhouette-machine-cut-fondant-happy-birthday

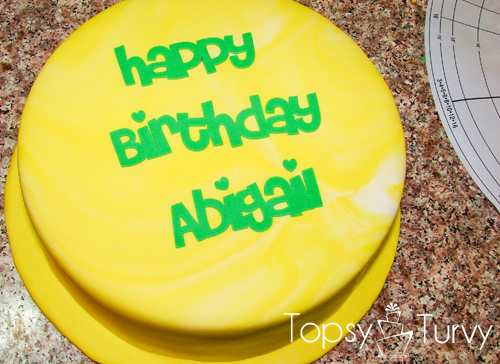
I just used clear vanilla to attach the writing.  I ended up going with flowers instead of the detailed grass/flowers I wanted.  Anyway, it was a great trial run, and I can’t wait to play with it some more!

using-silhouette-machine-cut-fondant

I BOUGHT my very silhouette kit from Dessert Designs. I am in no way affiliated with them, and they don’t even know I wrote this post. I just think she has a great product (the special blade) and good ideas and instructions.

Related Posts:

  • Fondant Roses Tutorial
    Fondant Roses Tutorial
  • Kermit and Constantine Cake
    Kermit and Constantine Cake
  • Topsy Turvy Cake tutorial
    Topsy Turvy Cake tutorial

JOIN MY NEWSLETTER!

Become an insider and receive this FREE Maple Icing Recipe (not seen on the blog!)

You have Successfully Subscribed!

Privacy Policy: We hate spam and promise to keep your email address safe. You'll receive email updates through AshleeMarie.com. You can unsubscribe at anytime.

  • Facebook
  • Twitter
  • Yummly
ashlee marie

About Ashlee

With the right tips and tricks, I believe YOU can make, bake, or create anything. This is what I love to do - make some awesome, teach you how, and give you that boost of culinary confidence you need to rock your own kitchen! Read more...

youtube facebook instagram twitter pinterest email rss

Reader Interactions

Comments

    Leave a Reply Cancel reply

    Your email address will not be published. Required fields are marked *

    Recipe Rating


  1. Katia Pereira

    September 10, 2017 at 11:39 am

    Hi Ashlee, can you please tell me if I can use Linda’s package with KNK cutting machine? I did not see any place to choose the blade for different cutting machines. I know you start talking about this subject a few years ago. Do you know if is anything else in the market now to cut/work with edibles?
    Thanks,
    Katia

    Reply
    • Ashlee

      November 3, 2017 at 2:54 pm

      I have no idea, I don’t even use the silhouette anymore, I’ve switched to the cricut, and I found it was much easier to just hand cut fondant 90% of the time! I’d reach out to Linda and ask her

  2. Lorraine

    October 4, 2017 at 12:33 pm

    I own a cameo 3 just wondering how do you clean the machine after using fondant or Gumpaste?

    Reply
    • Ashlee

      October 29, 2017 at 12:03 am

      I didn’t find that it got very dirty – since it needs to be so dry to cut, it used it’s own blade, and that’s really all that touched the fondant, as you need to push the rollers off to both sides so they don’t touch the fondant.

« Older Comments

Primary Sidebar

about ashlee marie
youtube facebook instagram twitter pinterest email rss

You have Successfully Subscribed!

Privacy Policy: We hate spam and promise to keep your email address safe. You'll receive email updates through AshleeMarie.com. You can unsubscribe at anytime.

Popular Posts

Homemade deep-fried monte cristo sandwich
homemade choco taco
one pot loaded baked potato soup
tamatoa cake - moana - disney
I love these candied strawberries, like a candied apple, a glorious crunch with a ripe strawberry center!

Footer

SEEN ON

as seen on
  • TV and Media
  • Privacy Policy

COPYRIGHT © 2007–2023 Ashlee Marie - Real Fun with Real Food

ashlee marie lets make some awesome
  • Recipes
    • Main Dish
    • Desserts
    • Breakfast
    • Sides
    • Bread
    • Soups & Salads
    • Drinks
    • Food Tutorials
    • Back
  • Cakes
    • Cake Recipes
    • Cake Tutorials
    • Carved Cakes
    • Wedding Cakes
    • Smash Cakes
    • Party Cakes
    • How to Video Series
    • Back
  • Parties
    • Complete Parties
    • Party Cakes
    • Party Food
    • Party Crafts & Decorations
    • Printables
    • Invitations
    • Back
  • Holidays
    • Valentines
    • St. Patricks Day
    • Easter
    • Cinco De Mayo
    • Mothers Day
    • 4th of July
    • Halloween
    • Thanksgiving
    • Christmas
    • Back
  • Travel
    • Culinary Travel – Cooking Schools
    • Family Travel
    • Disney
    • Universal Studios
    • Blogger Trips
    • Back
  • Videos
    • Recipe Videos
    • Short Videos
    • Kitchen Tip Videos
    • Video equipment links
    • Back
  • Crafts
    • How to & Craft Tutorials
    • Crochet & Knit Patterns
    • Decorations
    • Photoshop
    • Sewing Projects
    • Back
  • Shop
    • Video equipment links
    • Baking and Kitchen equipment
    • Back