My first Topsy Turvy cake was for my cousins 16th birthday. I loved it then, but now that I’ve had more practice I think it was an absolute MESS. I learned a lot from it and each one after that has gotten better and better! The pictures today actually came from the second Topsy Turvy cake I made, 2 years ago, for my daughters 1st birthday party. While I go through all the steps for carving a Topsy Turvy cake here I didn’t want this post to be 5 pages long so I’m assuming you know some of the basic’s, but if not I’ll add links to take you to some basic instructions to help you out. And if there is something you don’t know or understand let me know!
This is the cake I’ll be showing you. The three layers are 4 inches, 6 inches and 8 inches. Each started at 3 inches tall.

To get started the first thing I always do is to get the cake boards ready to go. You don’t want to be ready with something and have to stop to make a board. You need a cake board for each layer, and each cake board should be 2 inches smaller than the layer (but no smaller than 2 inches). So for the 4 inch cake I had a 2 inch cake circle, the 6 inch cake had a 4 inch cake circle and the 8 inch cake had a 6 inch cake circle. Then wrap them all in foil. Then for the main cake base I took three 8 inch circles (3 for strength, this will be one heavy cake), stack them together and wrap it in Foil. So in the end I had a 2 inch, 4 inch, 6 inch and 8 inch (extra thick) cake circles.
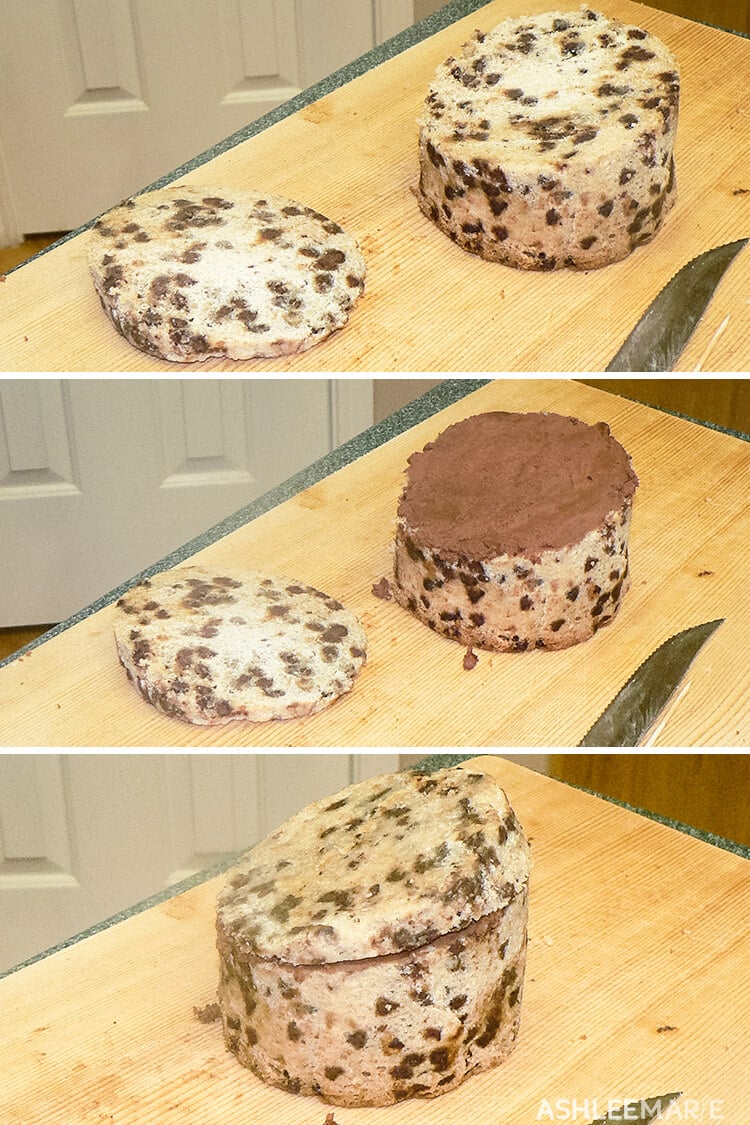
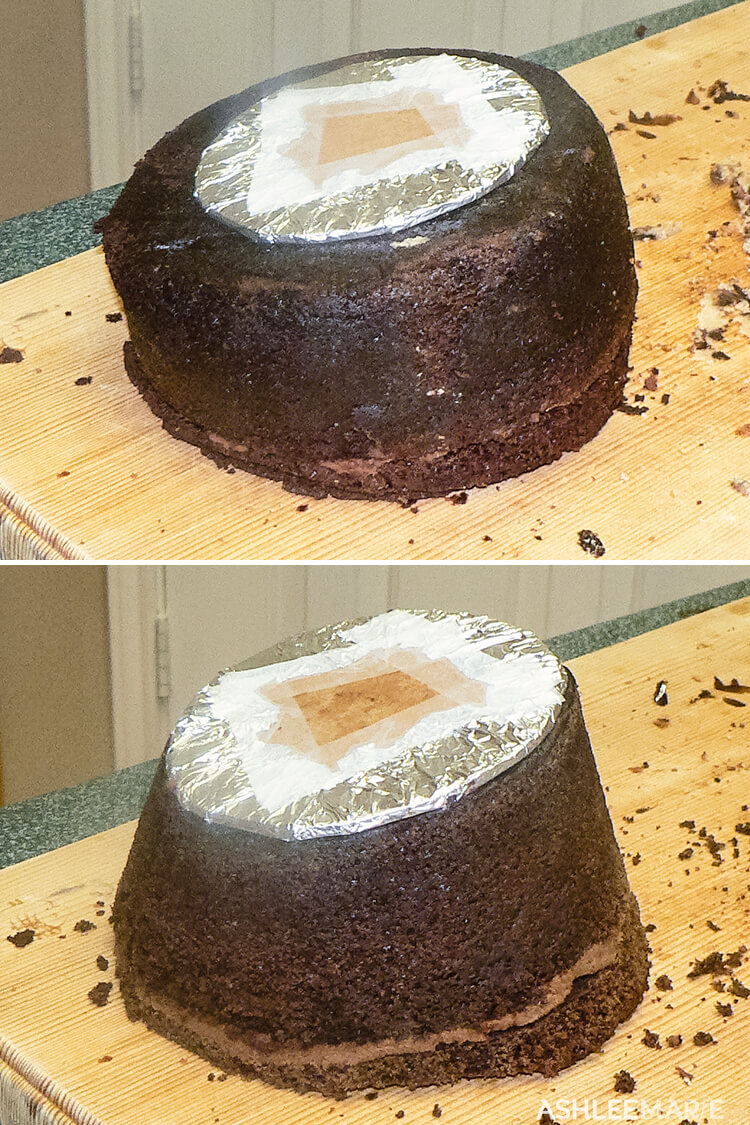
Time to start the cakes now. WARNING: do NOT use cake mixes. They are too weak and crumbly for the stacking and carving. Use very dense cakes, like pound cakes for your recipes. This is a great site for Pound cake recipes. For more tricks and instructions go to this post for my tips and tricks for baking a great cake. After the cake is baked I let it cool for about 10 mins, then as soon as I can stand to handle it I wrap it in a few layers of plastic wrap and put it in the freezer to cool. I do this so that instead of all the steam leaving the cake while it cools it’s trapped inside, creating a super moist cake. Normally as soon as it’s cool you can take it out. But I find it easier to carve a more frozen cake so if I’m going to carve it I leave it in the freezer. Start with cutting off the tops to create a flat surface to start with. You can see mine just got out of the freezer by the chalky white color on the chocolate layer.

Now we’re going to carve the top angle of the cake. Here is where it get’s tricky. You want your cake to be at LEAST 3-4 inches tall for this style. A three inch tall pan is a great way to start, but you can also extend your pan height by using parchment paper, I show you how in this preparing your cake pan tutorial. Now, carve the angle on the cake. Sometimes I find it easier to place the cake on it’s side, if it’s still mostly frozen. Starting at one of the top corners carve down at an angle. You want the larger side of the wedge to be about 1/3 of the cake height. In this cake the top wedge is 0″ on one side and 1″ on the other, while the bottom is 3 inches thick on the tall side and 2 inches thick on the short side. Here you can see the two pieces.
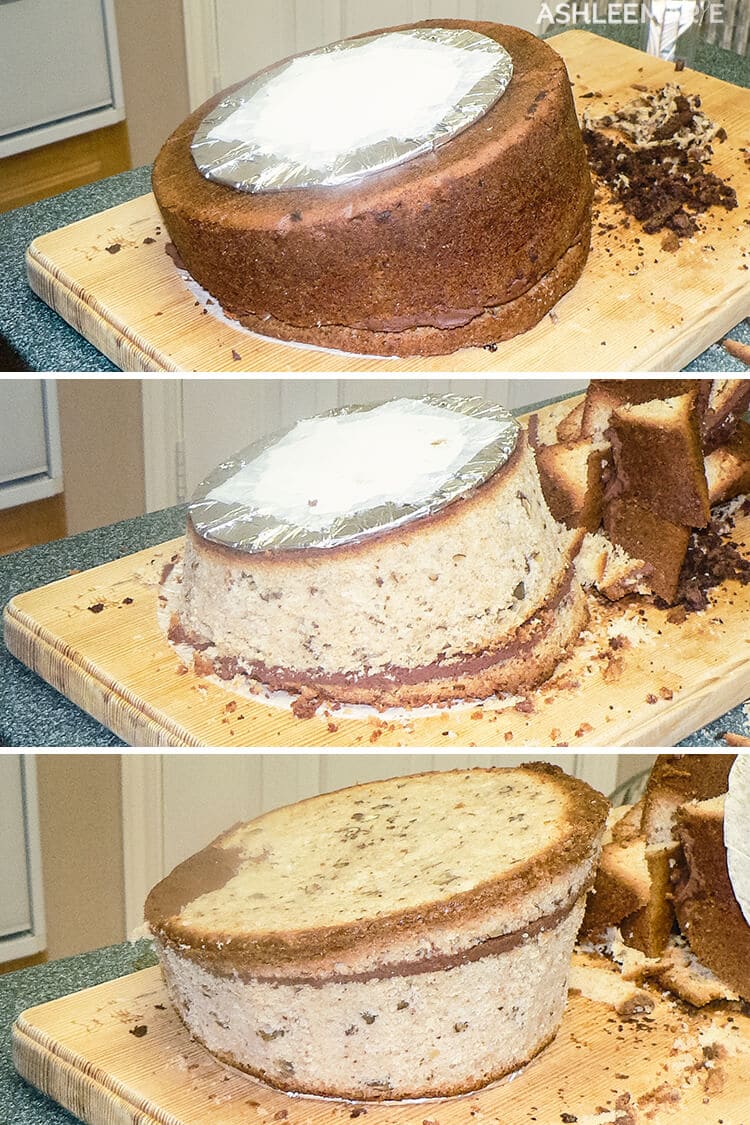
Then your going to GLUE the pieces back together, thick sides touching to create a sharper angle to the cake. You can use frosting, but I prefer to use room temperature Ganache, it prevents slipping. Spread it onto the thicker piece (you don’t want to risk ripping the thin top slice.)
Then you are going to “glue” the two pieces together (cut side together). It’s like you just rotated the cut top 180 degrees. This will create a 4 inch tall side and keep the 2 inch short side.
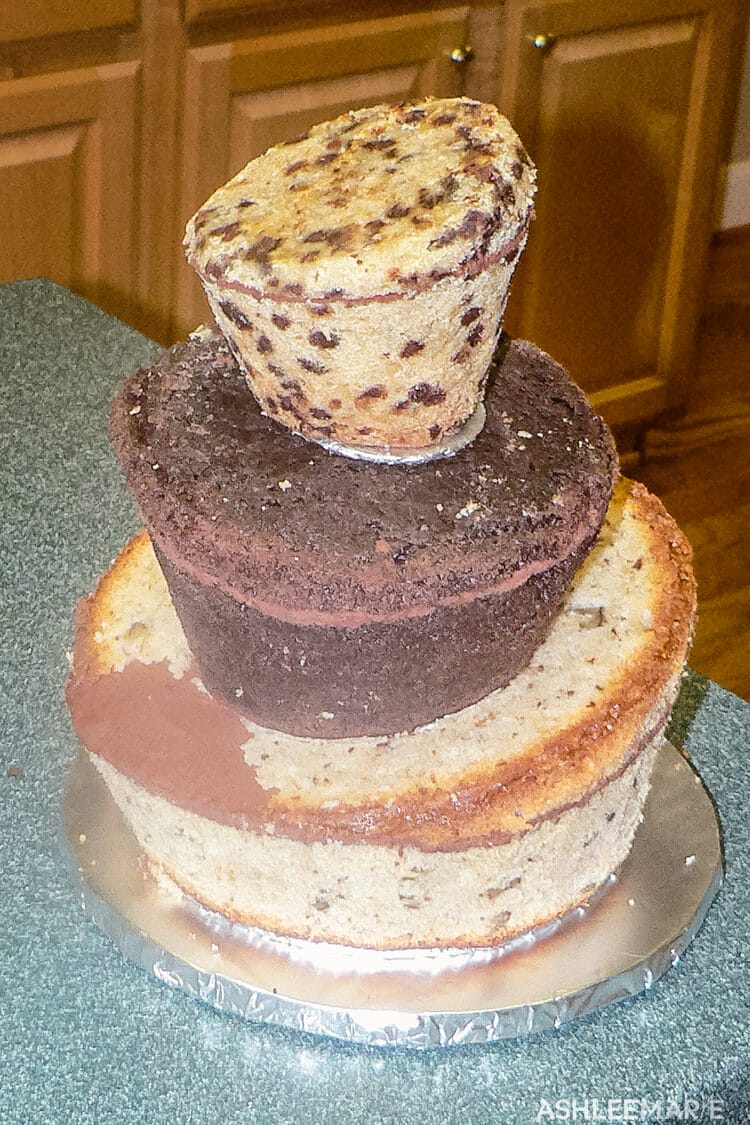
Here are pictures of the other cakes with the angle carved and “glued” back on.
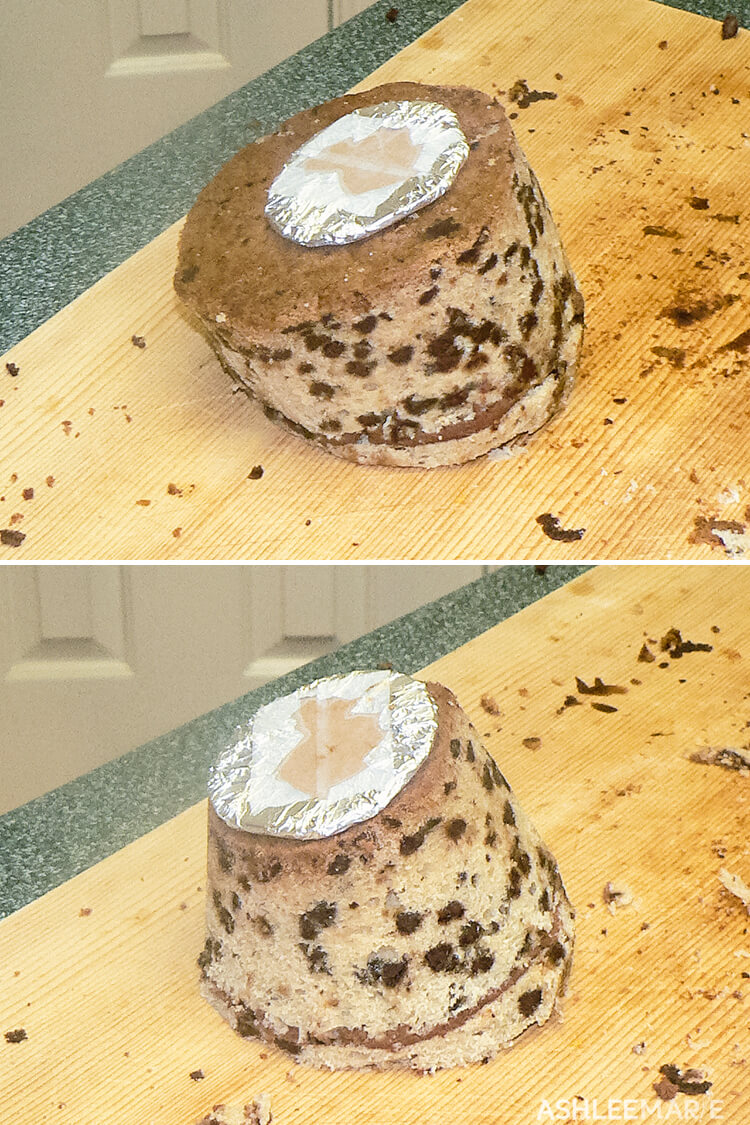
Now turn the cake upside down (I put the parchment circle down so it wouldn’t stick to the crumbs or to the board.) and put the cake board on the cake. For the largest layer place the cake board in the center of the cake. (for the smaller 2 layers start with the cake circle closer to the tall side.)
Starting at the cake board carve out to the edges. Carve a little at a time. Better to have to carve more later than to carve too much and regret it.
Then you flip it back over and carve a bit of the edge away so it’s a soft corner instead of a hard sharp corner. You don’t want to cut too much, so be careful! You just don’t want it so sharp that it cuts the fondant when you lay it on!
Repeat 8-9 on the smallest layer. Here you can see how the cake board is closer to the tall edges on the smallest layers. It creates a better finished look.
Repeat 8-9 on the middle layer. You can see again that the cake circle is much closer to the taller edge.
Here you can see a quick mock up of what it will look like finished… I just wanted to practice what angles I wanted everthing at, but didn’t want to pracice once the frosting and fondant were on and make a mess. You don’t want to just do opposites. Tall layer, to short layer to tall layer. It’s more like each tall layer is at one of 3 corners, instead of back and forth. Is that at all clear? Or toally confusing. Like a clock. In the base layer here the tallest is at 12 O clock, the middle layer tall side is at 8 O clock and the mini layer tall side is at 4 O clock. Was that more or less confusing… Anyway, now is the time to play with it a bit…
Then frosting. This is just like a regular cake, but a thinner layer. If you go too thick when you put the fondant on you’ll just end up squeezing out a bunch of frosting OR you’ll get a bulgy look instead of a nice sleek finish to the shape. You can use normal buttercream, or my new favorite Ganache. I like using the Ganache because when it cools it hardens a bit, but because it’s almost completely chocolate I can just rub my hand over a spot and the heat of my finger is enough to melt a point right down and get a nice smooth layer. Be caustion frosting the smallest layer, it is so light I just held it in my hands to frost, it kept falling off anything I put it on. It doesn’t have to be perfect.
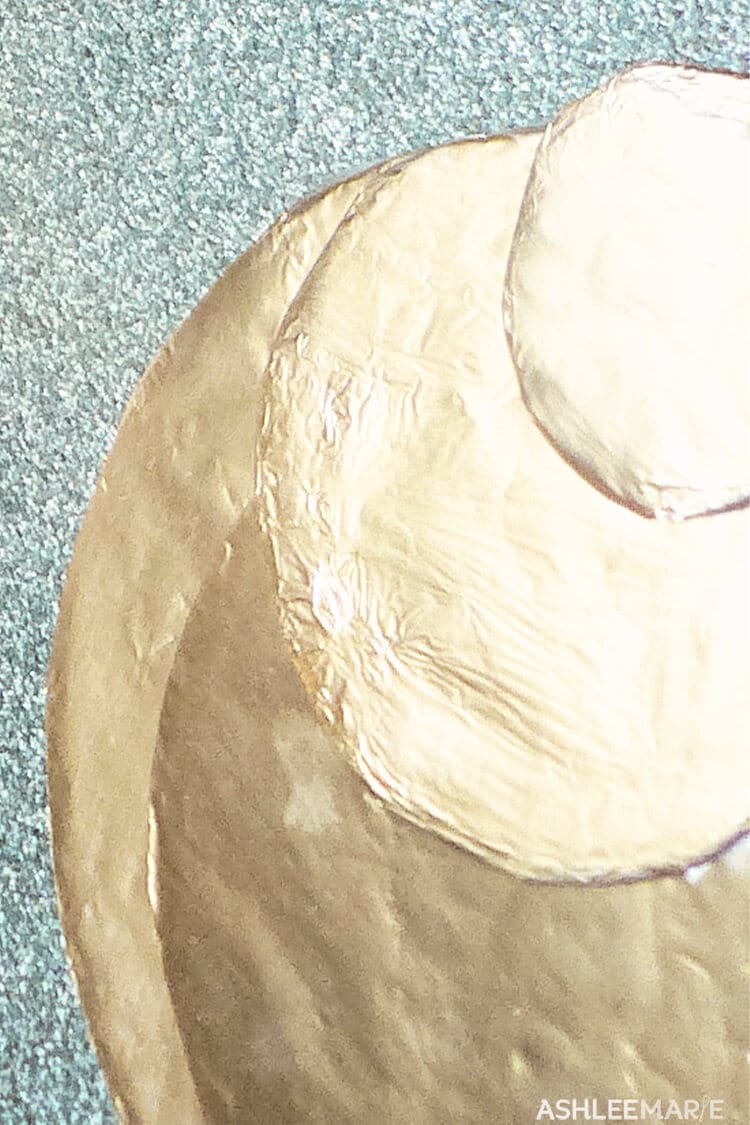
Fondant: THICK fondant is the key. I like mine between 1/8 and ¼ of an inch. Lay it over the cake then cut off the excess right away (anything that hangs over the cake board, you don’t want the weight of it pulling the rest of the fondant), then work on the shape, slowly going around the cake, don’t try to perfect one side at a time, it won’t work. Work a bit, turn, work a bit turn, work a bit turn… etc… Pushing it into itself and with the thick fondant you can allow for a bit of pulling down as well. Also use the fondant smoother (keep it clean and DRY) to help push the extra fondant down once the shape starts to hold. Then using a sharp knife cut just under the board streching the fondant around the cake board a bit to hold. You always want to cut underneath so none of the board shows (see the next one for more details). I like to use two fondant smoothers so I don’t get any finger marks as I smooth everything down. If you get any air bubbles in your fonant use a very thin straight pin at a 45 degree angle (not straight in, it leaves a hole) and push it into the bubble. Using the fondant smoother press the air of of the hole you mad. Notice it isn’t perfect… Anything not perfect get’s covered up with the detail stuff later. To cover the cake board use piping gel, or corn syrup to make it sticky then lay the fondant on top. I spread it around the cake board and sides with my finger.
The support dowels. So that your cake doesn’t collapse you want to support each layer with dowels. Usually, for a traditional stacked cake, you cut all the dowels to match (I bought a garden cutter for the dowels, it’s sharpe and cuts well, but I keep it in the kitchen. You never want to use something you use on flowers on your food.). When they match perfectly your cake will be perfectly level. Also food grade dowels are considered safer than regular old dowels from the home depot… I’m not sure what difference it would really make, but when I make cakes for others I take ever precaution. ANYWAY… (this is a different cake, because I didn’t photograph this party the first time around!)
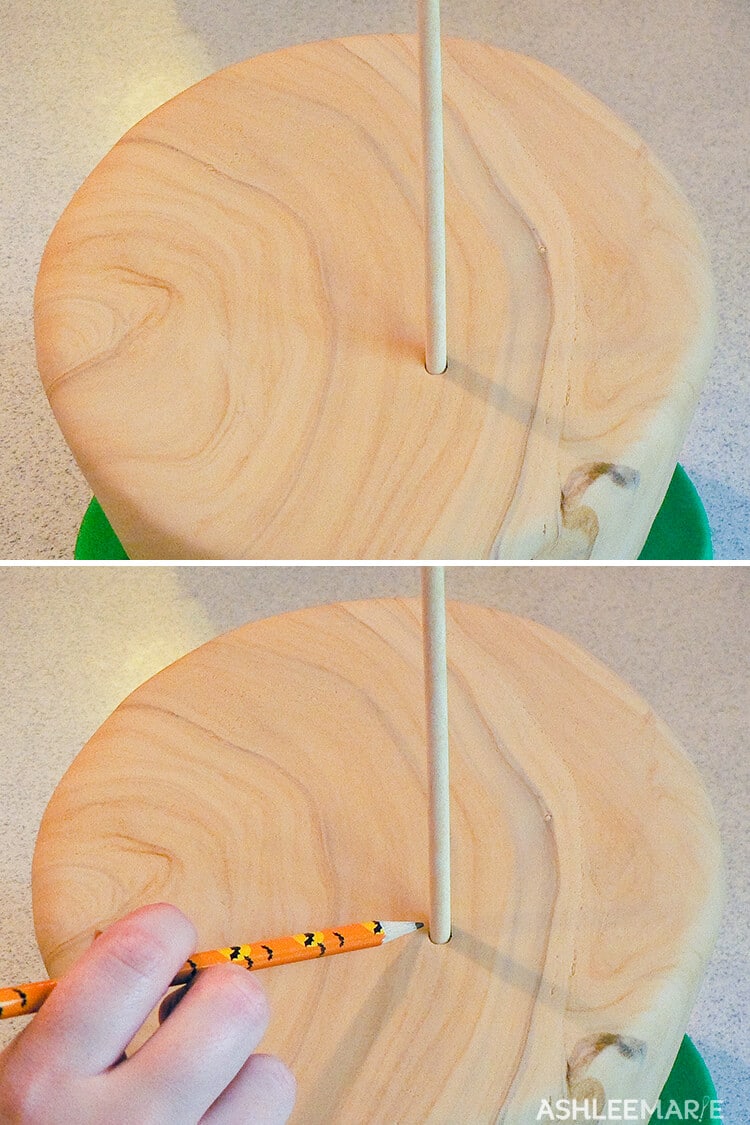
So push a dowel into the cake, mark all around with a pen or pencil and pull it back out.
Now your going to cut the dowel (with your separate, only for food cutters). For a normal flat cake you cut the dowel flat. For this cake you want to cut at the angle you already marked. Fondant has a bit of give to it, so instead of cutting RIGHT at the mark your going to cut just underneath the mark you made. This way the next layer will sit down into the fondant a bit instead of sitting on top leaving a gap between the layers.
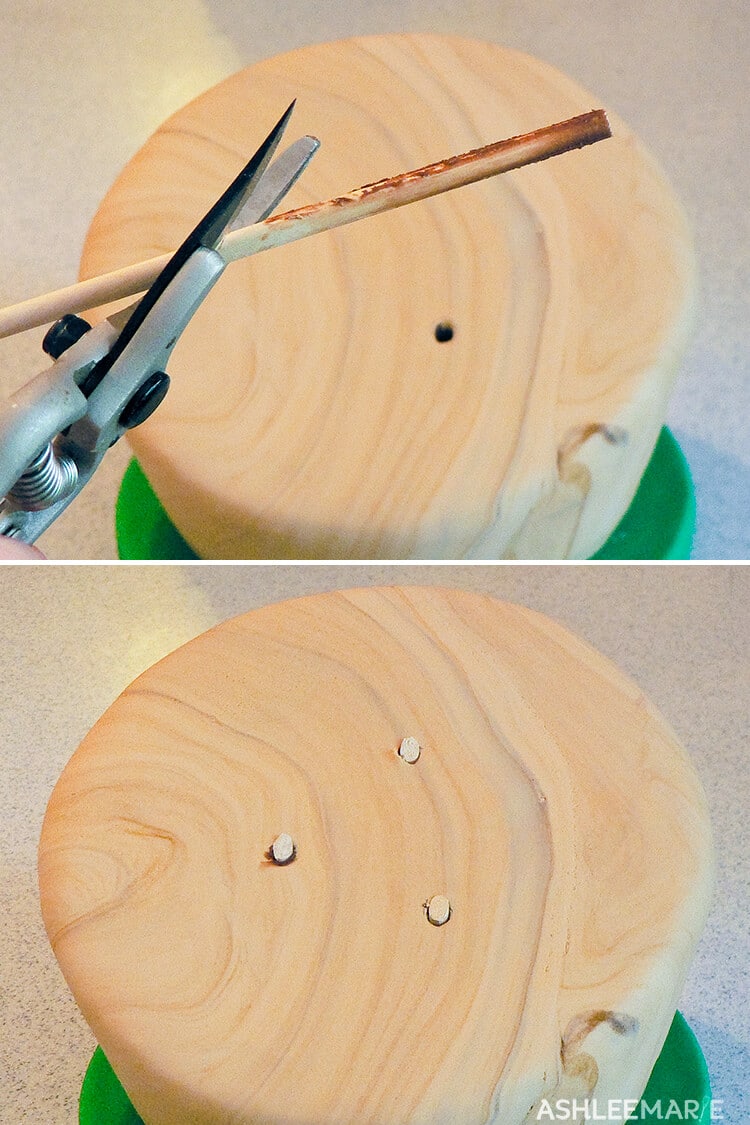
Do this for all 3-4 (or more depending on the size of the cake) dowels individually. Each one will be different height’s obviously.
Place the next layer on top of that. Now to stabilize the layers. We don’t want anything slipping off! So take a longer dowel and sharpen one edge. Push it into your cake layer. When you get to the cardboard you’ll need to hammer it slightly to push it through. Then keep pushing it through the bottom layer, and hammer it into the bottom cardboard layers.
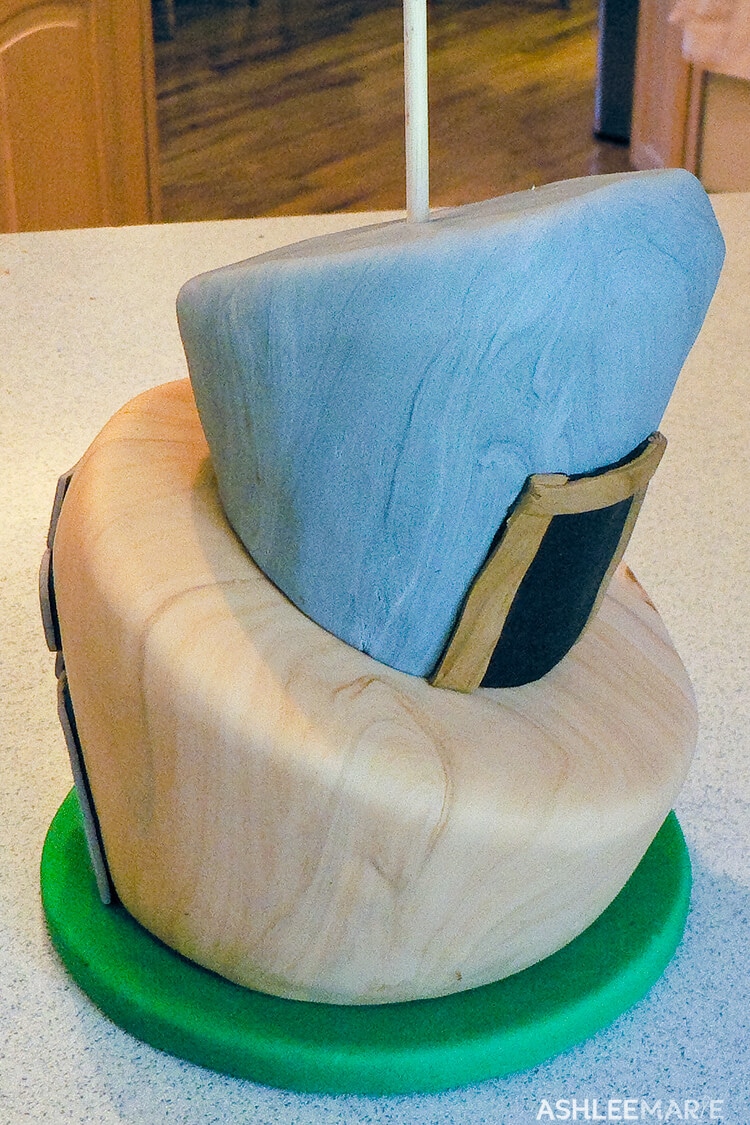
Now to add the top layer. In this case it’s small enough that you don’t have to add more support dowels but if you top layer is larger or heavier than mine you’ll want to. You COULD put all three layers together and THEN hammer in the stabilizing dowel, but then your left with a hole in the top of the cake. So that only works if you have a decoration for the top of the cake. At the times when you don’t have a top decoration, or not one large enough to cover the hole then this is what you want to do. Cut dowel so it won’t go through the top of your layer, and sharpen it.
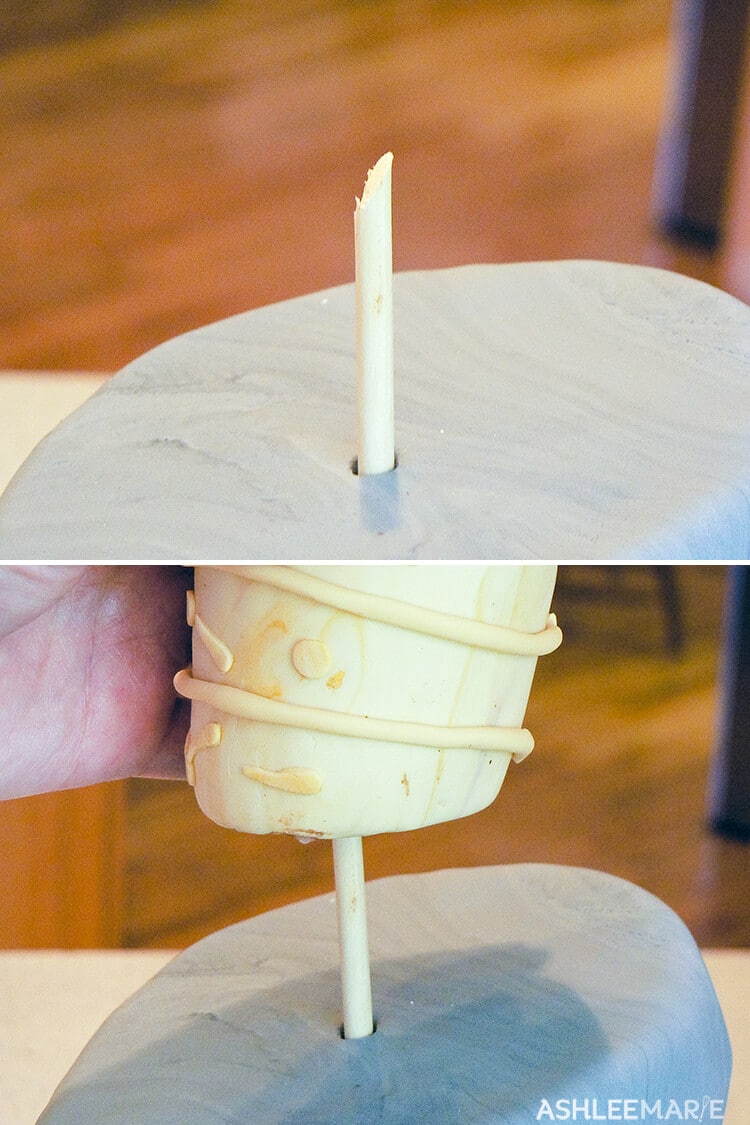
Now before I put the cake on this small cake board I put in a hole for preparation of this step. So just slowly slide the cake onto the dowel! Pretty slick, huh?
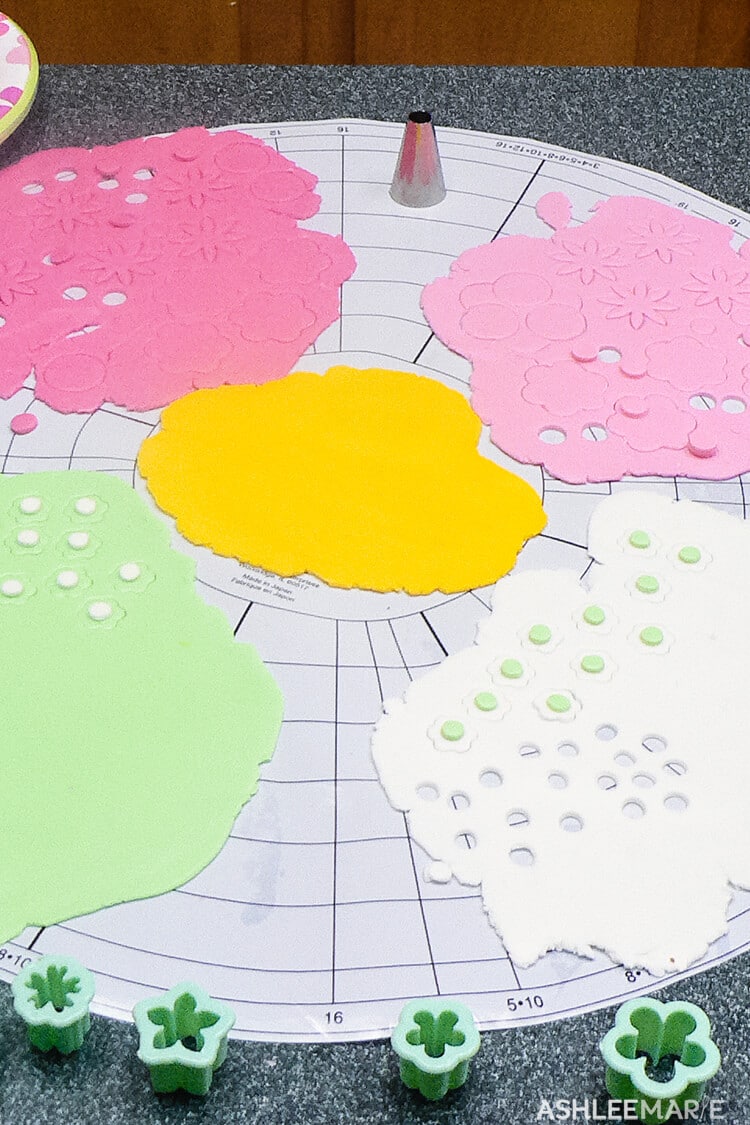
Now The cake is done, but of course you want to decorate it. So back to our first, example cake. Finally roll out the colors for your decorating, as thin or thick as you want. Then cut out your shapes and decorate. To adhere them to the cake use Clear Vanilla. Notice I rolled out Yellow, but didn’t use any.
And you have the final cake!


Cheri Peoples-its so very cheri
You are being featured in my favs tonight.
All of your urls were broken so I had to search for pictures so it may not be everything you posted-sorry
Cheri
Ashlee
It’s so annoying, but I’m trying to go back and fix links one post at a time…
Jacqueline
Thanks for the great tutorial. I have made a few of these, but have done it differently. You have a lot of great tips that I am going to try. Thanks for taking all the time to teach.
Ashlee
There are a million ways to do anything! That’s the great thing about cakes these days. They don’t have to be the same! Let me know if you try this version, or any of my tips. I’d love to see how it turns out!
Jennifer
Coming over from Today’s Creative Blog to say hello!
I am itching to try a Topsy Turvy cake but they make me soooo nervous. Your cakes are gorgeous!!!
Ashlee
You should totally try it. The secret really is dense strong cakes. So just use any pound cake recipe and go to town! And if you cut too much it’s really not a big deal! No one but you know’s what you wanted it to look like, so if it ends up a bit narrow no one else will notice at all!
evi
Hi and many thanks for the amazing tutorial!!!
I made the cake BUT I had few problems.
First, are you sure that the cakes on the tutorial are4΄, 6΄and 8΄?
Because they look much bigger than mines…..
Second., I simply could not cover the cakes with fondant (and I have covered a lot of cakes…) at the bottom. I had to cover the ends….
Any suggestions?
Thanks
Ashlee
yes, the cakes are 4, 6 and 8. They were each pretty tall too, remember. I’m not sure what you mean by you couldn’t cover the bottom? the bottom as in the cardboard? I never cover the bottom, just the tops and sides. the key to fondant is using HIGH QUALITY, not that crap Wilton sells. I like Satin ice for being affordable, but I really like Massa. And not rolling out your fondant too thin. you want it about 1/4 inch thick, to be able to get it around the cake without ripples.
Heleen
Hi. After searching the web for days I am glad tohave stubled upon your site / tutorial.
However > I never seem to be able to bake cakes that are ‘high’ enough. Please let me know your tips and trics b ecause yours look absolutely fab!
Thnx 🙂
Ashlee
just add more batter, often a batch and a half or a double batch. Then cook at a lower temp and for longer, and use bake even strips so the sides won’t over cook. is yours falling in the middle? what elevation are you at? higher elevation baking is much more difficult.
nyny
hi im making my first topsy turvy cake for my sons birthday is going to be a 4 tier cake, my question is it is safe to use the cake extender and a cake mix box or is better to make the batter from scratch i want it to be a solid cake , also do i need a special base or do i use only the suports you cut into the cake for each tier tnks for your time and the tutorial i cant wait to use it
Ashlee
I’m not sure what you mean by cake extender? Do you mean my tall layers?
Never ever EVER use a box cake mix for fondant if you can help it. It’s okay for buttercream, but simply can’t handle the weight of the fondant. My sister did it once and the cake totally collapsed before the party.
AND cake mixes don’t carve well either. I only use very dense cakes for carving, pound cakes work esp well.
I don’t do anything special for the base, but use 3 cake circles so it’s a little stronger. and just use the dowels for the support structure.
nyny
sorry also what size cakes do i use and how many pound of fondant do i need sorry this is really my first time 🙁
Ashlee
you can use any cake size you want, mine for this cake was 4, 6 and 8 inch rounds, 5-6 inches tall. I’ve never even stopped to measure how much fondant I use. Avoid the wilton brand, it’s terrible to work with, I like Satin ice, but Duff’s is okay (not great, but okay). I buy 20 lbs at a time.. I think 5-10 lbs depending on how much your decorating it up.
Tia
I love your cakes! How do you get the different color fondant, I noticed you had some that was swirled. I am making my daughter first birthday cake and I’m going to take 5 months to practice. Also in decorating do you use gum paste or modeling chocolate?
Ashlee
it depends, sometimes I buy it colored, sometimes I color it myself. When I do I use gel coloring. if you don’t mix it in all the way you’ll get a marbled effect.
Shirley Chetty
Hi can u please post a tutorial on how to make Iron Man`s outfit in sugar paste
Ashlee
I’ve done iron man’s gloves on one cake, and his mask on another, but I’m not really interested in doing his whole outfit. I like picking details of a character to put on a cake, not making figures. Try a decorator that specialize in figures, it’s just not what I’m best at.
Sheila
Aren’t they called tiers and not layers?
Ashlee
layers are the cake layers within a tier. so both are used in cake decorating, but I tend to call it all layers, confusing I know, sorry.
Melanie
Hello
Thanks for all these amazing tips, everything is perfectly clear.
I am going to do my first topsy turvy cake for friday, I watched a lot of howto and there is one thing I can put an explanation on.
Sometimes people remove a bit of the inside of the cake on the top of the taller side before covering with fondant.
So in the end there is like an empty “hole” so that the upper cake lays horizontally and not in diagonal.
(I dont know if my description is clear enough.)
It seams easier to maintain so that the upper tier doesn’t slip but it seams like cheating to me, Wouldnt feel like I did a regular topsy cake, see?
What do you think , is there a real explanation to the diferents methods ?
Maybe it depends on the cake style ?
Many thanks in advance for your comeback.
Have a good day.
Regards.
Ashlee Marie
I’ve seen that to, it’s a personal preference. It seems like a smart option, no reason not to do it! I just had always done it this way so that’s why I shared it.
Jennifer
The best fondant I have found & tastes great is the marshmallow fondant you make with a bag of mini marshmallows water and powdered sugar. It tastes great & very easy to work with- also easy to color because you can put your color in the water.
Ashlee Marie
I don’t personally like marshmallow fondant. I think it’s too soft, and I don’t like working with it as much as a quality fondant – I like satin ice. But it’s a personal preference and you should use whatever you feel comfortable with!
Paula Geheb
When you mention wrapping the cakes in plastic wrap and putting them in the freezer – is that after they are removed from the pan?
Ashlee Marie
yes, I take the cake out of the pans about 10 mins after taking them out of the oven and wrap them to keep the steam in the cakes and keep them moist.