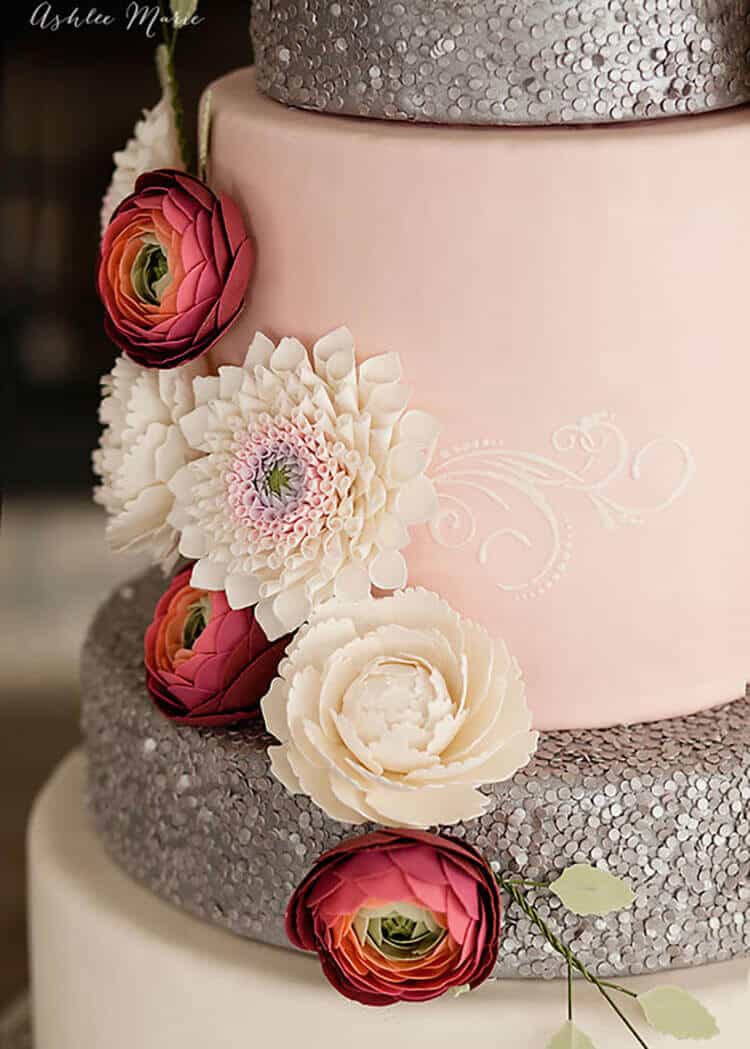
I’ve been crazy busy MAKING a ton of fun projects and recipes! I’ve been on a roll and have been having so much fun! I have so much to share with you, and I’m starting with sharing the tutorials from this silver sequins and gumpaste flowers wedding cake a few months ago! Sequins today, flowers up next!
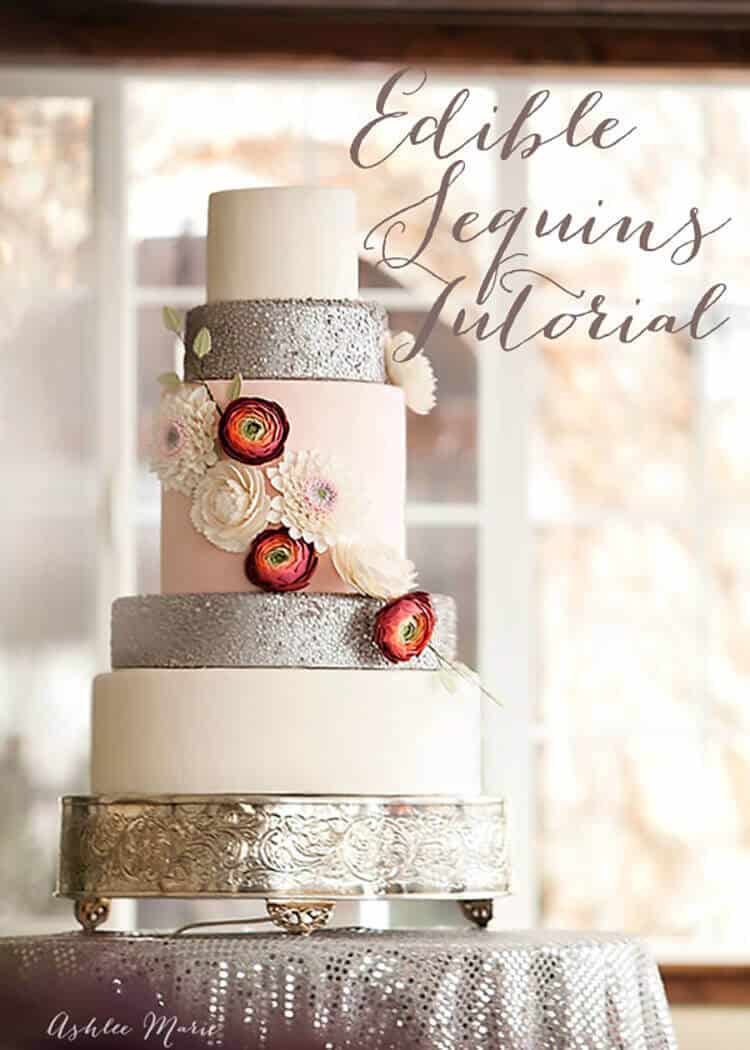
I have been in LOVE with the metallic cakes, especially the sequined ones, I’ve seen all over Pinterest. So when the opportunity arrived to design my own cake I couldn’t WAIT to give it a shot!
It took some playing, a few fails, but I’m really happy with how it went! I hope you guys enjoy the tutorial and I’d LOVE to see pictures of any cakes you create using this tutorial! (or if you find that something else works better for you)
So first I tried rolling out a gumpaste/fondant mixture (white). Then I tried airbrushing it- no bueno, the silver spray paint was like BLUE, NOT silver like I wanted.

So NEXT I rolled out more white and painted it with this silver glaze. It was a nice shade of silver with a great shine. BUT the problem with the glaze is trying to paint a second coat messed up the first coat, but I didn’t love just one layer.
BUT I continued on, I let it dry then cut out a ton of circles using a round tip. FAIL – 1. it took forever, and they kept sticking together, and 2. the edges were WHITE, I didn’t want to take the time to paint each edge, boooo, so nope.
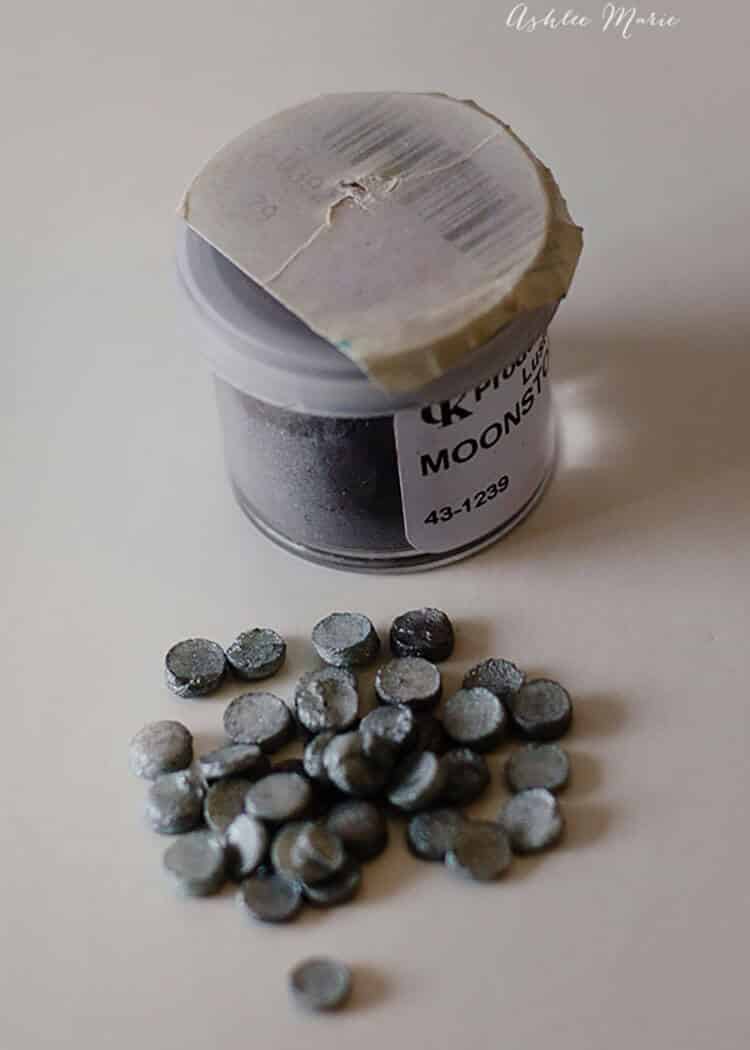
Next up I tried luster dust! I figured this would cover the sides of the sequins better. So I rolled the white gumpaste/fondant mixture out, cut the circles then spread it out. I then poured them into a baggie with luster dust and shook them all around! This covered all the sides great, BUT it didn’t get shiny! It was dark and dull, and didn’t reflect the light the way I wanted the sequins too! BOO
I also tried the spray paint with the luster dust, to goopy. I also tried the glaze with luster dust, nope…. GAH
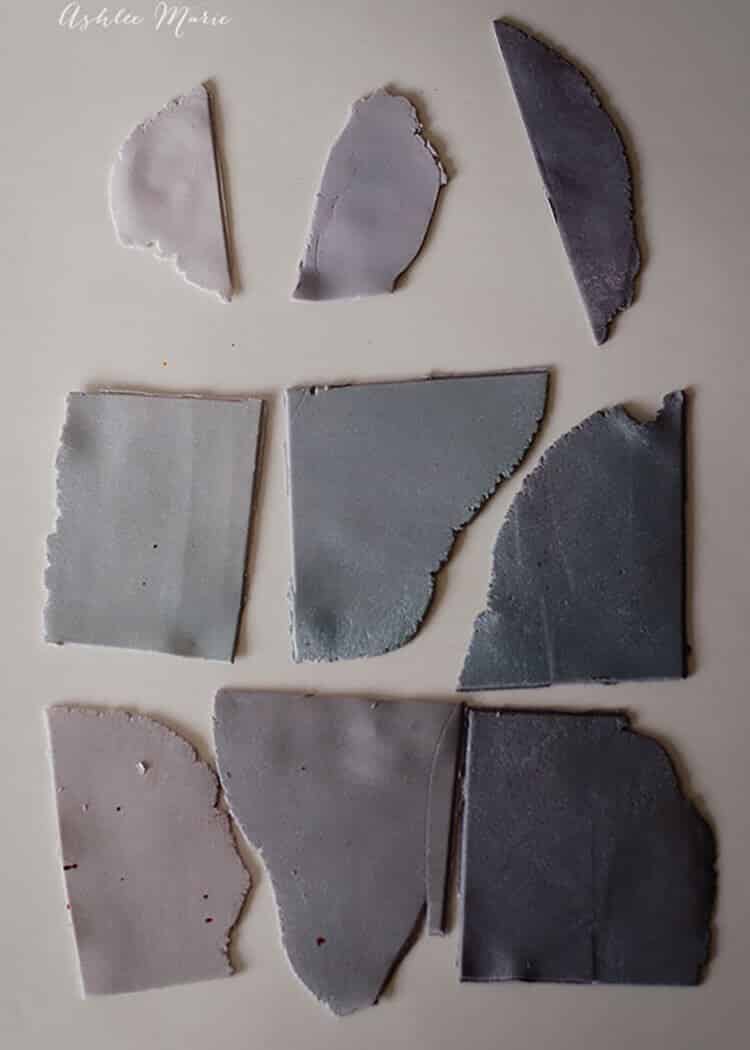
FINALLY inspiration hit, what if I put the sequins ON the cake then sprayed them? I still had the problem with the airbrush silver paint looking BLUE. So instead of spraying WHITE fondant/gumpaste I decided to try GREY gumpaste/fondant. ALSO to counteract the BLUE in the silver I added a BIT of red and gold (orange-y counteracts blue).
Then I rolled out three different shades of grey, then spray painted the samples with the plain silver, a little of the red/gold and another batch with more red/gold. Then I took them outside and decided which look I liked the best (I liked the medium grey with the silver with just a TAD bit of the red/gold.
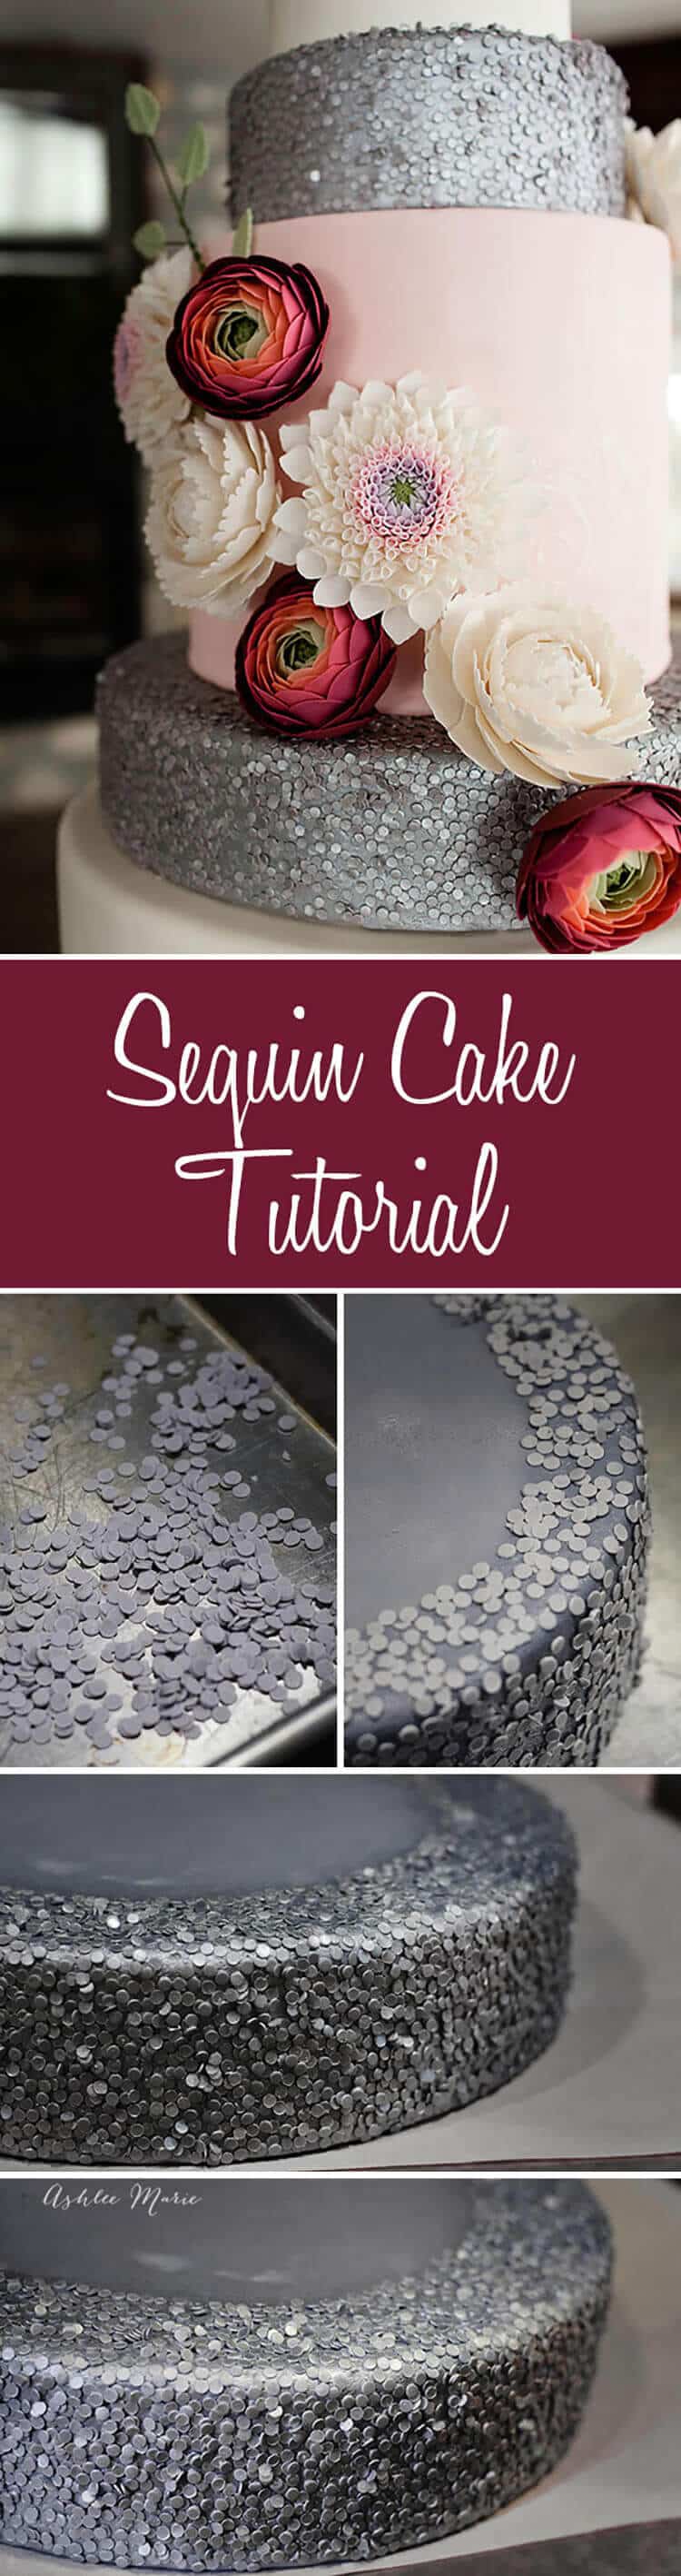
WINNER! Now came the time consuming part. Mixing the gumpaste/fondant mixer, dying it all grey and then rolling it out into a TON of sheets and cutting out MILLIONS of circles. I started rolling out multiple sheets, letting them dry a bit, flipping, then drying a bit more. Then I stacked the sheets so I could cut 4 at a time.
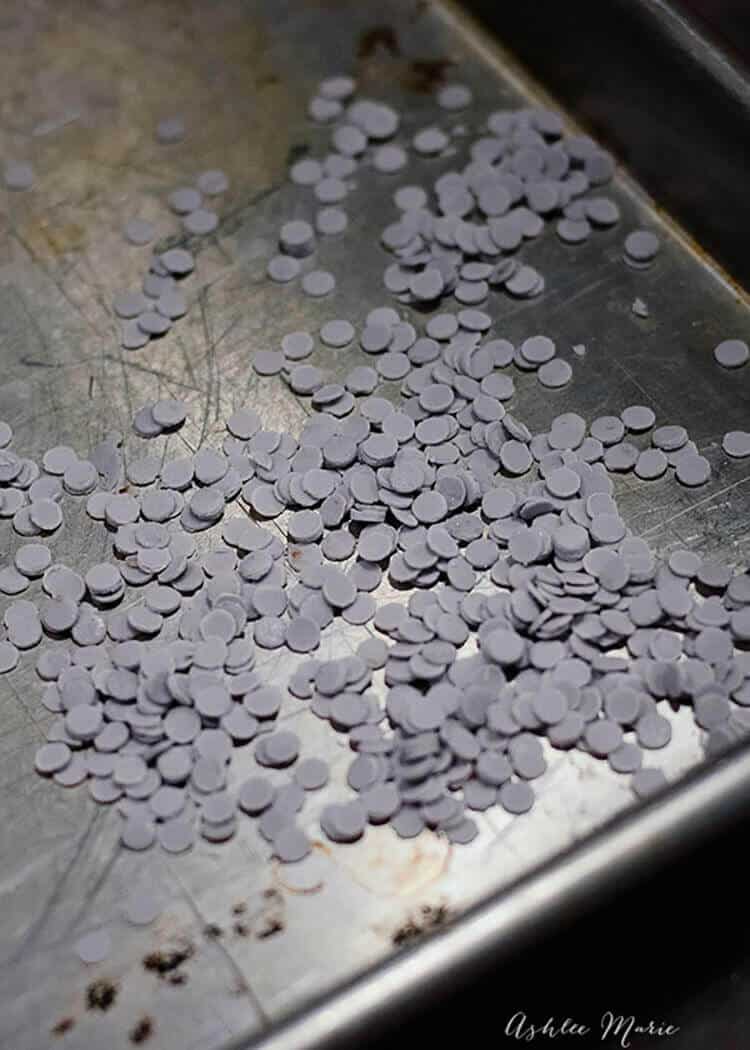
My finger still KILLED by the end AND it took so much time I spend a few DAYS doing this and still wish I’d had more. ANYWAY. Once you cut them out, spread them out and let them dry.
Next up cover the cakes with the same shade of fondant, then to get the fondant tacky you can either brush it with clear vanilla/vodka OR I ended up using my steamer on my cake to get it tacky (love my steamer!!!).
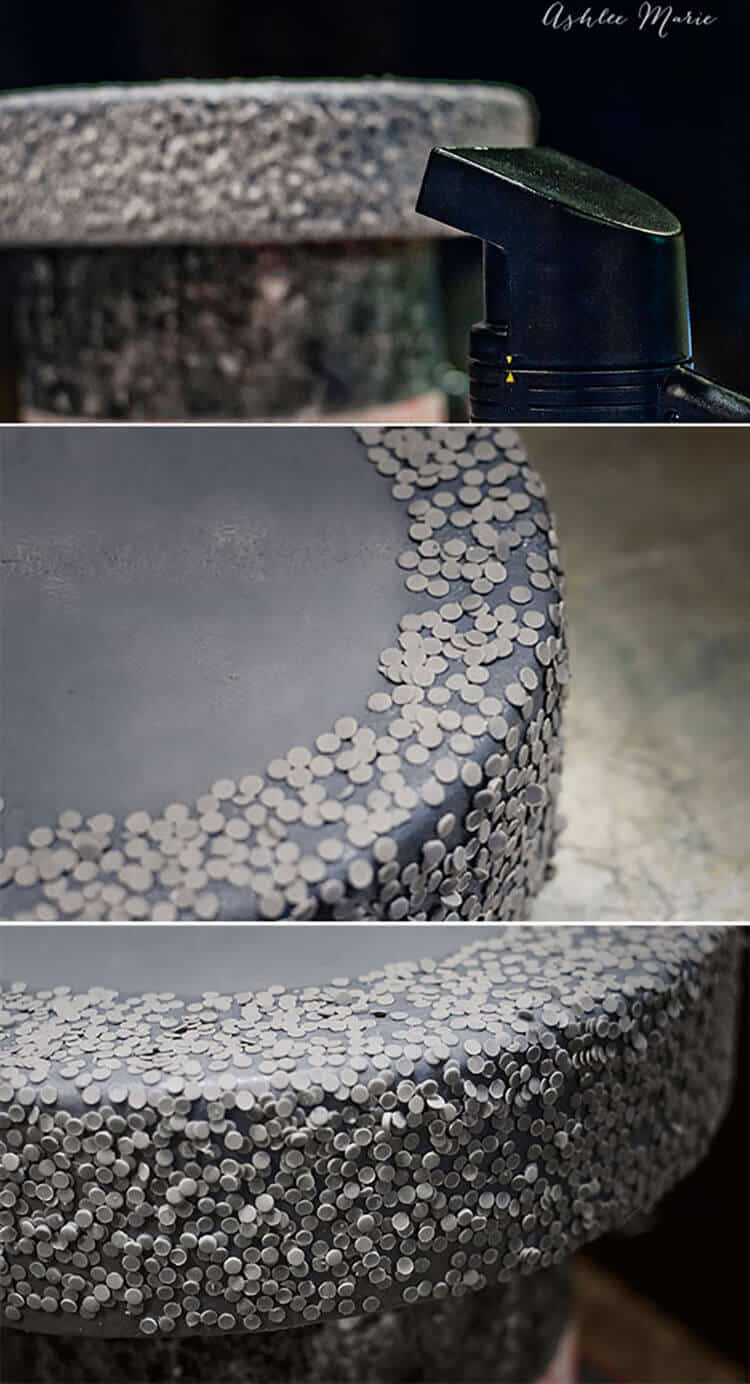
I steam a section at a time then using the same technique as this sprinkles cake I cover it with the circles working my way around. Pressing it into the cake a bit (that’s where the fresh fondant on the cake but dried circles works best). I will say that this is the same color of fondant, the dried circles faded, the result is still great.
I wasn’t happy with one layer so I let it dry, steamed it and did it again. I WISH I had enough circles to do a THIRD round. BUT alas, I didn’t have enough. I will for SURE do more next time, esp the edges. I think vodka would work better than the steam, I’ll try that too.
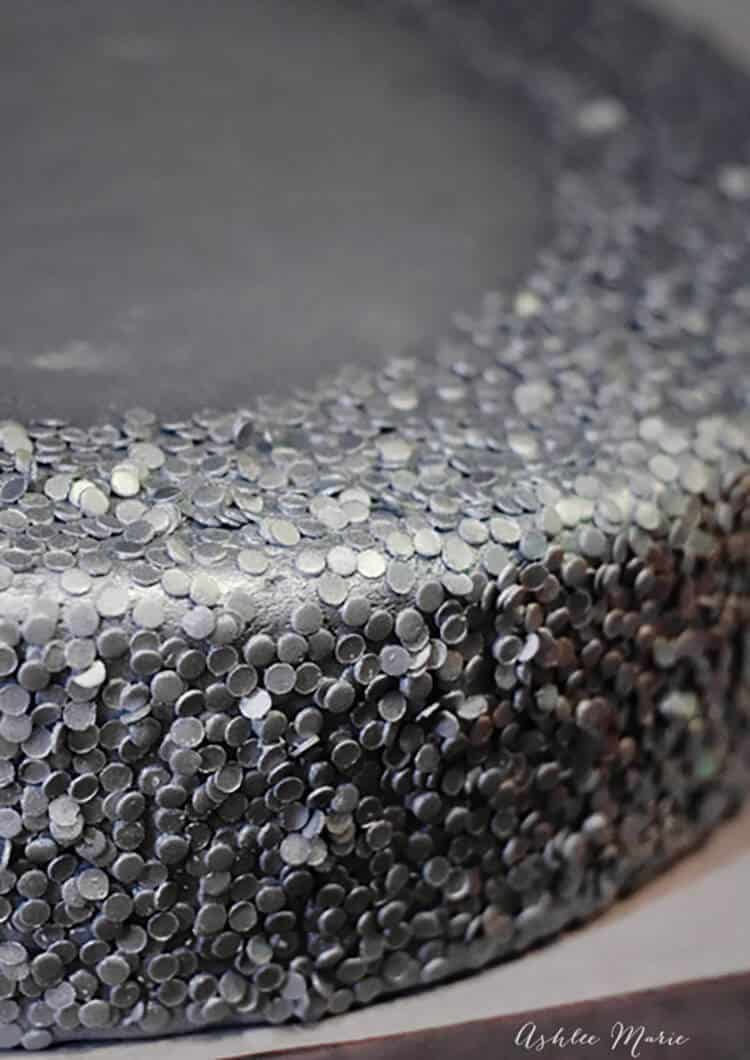
THEN I used the silver (with a BIT of red/gold) and airbrushed the whole thing! YAY, It’s starting to come together!!! I love how it colors the sequins AND the fondant underneath.
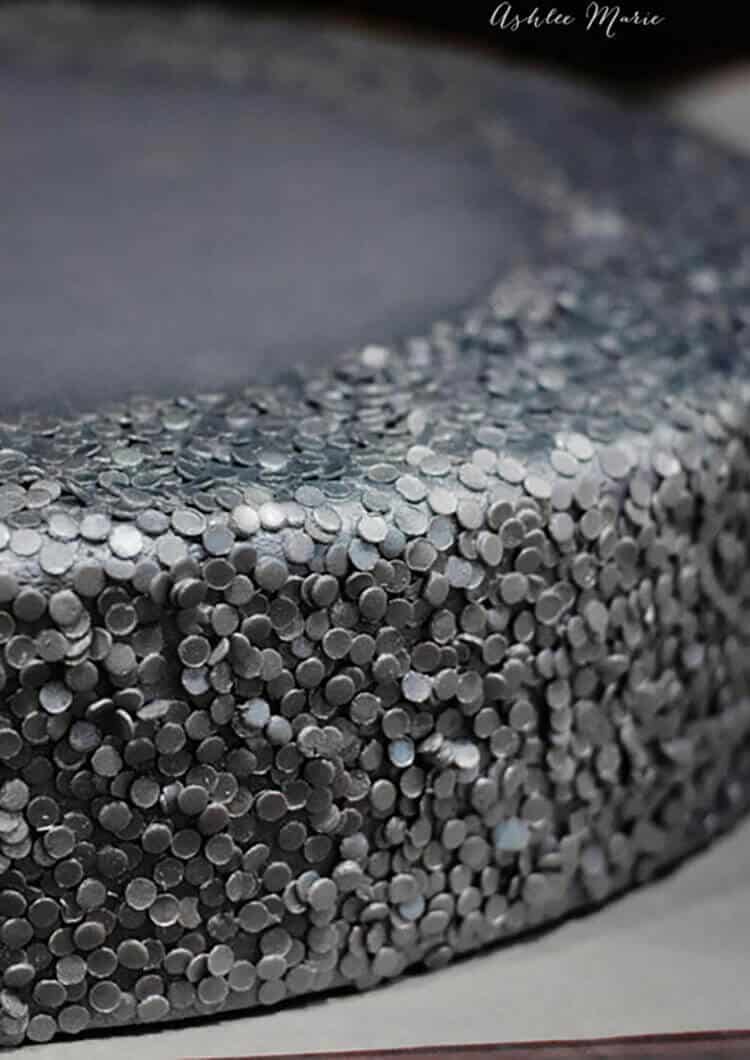
Second layer of airbrushing! LOVE!!! It’s not QUITE as glossy shiny as I wanted, but I am SOOOO happy with how it looks! The end result is to DIE for and the whole cake looks AMAZING! I can’t wait to try it in gold as well! Maybe a bronze?
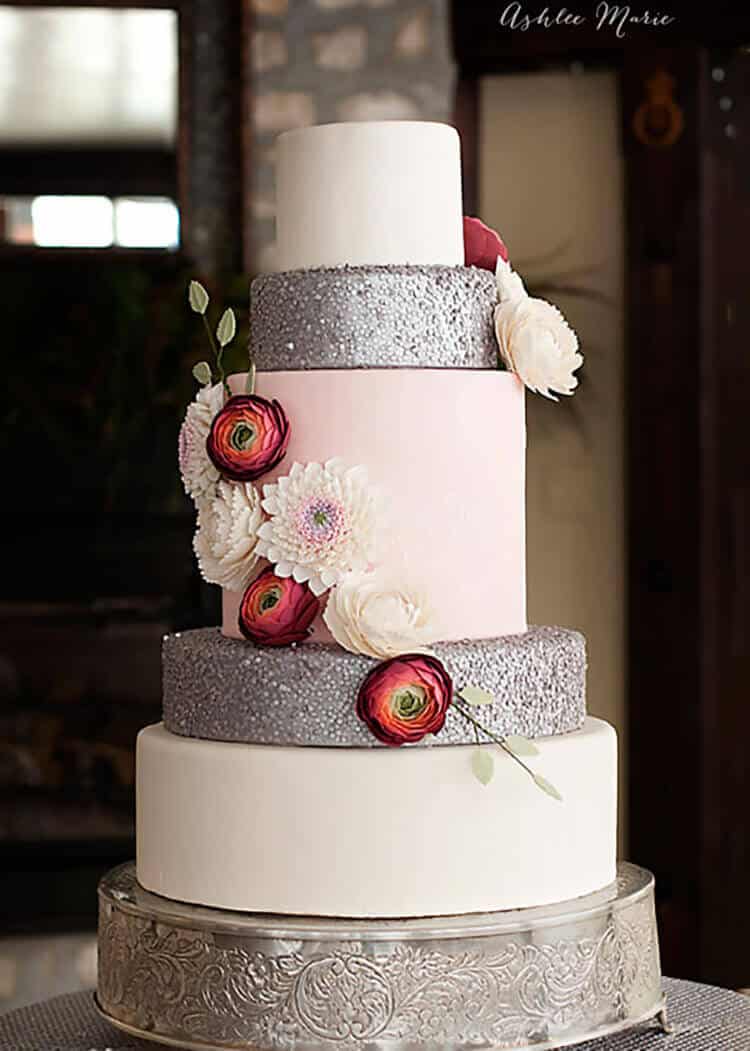
What do you think? What tutorial from this cake do you want to see next? Stenciling on a cake? Or the Peony’s, Ranunculus or Dahlia’s?
")


Carrie
Could I like move to Utah so you can make cakes for me? This is GORGEOUS!!! Thanks for the tutorial btw. Just in case I get ambitious and decide to try and make a cake. (wonder how disastrous that would turn out. if something can go wrong, with me it does 😉 )
Ashlee
of COURSE you can move here and have me make cakes for you! I would love that! or just take my online classes and make your own. It’s really not as hard as it looks, just time consuming!
RENAE MARTIN
Hello,
I just viewed your beautiful sequin cake. I have an easier solution for you that I just discovered on youtube. Look up Savannah’s Custom Cakes. She uses those premade confetti candies that come in multiple colors. She puts piping gel on the cake to be sequined, then uses handfuls of the confetti, once it dries, she uses vodka and dust to paint on the metallic color. It looks just like yours only now you won’t have to hand cut all those tiny circles. I hope you will give it a look.
Ashlee
thank you, I’ve seen it done that way before, but I found this to be a better fit for me, which is why I’m sharing it. I thought it took WAY longer covering all the colored confetti with coat after coat of paint.
Jessica @ Pretty Providence
Umm.. this is seriously the raddest post I’ve seen in such a long time! I freaking love these! Thanks for sharing! P.S. I am totally bummed out that we didn’t get a chance to meet at snap! What the heck?
Ashlee
awww thank you so much! And why DIDN’T we meet at SNAP? CRAZY, hopefully you’ll make it to one of our Utah Blogger nights and we can meet IRL!
Janae jewel
Hi I was wondering what did u use to cut out the little sequins
Ashlee
Like I say in the tutorial I simply use a round piping tip! Any size works depending on the size sequins you want! I used an 8!
Leah
Wow! Where were you 16 years ago when I got married. I would have loved this for my wedding cake. You are incredibly talented!
Ashlee
Where was I 14 years ago when I got married! I wish I had this talent and had made my own cake!!! Cakes are so much more fun these days!
amanda
seriously… amazing!!
Ashlee
Awww thanks! It is a really fun technique and while it’s time consuming it’s totally worth it for the end result!
Cindy Eikenberg
Ashlee, this is seriously fabulous and that cake is beyond words! Totally loved reading about your process and the results are stunning! Would love to see the peonies, my favorite flower! Thank you so much for sharing!
Ashlee
Thank you so much! I’ll start sharing the flowers this week! I’m so glad you like the cake and tutorial so far!
Lindsey | Cafe Johnsonia
Ashlee!!! I am 100% blown away by this. It is stunning! I, too, would like to see the peonies. I’m going to sign up for one of your classes STAT. 🙂
Ashlee
Awww thanks Lindsey! I’d LOVE it if you wanted to take my classes! I’d love to see what you do with the techniques!
Becca
Hey Ashlee! Your work is just incredible! I am LOVING looking through your cakes. My mom and I sat down and just “oooo” & “ahhh”ed. You’re so talented! Thank you for sharing your talents 🙂
It was so nice to meet you at snap!
Ashlee
Thank you so much! I really love what I get to make and create! Isn’t that why we all love to do it? see what we can make with our own two hands? love the new haircut, I cut my own hair too!!! It was great meeting you as well! hopefully our paths will cross again!
Patty
This is gorgeous!!! How much do you charge for a cake with that technique??
Ashlee
honestly? I’ve never done it for a paying wedding cake, but I would charge a LOT because of the time, at least an extra $1 per serving for that tier.
Edna
Hi!! Such a lovely and unique cake!! What did you use to cut the circles? Did I completely miss that?!?
Thanks for sharing!! 🙂
Ashlee
It was a frosting tip, whatever number you want to get the size. I think I used an 8? I honestly forget.
lynette
How would you ever charge for a cake like this to make it worth your “days” of cutting tiny circles? It is beautiful and I love the look but I don’t think I could ever make it worth my time.
Ashlee
Never enough, certainly not here in UT where I can’t charge as much as I would in any other state! I did it because I loved the style and wanted to do one, but I would charge quite a bit (also it would go faster now that I know what style works best for me.
Mildred
Wonderful! Please, for next tutorial, any flower: ranunculus or dahlia. Thanks for sharing.
Ashlee
working on getting the flowers up! Tutorials are always the most time consuming part, but I will get them up!
Gema
What kind of airbrushing did you use?
Ashlee Prisbrey
any airbrush gun with edible paint will work! airbrush gun
Casey
I love this method. What do you think about gold sequins? I have the gold airbrush color, but I don’t know what color fondant I should start with. To my knowledge, there is no “gold” fondant- But I suppose I can mix a whole bunch of colors together and hopefully get something that resembles gold underneath. THoughts?
Ashlee
I totally have plans for some gold ones. I’m going to dye the fondant/gumpaste ivory first, then use the gold paint over the top! I tested out a few different ivory options already and I’m liking the results so far!
A L
Wow such a wonderful looking cake!! How did you make the round disks? xx
Ashlee
I used a round frosting tip to cut them all out, whatever size you want, I believe I used a #8 for this cake.
Tammy
Your cake is beautiful! What sizes are your tiers?
Ashlee
Thank you! This was a 6, 8, 10, 14, 16
sarah
I am going tp try this but using a grater to cut all the circles…
Ashlee
let me know if that works! it would be a time saver, i know some bakers use candy confetti, but it takes so much paint to cover the colors I didn’t love it.
Natalya
I found out an ideal way of making sequins on Kara’s Couture Cakes gelatin sequins. I made a bunch of them in gold color they are light shiny and look a lot like real sequins
Ashlee
I’ve seen that way, glad you like it! it’s just not the look I was going for
Lieu Nguyen
Hi , your cake is beautiful . And thanks for sharing.
Which brand of gold/silver dust is safe to eat along with the cake ?
Thanks .
Ashlee
I used food grade airbrush paint, so it’s edible, not one of the powders. There are a few none edible golds, but most made for cake are edible, just stay away from the glitter
Karina
Last year I made colorful sequins for cupcakes. I am Dutch and because I didn’t know this was called ‘sequins’, I had no luck finding online tutorials to make it. I came up a method myself that made a couple of sequins at the same time.
What I did was binding a couple of straws together and dip it a few times in confectioners sugar. I rolled out fondant very thinly,sprinkled it with more confectioners sugar and pushed the handful straws in the fondant. The ones that were stuck in the straw, I gently pushed out with a long toothpick.
Ashlee
smart!
kelleykakes
I recently did a small band of hand cut little fondant circles around a cake to get this look. It took me a day and a half to cut out those little circles. I watched an entire season of Oz. But dang, did it look awesome. My hand hurts just thinking about it, though!
Ashlee
right!!! SO LONG but so worth it.