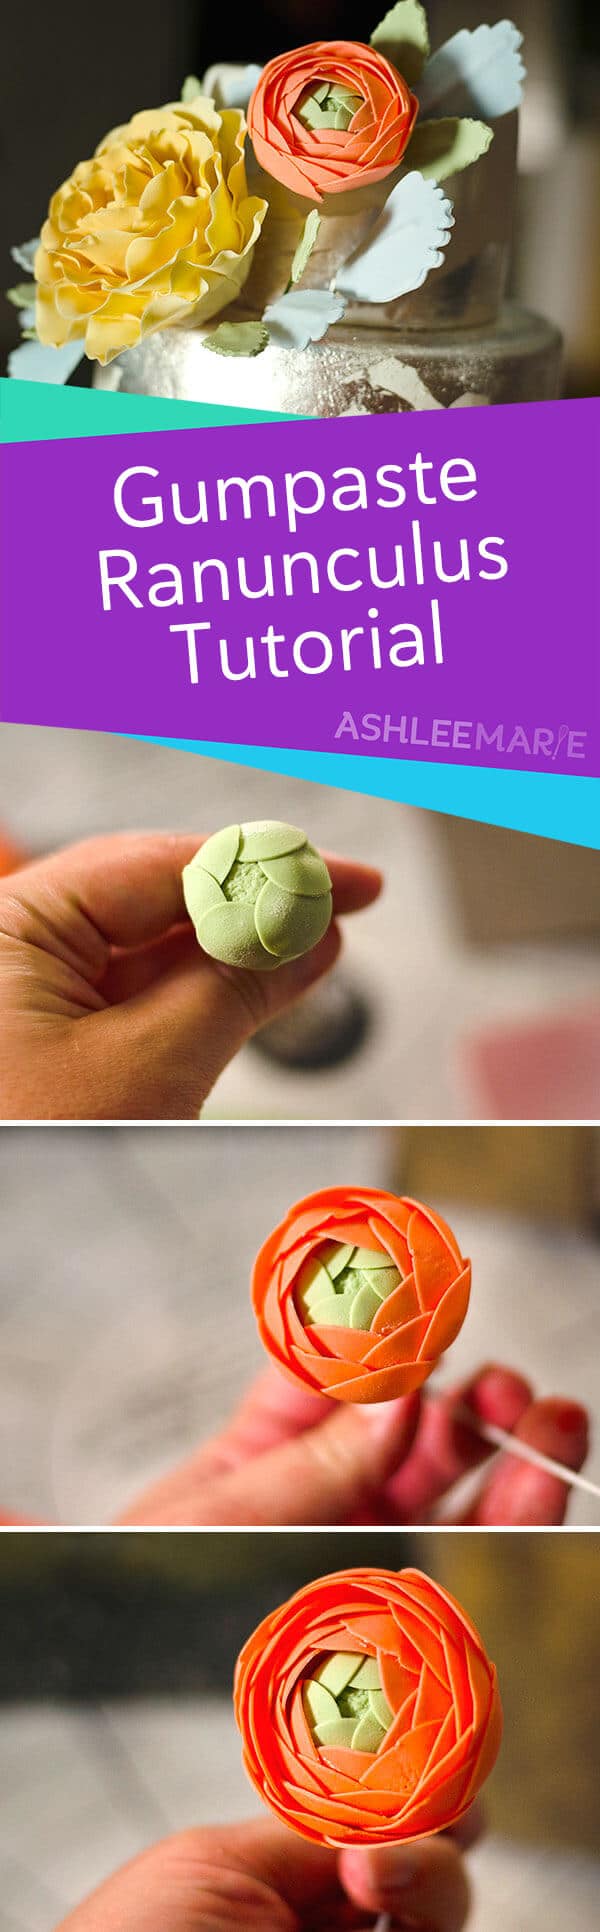
I’m so excited to share another cake tutorial with you guys. Gumpaste flowers are SO much fun! And they really add something special to a cake. I’ve done Gumpaste Ranunculus a few times recently and I am really happy with how they look! Such a pretty flower! I’ve loved the freedom of creating my own wedding cakes recently!
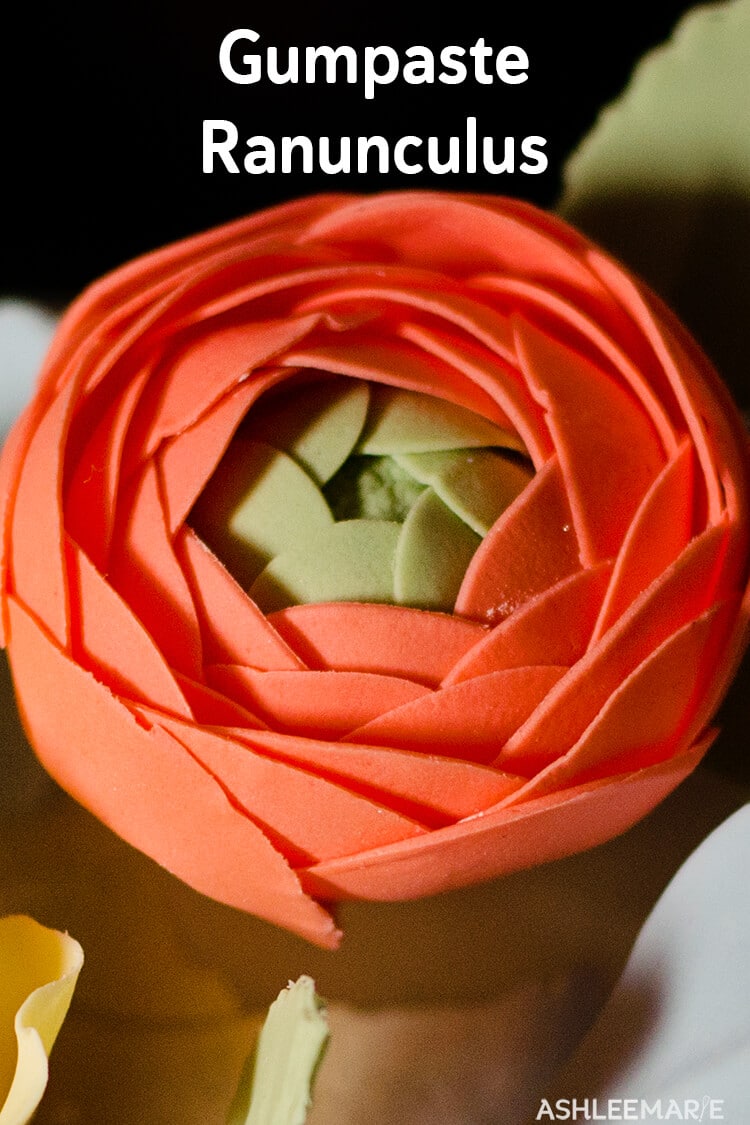
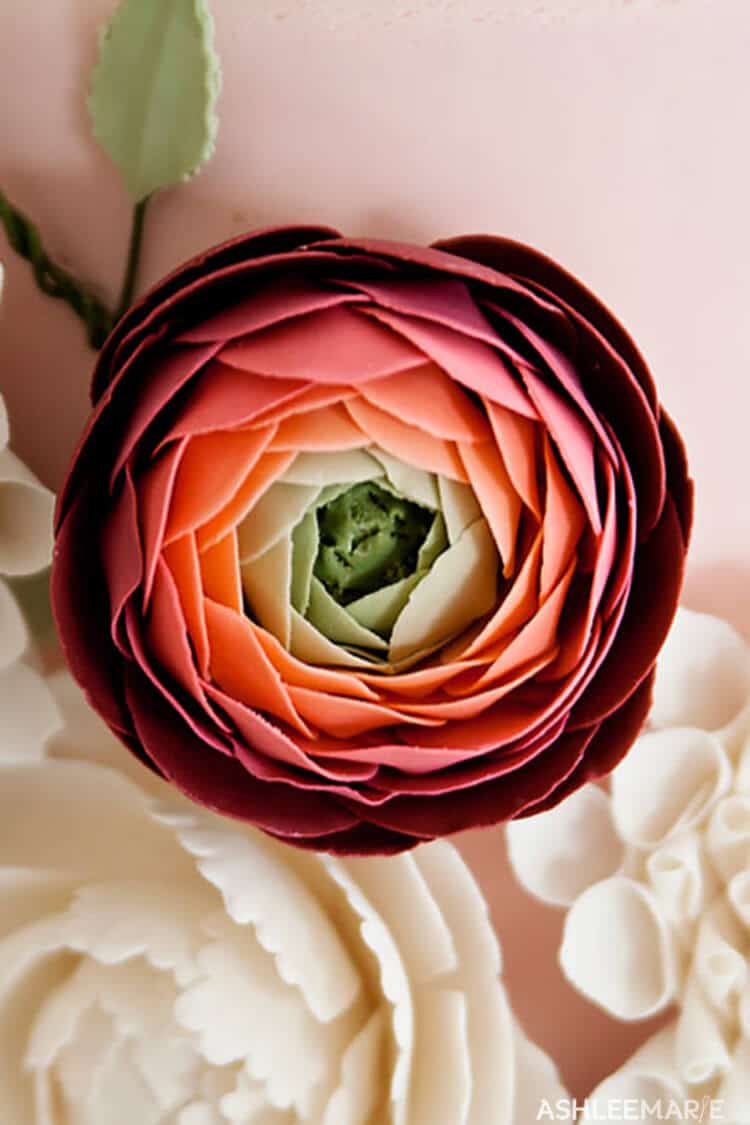
Their are a lot of possibilities as well. You can do it all one color (like above) or multicolored (like below). You can make them a little larger when you need to (below) or keep them more realistic and smaller (above). I can’t show you the full version of the above cake yet, but I didn’t want to wait any longer to share this tutorial with you guys!
I love the darker colors of the ranunculus from this edible sequins cake (see the edible sequins tutorial here) but I think I should have done a few less rows, the smaller one looks more realistic to me. Next time I’ll do another ombre ranunculus that’s smaller.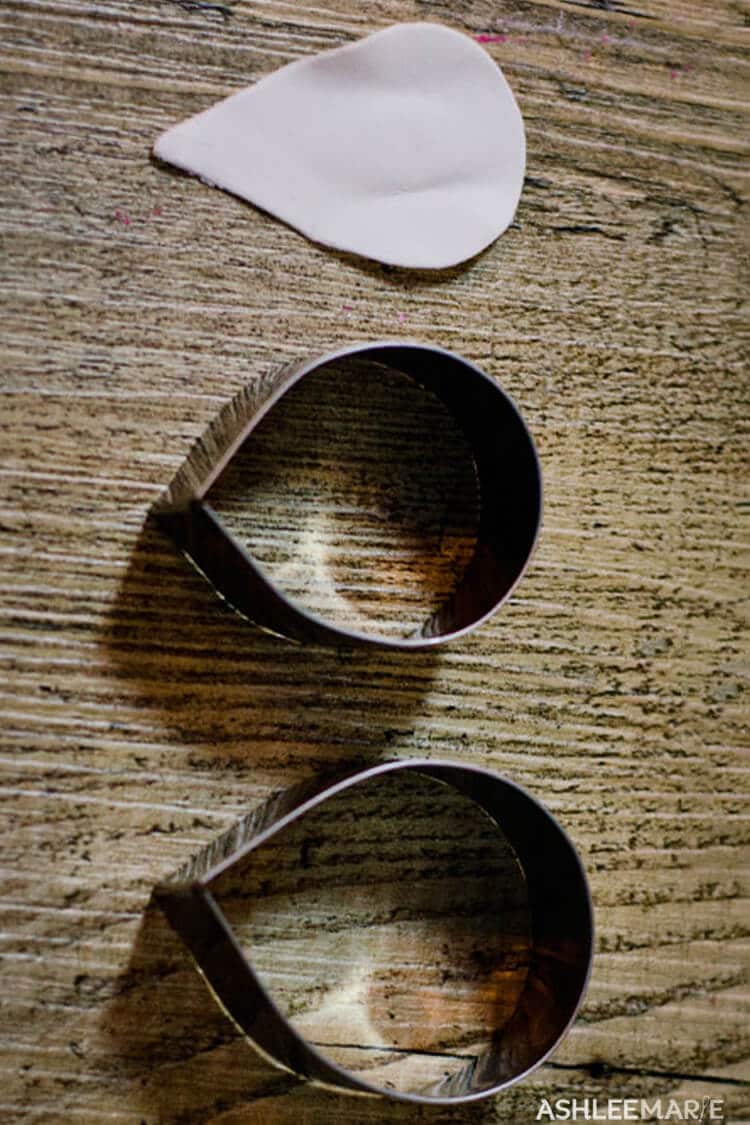
I bought this cutter set, but you can see how narrow it is (the petal). I wanted wider petals for this flower so I actually bought TWO sets and using needle nose pliers I widened an entire set to create fatter petals. You can see how much wider (and also shorter) they are once I do it here.
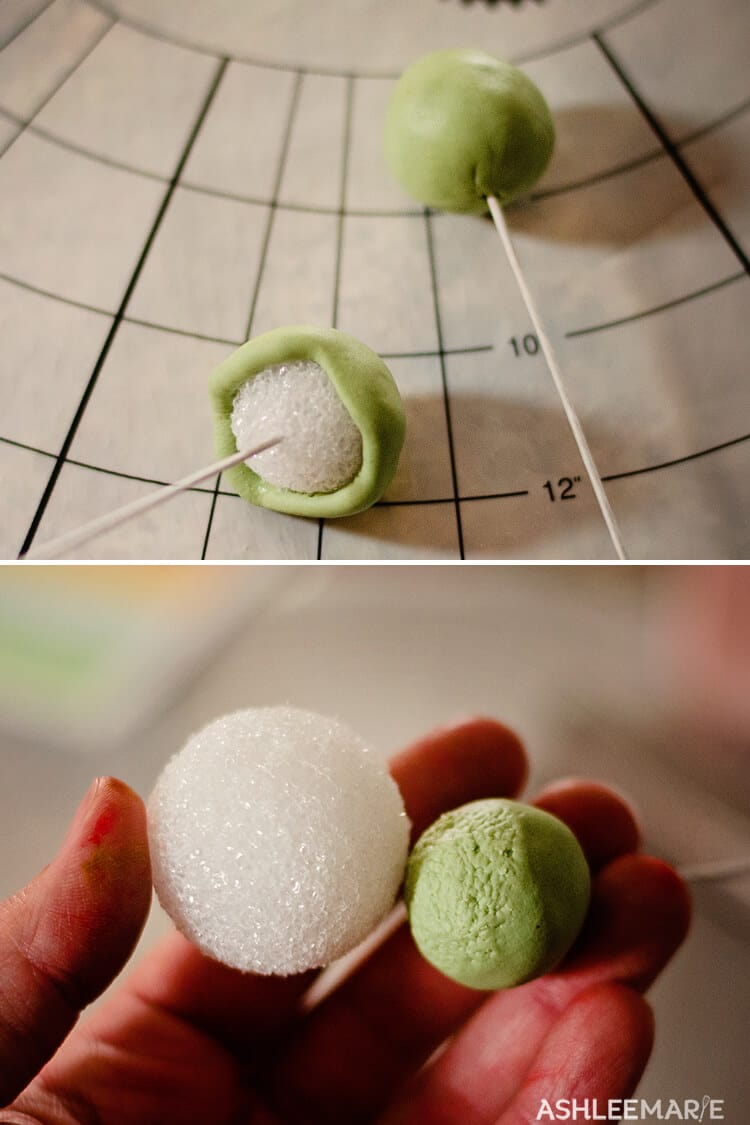
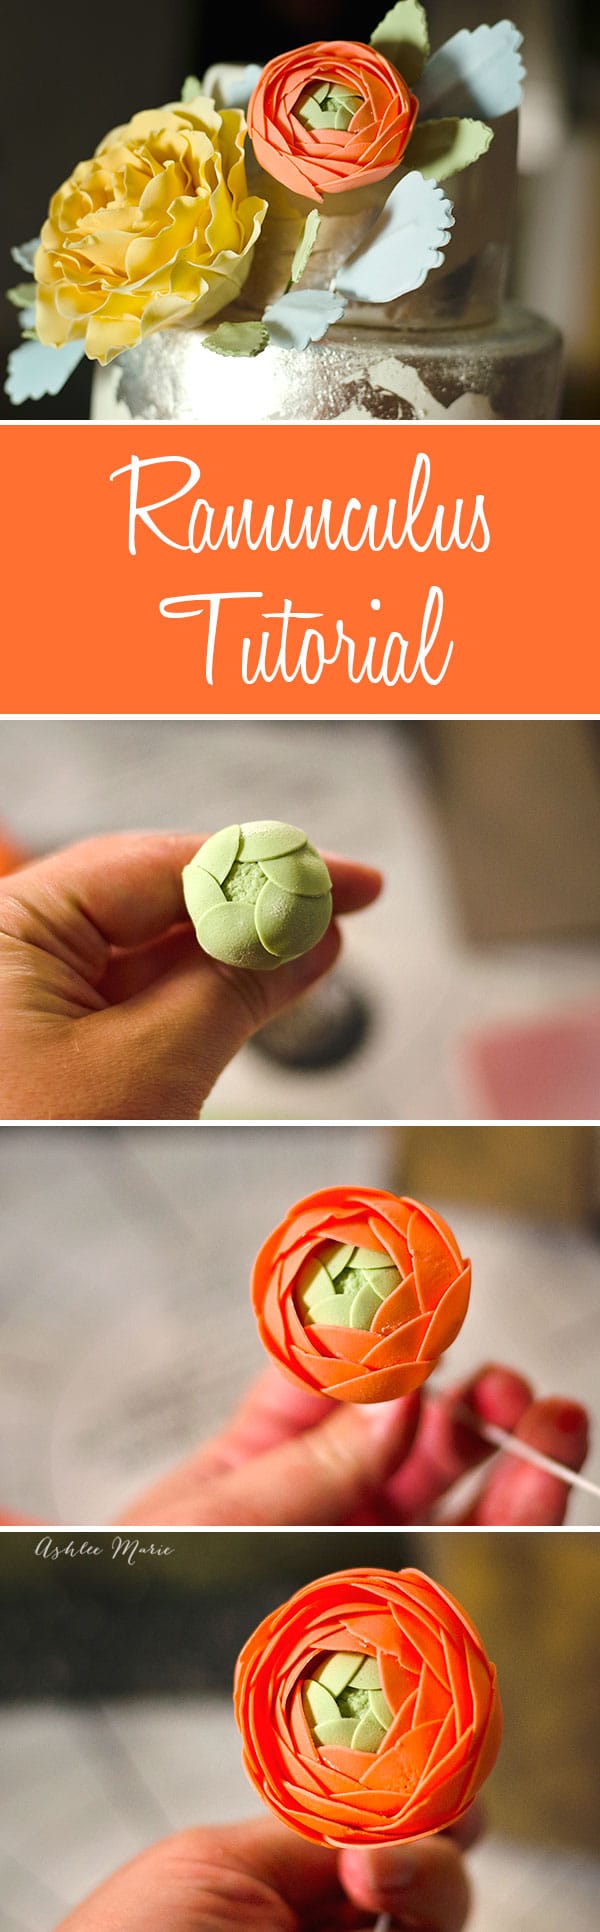
Start with your center! This is a 1 inch styrofoam ball with some 18 gauge covered wire stuck into it. Get the ball wet, shake off the excess, then wrap it with some of the green fondant (I used avocado for color).
Once it’s wrapped completely I roughed up the top by using another styrofoam ball to create texture. But you can also use small, sharp, scissors to make some cut marks, both versions work.
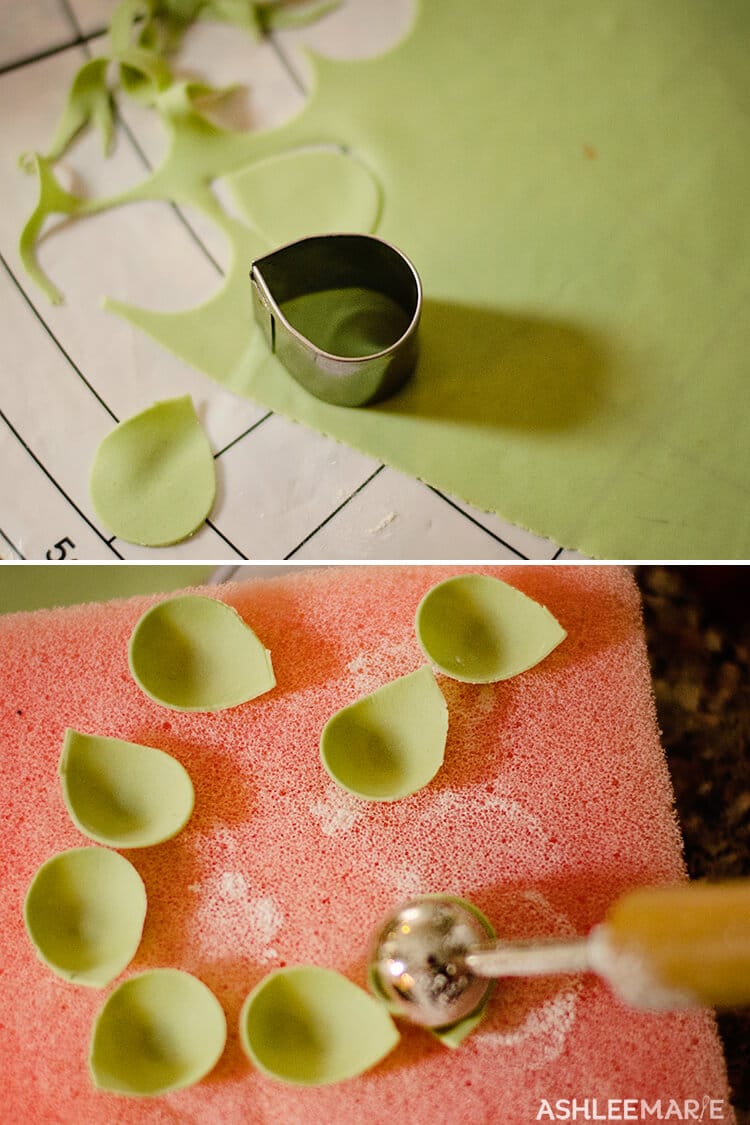
Using the same shade of green, or one shade lighter for the ombre effect, cut out small petals just shorter than the height of the center ball. Once you cut them out using the thick flower foam and a extra large ball tool dimple each petal (6 for each center).
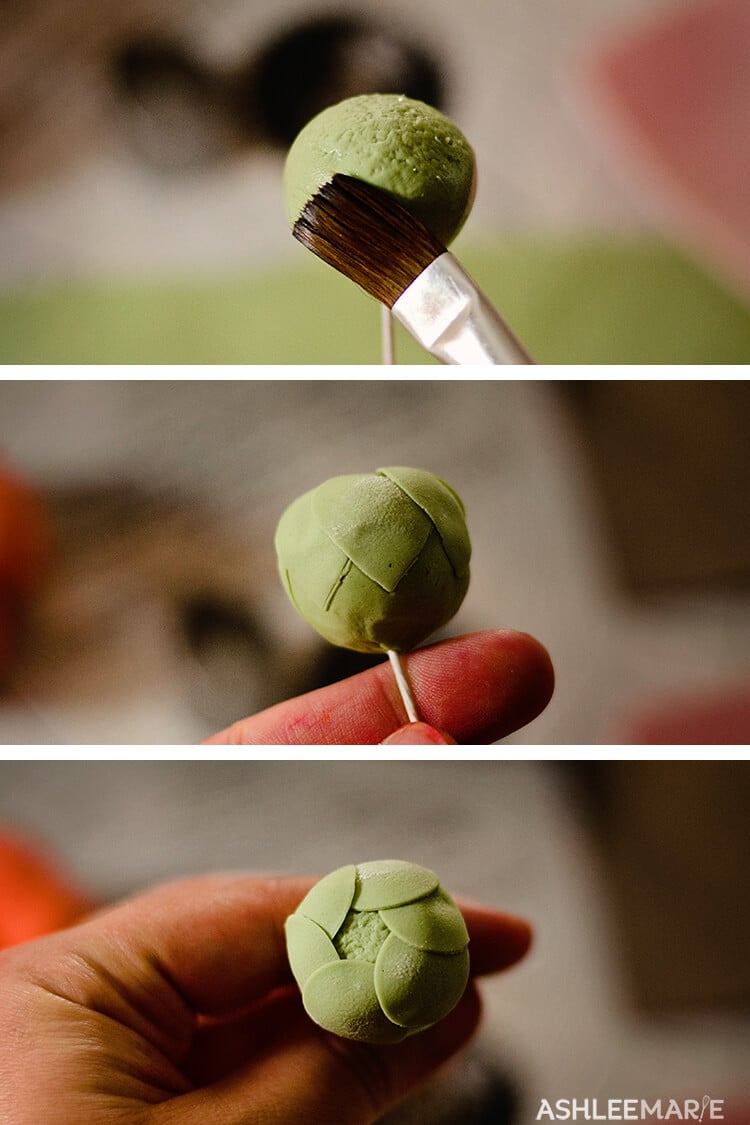
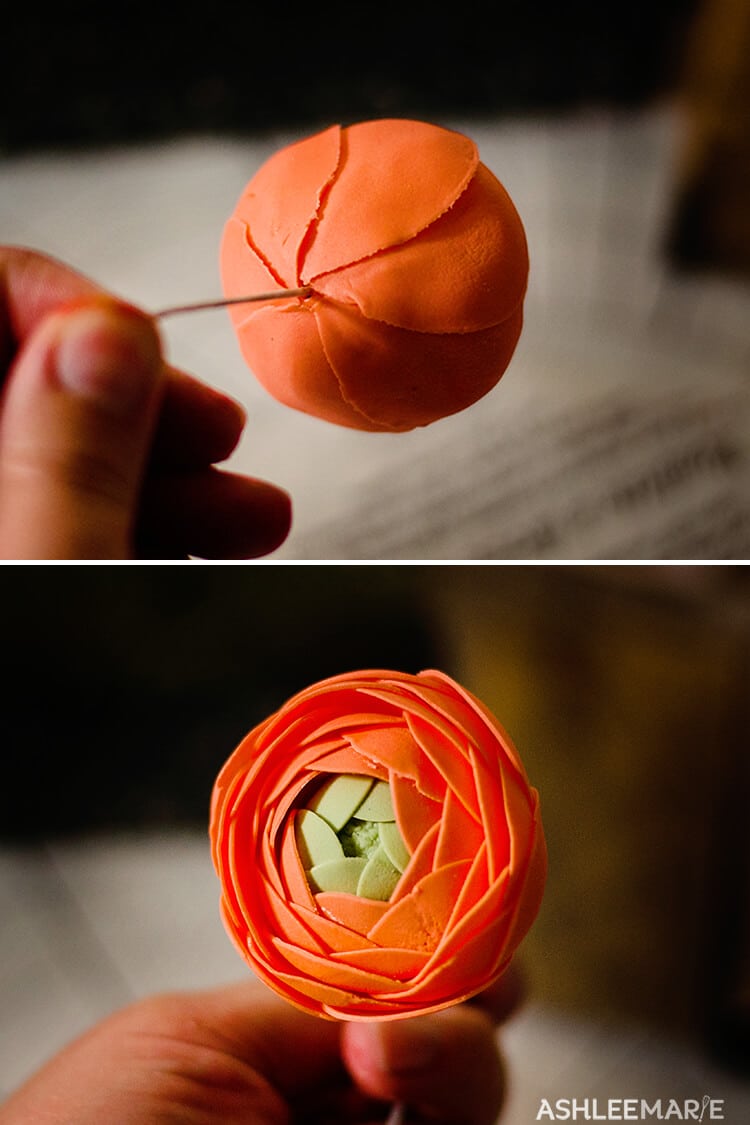
Brush clear vanilla or vodka around the center ball then overlapping place each petal on. I usually stick the first petal on halfway, wrap around then fill the last petal into the opening of the first petal then lay that first petal down, that way each petal is tucked in.
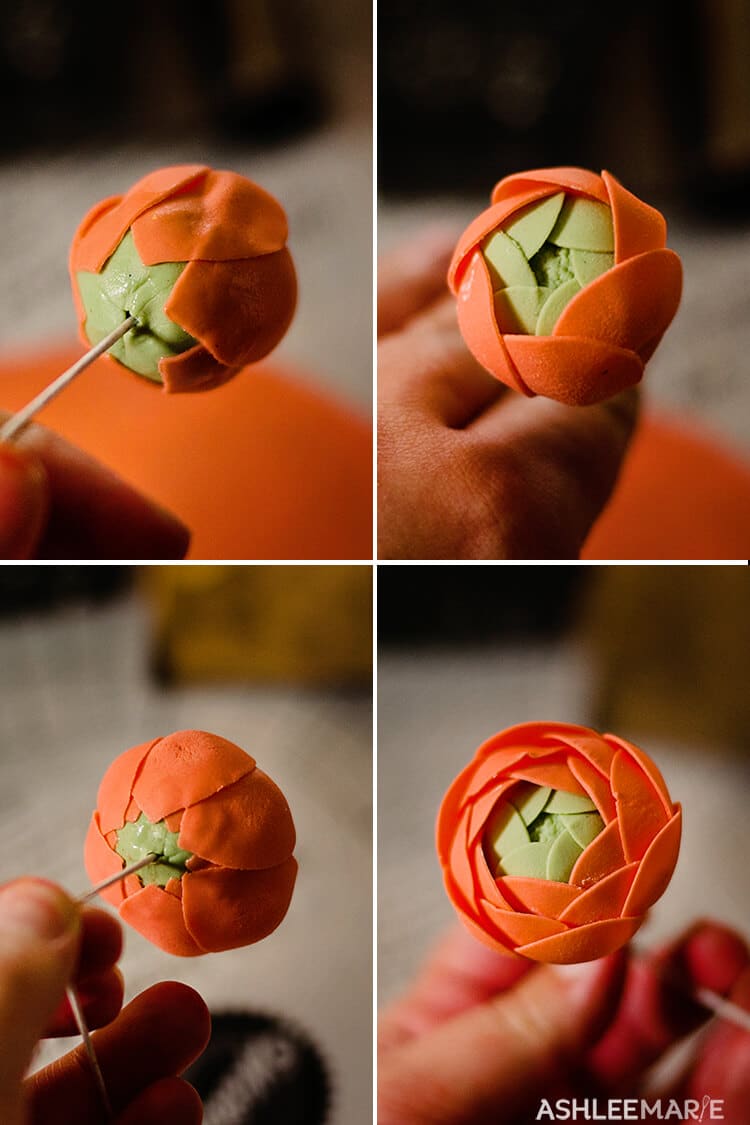
Moving up a petal size you are going to do the same thing around, but this time with the color! Keep using the same sized petal do two more rows! Easy peasy.
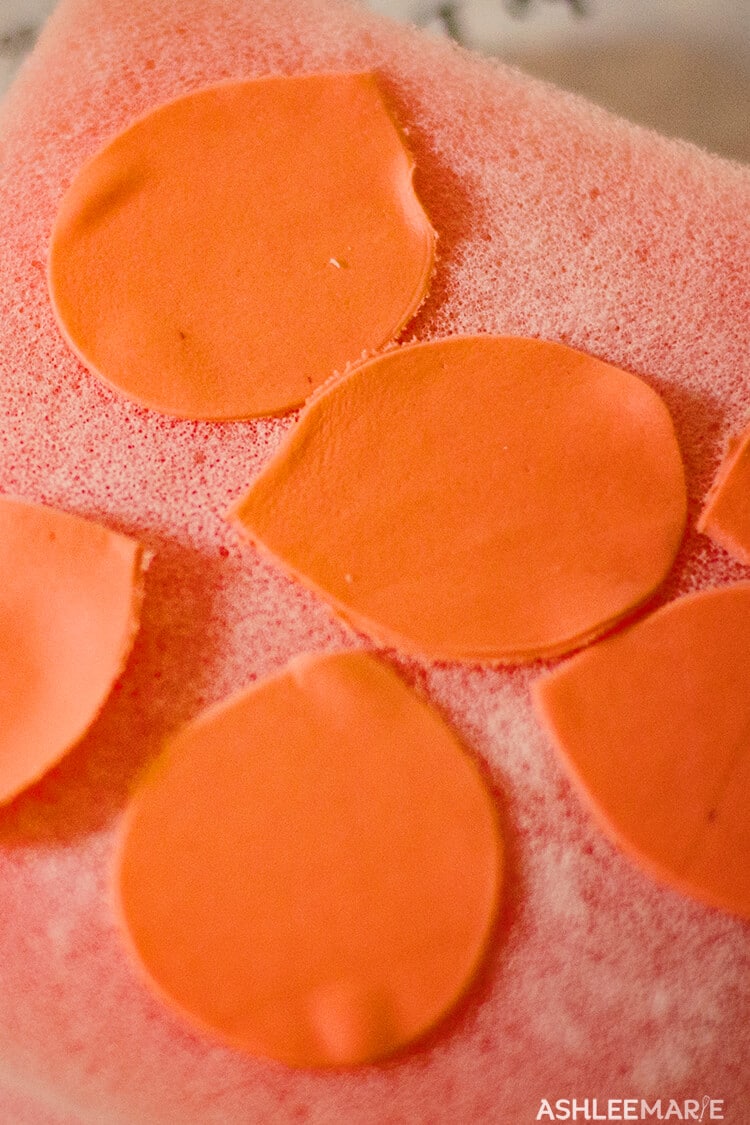
I moved up another petal size for the last few rows. By this time the petals are large enough that it’s hard to get the same curve out of the petals. Work in smaller batches for cutting out and using the ball tool at this point because you want soft gumpaste for flexibility so it it curves without ripping.
Then place the curved petals into a spoon while your working so it can hold the shape and start to dry before adding it to the flower. You can do all the petals (if you have enough spoons) at this point.
I did three more rows at this size petal! You can see by this point the petals are large enough to come all the way around the back to the covered wire! The petals stay around the same height, but those last few petals start to come lower down the sides, but not too much!
Hang the flower upside down while it dries so it doesn’t open up too much. the tighter it is the more realistic it’s going to look.
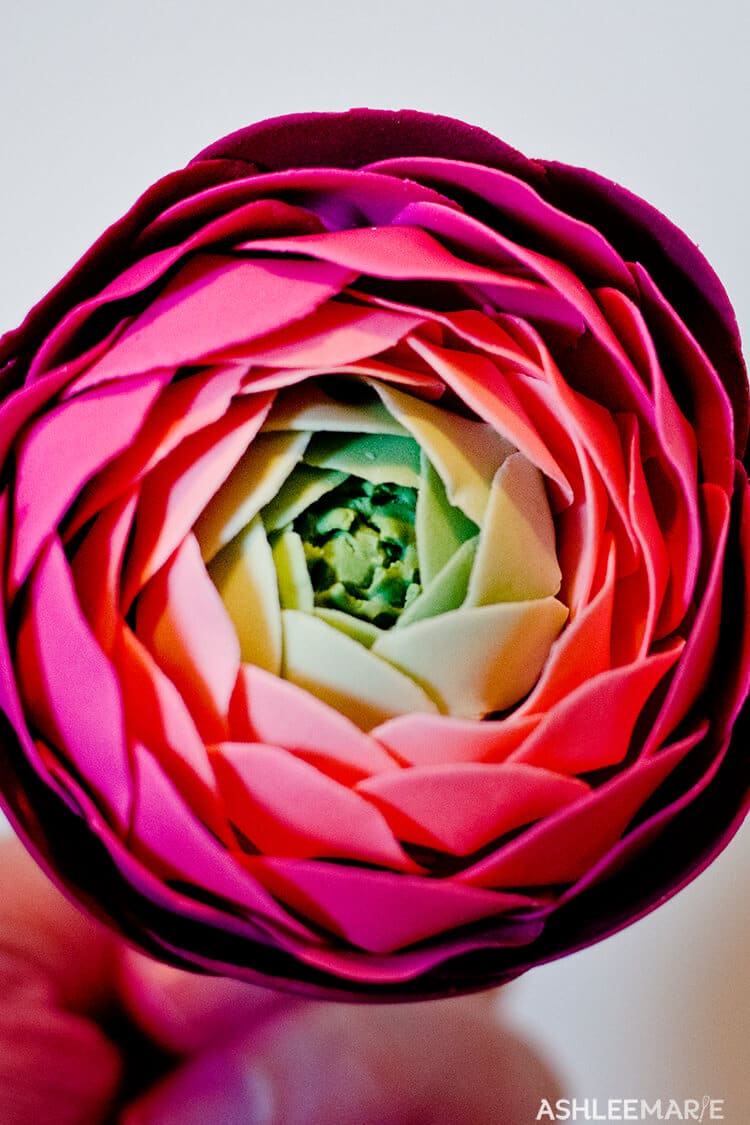
This ombre Ranunculus is actually much bigger, even though it only has 1 extra row (a 2nd green row) it’s because I used the cutters while they were still narrow, making them bigger made a huge difference.
I also left more space between all the rows, while in the orange one the rows are tighter and I love the effect. I can’t wait to do another ombre one but tighter so it’s smaller and looks better.
Do you want to see more gumpaste flower tutorials? Comment below!


leah
Plz do the dahlia 😀
Ashlee
Took the pictures of it, but not happy with how it turned out, hopefully the NEXT time I make them I’ll get better pictures!
rocio estrella
Hi, I found your videos and I want to appreciate you time and effort to share with us.
Ashlee
thank you so very much! I appreciate you taking the time to leave such a sweet note
Sally Melendez
Omg so beutyfull
Ashlee
thank you so very much!
Heidi @ Honeybearlane
These are gorgeous! I want to have a party someday just so you can make some sort of dessert with these flowers on them. Ranunculus is one of my faves. PS I love this new site!! Congrats on making the switch!
Ashlee
anytime! I’d love to make something for you! and thx so much! I’m so glad I made the change and new design!
Christy
Dahlia please!
Ashlee
Working on it! thx for your input!
hira ahmed
OH I JUST LOVE THESE!!!!! can you plz give some ideas to what colors you used and mixed to get the colors in your ombre rununculus. I have a wedding cake coming up and these would look perfect on it.
Ashlee
my gel is all missing so I can’t get the exact shade, but I believe the green was avacado, then peach and burgundy for the petals
Christy
Is yhe white flower pictured the Dahlia? If so please do a tutorial on it! Yours are the best I’ve seen!
Ashlee
thank you so much! I’m not happy with the pictures I took last time so I’m probably going to redo it before posting, but I’ll move it up the list of tutorials to work on.
jakia
Hi Ashlee
I’m absolutely loving your tutorials. Can I ask how do you ensure the wired flowers on the sides of the cake don’t fall out and pull the icing with it?
Many thanks
Zakia xx
Ashlee
keep the wire long so it can go in farther, and I try to get the wire to stick through the cardboard cake boards on one of the level’s, that always helps. you can also use some royal icing to help stick the flowers to the cake better to keep them in.
Nelushiya
Ashlee,
Thnx for your tutorials! I love them. Just a quick question. When you sprayed your sequins does that mean your air brushed them with silver colour you had.? Like everyone else I would love to see your Dahlia tutorial.
Thnx
Nelusha
Ashlee
There is a tutorial for them here, and yes it was an airbrush gun. http://ashleemarie.com/silver-edible-sequins-tutorial/
Tortendeko
they look so amazing. thanks for sharing
Ashlee
thank you so very much!
niki
hi,
That was very neat tutorial .tks
Ashlee
thank you so much
miss williams
The dahlia!
Ashlee
pretty huh…
Ag Yeo
Hi Ashlee, beautiful ranunculus. You mentioned buying rose cutters that were too narrow and how you widened them with pliers. Can you share how it’s done cos I have the same problem with my cutters.
Ashlee
I just used my pliers to open the point up a bit bringing it from narrow to wider,
Sherie Rodrigues
Dear Ashlee, I just would like to say that I think you are one of the good folk on this Earth. You are so willing to share your craft with the masses, and that is truly inspiring. Just to know that you are self taught and with a lot of hard work to achieve what you have is maybe possible, (will take me a little longer, a lot longer), but I am going to have a lot of fun thanks to you. Love you and your beautiful craft. Lots of hugs Sherie
Ashlee
thank you so very much! I appreciate your sweet comments so much! I hope my tips and tricks help you!
ellaine salamat
I so love this tutorial. thanks for sharing your knowledge on making these beautiful flowers. please make more and more tutorials please 😊
Lai
Love it! And thanks dor sharing
Toni Hottovy
what is best to use for flowers fondant or gumpaste or a combination
Ashlee Marie
I like to us a 50/50 mix
Gina
Kindly can you show us how to stick leaves together
Ashlee Marie
just use vodka to stick two leaves together over wire