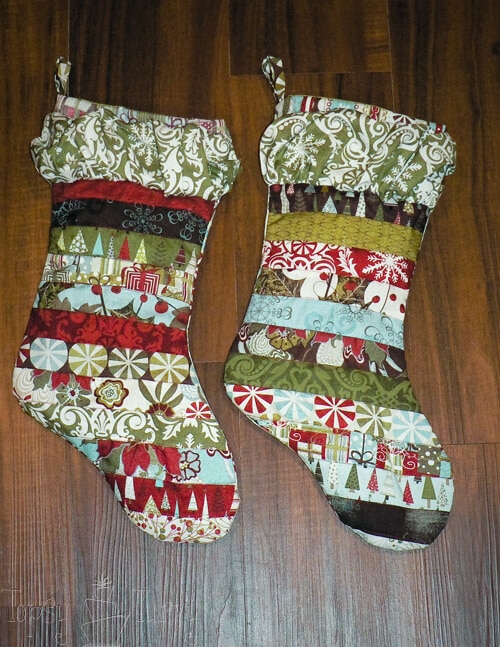
My mom made the stockings I grew up with, quilted in fact, so while I’ve bough a few stockings over the years I’ve never loved them the way I loved the homemade ones I had growing up! So I decided to finally do something about it! I made my own Tree Skirt and Stockings this year and I LOVE how they turned out!
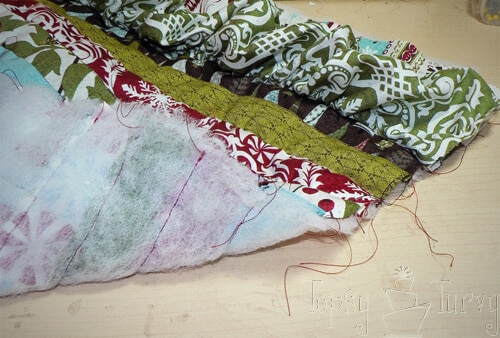
I started these stockings the same way as the tree skirt. I used 1 1/2 inch strips (honey bun) instead of the 2 1/2 inch strips (jelly roll). The ruffle was 4 inches ruffled and pulled to 2 instead of 6 inches ruffled and pulled to 4. But the technique was EXACTLY the same. Then I quilted the front onto a layer of the batting. Here is the stocking tutorial starting at that point. I made 2 different sets of this. So get the tutorial for getting to this point over at my tree skirt tutorial!
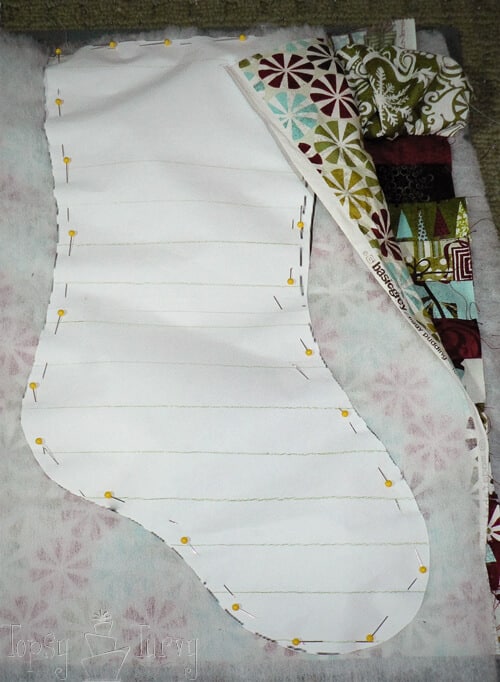
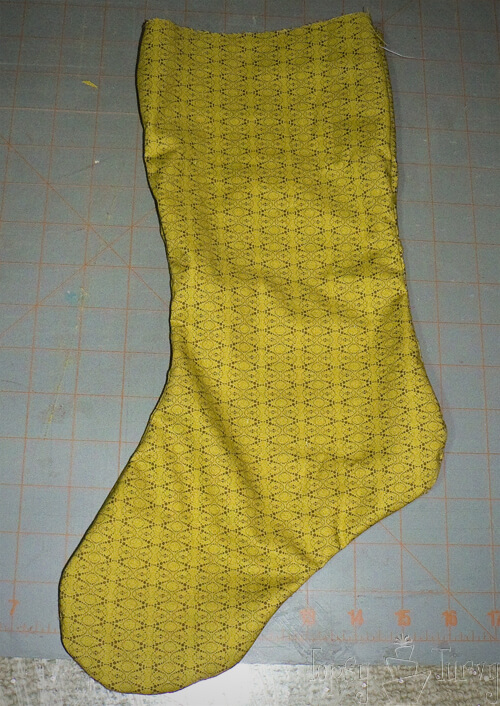
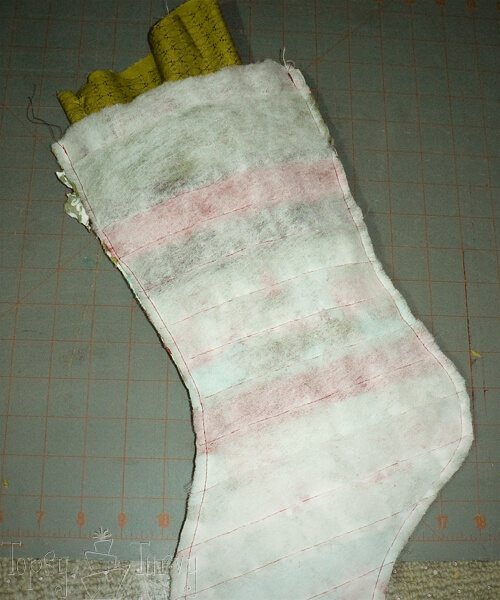
Now layer a layer of batting, the back, the quilted front/batting together. With the right sides of the back and front facing each other. Now we get to cut out our stocking! I did a google image search for stocking patterns to find the shape I wanted. I was able to get 4 stockings out of each 40 inch long set!
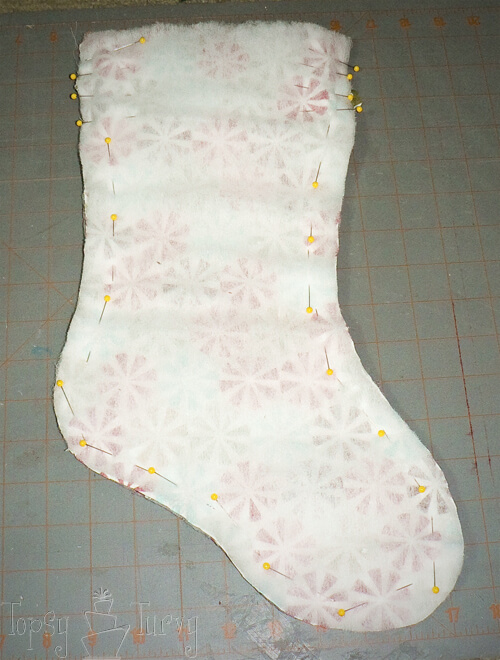
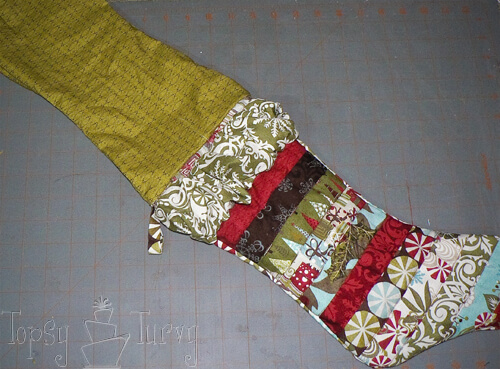
Keeping everything in this same order I sewed it all together, leaving the top open for now. See those extra pins along the top? Remember all that extra material from the ruffles? I made sure all that fabric was pushed into the inside to get the largest ruffle possible!
Now onto the lining. place your lining right sides together and using the same pattern cut the pieces out. Now sew the lining together, keeping right sides together, leaving the top open. The one thing you have to remember is to leave a 2 inch gap somewhere along where you sew to leave a gap for turning the stocking inside out.
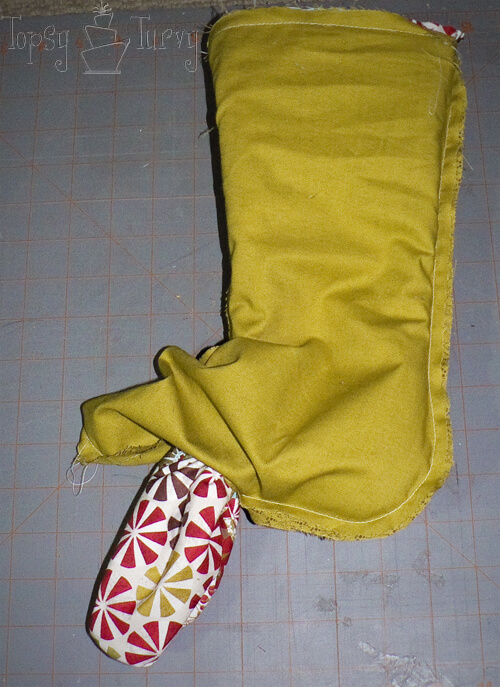
Now you can do one of two things. Leaving the stocking inside out shove the lining (right side out) inside. Like I did here! Or leave the lining inside out and shove the stocking inside of it, right side out (like I did with the rest of the stockings, and all the other pictures you’ll see).
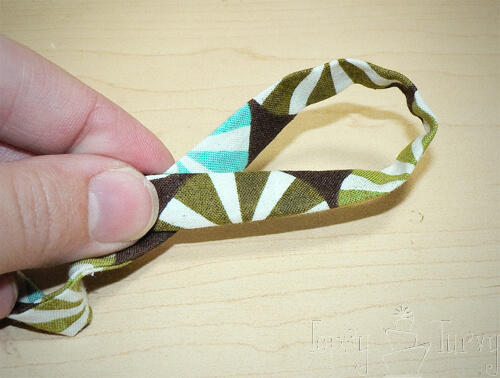
Now for our loops! Stockings HAVE to be able to hang, right? I made a loop the normal way. Fold your 1 1/2 inch strip right sides together and sew along the rough edge with a 1/4 inch allowance. Then turn it right side out and iron! Easy Peasy! Fold it together playing with the length until your happy with length you want for your stockings. Then cut all the loops the same length.
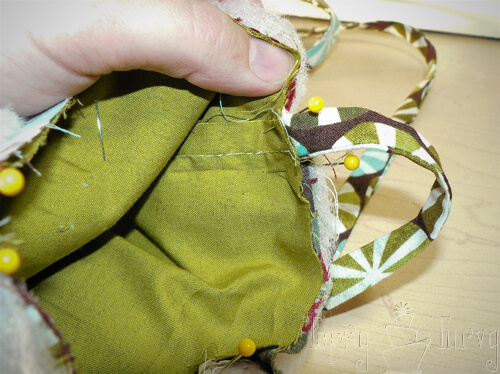
Shove the loop inside the top between the lining and the front in the back where you want your stocking to hang from.
Now sew along the top (the same 1/4 inch allowance). AND find that hole you left in your lining. Pull the front of the stocking through that hole turning your stocking right side out!
Hand stitch the hole in the lining closed and your now ready to shove the lining back into the stocking!
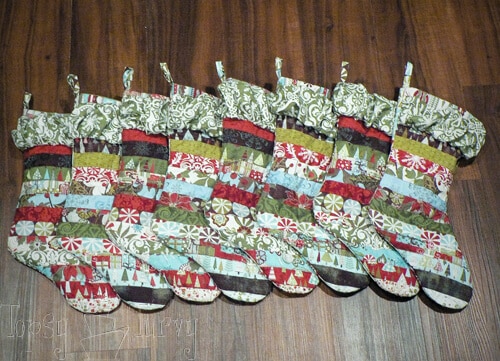
Done!!! It looks AMAZING! I am SO happy with how they turned out. The colors, the fabric, the ruffle… They turned out JUST how I pictured it in my head when I was designing them. I am in LOVE with my stockings! Now I just need to finish my fireplace and mantel so I have a place to hang them up (half way done with the tiling, building the mantel now!)
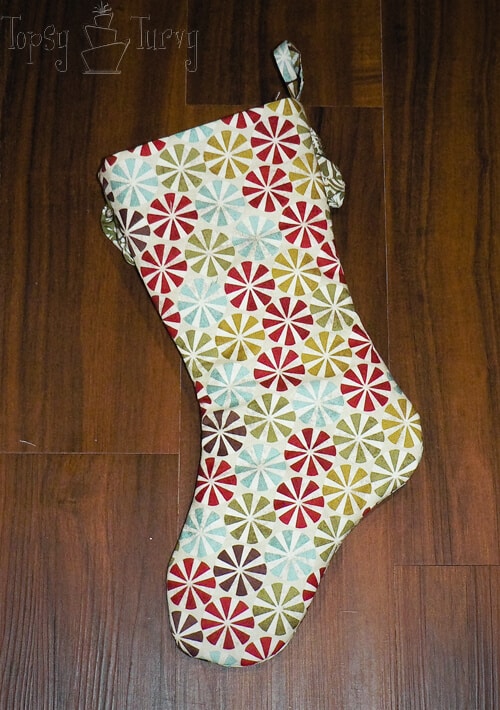
And check out these adorable backs!!! I love this candy looking material!
I made 8… I know we only have 6 family members, but as long as your sewing you might as well make extras. You never know when you’ll need one, either for visitors, replacement (with my kids it’s not a bad guess to think one might get ruined) OR an extra family member at some point… ??? JK.
Don’t forget to check out the tree skirt tutorial (to get the beginning instructions on how to make these stockings) as well as my binding tutorial I made for the tree skirt!




Korrie@RedHenHome
These are sooooo cute! Always good to have extras, too. I stockpiled counted cross stitch stocking kits for a couple of years…and eventually I used them all!
http://redhenhome.blogspot.com/2010/12/in-hopes-of-st-nicholas.html
Ashlee
AMAZING! I can’t believe you made so many cross stitched stockings. I have been working on the same one, 22 gauge, for a few years now! SOMEDAY I will finish and instead of a stocking I think I’ll make it into something for the wall.
Haley Davis
Oh wow!! You have some patience! The stocking and the tree skirt are super fabulous! Great job!!
Ashlee
Thanks!!! It actually went pretty smoothly, and didn’t take TOO long. It was worth it.
Maggie
Those are to die for! I’ve rated both your ruffle Xmas tutorials a 5. I have a “thing” for stockings and your are up with teh top 3 I’ve ever seen. Do consider sharing this on my linky for stockings:
Thanks again for sharing – your work is inspiring.
Maggie
Ashlee
Thank you so much!!! I’m in love with them, but when you create something you never know if anyone else will like it. I’m so glad you like it!!!! I linked up.
Naturally Carol
Those are wonderful stockings, just the right amount of ruffle and colour. Good idea to make extra!
Ashlee
Thank you! I tend to go overboard, so I’m never sure if it’s TOO much or not! I guess I have busy tastes!
Kristen
oh thanks so much for linking these up! they are precious!!
Ashlee
Thanks again for the invitation! I am so pleased with how they turned out!
Gloria
Wow, you do beautiful work — these are gorgeous! I can’t sew a lick, so I really admire beautiful sewing projects such a this. Love the material you used!
Best regards,
Gloria
Ashlee
Thank you so much! I don’t know how to sew a LOT of things, but I’m learning! My mom can sew anything!!! She used to make suits and even sew her own bra’s!!! Now that’s talent. I’m all about the STRAIGHT stitches! It’s amazing how much a good straight stitch will get you!
Lynsie
I absolutely love these stockings, and your tree skirt too! I just started sewing (self taught) a few months ago, I am going to attempt these for our family, might take me a year to figure out but I will.
Beautiful work! You are amazing!
Ashlee
Thank you so much! They are all straight lines. Once you get th right angles it’s really quite quick! I’m happy to answer any questions that come up! I’m so glad you like them.
tammy
very cute, thanks for the turtorial. i’m very new to sewing, so seeing how makes it much easier for me. i saw your link on Finding Fabulous.
Ashlee
I hope the tutorial is clear enough. I always worry that I miss something when I write one up!
Jade
I love these! where do you buy your fabric? I love how they don’t all match but go so well together!!
Ashlee
Thanks! I can’t take the credit for matching the fabric. This was from last years Figgy Pudding line from Moda Fabrics. I fell in love with this line and ended up having to go to 4 different online stores to get what I wanted. I wish I had been able to find a fabric line from this year (easier to get) but I just LOVED this last year’s line. Going with a line is the way to go, it all matches but doesn’t and all works so well together so easily!
lilly
wow!! these are wonderful! so festive, but modern too. and depending upon the fabric used, they can have a totally different feel. i can’t wait to make some of these for next year. i couldn’t even tell you how old our stockings are, but they are definitely old, and definitely store bought! thanks for sharing! 😀
_lilly
Ashlee
I’ve had store bought for years! Growing up my mom made us all quilted stockings. I think that’s why I went the quilted route, it just speaks “Christmas” to me… My baby sister got our old stockings (the baby get’s EVERYTHING!) But I am in LOVE with the ones I made so it doesn’t bother me!
Chris
These are beautiful. I love the fabric you chose.
Thanks for sharing the how-to.
Ashlee
thank you! I love the fabric too, It was hard to find, but oh so worth it!
sweet european dreams
Wow. The colors are amazing and I love the mix of quilt & ruffles. This tutorial is here just in time – I’m in the midst of making my son’s stocking and I need help! His won’t be quite this elaborate, but I’ll try! -diane
Ashlee
Thank you so much! Good luck finishing your son’s costumes! I was so glad I had a goal to work for, otherwise it might’ve taken me a few years to finally get around to finishing these! I hope I’ll see yours linked up for one of our Topsy Turvy Tuesday’s! I’m sure whatever you do your son will love it!
Jami
These are so cute. I LOVE the fabrics you used!
Ashlee
Thank you so much! I am SO in love with this fabric too. If I hadn’t been able to find it I might not have bothered making them this year!
Elizabeth
I should have made stockings this year! Oh well there’s always next year…Would love for you to visit me at Sew Chatty and link up to Made with Love Monday! The party will be open until Friday if you want to link up multiple projects. Hope you have a great day!
Ashlee
I linked up all my this week’s link up’s!!! I hope I didn’t do any repeats from last week… I might have. I wasn’t sure since I didn’t have you in my normal link up list. But I do now! See you next week!
Andrea
I love those. Just fabulous.
Ashlee
Thank you so much!!! I am so tickled that people actually like them. When I finish a project and post it the biggest fear is that no one will comment, meaning they all hate it! Thanks for commenting. It means so much!
Rachel Nehmelman
I know this is an old post but I love your stockings and tree skirt a question though, how many stockings did you get out of one hone bun, where did you get your stocking template and how large is the tree skirt out of the jelly roll, I have a 7 foot tree and want to be able to see the skirt outside of the tree. Didn’t know if I could just add more strips or if it was pretty long anyway.
Ashlee
Not a problem! I used one bun for the stockings, made two different strip sets and got 4 stockings out of each set. The skirt… It’s in storage right now but I think it was about 5 feet wide? I like big trees too, I actually have a ginormous tree stand so by the time I wrap my skirt around it (it’s not only wide but tall) I actually lose one of the wedges to folding over! But you could totally add more stripes, but you MIGHT end up having to get another bun, my outside row was almost a full strip. I’d add more to inside the ruffle to keep the bubble ruffle as close to the outside edge as you could! If you make it send me pictures!
Splendid Little Stars
I love these stockings! so pretty! I like the cute ruffle and binding on top. I came here from Rose’s hub.
Ashlee
Thank you so much! I can’t wait to open my Christmas boxes and see them again!!!
Amanda Bailey
These are awesome! I was wondering if you drew the sock paper pattern out yourself or had a pattern you used? This is the best proportioned stocking I have seen out there!
Ashlee
I used this pattern http://2.bp.blogspot.com/_UnZR_wYDRt8/Smd_uW439-I/AAAAAAAACc0/uhry67pZyMM/s400/moda+stocking.jpg
Hillary
I really love these stockings. How many stockings did you get out of each honey roll? I am looking to make stockings this year for our 4 kiddos and LOVE these!! Thanks for posting and sharing!
Hillary
Ashlee
I had one honeyroll and made 8 stockings! I got 4 from each length, it was tight, but it worked.
Lindsey
These stockings are super cute! One question though… I am in the process of making one front-piece set and I am at the point where you sew on the ruffle… In the tree skirt tutorial you said that your triangle was 20in so you used a 40in piece for your ruffle… In the case with the stocking this front-piece set is 40in long… How long was your ruffle piece? 80in?
Ashlee
yes, I doubled the length to get the amt of ruffling I wanted.