• Skip to primary navigation
  • Skip to main content
  • Skip to primary sidebar
  • Skip to footer

Ashlee Marie - real fun with real food

  • Recipes
    • Main Dish
    • Desserts
    • Breakfast
    • Sides
    • Bread
    • Soups & Salads
    • Drinks
    • Food Tutorials
  • Cakes
    • Cake Recipes
    • Cake Tutorials
    • Carved Cakes
    • Wedding Cakes
    • Smash Cakes
    • Party Cakes
    • How to Video Series
  • Parties
    • Complete Parties
    • Party Cakes
    • Party Food
    • Party Crafts & Decorations
    • Printables
    • Invitations
  • Holidays
    • Valentines
    • St. Patricks Day
    • Easter
    • Cinco De Mayo
    • Mothers Day
    • 4th of July
    • Halloween
    • Thanksgiving
    • Christmas
  • Travel
    • Culinary Travel – Cooking Schools
    • Family Travel
    • Disney
    • Universal Studios
    • Blogger Trips
  • Videos
    • Recipe Videos
    • Short Videos
    • Kitchen Tip Videos
    • Video equipment links
  • Crafts
    • How to & Craft Tutorials
    • Crochet & Knit Patterns
    • Decorations
    • Furniture
    • Photoshop
    • Remodel
    • Sewing Projects
  • Shop
    • Video equipment links
    • Baking and Kitchen equipment
  • Navigation Menu: Social Icons

Home » How to & Crafts » How To & Craft Tutorial » Quilt binding

Quilt binding

By Ashlee Marie 6 Comments

  • Facebook
  • Twitter
  • Yummly

Here is how I did my tree skirt binding.  I am happy with how it turned out, but I think I might try a different style next time I bind a quilt just to try it out.  Don’t forget to go see the tree skirt tutorial and the stocking tutorial on the blog!

binding quilted ruffled tree skirt

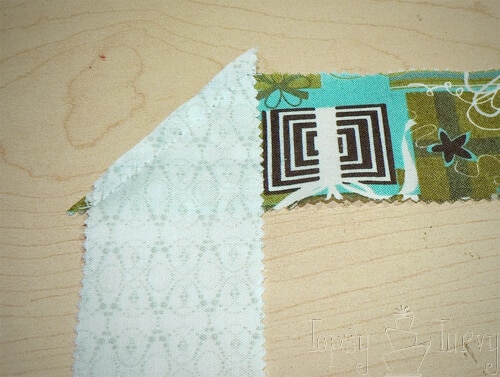
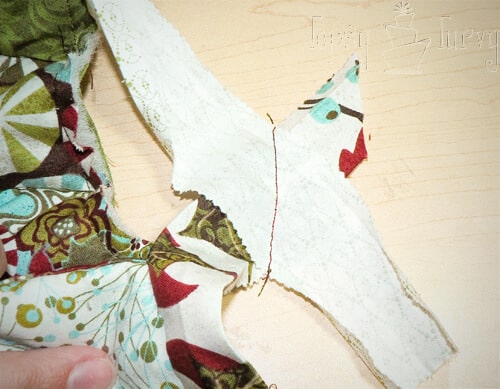
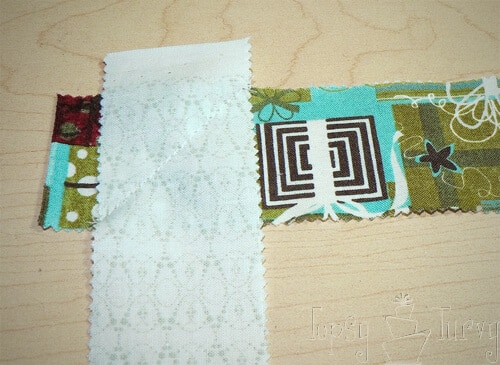
I decided to use 1 1/2 inch strips for my binding. I put the fabrics right side together at 90 degrees.  Then sewed at a 45 degree angle from one corner to another.

binding quilted ruffled tree skirt

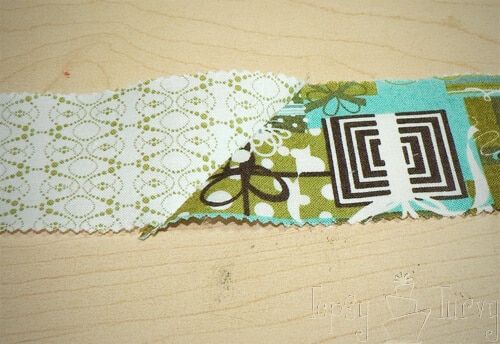
Cut off the excess edges.

binding quilted ruffled tree skirt

Open it up and iron it!  You’ll want to make sure you sew together enough strips that it is long enough to go completely around the quilt (or in this case my tree skirt!)

quilt binding folding ironing

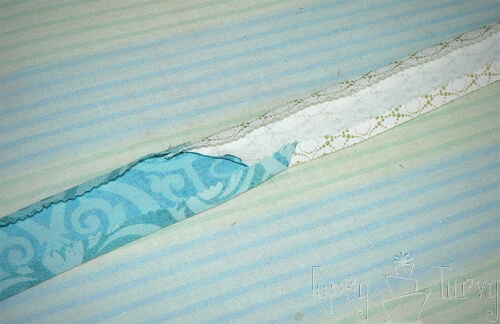
Fold in both side 1/4 inch and iron them down.

quilt binding folded again ironing

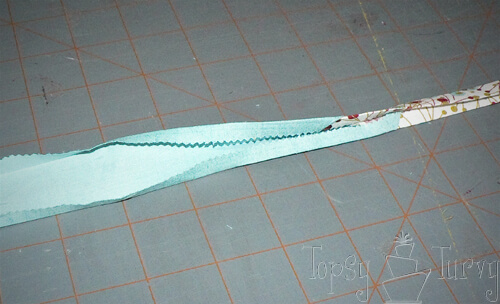
Then fold it in half and iron it again!

sewing the binding on the top

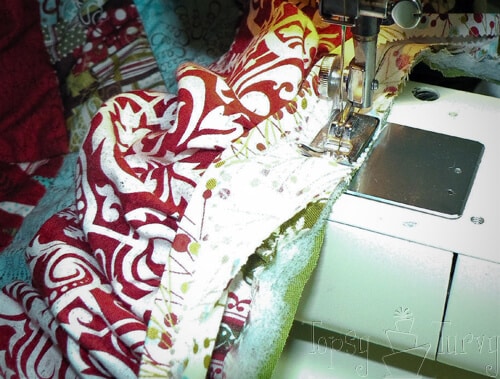
Open it back up again, lay it on top of your quilt right sides together.  Sew along your ironed 1/4 line all the way around your project leaving a tail on each side a few inches long each.

sew the beginning and end of binding

Once you get all the way around you’ll want to sew the tails together using the same style you did before  when you put the strips together.  Then finish sewing the binding onto the top of the quilt/skirt.

fold the binding over and sew

Fold the binding back up and around the edge of the quilt (tree skirt).  Pull it tight and around the top.  Now here is the part I totally spaced taking a picture of! (Grrrr  there is one picture in every craft I regret not capturing- this time a crutial step!).  Your actually going to sew around the quilt again, from the top, where the binding meets the quilt CATCHING the folded over binding from the other side while you do.

quilt binding finished

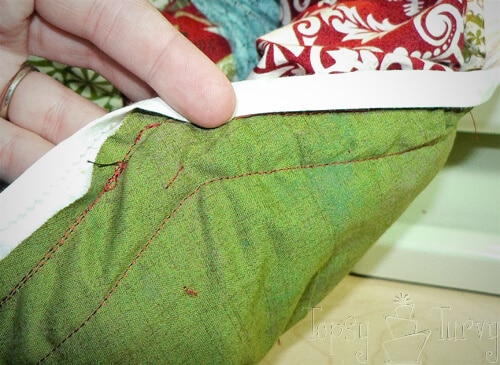
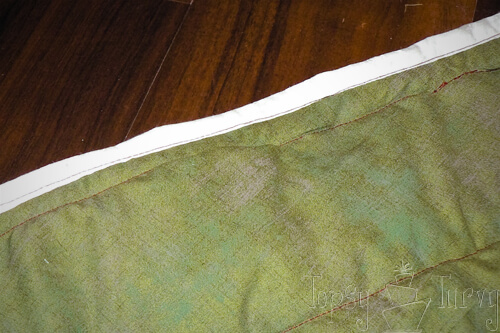
Here you can see the back side.  You can see how the stitches from the front caught the back side.  And finally the finished binding around the quilt!   Don’t forget to check out the rest of the tree skirt tutorial! And while your at it the stocking tutorial as well!

  • Author
  • Recent Posts
Ashlee Marie
Follow me
Ashlee Marie
With the right tips and tricks, I believe YOU can make, bake, or create anything. This is what I love to do - make some awesome, teach you how, and give you that boost of culinary confidence you need to rock your own kitchen!
Ashlee Marie
Follow me
Latest posts by Ashlee Marie (see all)
  • The Perfect Steak using Sous Vide - February 2, 2021
  • Pistachio cheesecake with coconut macaroon crust - November 19, 2020
  • 21 Amazing Chocolate chip cookie recipes - November 19, 2020
  • Facebook
  • Twitter
  • Yummly

More From Ashlee Marie!

JOIN MY NEWSLETTER!

Become an insider and receive this FREE Maple Icing Recipe (not seen on the blog!)

You have Successfully Subscribed!

Privacy Policy: We hate spam and promise to keep your email address safe. You'll receive email updates through AshleeMarie.com. You can unsubscribe at anytime.

Filed Under: How To & Craft Tutorial, How to & Crafts, sewing

Previous Post: « Quilted Ruffled Stockings
Next Post: Quilted Ruffled Tree Skirt »

Reader Interactions

Comments

  1. Julie

    December 7, 2010 at 12:17 pm

    I’ve always wondered how to do this without doing it by hand. Maybe now I can finish a lap quilt. Thanks!

    Reply
    • Ashlee

      December 7, 2010 at 12:21 pm

      There are quite a few instructions for machine binding out there on the blogsphere. Find one that works for you!

      Reply
  2. Amber

    December 8, 2010 at 11:45 am

    I was looking for just this the other day, I’m working on my first quilt (alone, I’ve had help before.) Great timing.

    Reply
    • Ashlee

      December 8, 2010 at 10:58 pm

      This was my 1st completed quilt, I’m half way done with a large queen sized quilt. I’m enjoying it. I’m not sure this first trial is the best style for binding, but it worked! I have another style I’m going to try on the big one! Thanks for your comment!

      Reply
  3. Kristen

    December 9, 2010 at 7:58 pm

    love this, this is so cute! Come link up to Handmade Tuesdays if you have a chance! http://www.ladybug-blessings.com

    Reply
    • Ashlee

      December 10, 2010 at 10:21 am

      I’m so glad you like it! I wasn’t sure if it was clear enough! I liked up, thank you for the invitation!

      Reply

Leave a Reply Cancel reply

Your email address will not be published. Required fields are marked *

Recipe Rating


This site uses Akismet to reduce spam. Learn how your comment data is processed.

Primary Sidebar

about Ashlee Marie image
youtube facebook instagram twitter pinterest email rss

You have Successfully Subscribed!

Privacy Policy: We hate spam and promise to keep your email address safe. You'll receive email updates through AshleeMarie.com. You can unsubscribe at anytime.

Popular Posts

Homemade deep-fried monte cristo sandwich
homemade choco taco
one pot loaded baked potato soup
tamatoa cake - moana - disney
I love these candied strawberries, like a candied apple, a glorious crunch with a ripe strawberry center!

Footer

SEEN ON

as seen on
  • TV and Media
  • Privacy Policy

COPYRIGHT © 2007–2021 Ashlee Marie - Real Fun with Real Food

ashlee marie lets make some awesome
  • Recipes
    • Main Dish
    • Desserts
    • Breakfast
    • Sides
    • Bread
    • Soups & Salads
    • Drinks
    • Food Tutorials
    • Back
  • Cakes
    • Cake Recipes
    • Cake Tutorials
    • Carved Cakes
    • Wedding Cakes
    • Smash Cakes
    • Party Cakes
    • How to Video Series
    • Back
  • Parties
    • Complete Parties
    • Party Cakes
    • Party Food
    • Party Crafts & Decorations
    • Printables
    • Invitations
    • Back
  • Holidays
    • Valentines
    • St. Patricks Day
    • Easter
    • Cinco De Mayo
    • Mothers Day
    • 4th of July
    • Halloween
    • Thanksgiving
    • Christmas
    • Back
  • Travel
    • Culinary Travel – Cooking Schools
    • Family Travel
    • Disney
    • Universal Studios
    • Blogger Trips
    • Back
  • Videos
    • Recipe Videos
    • Short Videos
    • Kitchen Tip Videos
    • Video equipment links
    • Back
  • Crafts
    • How to & Craft Tutorials
    • Crochet & Knit Patterns
    • Decorations
    • Furniture
    • Photoshop
    • Remodel
    • Sewing Projects
    • Back
  • Shop
    • Video equipment links
    • Baking and Kitchen equipment
    • Back