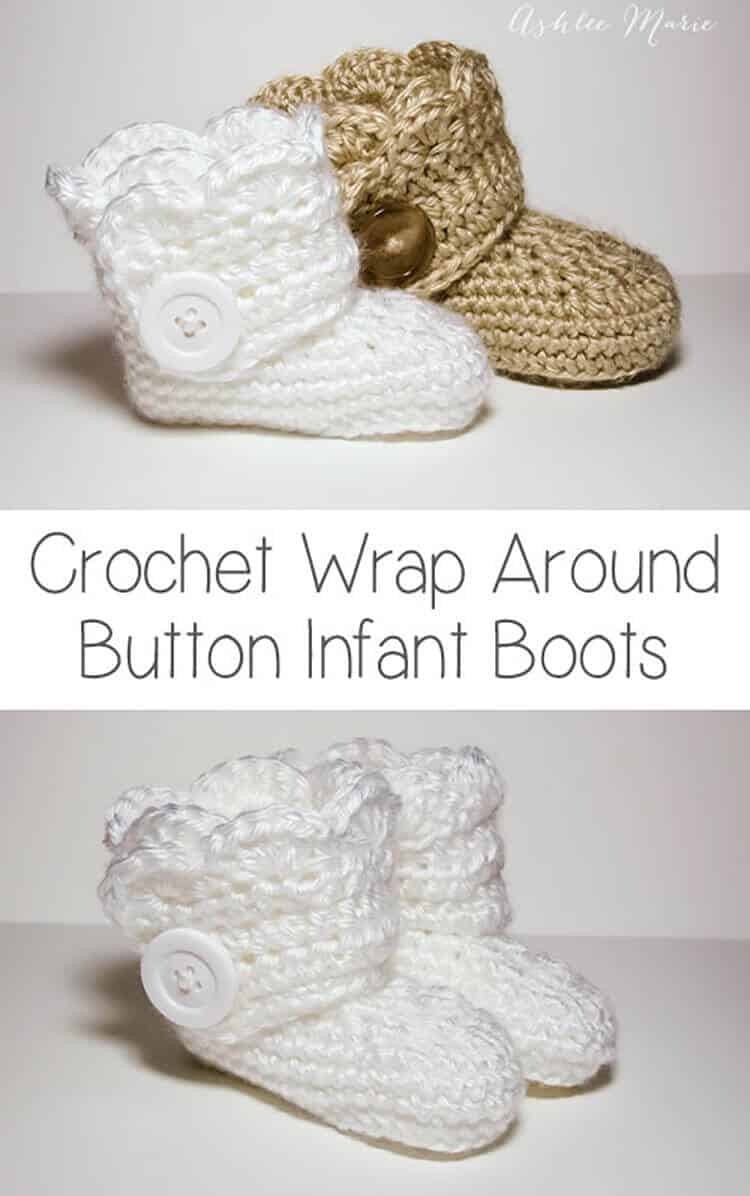
This is an easy to follow pattern to make wrap around infant booties – both for boys and girls.
Okay, after some confusion I’m separating out the patterns. Here is the one for the INFANT size! I realized after making a second set of these that I have two G hooks and they are different sizes???
So for the larger Baby sized shoes I used a G6 – 4mm for these infant shoes I used G6 – 4.25! So if your looking for an infant size 1 (or 0-3 month) boot your in the right place! For a larger (closer to size 4) shoe go to the crochet wrap around button baby boots!
Buy BOTH the Ad-Free pattern pdf’s for both the Baby AND Infant sized discounted here!
The pictures are still the same as before, for the larger size, I’ll try to substitute out smaller pictures when I make another pair!
Buy the Ad-Free pattern pdf for just the infant size here!
Infant wrap around boots
Crochet materials:
caron simply soft yarn
large buttons
G6- 4.25 mm hook (To go up a size use a larger hook, or a larger pattern, to go down a size use an G-4mm hook)
abbreviation:
ch (chain)
sl st (slip stitch)
sc (single crochet)
hdc (half double crochet)
dc (double crochet)
sc2tog (single crochet 2 together)
dc2tog (double crochet 2 together)
dc3tog (double crochet 3 together)

sole:
ch 11
row 1- sc in 2nd ch, sc 5 times, hdc 3 times, 7hdc in last ch, finish the rest of the round working along the back of the chain, hdc 3 times, sc 5 times, 4sc in the last/first ch, sl st to the first sc (28)
row 2- ch1, sc in same sc, sc 7 times, hdc, 2hdc 3 times, 3hdc (in one stitch), 2 hdc 3 times, hdc, sc 8 times, 2sc 3times, sl st to first sc (39)
shoe:
row 3- ch1, working in back loops, sc in same sc, sc around, sl st to first sc (39)
rows 4-5- ch1, sc in same sc,sc around, sl st to first sc (39)
row 6- ch 1, sc in same sc, sc 9 times, sc2tog, dc2tog, dc, dc3tog, dc, dc2tog, sc2tog, sc around, sl st to first sc (33)
row 7- ch 1, sc in same sc, sc 7 times, sc2tog, dc2tog, dc3tog, dc2tog, sc2tog, sc around, sl st to first sc (27)
row 8- ch 1, sc in same sc, sc 5 times, sc2tog, dc, dc3tog, dc, sc2tog, sc around, sl st to first sc, cut yarn weave in ends. (23)

Boot cuff:
for the right boot sl st in the 7th stitch from the seam, for the left boot sl st in the 11th stitch from the seam
ch 12
row 1- hdc in 3rd ch from hook- ch2 counts as hdc, hdc in next 9 ch, hdc in first sc (the same one you sl st in), hdc 19 times (there will be 3 spaces left), skip 2 spaces, sc in last space. (32) **note – some people had a problem with getting two right or two left feet. remember to not cross over the front, work down the inside, around the back and back up the outside, so you’ll work in opposite directions for each bootie, counterclock wise – looking top down, or “wrong” side out for the right booties and clockwise, or “right” side out for the left bootie**
row 2- ch2 (counts as hdc), turn, hdc in first hdc and around 28 times, ch 1 skip one hdc, hdc in last 2 (31- with a ch1 space)
row 3- ch2 (counts as hdc), turn, hdc, hdc in ch1 space, hdc around (32)
row 4 scallops (girls)- turn, 5dc in second hdc, *skip 1hdc, sc in next hdc, skip 1hdc, 5dc in next hdc*, repeat around (8 shells), sc down the side (I fit 5), continuing around sc across the bottom along the original chain (11), sl st, cut yarn and weave in ends

row 4 simple (boys)- ch1, turn, sc across top (32), down the side (5) and across the bottom chain (11), sl st, cut yarn and weave in ends
And both the boys and girl versions (again these are the larger size)
Don’t forget to add a button where ever you like and your done! I placed mine at the bottom of the 5th hdc over from the front- I might go lower next time… or maybe two smaller buttons?
And one final picture, I thought you might want an inside shot so you can see how it wraps a bit… I’m still so very much in love with these boots.


Anna
Thank you for posting this pattern for free and it even has a phototutorial! I’ve finished my first pair and will be starting a second one..all for my soon to pop-out baby girl. Now, I’ll be able to dress her up for the winter in these stylish booties. Might try my hand on the top hat too. Thanks again. = )
Ashlee
your so welcome! I love the top hat too! Good luck with your soon to pop-out baby girl!!!! Eeek! I love new babies, I can’t believe my little guy is already 10 months, it goes so fast!
Barb Boran
First thank you for such a cute bootie pattern and then free besides! I am havig trouble with the second bootie making the wrap go the right way. I kno u count to 11 for the second bootie but after u work the hdc on the chain do you work toward the front of the boot or the back? When I work the cuff do I sl st and work around from the right side for one and then the wrong side for the other bootie. Thanks so much!
Ashlee
after the chain you hdc down the chain, then around the BACK on both booties. so right side first row for one, wrong side first row on the other!
Barbara Kennedy
I love this pattern. I am crocheting this for my first great grandbaby.
Ashlee
congrats on the great grandbaby! I hope you enjoy this pattern!
Sarah
Thank you so much for posting this for free! A friend and my sister are both about to have a little girl and I have been searching everywhere for a good pattern. Thanks!
Ashlee
your so welcome! I hope they like the booties!
Nancy Firstiant
I have been dreaming to make a pair of baby crochet shoes, because one day I wanna give ’em to my daughter’s baby.. but looking at the step by step pics above, I think I missed the very first step, I mean I don’t know how to make the sole.. would you please help me.. I hope you have pictures about the :
ch (chain)
sl st (slip stitch)
sc (single crochet)
hdc (half double crochet)
dc (double crochet)
etc.
I know a bit crocheting, I’ve made a crochet blanket.. but I don’t know the name of the single work of the needle.
Thanx a lot
Ashlee
I’m not sure what your question is? There is no picture of the abbreviation list, it’s just a list of the stitches and the abbreviations used in the pattern.
let me know if you have any other questions! I’m happy to help, this is NOT a beginner pattern so it might take a few tries, don’t give up!
you used the word needle, rather than hook, are you thinking of Knitting???
Nancy Firstiant
Thanx for the reply
I was wandering through Pinterest just now, and I got the picture although no word explanation except the steps.. I think it’s quite understandable.. so I can follow the Pinterest steps to make the sole then.
Yeahh.. it’s an intermediate-advanced I think, but I understand the steps of your pattern. I just know the straight crochet ^^
I don’t know the tool’s name in English (I’m Indonesian), I have one exactly like on your pic.
I wanna make a cute baby hat too.. if you have one. Thanx ^^
Ashlee
I’m not sure what you mean by pinterest steps, could you send me the pin you saw?? pictures and no words? that doesn’t make any sense? my post is full of the pattern, written tutorial AND pictures.
What is straight crochet? I think the first thing you need to find is an English to Indonesian crochet stitch guide. I tried to find one online, I tried for about half an hour! but I couldn’t even find an Indonesian stitch guide so it’s hard to help when you don’t recognize my stitch instructions. I’d love to help you make them.
all my free crochet patterns are on my blog
Trista Morgan
I have question about this. line 2hdc 3 times, 3hdc (in one stitch), 2 hdc 3 times does this mean that 2hdc in the same stitch for a increase 3x than increase 3 hdc in the next stitch. I also have question about sc2tog, dc2tog, dc3tog, dc2tog, sc2tog, I don’t think I understand what that means exactly I am not great at reading patterns. sorry. I just wanna make sure I have understanding. I love these little boots.
Ashlee
when the number is before the stitch eg 2hdc it means 2 half double crochets in the next stitch. when the number comes AFTER the stitch, eg 3 times, it means do it in the next 3 stitches. so 2hdc 3 times means 2 half double crochet in EACH of the next 3 stitches. then 3 half double crochets in the next stitch and 2 half double crochets in the next three sitches. so your going from 7 stitches to 15 stitches.
the stitch abbreviation guide is at the top of the pattern
abbreviation:
sc2tog (single crochet 2 together)
dc2tog (double crochet 2 together)
dc3tog (double crochet 3 together)
I don’t blog about the basic stitches. there are a ton of blogs out there that do though, so finding instructions is luckily super easy. href=”http://www.lionbrand.com/cgi-bin/faq-search.cgi?store=/stores/eyarn&dictionaryOfAbbreviations=1&utm_source=Learning-Center&utm_medium=Abbreviations&utm_campaign=TopNav”>Lion Brand yarn has a great basic list, click on any abbreviation and it will take you to written instructions
they didn’t have dc2tog listed so I googled it for you and found written instructions, picture instructions and a video for it!
the dc3tog is the same thing but adding a third before the final pull through. I hope this all helps! Good luck and I hope the rest of the patterns goes better for you, but remember it is a more advanced pattern, so just be patient!
Eli
So, I had found a bunch of these wonderfully cute patterns online, and I only now just figured out that they were all yours! You are wonderful! Thank you so much for putting your patterns out into the world and sharing!
Ashlee
thank you so much! I’m so glad you found them and like them! Which ones have you made?
Eli
Also, just to let you know, I gave your credit for the pattern on all the pictures of the stuff I’ve made! Thanks again, everyone loves them!
Ashlee
Thank you SO much, I really appreciate that! So many people don’t think to credit these days, I really really appreciate it.
Nancy Firstiant
This is the original site liveinternet.ru/users/sovit-2010/post183873888/ , i got it from pinterest. i just started to make it for i can make the sole, but i got mine ruffled after some steps.. i think i have to modify it, make it flat.. then i do your booties pattern above.
I supposed trying the easiest pattern first i think..
hmm .. your baby sandals pattern looks easy, need to try.. they’re cute, thanx ^^
Ashlee
I’m SO sorry, but your comment totally confused me? Why did you link to that ruffle tutorial? and what does it have to do with my pattern? That would not work for a sole at all, the whole point of that pattern is to create a ruffle, it has NOTHING to do with a shoe. Also the sandal pattern uses the same sole tutorial as my booties, and I’d say the sandals are a bit trickier than the booties, IMO.
Ashlee
I added a diagram of the sole, hopefully that will make it more clear
Eli
I made 3 pairs of the wrap around booties, took me awhile to get the hang of the descending stitches, because I was doing them wrong, but they still came out cute! I am about to give the baby sandals a try. I love the colors you chose! I am also thinking about the top hats, and the baby converse! 😀
Ashlee
I’m so glad you go them right and were able to make some pairs! Good luck with the sandals, they are a bit tricky… I tend to just play around and make them, and then try to figure out the best way to explain how I made them… I’m afraid it doesn’t always make sense to everyone else! let me know what you think about the other patterns!
Crafty Lady
I absolutely love these boots!! I am currently attempting to make a pair but am having a hard time starting the cuff part. I have the cuff for the one that buttons on the left but cant figure out how to do the other one so that it opens on the opposite side….
Ashlee
it’s the same cuff, but started a few stitches over. Te difference is the right side/wrong sides are opposite! so chain, then hdc down the chain down the side, around the back and up the other side. does that help?
Vivian
Hi, so cool that you’re sharing this pattern. I guess you can say I’m somewhat a beginner… I’ve made a few things here and ther but have never tried shoes. I’m having trouble with the sole… when I get to the toe area and do the 2hdc in 3, I get somewhat of “holes” as the toe curves. There’s one big one in the center and then 8 smaller holes. I used a 4mm hook and some fine baby soft, yarn. Ive tried using a bigger hook & that just made everything looser. If I tried tighter stitches, the sole will be fit for a mouse! Any tips to get the stitches close together? Could it possibly be to fine of a yarn?
Here’s my sole:
https://www.dropbox.com/s/4ivdu8wt2gtqna1/2012-09-06%2018.17.19.jpg
Ashlee
it looks like your beginning ch’s are too loose. try doing the original ch on a smaller hook, then switch back to the normal hook and do row 1. we all crochet a bit different, and knowing how you crochet, tight/loose will help you change up patterns to fit your style. I don’t think I’ve ever followed a pattern without changing something.
Ashlee
I added a diagram of the sole, hopefully that will help!
Hannah
Can you please explain what 7hdc in last ch means?
Ashlee
it means to 7hdc in the last ch, long hand: seven half double crochet in the last chain
Anna
OMG! I love these and they were super easy to make! I wish I could find a pattern like this for adult sizes lol I want a pair for myself! 🙂 Thanks for sharing! They’re great!
Ashlee
your SO welcome! Thank you so much for taking the time to leave positive feedback! I really really REALLY appreciate it!
Linda
Thank you so much for posting this, especially with such easy to follow instructions. I love them. I made a pair for a baby shower a bit ago and everyone just loved them. I am now making another pair for another baby shower, i am going to try to make a color change on the top of the boot to match an outfit i am making. I very much appreciate people such as yourself who love the craft and don’t require money to share your expertise, or your beautiful patterns. It makes it so helpful for others. Before finding your pattern i think i surfed the internet from one end to the other for just the right bootie, yours are just perfect. Thank you very, very much!!!
Ashlee
your so welcome, thank you for taking the time to comment! Three nice comments in a row today! I’m on a roll. It totally tickles me! I usually get question after question after question for my patterns, which is expected for patterns and totally fine, but sometimes it gets to be so much I wonder if I just wrote a dud! so getting such sweet comments letting me know it went well just makes my day!
Danielle Story
I Love this pattern!!!
It works up exactly right, comes together perfectly, and with a size E hook they fit my preemie perfectly!
Thank you thank you for sharing!
Ashlee
you are so so SO welcome! I’m so glad the smaller hook worked so well for you!
Stephanie
I was taught to crochet years ago and the only thing I made was a simple beenie. I am trying to teach myself again, but having trouble. I think you should make a youtube video of you doing this. 🙂 I am going through videos relearning how to do this, but none of them have any booties as cute as these.
Ashlee
thanks for the request, I have a lot of requests for patterns, videos, etc… it’s just not really my thing. but I’ll add it to the video request list if i ever get around to it. the best thing to do is watch videos of STITCHES, then read a pattern and make it! if I was to do a video it would be under 5 mins and just be highlights of the pattern, no one wants to watch a few hours of me making booties!
Candace
I LOVE your pattern for the booties! I have tried to make them several times and I am doing something terribly wrong – I’m sure it’s user error. Which row begins the toe portion? My toe portion always ends up lopsided to the right of center by about an inch. I’m sure I’m just reading the pattern wrong so can you clarify which row starts the toe please. I can send you a picture if you like.
Ashlee
There isn’t a ROW for the toes. there is the sole, the under part of the shoe, then the shoe rows is when it starts climbing up the sides- so the toes/heels everything. so I’m confused by your problems. go ahead and send me a picture and I’ll see what I can answer for you!
Jackie
Thank you so much for this pattern. I have a granddaughter being born next Friday (2nd c-section) and my daughter has shown me other boot patterns that she likes. These are by far the cutest! The directions are very clear and the pictures help a bunch. I wish more people would have pictures to help us “newbies” figure out what to do!
Ashlee
Your SO welcome! Thanks for the super sweet comment! And congrats on the upcoming Granddaughter!