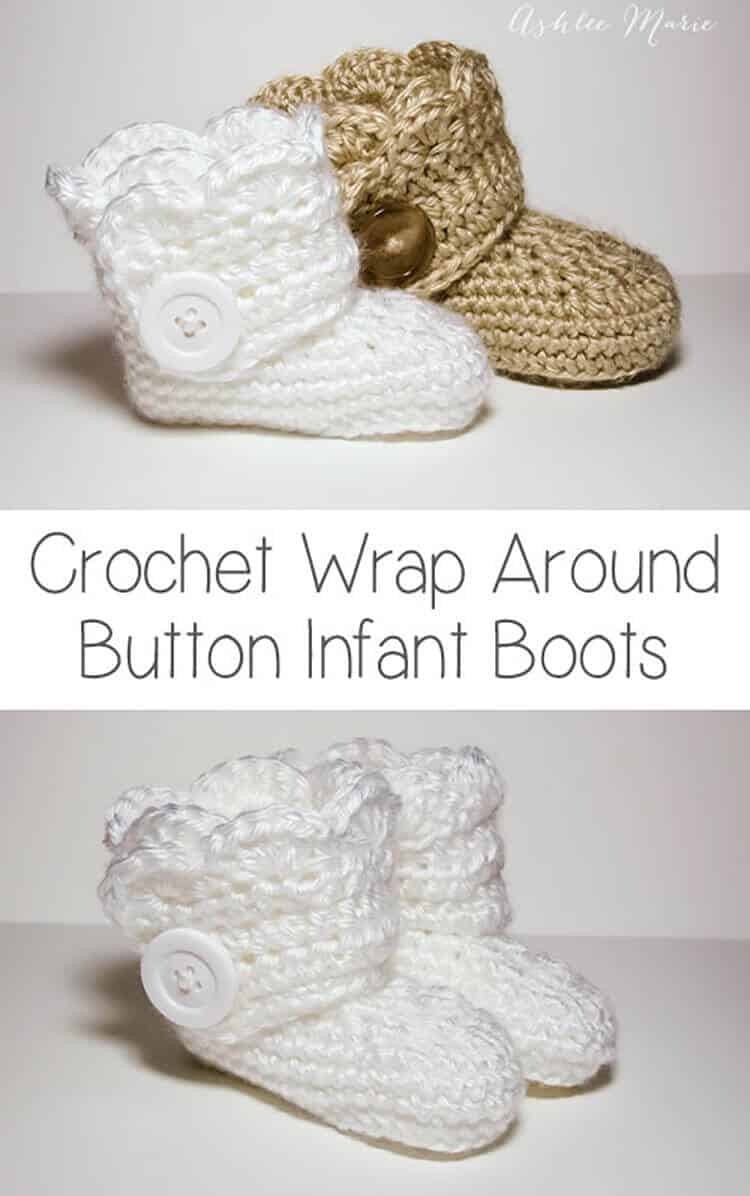
This is an easy to follow pattern to make wrap around infant booties – both for boys and girls.
Okay, after some confusion I’m separating out the patterns. Here is the one for the INFANT size! I realized after making a second set of these that I have two G hooks and they are different sizes???
So for the larger Baby sized shoes I used a G6 – 4mm for these infant shoes I used G6 – 4.25! So if your looking for an infant size 1 (or 0-3 month) boot your in the right place! For a larger (closer to size 4) shoe go to the crochet wrap around button baby boots!
Buy BOTH the Ad-Free pattern pdf’s for both the Baby AND Infant sized discounted here!
The pictures are still the same as before, for the larger size, I’ll try to substitute out smaller pictures when I make another pair!
Buy the Ad-Free pattern pdf for just the infant size here!
Infant wrap around boots
Crochet materials:
caron simply soft yarn
large buttons
G6- 4.25 mm hook (To go up a size use a larger hook, or a larger pattern, to go down a size use an G-4mm hook)
abbreviation:
ch (chain)
sl st (slip stitch)
sc (single crochet)
hdc (half double crochet)
dc (double crochet)
sc2tog (single crochet 2 together)
dc2tog (double crochet 2 together)
dc3tog (double crochet 3 together)

sole:
ch 11
row 1- sc in 2nd ch, sc 5 times, hdc 3 times, 7hdc in last ch, finish the rest of the round working along the back of the chain, hdc 3 times, sc 5 times, 4sc in the last/first ch, sl st to the first sc (28)
row 2- ch1, sc in same sc, sc 7 times, hdc, 2hdc 3 times, 3hdc (in one stitch), 2 hdc 3 times, hdc, sc 8 times, 2sc 3times, sl st to first sc (39)
shoe:
row 3- ch1, working in back loops, sc in same sc, sc around, sl st to first sc (39)
rows 4-5- ch1, sc in same sc,sc around, sl st to first sc (39)
row 6- ch 1, sc in same sc, sc 9 times, sc2tog, dc2tog, dc, dc3tog, dc, dc2tog, sc2tog, sc around, sl st to first sc (33)
row 7- ch 1, sc in same sc, sc 7 times, sc2tog, dc2tog, dc3tog, dc2tog, sc2tog, sc around, sl st to first sc (27)
row 8- ch 1, sc in same sc, sc 5 times, sc2tog, dc, dc3tog, dc, sc2tog, sc around, sl st to first sc, cut yarn weave in ends. (23)

Boot cuff:
for the right boot sl st in the 7th stitch from the seam, for the left boot sl st in the 11th stitch from the seam
ch 12
row 1- hdc in 3rd ch from hook- ch2 counts as hdc, hdc in next 9 ch, hdc in first sc (the same one you sl st in), hdc 19 times (there will be 3 spaces left), skip 2 spaces, sc in last space. (32) **note – some people had a problem with getting two right or two left feet. remember to not cross over the front, work down the inside, around the back and back up the outside, so you’ll work in opposite directions for each bootie, counterclock wise – looking top down, or “wrong” side out for the right booties and clockwise, or “right” side out for the left bootie**
row 2- ch2 (counts as hdc), turn, hdc in first hdc and around 28 times, ch 1 skip one hdc, hdc in last 2 (31- with a ch1 space)
row 3- ch2 (counts as hdc), turn, hdc, hdc in ch1 space, hdc around (32)
row 4 scallops (girls)- turn, 5dc in second hdc, *skip 1hdc, sc in next hdc, skip 1hdc, 5dc in next hdc*, repeat around (8 shells), sc down the side (I fit 5), continuing around sc across the bottom along the original chain (11), sl st, cut yarn and weave in ends

row 4 simple (boys)- ch1, turn, sc across top (32), down the side (5) and across the bottom chain (11), sl st, cut yarn and weave in ends
And both the boys and girl versions (again these are the larger size)
Don’t forget to add a button where ever you like and your done! I placed mine at the bottom of the 5th hdc over from the front- I might go lower next time… or maybe two smaller buttons?
And one final picture, I thought you might want an inside shot so you can see how it wraps a bit… I’m still so very much in love with these boots.


ivy
WOW i just ♥ your site, thank you so much for all the work you put into it. i work lots better with pic tutorials together with written, as i am a very visual learner..
Ashlee
your so welcome! thanks for taking the time to write such a sweet comment! I really REALLY appreciate it!
Nevi
HI, how do you do a dc3tog, everywhere i look gives me a completely different method!
Ashlee
it’s a decrease, your double crocheting 3 stitches together, so you do half of the dc in each stitch, then do the final yo and pull through all 4 loops on your hook to create one stitch~
Gloriousaffinity
This is what my pattern did also! I’ve finished one as I thought it was meant to happen, as it kinda makes it look like a shoe with a curved ball of foot area, but then when I went to make the second one, I was thinking uh oh. I don’t want to undo the other bootie but I think the pattern should be counting the the first sc as number one, instead of then doing 9. Maybe there should one be 9 in total on round 2, as this is where I am finding the problem.
Ashlee
nope the pattern is written just right. You are more than welcome to change it to fit your style of crocheting, I do it all the time when I read patterns, but it’s written just right. the soles are symmetrical and getting rid of one stitch would throw it all off. But we all crochet differently, tight, loose, crooked, etc… so feel free to make it your own, and do what you need to make it work for you, but please don’t confuse other readers. I can’t figure out if the tight crocheting or the loose crocheting is causing it to curl over (I wish I could watch someone crochet it to tell). But if you just block it out (or tug it into place like I do- I don’t have the patience for blocking) it should go right into place. I should really draw out a chart so people can see it better maybe?
Anna
I am a bit confused, what do you mean sc/dc 2 together? I originally thought you meant two in the same stitch, but that definitely does not make the shoe close like that.
Ashlee
dc2tog is a decrease, you’ll dc (or sc) two stitches into one
Laura Wild
Hey there 🙂 I am absolutely in LOVE with these booties. Although I am not a beginner, I am still at a novice level. I have a really stupid question for you. What is my old seam? Or maybe where is my old seam? I have one bootie made and I just decided to wing it on my placement of the wrap. It looks okay, but I am a bit of a perfectionist so I want it to look just like yours. Also, do you think it would be possible to add the wrap without finishing off the boot first? Thanks a million for the fantastic tutorial. My girlfriend and her husband just had twin boys 3 days ago and were completely unprepared, so I know they will love these too.
Ashlee
you can add the wrap without finishing off for one foot, by sl st over, but it just doesn’t look right… I hate finishing off and restarting, but when it’s right it’t right! The seam is the seam from the foot part- where you sl st at the end and ch up, is there any other kind of seam, should I call it something else? I’m still totally new to writing patterns, and I write what makes sense to me, sorry if it’s too confusing! The booties are HUGE, so hopefully they’ll fit them in the winter!
Courtney
I have to start by saying that I absolutely loved this pattern. I tried for months, actual months to make my first pair of booties and it wasnt until I found this pattern that I was able to do it, and I’m a fairly good crocheter. On my third pair, I realized an error I was making that someone else also mentioned about the booties not looking as closed as yours.. this happens in row 1 of the boot cuff if you dont sc in the right place. The cuff ends up not closed and looks more like a shoe than a boot. I think it may be helpful to add a picture showing that that sc is placed across almost to the beginning at the other side. When you miss this step, it makes the decreased rows not look as neat also. Thanks for sharing this great pattern!
Ashlee
the picture above that row actually has the picture after the sc in the last spot, but because I don’t have anyone helping me take pictures at 2 am the hook kept falling over so it’s hard to see, if I make another pair I’ll try to get a better picture. glad you were able to figure it out!
JaviValdesM
thanks for the pattern, I was looking for this long time ago!!
It was really easy to follow, but i have a doubt because the sole looks like they were both right foot or I’m wrong :S jijijiji
kisses and sorry if a wrote the words wrong my native lenguage it’s not english, I’m from Chile so I speak spanish
Ashlee
the sole is symmetrical so they are both left or right feet! when you first crochet them they sometimes twist a little, but just pull them back into place and it will be fine!
Ashlee
I added a diagram of the sole, hopefully it will help show how symmetrical the soles are
RACH
Hey! I really love this pattern, and I was wondering. Can we sell what we make, or would you prefer we just use them for our own personal use? Thanks! I have looked at all of your patterns and love them all! Great job!
Ashlee
you can totally sell what you make, please link back to my pattern and give me design credit. then people who want to make them can, and people who don’t want to make them have something to buy- best of both worlds! good luck!
Krissy
Thank you so much for this cute pattern! The booties are absolutely adorable and I can’t wait to see them on my son who’s due later this year!
Ashlee
congrats on expecting!!! I love being pregnant, and having babies, and nursing, and raising them, etc… I love it all! I loved crocheting things for the baby during my last few months of my pregnancies, imagining what my baby is going to be like, and how great it’s going to be! So have fun and enjoy it all!
Morgan
Ok. I am new to crocheting. I did exactly what your pattern said and it was amazing! I impressed myself so much! Thank you very much! It was very easy to follow! I only have one question! No one laugh!!! HOW DO I MAKE THE OTHER FOOT!? I’ve been trying different things and have absolutely no idea where to start! Please help because unless my neice only has one foot (God forbid) , I’ll need both!
Ashlee
like the patterns says, the bottom portion of the booties are the same for both feet, the only change is when you add the cuff,
Boot cuff:
for the right boot sl st in the 7th stitch from the seam, for the left boot sl st in the 11th stitch from the seam
Jules
Hi Ashlee, I just wanted to say thank you & let you know this is a wonderful pattern I have just finished the first bootee and I found your instructions to be very clear. You are so patience when answering all the questions posted to your blog. You are very generous with your time & knowledge, your kindness shines through your words. I found by reading your replies all my questions were answered. You are very creative keep up the good job! Sincerely, Jules.
Ashlee
your so welcome! I’m glad you were able to find your answers in the comments! I hope you didn’t have too many questions!
Kristy
THANK YOUUUUUUUUUU : ) Love these booties and I have even made them without the cuff of the boot for little ballet slippers. The instructions are simple and easy to follow. Well done and thanks so much for sharing : )
Ashlee
your so welcome! I’m glad you like them!
Donna
These booties are absolutely adorable. I knit most of my booties mainly because I havent really found many crocheted bootie patterns that I liked. This one …… I LIKE! No … I LOVE! Thank you for sharing.
Ashlee
your so welcome!!! And knitting booties? That must take forever, but look amazing!
Becky J.
I just finished my first pair of these!!! Thank you SO much for the seriously darling pattern… of course it took a few tries for me to get it to work for me (and a safety pin in my first sc so I could keep my stitches straight!) but now I have such a cute gift to give at baby showers… and my hubby will be happy because now I won’t feel like I have to crochet an entire blanket to give to my friends, and that gives me more time with him! These are much quicker, even with all my detours 😉 and now that I’ve figured it out, it will be much smoother. Anyhow, you are very talented and I love your family pictures, that place is right around the corner from me. Thanks again 🙂 Becky
Ashlee
using a stitch marker is a great idea! I usually use a piece of off colored thread when I’m working on a piece that I have trouble keeping track of the first stitch with!. And much faster than a full blanket!
cindy
I know how to make a sc 🙂 But there was a picture where yours are straight above eachother. Mine are always like the other pictures. Ive seen it before with someone else but she wouldn’t tell me how she did it. There has to be a way haha! But thanks anyway!
Ashlee
I honestly have no idea, it’s just how I crochet, not trick to it! We all crochet so differently, tight, loose, etc… feel free to alter the pattern to fit who you crochet!
Tamara
Love these! Such a great tutorial too. I linked to this pattern on my blog this morning for a booties roundup, at http://www.mooglyblog.com – thanks for sharing this pattern for free!
Ashlee
your welcome! and thanks for linking back to me and giving me credit!
Kristin
Hi Ashlee,
Thanks so much for sharing your pattern — and then for following up to the comments with such clear and generous answers. I’m a novice crocheter and this is the first item I’ve made that isn’t a toy (and therefore the first thing I’ve made where the stitch count *really* mattered). It took me a few tries to get the stitches right for the first shoe but I found all the answers to my questions within the comments here and now I have a FANTASTIC pair of booties for my friend’s little boy (due later this month). These have been hugely satisfying to make and I love how structured the final pieces are. If I ever have another baby of my own, s/he will have many, many pairs of these. 🙂
All the best, Kristin
Ashlee
your so welcome! Thank you so much for your sweet comments! I am so glad your questions were answered easily!
Aliah
OMG i absolutely love these they are super adorable :), are we allowed to sell the finished products giving you credit ofcourse??
Ashlee
Yes, you can sell your finished products, and please give my pattern credit and a link back so people who would rather make their own instead of buying it can find the pattern!
Jackie
Hey! I love these! I made a pink pair of the girl version and put a cute little white rabbit button on them for my best friend`s baby! She loved them. 🙂 Great pattern and really helpful pictures. 🙂
Ashlee
How cute! Pink with rabbit buttons? adorable! I’m glad you liked the patterns
Aliah
yes deffinately 🙂 thank you so much
Ashlee
your so welcome!