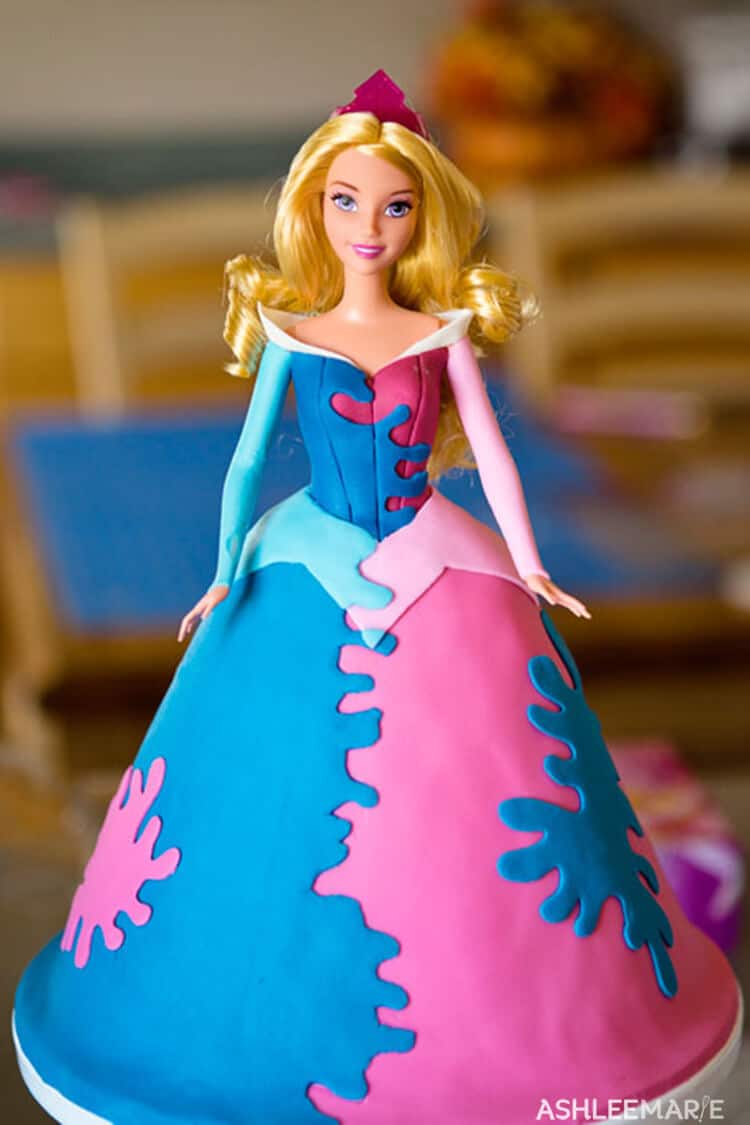
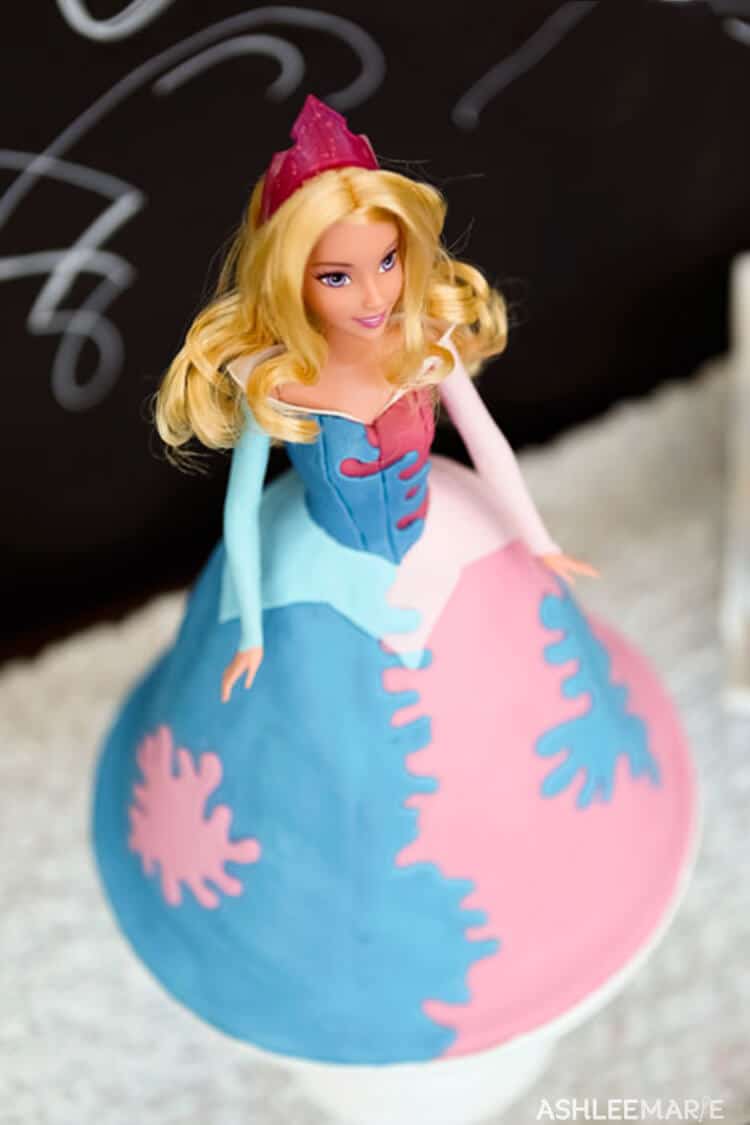
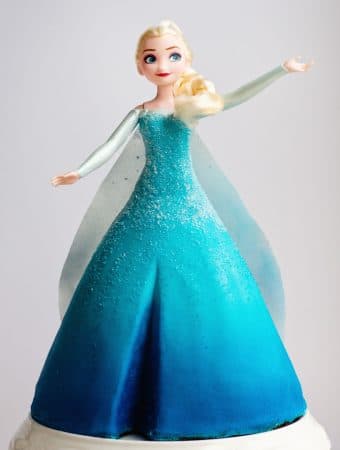
I know my princess Cakes (Elsa, Anna, Merida, Rapunzel and Tiana) have been a popular series so I was excited to add Aurora to the mix! You can use this tutorial to make a pink or blue simple dress, or add the extra steps to make this multi colored, splattered dress (Yes I know she doesn’t ever wear, or even SEE this splattered version in the movie, but it was something different and eye catching to create).
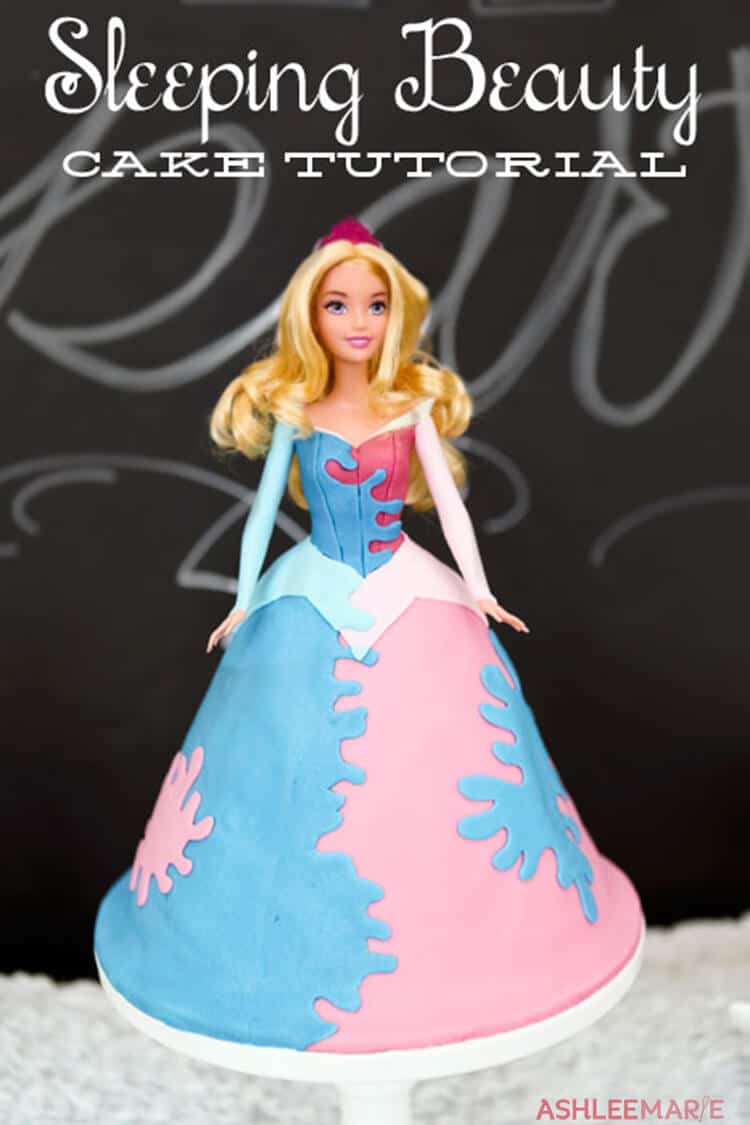
supplies:
1 full dense cake (pound cakes are great for carving) baked in the Wilton Wondermold pan
1 full dense cake (same as above) baked in an 8 inch x 3 inch pan
double batch of Ganache
Sleeping Beauty Doll
Sharp serrated knife and smaller sharp knife(I like cutco)
Pink and/or Blue Fondant (I use Satin Ice)
White Fondant and gum-tex OR white gumpaste
fondant mat (optional but I highly suggest it)
clear vanilla or vodka
paint brush
burgundy and/or navy gel food dye
shortening (to spread on the mat and keep on your hands when working with fondant)
powdered sugar/corn starch mixture (50/50, you can powder fondant up when you need to)
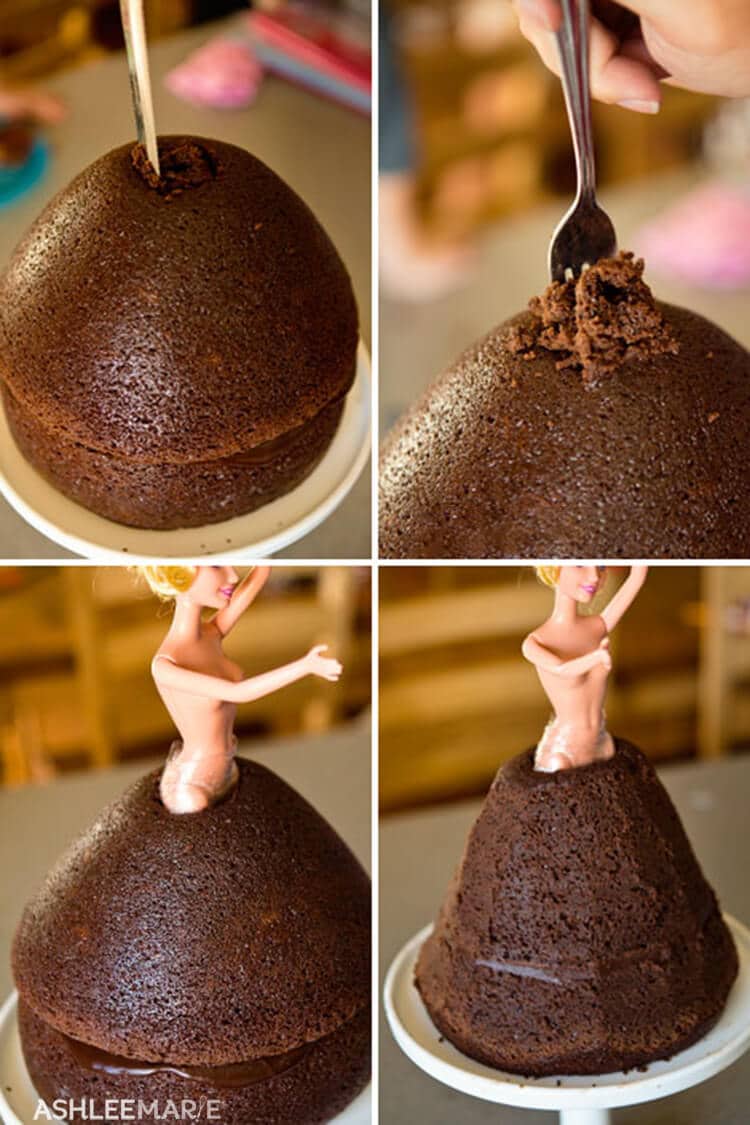
Start by sticking the cakes together with ganache (tastiest glue you’ll ever use). Then once it’s set use a long, sharp serrated knife to cut a hole in the center of the cake. Use a fork to pull out the cake from the center.
Wrap your barbie’s legs in plastic wrap and stick her down into the hold, pushing all the way down. Then carve the cake, I wanted more of a flowy bell shape to the skirt (a line with the edges fluting out).
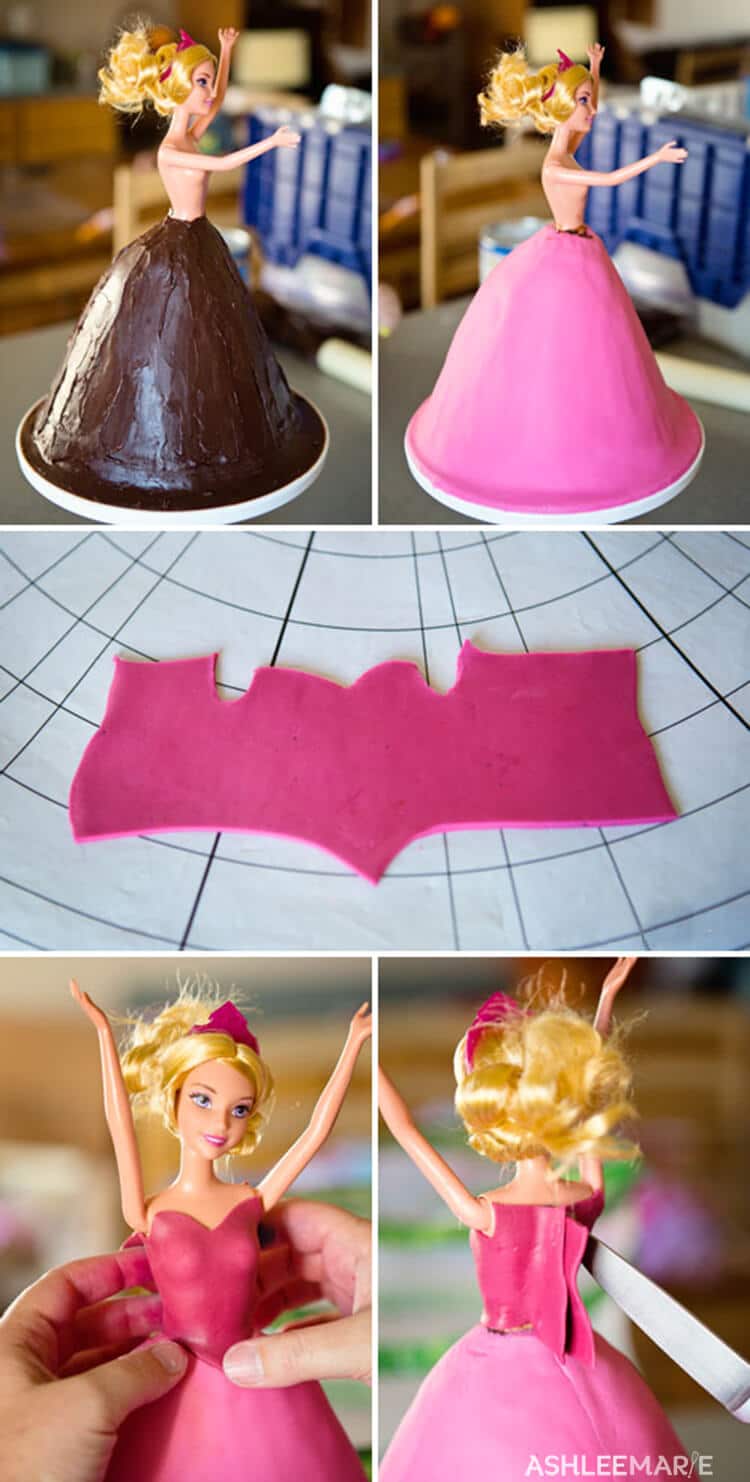
Cover the skirt with ganache and let it set. I also use ganache to fill in the area at the top of the cake into her waist, and for this skirt I also brought the ganache out at the edges of the skirt to the edge of the cake plate to help with that flowing out effect.
Roll out the med pink or med blue (depending on what color dress your going for) fondant about 1/4 inch thick and cover the skirt area. Trim around the edges and waist.
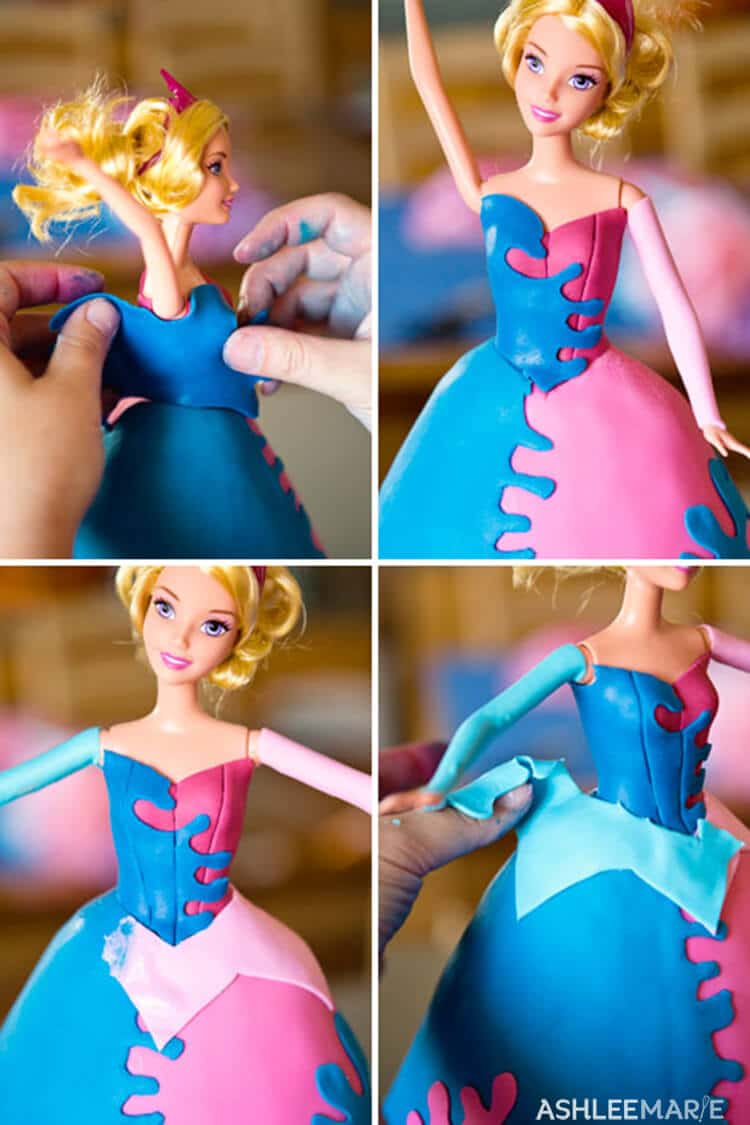
Color the med pink or med blue darker with the burgundy or navy food gels. Roll it out thinner this time, about the height of a dime, and cut out the basic shape of the bodice. Paint the back with the clear vanilla/vodka and then stick it to the doll, pressing into place and wrapping around the back, cutting the excess off. Then clean up around the waist and neckline where you need to.
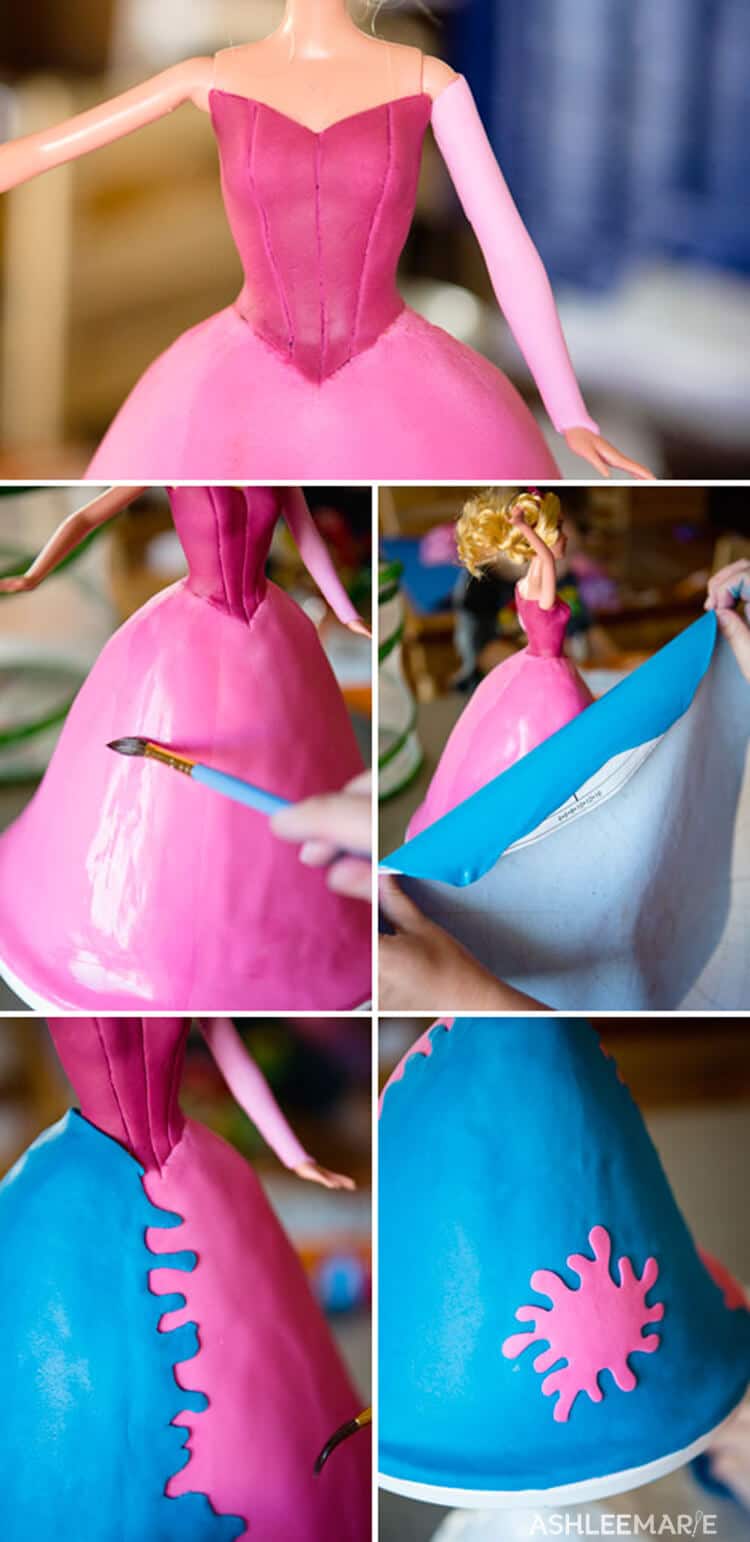
I used a dull tool to mark lines down the bodice as an extra detail, but do it while the fondant is still fresh. Now lighten the med pink by adding white fondant. Then roll out a small portion so thin you can see through it.
If your having trouble getting it thin enough if might simply not be strong enough. I like to either mix in gumpaste (instead of the white fondant) or mix in this powdered gum-tex. it strengthen the fondant so you can roll it out super thin. Paint the back with the clear vanilla/vodka and lay it over one arm, trimming the excess with your sharp knife.
If you just want one color for your dress do the other sleeve and move on to the collar. If you want to do the splatter dress like this then roll out the opposite color, not too thin, like the height of a nickel or a little less.
Paint the half of the skirt your going to cover with the clear vanilla/vodka and lay the fondant over the skirt. Then cut the excess around the bottom of the skirt and waist. Then have fun! Use your sharp knife and cut rounded corners, peninsula and bay shapes from the waist to the base in the front and back!
finally we added a splatter shape of the opposite color on each side of the skirt
Darken the fondant and do the other half of the bodice the same way, roll it out pretty thin, cut the basic shape like before, cover the half of the bodice your covering with clear vanilla/vodka and place the bodice on, cutting the same fun shapes in the front and back.
add white again to create a lighter shade and cover the other sleeve like the first. And now it’s time for the pointed hip/waist area of the skirt! I rolled out the pink super thin again, cut the basic shape, painted the back with the clear vanilla/vodka and put it into place, trimming where needed. Then I cut away at it where the blue would be so it faded into that half of the skirt, so it can be covered easily without a line showing through.
Roll out the light blue super thin and do the same thing on the other side, cutting swirls to the front and back again!
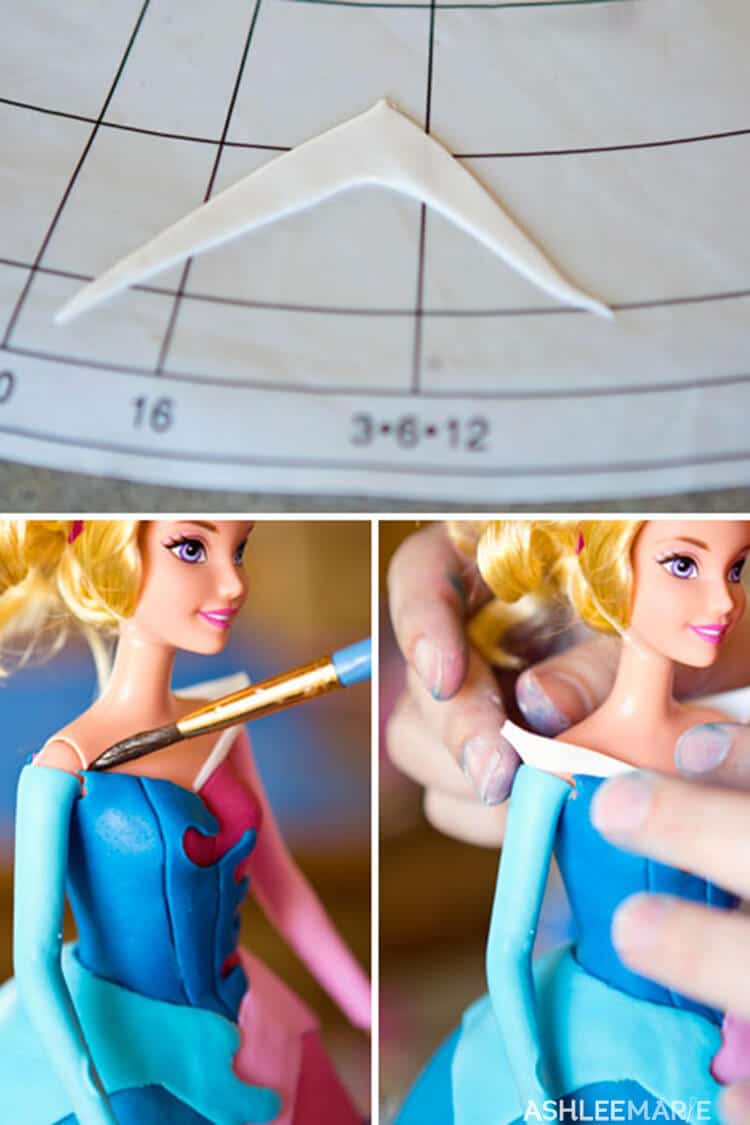
Almost done! Now we just have the collar! For this you DEF want white gumpaste, or white fondant mixed with gum-tex. Roll it SUPER thin (so it will be light) and cut out a 90ish degree corner shape.
Paint the very edge of the neckline/sleeve area, you don’t want it dripping, but you definitely want to get it sticky/tacky. Then carefully place the edges of the collar into the neckline, making sure the whole collar doesn’t stick to the doll. (leave her hair tied up so it doesn’t put pressure on the collar while it dries).
And your DONE! It was actually faster to make the cake itself than edit the pictures and write up this description! Funny how that happens. This cake was probably just under 3 hours to make. Let me know if you have any other questions and don’t forget to check out the rest of the Princess Spa Party and other recipe and decoration posts!
[riview showtitle=always id=64 name=parties tags=disneybeauties size=150x150 lightbox=0]


Nini
Hi Ashley thanks for this!!
How much Fondant did you use??
Ashlee
I seriously have no idea! I usually have about 11 lbs of fondant at my house at any given time, and I don’t really take the time to keep track when I’m working on a cake.