• Skip to primary navigation
  • Skip to main content
  • Skip to primary sidebar
  • Skip to footer

Ashlee Marie - real fun with real food

  • Recipes
    • Main Dish
    • Desserts
    • Breakfast
    • Sides
    • Bread
    • Soups & Salads
    • Drinks
    • Food Tutorials
  • Cakes
    • Cake Recipes
    • Cake Tutorials
    • Carved Cakes
    • Wedding Cakes
    • Smash Cakes
    • Party Cakes
    • How to Video Series
  • Parties
    • Complete Parties
    • Party Cakes
    • Party Food
    • Party Crafts & Decorations
    • Printables
    • Invitations
  • Holidays
    • Valentines
    • St. Patricks Day
    • Easter
    • Cinco De Mayo
    • Mothers Day
    • 4th of July
    • Halloween
    • Thanksgiving
    • Christmas
  • Travel
    • Culinary Travel – Cooking Schools
    • Family Travel
    • Disney
    • Universal Studios
    • Blogger Trips
  • Videos
    • Recipe Videos
    • Short Videos
    • Kitchen Tip Videos
    • Video equipment links
  • Crafts
    • How to & Craft Tutorials
    • Crochet & Knit Patterns
    • Decorations
    • Photoshop
    • Sewing Projects
  • Shop
    • Video equipment links
    • Baking and Kitchen equipment
Home » How to & Crafts » How To & Craft Tutorial

Pom Pom hair clips

Published: January 19, 2011 | Updated: November 12, 2019 | By Ashlee

  • Facebook
  • Twitter
  • Yummly

A few weeks ago I was lucky enough to get to attend a cookie exchange at Jen’s house (of Tatertots and Jello fame). There I met the adorable Amy of Ameroonie Designs. She had this AWESOME felt flower on her purse. And she has a great tutorial for it!!!!

small felt pom pom flower headband

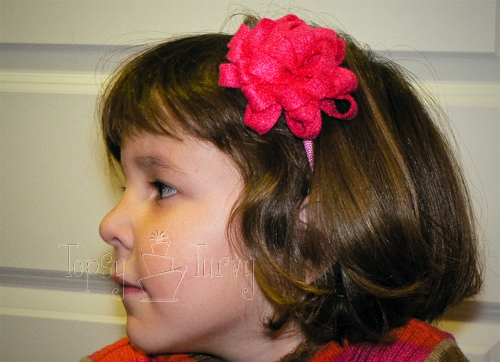
I’m not really a purse gal (but I want to be, I’m just not yet) but I AM a hair band, hair clip gal… This is so easy and so fun to make I made three different sizes. The first two are made from the same sheet of felt.

felt ribbon pom pom flower cutting

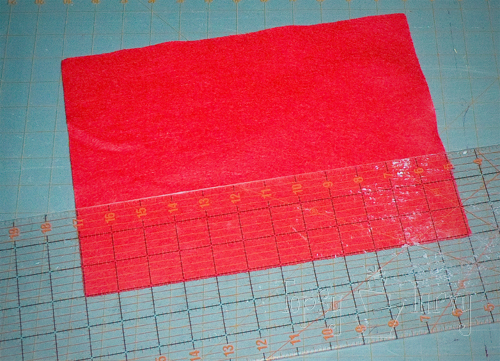
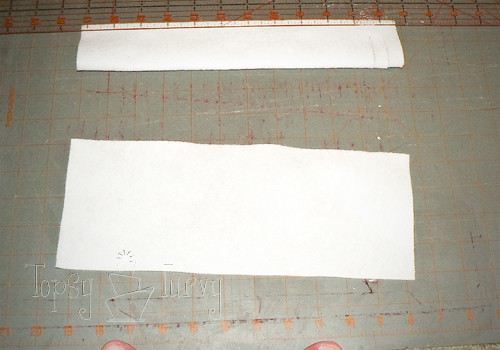
First I cut the felt page (mine is 9 inches wide) into 3 inch strips.  I first tried making a flower with all three strips, but it was a BIT to big for hair, and too small for a bag.  So I switched to using one strip for the small headband size pom pom flower, and the other two strips for the medium size flower.  ALTHOUGH I did cut the last 3 inches off the second strip of the medium flower first and use that little square for backing both the small and medium flower.

felt ribbon pom pom flower cuts

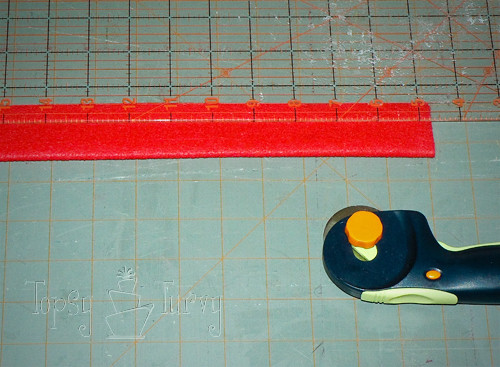
Once you cut the stips, fold them in half and cut strips every 1/2 inch from the folded side, but don’t cut all the way through. I put my plastic cutting thing over the bottom1/4 inch and then used my rotary cutter, but if you have nice sharp scissors that will be just as fast. It’s all about preference. Make it easy on YOU.

felt ribbon pom pom flower stripes

See??? This is what it should look like when your done.

felt ribbon pom pom flower gluing

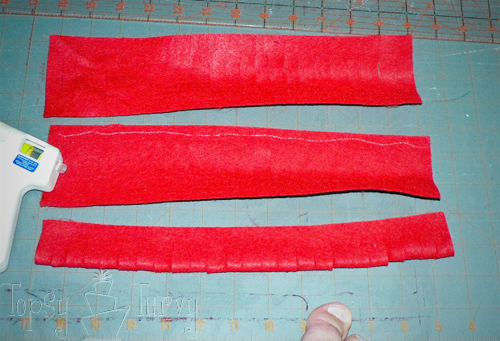
To make it easier I tried using a hot glue to glue it closed, or you could just skip to rolling it. I tried it both ways and decided which way I liked it better. Different effects, so you might one better than another.

felt ribbon pom pom flower rolling

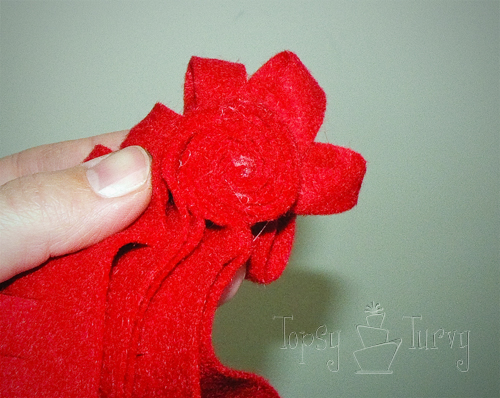
Then starting on one end start rolling…  I tried rolling tight and loose.  I prefer it a little loose, but try it and see what you think.  I first tried layering all the strips together and then rolling, but I found that I liked it better rolling one strip at a time.

felt ribbon pom pom flower back

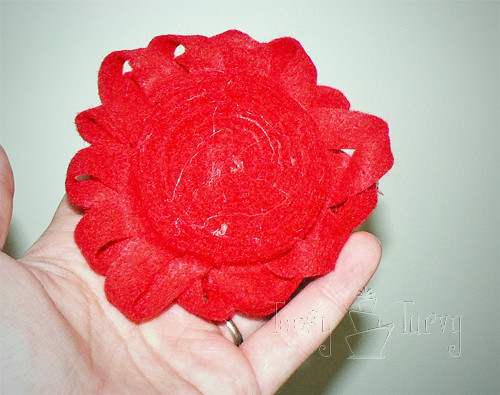
this is what the back looks like (medium)

felt ribbon pom pom flower back hair clip

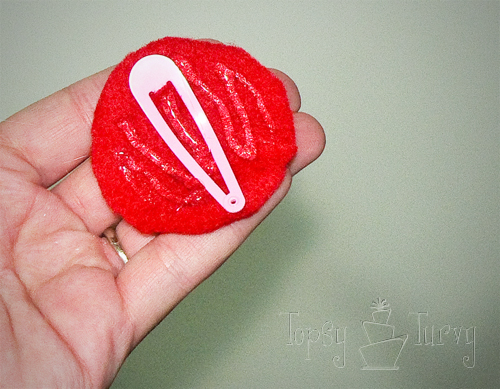
Out of the extra square (remember to cut 3 inches off the last strip before you cut the strips and roll the flowers to use for backing) cut a circle the size of your back.  Cut a slit and slid you clip of choice through it.  I like these snap clips, they work well in my hair…  add your glue…

felt ribbon pom pom flower medium hair clip back

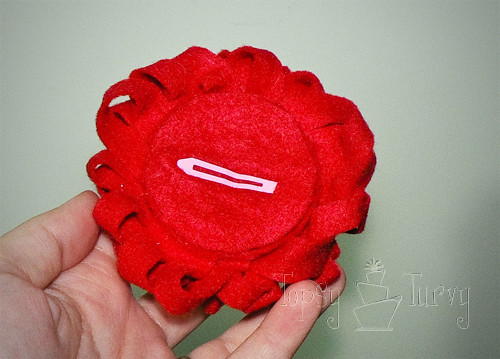
and add it to the back!

felt ribbon pom pom flower medium front

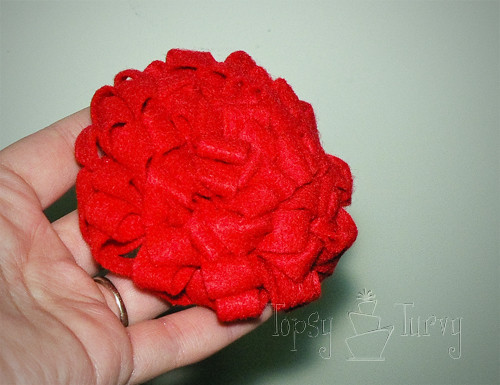
there you go, medium flower!  (the one above is the three strips rolled tightly.  The one below is the two strips rolled loosely.)  I prefer it, not so TIGHT or bunchy.

medium felt pom pom flower headband

For the Larger flower I used two sheets, this time in two different colors. White and red.

extra large felt ribbon pom pom flower

I started by cutting the sheets in half, 4.5 inches wide each.

felt ribbon pom pom flower rolling

Then I did the strips every 1/2 inch, like before, but of course this time they are longer. Now I glue the two colors together and started rolling.

felt ribbon pom pom flower extra large back

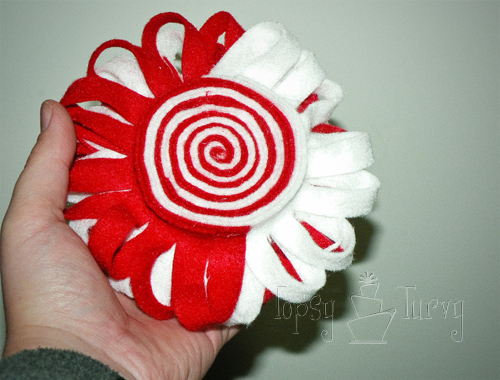
Here is the back, you can see how pretty it is, and I love the two colors together. Of course this would also look great in one color, but I wanted something for my coat for the winter months.

felt ribbon pom pom flower front extra large

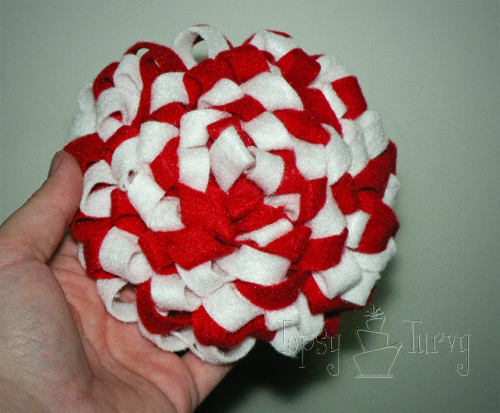
And the front! It’s HUGE, like the ones on Amy’s bag’s. Personally I’ve been wearing it on my coat and getting complements everywhere. If you have that perfect bag it would look great on it too, but this flower is about twice the size of my small denim purse! And too much for my zipper purse!

felt ribbon pom pom flower extra large

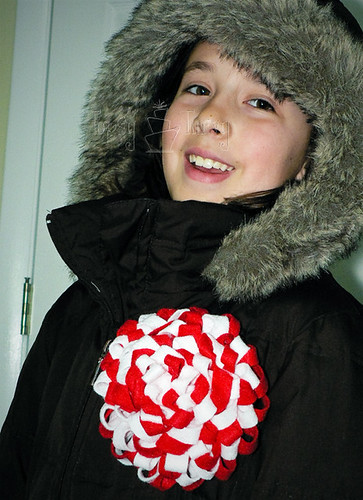
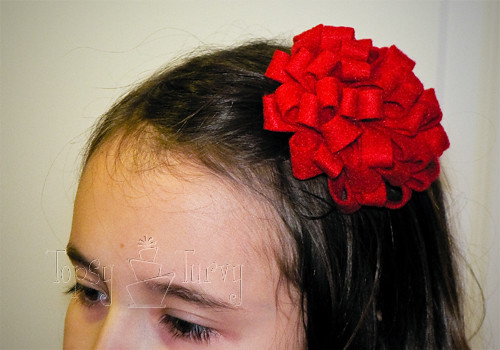
Here’s computer girl modeling it on her coat. It’s just too hard to take pictures of myself, and I never have anyone around to take pictures of me!   So I know it’s way too big for her coat, but it looks great on mine (at least I think so)  Also… My camera died, died died died!  So now I’m stuck sharing tutorials of things I already have pictures of, and I CAN’T replace it any time soon.

Related Posts:

  • Ruffled Felt Flower Hair Clip
    Ruffled Felt Flower Hair Clip
  • Flower Bow
    Flower Bow
  • Frozen Snowflake Hair Clips
    Frozen Snowflake Hair Clips

JOIN MY NEWSLETTER!

Become an insider and receive this FREE Maple Icing Recipe (not seen on the blog!)

You have Successfully Subscribed!

Privacy Policy: We hate spam and promise to keep your email address safe. You'll receive email updates through AshleeMarie.com. You can unsubscribe at anytime.

  • Facebook
  • Twitter
  • Yummly
ashlee marie

About Ashlee

With the right tips and tricks, I believe YOU can make, bake, or create anything. This is what I love to do - make some awesome, teach you how, and give you that boost of culinary confidence you need to rock your own kitchen! Read more...

youtube facebook instagram twitter pinterest email rss

Reader Interactions

Comments

    Leave a Reply Cancel reply

    Your email address will not be published. Required fields are marked *

    Recipe Rating


  1. Amy

    January 19, 2011 at 7:48 pm

    They turned out so great Ashley! I love the looser one too, it’s such a fun look! Thanks for the shout-out!
    xoxo,
    Amy

    Reply
    • Ashlee

      January 21, 2011 at 10:07 am

      I get compliments everywhere. Esp on the smaller hair band for my girls. How would you feel about me selling them on my store?

  2. ShannonSews

    February 9, 2011 at 9:52 pm

    I love how your flowers turned out! Very cute. Sorry about your camera!

    Reply
    • Ashlee

      February 11, 2011 at 9:34 am

      Thanks! Me too. But I have very generous friends who have lent me one while I save up for my DREAM camera (should have started saving earlier!)

  3. christie

    February 10, 2011 at 7:57 pm

    I love these flowers & will be making them soon! Thanks for sharing and for such great step-by-step pictures!

    Reply
    • Ashlee

      February 11, 2011 at 9:37 am

      I always worry when I to a tutorial it won’t be clear enough. So I’m so grateful for comments letting me know I did an okay job! Good luck!

  4. Rachael@Lovely Crafty Home

    February 12, 2011 at 6:42 pm

    This is so cute! Thanks for sharing!!

    Reply
    • Ashlee

      February 14, 2011 at 3:06 pm

      Thanks so much!

Primary Sidebar

about ashlee marie
youtube facebook instagram twitter pinterest email rss

You have Successfully Subscribed!

Privacy Policy: We hate spam and promise to keep your email address safe. You'll receive email updates through AshleeMarie.com. You can unsubscribe at anytime.

Popular Posts

Homemade deep-fried monte cristo sandwich
homemade choco taco
one pot loaded baked potato soup
tamatoa cake - moana - disney
I love these candied strawberries, like a candied apple, a glorious crunch with a ripe strawberry center!

Footer

SEEN ON

as seen on
  • TV and Media
  • Privacy Policy

COPYRIGHT © 2007–2023 Ashlee Marie - Real Fun with Real Food

ashlee marie lets make some awesome
  • Recipes
    • Main Dish
    • Desserts
    • Breakfast
    • Sides
    • Bread
    • Soups & Salads
    • Drinks
    • Food Tutorials
    • Back
  • Cakes
    • Cake Recipes
    • Cake Tutorials
    • Carved Cakes
    • Wedding Cakes
    • Smash Cakes
    • Party Cakes
    • How to Video Series
    • Back
  • Parties
    • Complete Parties
    • Party Cakes
    • Party Food
    • Party Crafts & Decorations
    • Printables
    • Invitations
    • Back
  • Holidays
    • Valentines
    • St. Patricks Day
    • Easter
    • Cinco De Mayo
    • Mothers Day
    • 4th of July
    • Halloween
    • Thanksgiving
    • Christmas
    • Back
  • Travel
    • Culinary Travel – Cooking Schools
    • Family Travel
    • Disney
    • Universal Studios
    • Blogger Trips
    • Back
  • Videos
    • Recipe Videos
    • Short Videos
    • Kitchen Tip Videos
    • Video equipment links
    • Back
  • Crafts
    • How to & Craft Tutorials
    • Crochet & Knit Patterns
    • Decorations
    • Photoshop
    • Sewing Projects
    • Back
  • Shop
    • Video equipment links
    • Baking and Kitchen equipment
    • Back