I’ve been looking for a fun Silhouette project for some time. I have another idea, using an old window, but I don’t have an old window. Maybe next time… But a few weeks ago I was at Michaels getting some supplies for my Mom’s birthday present and I ran across four 8×10 canvas’s for quite cheap. But what kind of medium to paint with? I found some thick acrylic textured paint. Perfect!
So this is how I started. I took pictures of each kid in front of the window and bright sunshine (with no flash of course). Lego Boy was by FAR the most difficult to get a shot of. But after 83 shots I ended up with 4 decent ones. Then I used photoshop bridge to edit the image to create this sharp contrast so I could see the edges better: (Here are my settings if you wanted to know:clarity: 100, vibrance: -100, saturation: -100, blacks: 100, exposure .35, tonal curve: point- strong contrast, sharping: 150, radius: 0, Detail: 0 and masking: 100).
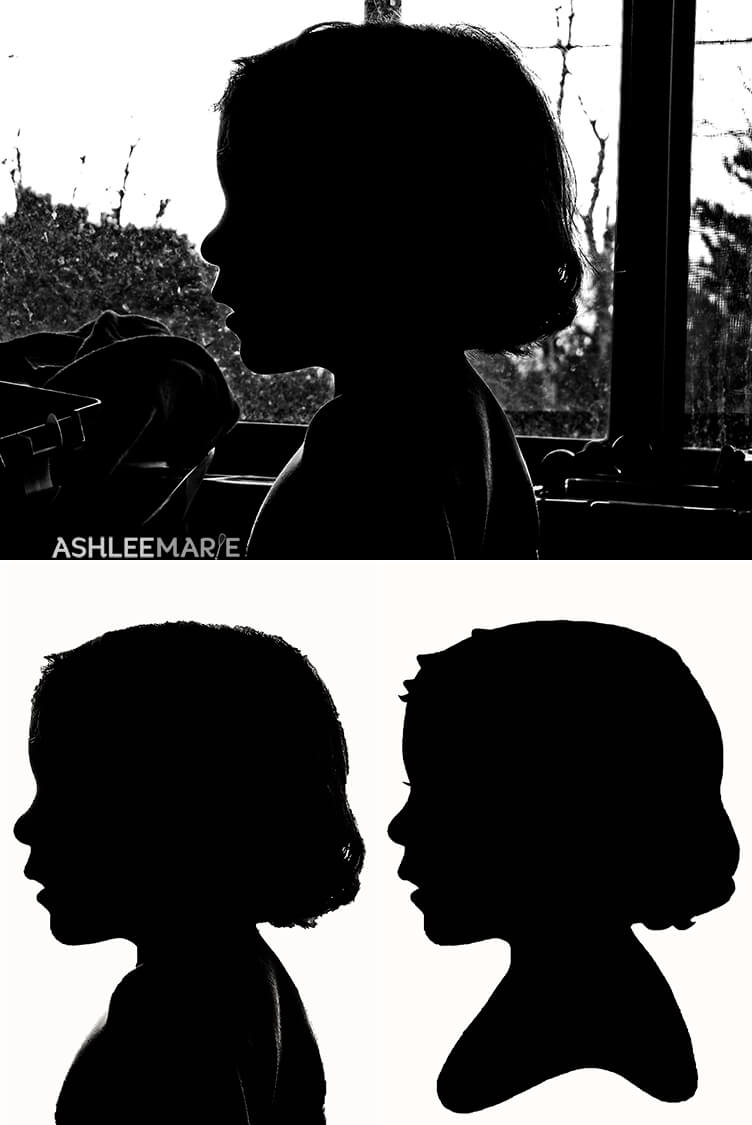
Then I used Photoshop to crop out the background. I used the quick selection tool to select everything but the silhouette. Then I cropped each image to 8×10, trying to make them all as even and similar in size as possible.
Here is the final image I used of the Destroying Angel.
I printed off this image and using my Xyron I turned the paper into a sticker. I also took my pen and did a bit of “fixing”. I fixed the curls on her forehead that got lost in the editing, I also drew where I wanted to make the bottom pretty. And finally I added eyelashes, because let’s face it silhouettes just don’t look quite right without them.
Then comes the cutting. I found my small sharp craft scissors. If only I had them for the Bathroom mirror project. Remember which way to cut. Since I wanted mine to be a stencil I didn’t care what the inside looked liked. So I started in the middle and cut away. I was careful not to cut too much, you can always cut more if you need to. If your cutting out a silhouette planning on USING the middle remember to start cutting on the outside in. Of course if you have a Silhouette Machine you can easily cut your image with it.
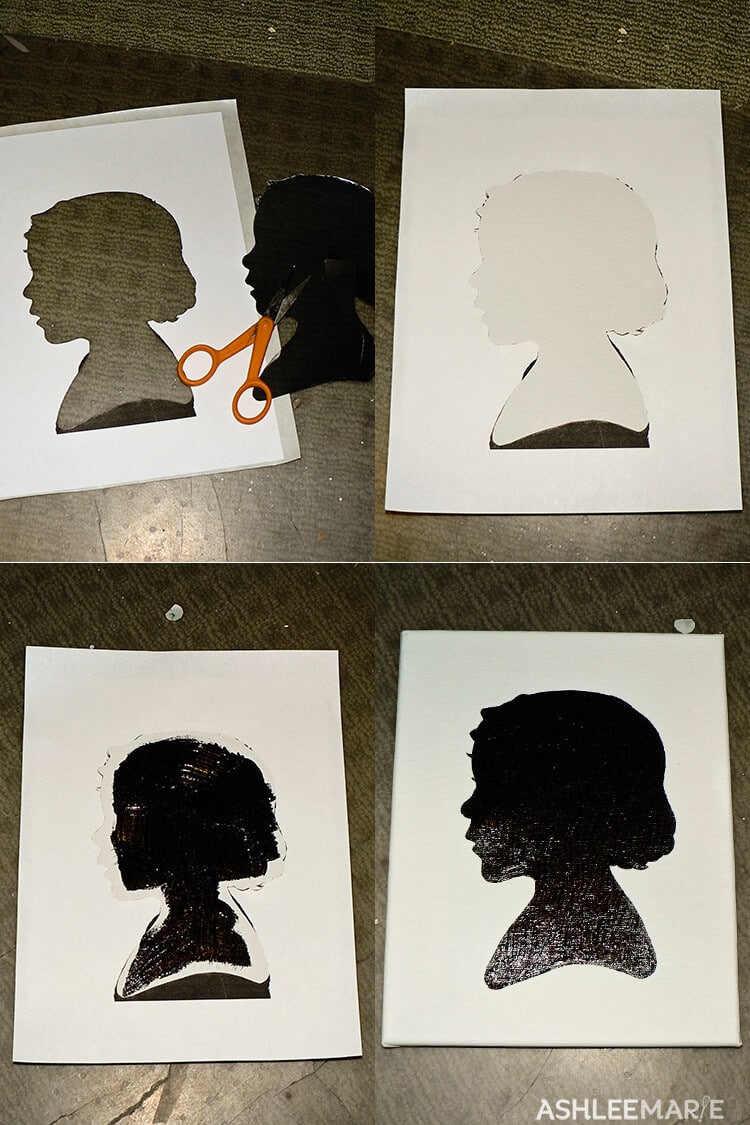
Once I was happy with the stencil I took my “sticker” off the backing and stuck it to the canvas. I pressed along the edges, but not TOO hard because I didn’t want to bend the canvas. ; Mostly just using my nail and a bit of pressure, to create the best possible seal.
Then I grabbed a brush and started painting! Once the paper get’s wet with the paint it starts to ripple, so start in the middle, getting it as thick as you want it, without touching the edges. Then quickly brush the edges, working outside in, and peel off the stencil! Be sure to peel from the top down, better to have the top details sharp and sometimes the last bit you peel off can be a bit messy.
I had a few spots where the paint spread a little past the crisp lines I wanted so with a smaller brush I fixed those and voila! Finished! Just the look I wanted! Thick with brush strokes, glossy with nice sharp edges.
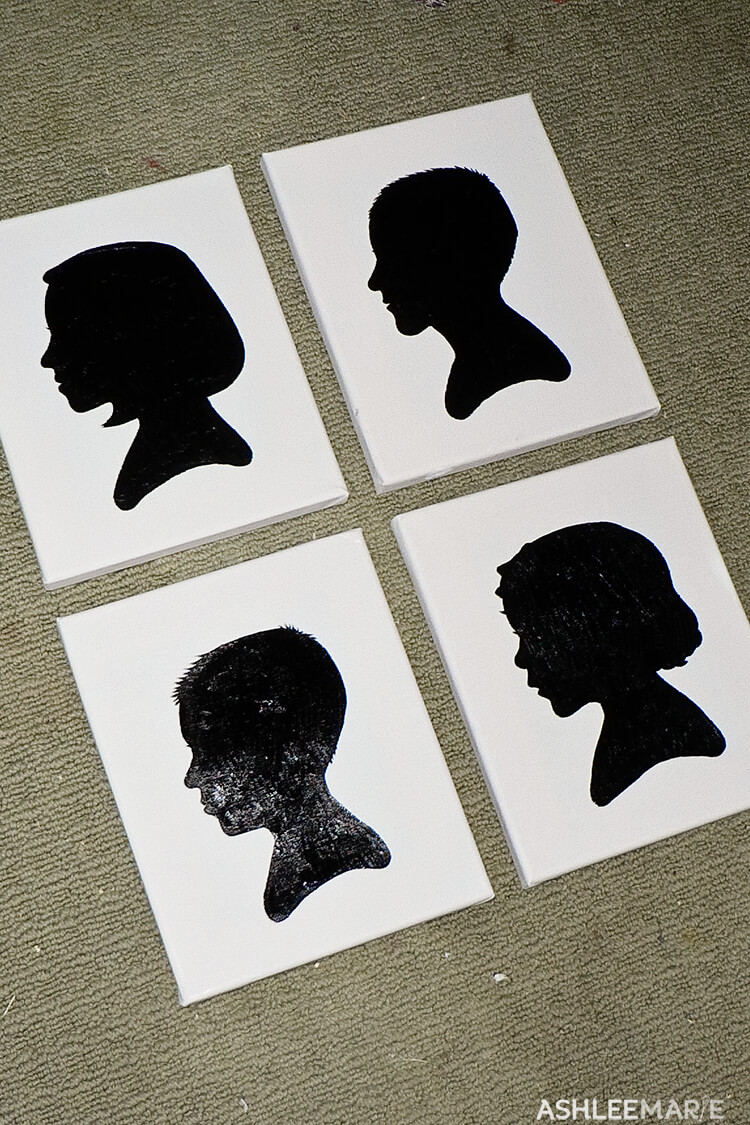
here are all four done, my children are girl (8 1/2), boy (7), boy (4 1/2), girl (2 1/2), which works out perfectly for this set up!
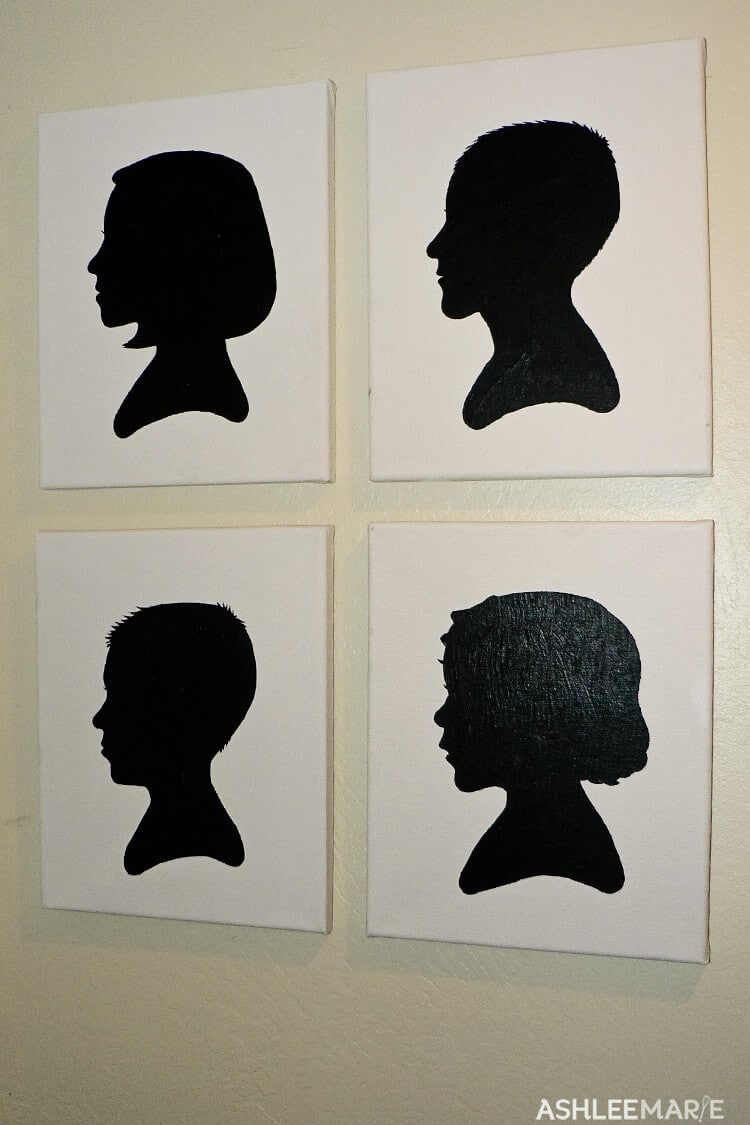
And finally hanging up. this is in the narrow hall between the bedrooms and bathroom, so I couldn’t get a much better angle than this shot, but it looks great. I only wish the walls were a prettier color. I think when we move out I’ll end up re-carpeting and repainting the basement as a “thanks for letting us live here and ruin your walls and carpet” gift for my in-laws! I should have just painted when we moved in, this sickly yellow is pretty difficult to look at day in and day out. Although not as bad as the wall to wall wood paneling in our bedroom!!! I’ll have to get pictures of that room next time!
As a side note. To create jewelry to print off, or to create a nice crisp silhouette to use with a cutting machine (like the Silhouette) it just takes a bit more photoshopping. Instead of hand drawing extra features like the forehead curls and eyelashes I used the Photoshop brush. Also I created a nicer looking bottom with the brush and erase tools. Finally I selected the whole image at the edges and painted the whole thing black rather than the slightly shadowy figure from before. Now it’s ready to re-size and print for projects like this heat transfer t-shirt.


Michell @ Girl In Air
I LOVE it! Thanks for explaining……I keep meaning to make one of my boy.
Ashlee
I desperately need to update mine (2 years old and another child!)! If you make one for your boy let me know! I drool over every single one of your posts! I need help coming up with a headboard for my new room that doesn’t clash with my super busy wall stencil! Wish you lived closer and could come help me!
mandy
Hi,
Can you tell me the size and brand of your Xyron ? Thanks
Mandy
Ashlee
Man that was a long time ago!!! They haven’t made that xyron in years and I can’t get refills anymore so I tossed it! I used my silhouette cameo for all this stuff now! (a cricut would work if you had the right software too) cut out vinyl to use!