I’m Cher from Designs by Studio C and am thrilled to be the DIY contributor to I’m Topsy Turvy!
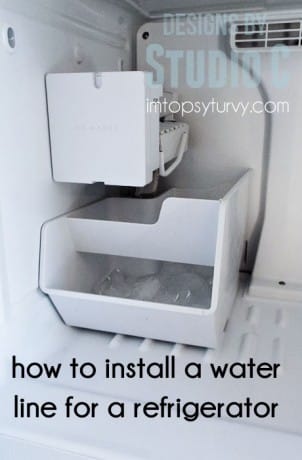
My boyfriend, Matt, and I have been remodeling a house affectionately known as “The Rebel House” named for the street where it resides. We are at the tail end of the remodel, finally, and needed to install a water line from the sink plumbing to the refrigerator for the ice maker. This is such an easy process and so I created a tutorial on how to install a refrigerator water line. The instructions apply to replacing an existing water line, as well.
What You’ll Need:
- Refrigerator Icemaker Kit
- An Adjustable Wrench or Pliers
- Utility Knife
First and foremost, if an existing water line is being replaced, turn off the water to the line. It will be located under the sink! More information may be included on the instructions that are included in the icemaker kit, so make sure to thoroughly read those first!
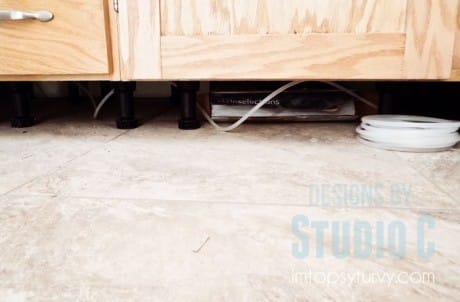
Carefully move the refrigerator out from the wall, and remove any kickplates installed on the lower part of the cabinet (on the floor). We built the cabinets in the Rebel house using furniture legs to elevate them off of the floor, and the kickplates had not been installed yet. If the line is just being replaced, unscrew the brass nut on the valve for the old icemaker line under the sink, and remove the line.
I removed the existing line from the refrigerator by unscrewing the brass nut holding the water line in the valve. The line is generally located at the lower right edge of the back of the refrigerator. It would be easy to add a coupler to tap into the existing line but doing so adds an extra place for a leak to occur. Plus, that part of the line would be located under a cabinet and it may leak for awhile before being detected thus ruining the floor or cabinets.
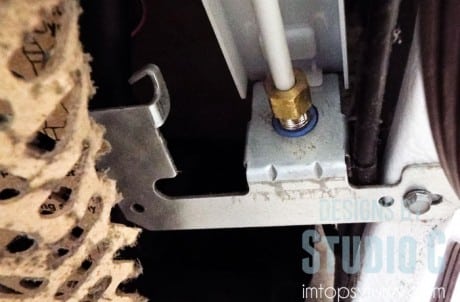
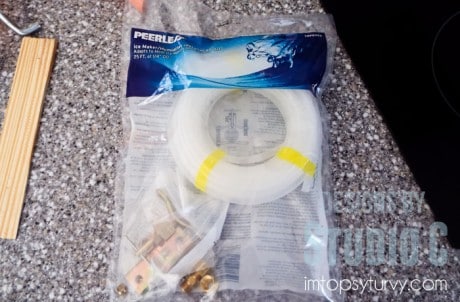
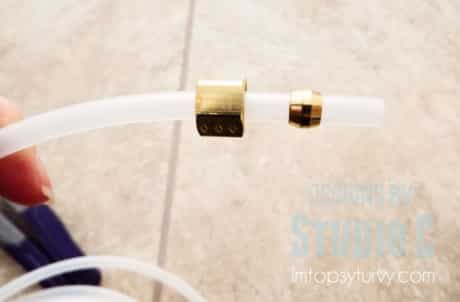
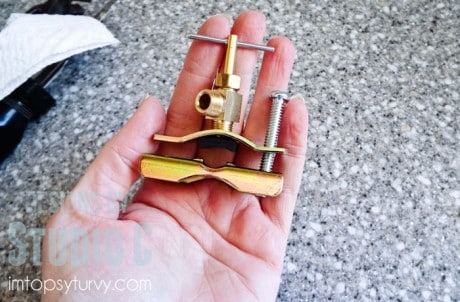
The icemaker kit will come with a water line, a coupler, a new valve, and a few brass parts such as nuts and ferrules. Remove the parts from the packaging. Install one end of the line on the refrigerator by threading the line through the nut, adding one of the brass ferrules to the line, and screwing the nut in place on the refrigerator valve. Do not “crank” the nut on the valve with a wrench or pliers. This can cause a leak. Once the nut is hand tight, a half turn with a wrench or pliers should do the trick! Do not cut the line, yet!
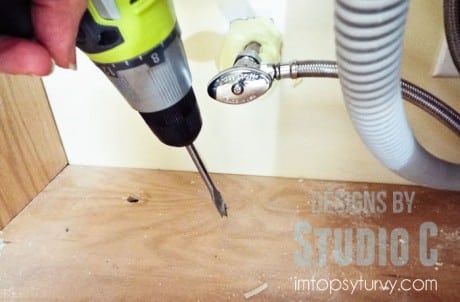
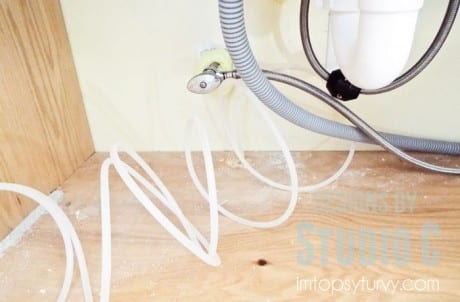
Loosely run the line under the cabinets leaving enough slack so there is no tension on the line. This will keep the line from pulling out of the nuts at the valves, and make it easier to move the refrigerator out from the wall in the future. I drilled a hole in the bottom of the cabinet under the sink using a ½” paddle bit so the line could run through and attach to the cold water line.
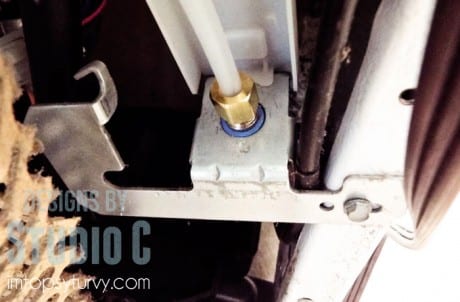
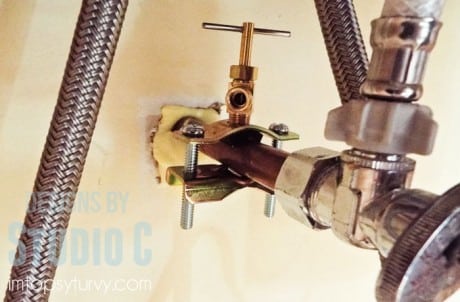
If the line is an entirely new one (where a line has never been installed before), a valve will have to be installed on the cold water line under the sink. The icemaker kit includes a valve and a clamp. Position the valve on top of the cold water line with the clamp on the bottom. Tighten the screws. Then turn the handle on the valve counter-clockwise to pierce the line. See the installation instructions for more information.
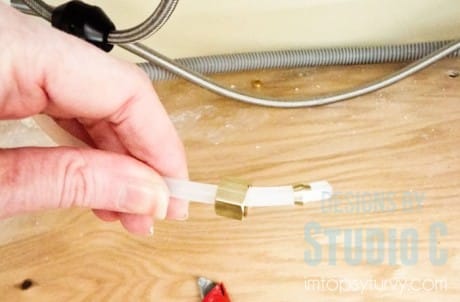
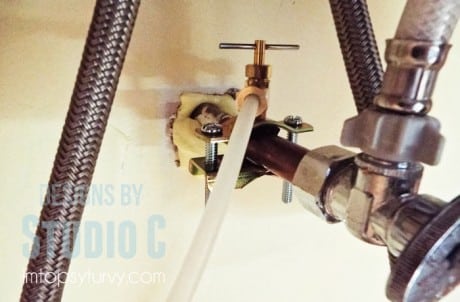
Cut the line to length; add a nut and a ferrule to the end of the line then tighten the nut on the valve. (Remember – after the nut is hand-tight, use the wrench or pliers to turn the nut a half turn!)Turn the water on and check for leaks. If there are leaks, tighten the nuts on the valves a half turn at a time with a wrench or pliers until the leaking stops.
If the line is just a replacement, Follow all of the same steps with the exception of drilling the hole in the cabinet and adding the valve, then screw the nut with the line on the existing valve.
So there you have it – a tutorial on how to install a refrigerator water line! It is really easy to do and is a quick installation job! If you have any questions, contact me at cher {at} designsbystudioc {dot} com!
I have a few other posts that may be of interest: Build Crown Molding Shelves, How to Drill Pocket Holes in Mitered Corners, and How to Use a Shelf Pin Jig.


Alli @ Cupcake Diaries
This is great! We’re about to move and installing a water line in the refrigerator is something we’re going to need to do. Yay! Thanks for sharing!
Cher @ Designs by Studio C
Hi, Alli!
It is super-easy to do… You’ll be awesome! Good luck with your move!
Cher
Aimee @like mother like daughter
We actually did this about a year ago in our house so that we could have an ice maker. Its been heaven sent! Great tutorial!
Cher Texter
Thank you so much, Aimee! I had already installed the water line in my own home which made this install such a breeze! Thank you for stopping by!
Summer
Love this tutorial! Last summer my father in law installed a water line to our fridge/ice maker. He accidentally installed it to the hot water line instead of the cold water line. I always joke with him that it is perfect for whenever I want hot chocolate. But seriously I think it is melting my ice and water is always slowly dripping frorm the freezer. I need to get this fixed – thanks for the step by step 🙂
Cher Texter
Oh no, Summer! That is probably what is causing the melting and dripping! If you change out the line, it may be easier to close the ice maker valve on the hot water pipe and just leave it there. Otherwise, there will be a hole in the pipe and it will have to be replaced. The water line kits are fairly inexpensive and will come with a new valve that can be installed on the cold water pipe. Hope this helps!
Kathleen @ Fearlessly Creative Mammas
Great tutorial. We just paid a plumber to install this very things. Wish this was a month earlier. I will hold on to this for future reference.
Cher Texter
Yikes! Plumbers can be expensive! Hopefully, you won’t have to do it again but just in case, I’ve got you covered! Thanks so much!