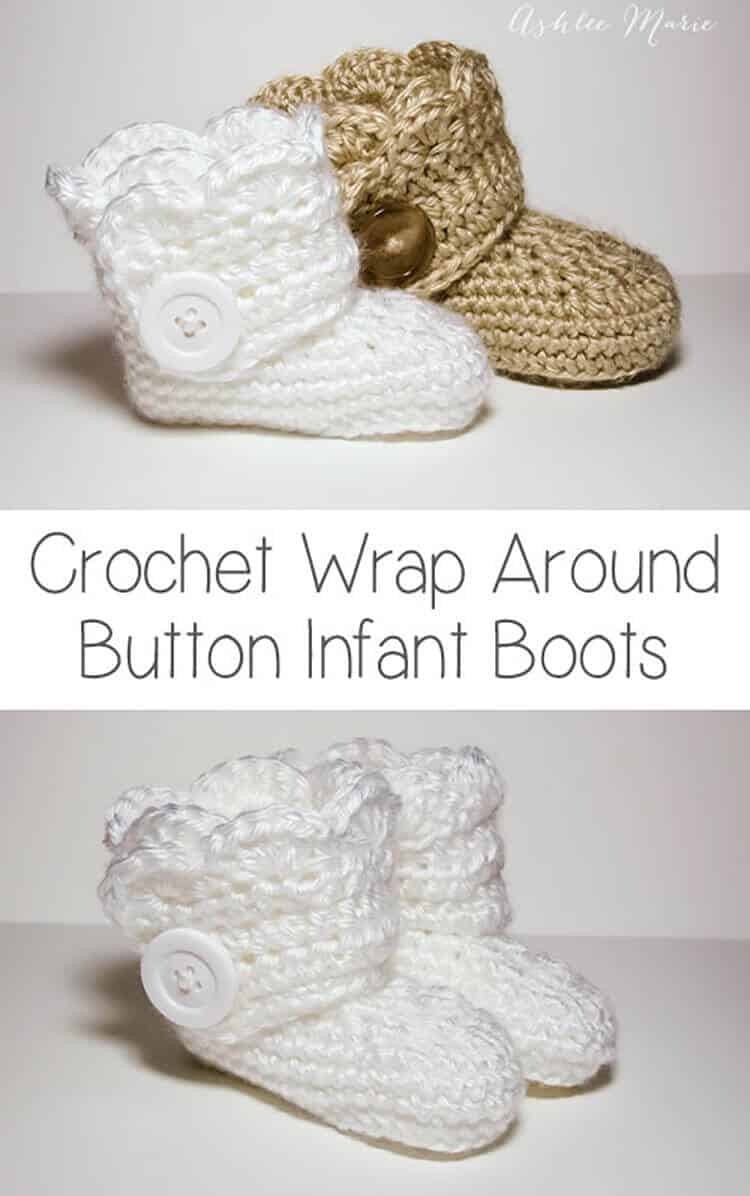
This is an easy to follow pattern to make wrap around infant booties – both for boys and girls.
Okay, after some confusion I’m separating out the patterns. Here is the one for the INFANT size! I realized after making a second set of these that I have two G hooks and they are different sizes???
So for the larger Baby sized shoes I used a G6 – 4mm for these infant shoes I used G6 – 4.25! So if your looking for an infant size 1 (or 0-3 month) boot your in the right place! For a larger (closer to size 4) shoe go to the crochet wrap around button baby boots!
Buy BOTH the Ad-Free pattern pdf’s for both the Baby AND Infant sized discounted here!
The pictures are still the same as before, for the larger size, I’ll try to substitute out smaller pictures when I make another pair!
Buy the Ad-Free pattern pdf for just the infant size here!
Infant wrap around boots
Crochet materials:
caron simply soft yarn
large buttons
G6- 4.25 mm hook (To go up a size use a larger hook, or a larger pattern, to go down a size use an G-4mm hook)
abbreviation:
ch (chain)
sl st (slip stitch)
sc (single crochet)
hdc (half double crochet)
dc (double crochet)
sc2tog (single crochet 2 together)
dc2tog (double crochet 2 together)
dc3tog (double crochet 3 together)

sole:
ch 11
row 1- sc in 2nd ch, sc 5 times, hdc 3 times, 7hdc in last ch, finish the rest of the round working along the back of the chain, hdc 3 times, sc 5 times, 4sc in the last/first ch, sl st to the first sc (28)
row 2- ch1, sc in same sc, sc 7 times, hdc, 2hdc 3 times, 3hdc (in one stitch), 2 hdc 3 times, hdc, sc 8 times, 2sc 3times, sl st to first sc (39)
shoe:
row 3- ch1, working in back loops, sc in same sc, sc around, sl st to first sc (39)
rows 4-5- ch1, sc in same sc,sc around, sl st to first sc (39)
row 6- ch 1, sc in same sc, sc 9 times, sc2tog, dc2tog, dc, dc3tog, dc, dc2tog, sc2tog, sc around, sl st to first sc (33)
row 7- ch 1, sc in same sc, sc 7 times, sc2tog, dc2tog, dc3tog, dc2tog, sc2tog, sc around, sl st to first sc (27)
row 8- ch 1, sc in same sc, sc 5 times, sc2tog, dc, dc3tog, dc, sc2tog, sc around, sl st to first sc, cut yarn weave in ends. (23)

Boot cuff:
for the right boot sl st in the 7th stitch from the seam, for the left boot sl st in the 11th stitch from the seam
ch 12
row 1- hdc in 3rd ch from hook- ch2 counts as hdc, hdc in next 9 ch, hdc in first sc (the same one you sl st in), hdc 19 times (there will be 3 spaces left), skip 2 spaces, sc in last space. (32) **note – some people had a problem with getting two right or two left feet. remember to not cross over the front, work down the inside, around the back and back up the outside, so you’ll work in opposite directions for each bootie, counterclock wise – looking top down, or “wrong” side out for the right booties and clockwise, or “right” side out for the left bootie**
row 2- ch2 (counts as hdc), turn, hdc in first hdc and around 28 times, ch 1 skip one hdc, hdc in last 2 (31- with a ch1 space)
row 3- ch2 (counts as hdc), turn, hdc, hdc in ch1 space, hdc around (32)
row 4 scallops (girls)- turn, 5dc in second hdc, *skip 1hdc, sc in next hdc, skip 1hdc, 5dc in next hdc*, repeat around (8 shells), sc down the side (I fit 5), continuing around sc across the bottom along the original chain (11), sl st, cut yarn and weave in ends

row 4 simple (boys)- ch1, turn, sc across top (32), down the side (5) and across the bottom chain (11), sl st, cut yarn and weave in ends
And both the boys and girl versions (again these are the larger size)
Don’t forget to add a button where ever you like and your done! I placed mine at the bottom of the 5th hdc over from the front- I might go lower next time… or maybe two smaller buttons?
And one final picture, I thought you might want an inside shot so you can see how it wraps a bit… I’m still so very much in love with these boots.


Nicalaine Brown
I cannot figure out the 19 stitches in the second row of the cuff….Do I crochet around the cuff or the boot part? Can,t figure out how to get 19 st out of it……
Such a cute bootie and I want to get it done!
Ashlee
do you mean row 1? as you can see in the picture right above row 1 you hdc down the chain you made then continue around the shoe part, that’s creating the cuff/boot
Liz
I must be the odd man out because I can’t follow these directions, they are unlike any I have seen. You wrote in 2012, ”when the number is after the stitch: hdc 3 times, it’s in the next 9 stitches…” How does that work? The way it is written indicates that one should do hdc in the next three stitches – how do you get to 9? If you need to do hdc in the next 9 sc, then that’s what it should say. Makes no sense at all.
Ashlee
it was just a typo
Christina
For anyone having difficulty with the hole in the first row with the 7 hdc: take your tail, which will be at the slipknot right there, thread it through the base of the stitches and give a nice tug. It closes it up nice and neatly. I was unsure about progressing further when it occurred to me how easy it was to fix it.
This pattern is awesome so far and I hope to make several pairs. 🙂
Ashlee
hole? I am not sure what hole you are talking about and I haven’t had anyone else say anything about a hole? now I’m worried!
bri
Thanks! I have been having issues with a hole appearing at that 7 hdc area too.
I have used this pattern many times!
Ashlee
huh, I never had that problem, but everyone crochet’s differently! I bet I have gaps in places other people don’t. hopefully Christina’s tip worked for you!
Rachel
Hello, I LOVE this pattern, but my daughter is a toddler and feet a bit bigger then this pattern and was wondering how would I make it into say a size 6ish toddler? Thank you!!!:)
Ashlee
there is a larger pattern the baby pattern, instead of this infant one, and while it makes a size 4-5 for me (everyone crochet’s different so it’s hard to know for sure) when I went up a hook size I got around a 6 so try that. Just start by making the sole and see if it fits before doing the entire bootie
Cynthia
This is the easiest bootie pattern I’ve seen so far! And I’ve tried four or five other patterns.
I was struggling with the cuffs, so I got creative and made them separately (ch 33, single stitched a row, ch 2, double stitched a row, ch 2, and double stitched another row) then slip stitched them to the shoe. Both side turned out identical. I wish I could post a pic here.
Thanks! 🙂
Ashlee
I’m sorry you had issues but glad you liked the overall pattern!
Lyric
Ms. A,
Thank you SO MUCH for sharing this pattern with us. I stumbled upon it yesterday and today I am going to print it out to make for my upcoming lovely grannette. . . a litle girl due in June. 😉
Cheers,
Lyric
Ashlee
awww congrats on the future grandbaby!!!! babies are the BEST (and they don’t draw all over your couch/floor/table/walls with a sharpie like 2 year olds do)
Katrina
I made these booties for my niece, I figured out the left and right, i was confused at first but sometimes you just have to reread. They are so cute and i am so glad to be able to get a free pattern. I am a grandmother and just like to make baby things, knit and crochet. and these are adorable!
Ashlee
you are so welcome! I’m glad you figured it out. I couldn’t figure out any other way to explain it any better!
Teresa
Ashlee,
Please help. I am lost with this instruction:
Boot cuff:
for the right boot sl st in the 7th stitch from the seam,
I have crocheted without problem till this. There is no SEAM……what in the world do you mean when you say seam? I want the placement of the wrap around correct so I don’t want to make guesses. Please advise.
Thanks for your help,
Teresa
Ashlee
the seam is the section where you chain and move up to start the next row, sorry I don’t know what else to call it
Sadie Long
Hey, so I have tried this pattern like 4 times today trying to get it right but I cannot. I am self taught so I definitely don’t know everything but I know the basics and all the general stitches. Everything works out wonderful till I get to the shoe part. I follow the instructions.. I think.. it just does not work, the round part above the toes does not form right.. Any words of wisdom you can offer would be greatly appreciated. Or A video tutorial could also solve many problems, yet i understand its a lot of work.
Ashlee
I’m not sure what you mean by the round part above the toes? are you talking about the decreases? and when you say its not working what do you mean? it’s not closing? it’s twisted? it’s off center? I need more exact details before I can help, sorry
shan
I am completely confused on a step that not many people seem to be confused on… Somewhere along the line, the center of the top of the toe ends up being wonky and over 5 stitches (or close to it) from being centered. Is there supposed to be turns after each step of making the toe, so it goes back and forth and evens out? I have read almost all of the comments above, and am not finding the answer. My stitch count is exact, and can’t seem to get it figured out! I am about to give up, but really don’t want to since these are soo cute! I have tried multiple times, so any help is appreciated!
Mary
I actually have the same problem, and we’re not the only ones… there are several people who commented on this before. Believing I made a mistake in stitch count or something similar, I even made the bootie 3 times before finally giving up on it. After three times, I don’t think I will manage any better on my own…
Ashlee
I’m sorry to hear your having a hard time with it, but as you can see from the diagram the rows are centered, it’s easy to get a little twisted when working in the round, but as long as you follow the diagram and your stitches are in the right place it will right itself as you block the booties.
Ashlee
nope, you work in the round, no turning involved. I included the diagram so you can see where all the stitches go, are you maybe skipping the first stitch? That’s all i can think of, sorry I can’t be more helpful than that.
jessica
Do you have the finished width measurement of the sole. It seems way to narrow with only 2 rows
Ashlee
these were a gift for a friend so after I made them i shipped them right off. remember babies feet are pretty darn small. if anything they were a little big for the gal I made them for.
carmen
Hi :
I just had to give u koodles for the baby bootie i made following ur instructions it came out very well, i got one bootie done the left one, now i am trying to do the right foot, wish me luck.
P.S
I think you are so creative, i learn a little crocheting and knitting when i was 10 by my godmother. Now i am 52 and trying to do a little more crocheting for my new gran baby girl coming in two months. If you have more simple patterns for me to do, about baby or infant things let me know i subscribed to ur page. Good luck in life and love,, Thank you soooooooooooo much
Ashlee
I’m glad you like the booties! I hope you’ve been able to enjoy the other crochet stuff I’ve had on the blog in the past! Since my baby isn’t really a baby anymore I don’t really do as much as i used to, it’s hard without a model!
Jillian Post
Hi, LOVE your site! I just made my first pair of these and they are darling! I am in Nebraska and have had a lot of people ask me to sell them to them. I would love to but I want to make sure I give credit to your amazing design skills. How do I go about that? Do I just add your website on my little label? Thank you so much for your beautiful designs! Love Them! – Jillian Post
Ashlee
I totally allow people to sell what they make from my patterns as long as they use their own pictures and include a link to my pattern so that people who want to make their own can find the pattern! good luck!
Mary Metz
Thank you so very much for your effort in working and sharing your baby booties. Your work is impeccable. I made a different top for the girl booties and it looks wonderful. You did a fabulous job.
Mary
Ashlee
you are so welcome, and I’m glad you enjoyed making them and added your own top!
Sharlene beatty
I am also having trouble. After row 3, mine goes all wrong. I was all the way to row 8 & I got no boot toe. I had a mess so I took it out all the way back to row 3 & started over. I still can’t get the toe of the boot. I don’t count the stitches in the row, I just follow the directions to the letter, & still, the toe ends up on the side of the shoe. I’m a beginner, but I can’t be this stupid. Why won’t mine come out right? I am following the directions.
Ashlee
without pictures it’s hard to say, feel free to email them to me. I will say that it’s totally normal for booties to be all twisted until you block them, but they should still be centered.
Sharlene beatty
Guess what!!! Your comment on Aug 20th, 2012 told me what I was doing wrong. I’m so happy I could cry! Turns out I’m not stupid, just terribly inexperienced. I am at row 4, but I need to take it out back to row 1. When it said 2 hdc 3 times, I wasn’t putting 2 in each of the next 3 stitches. My brain just didn’t get it. Thank you for reading all these comments and answering all these questions. I dearly love to crochet but I have so much to learn. I am so greatful you take the time to post these patterns and explain everything. I don’t have anybody to help me, just you. Crocheting is anti-stress therapy for me, and you are wonderful!!!
Ashlee
awww yay! I’m glad you figured it out. I only answer comments and emails every other month these days so I don’t always get to these in a timely manner.
Sharlene beatty
I just found out something else I was doing wrong. In row 6, we start seeing those mystery sc2tog things. I thought it meant 2 single crochet in same stitch. I read some more on the Aug 30,2012 and googled those stitches. I found a cool site called “crochetparfait.blogs”. they have a drop down box and you can choose from a whole list of stitches. It gives you the words of how to do it, and a picture. For beginners like me, you really need to check this out. The bootie comes to life when you do each row correctly. And don’t assume you understand a stitch if you’ve not seen it before like I did. I am learning so much and enjoying this. I have some books but I don’t know if any of the ” tog” stitches are in them. You can always look for a reference book of crochet stitches at the library too if you prefer. I am loving the crochet parfait blog.
Ashlee
I’m glad you found a place to get the answers you need for this more advanced pattern! I hope the rest of the booties went well!
Sheria
I am missing something lol Why did you use a 4mm hook to crochet the regular booties and a 4.25mm hook to crochet the infant booties? Isn’t a 4.25 bigger than the 4? Great Pattern Btw!
Ashlee
when I used the 4.25 on the baby it made it HUGE, and using the 4.0 on the infant made it too small. sometimes it just works that way! the infant pattern starts with no only less chains but also only 2 rows not three for the sole, so a larger hook was a better fit.
stephanie
Wauw, i love those boots! i would lvoe to make them!! how much yarn would i need?
thank you
Ashlee
I used leftovers from another project on these, not even half a skein.
francesca Bowman
After reading all the comments here I would like to say Thank you. This pattern is well written and explained with pictures. I just made a pink pair in 2 hours with distractions and I am just starting a brown pair. I will block them as I do all baby booties. Thank you for sharing it with us for free
Ashlee
you are SO welcome! Thank you taking the time to say thank you! I’m glad you found it easy to make, and that you knew to block them!