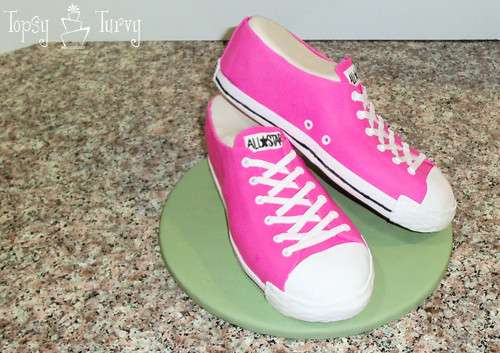
It was my cousin’s 16th birthday last weekend. Her mom (my aunt- DUH) asked if I could make her favorite fashion item, a pink low-top converse, into a cake! I figured I was up for the challenge. Not owning any converse my self (shocked?) I started collecting images from Google for my inspiration.
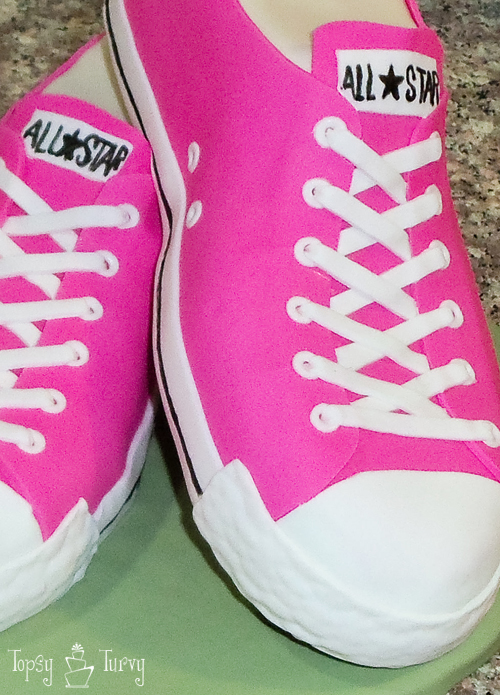
I actually printed off the picture of the bottom of a shoe to use for my carving template! It worked great! I used an impression mat, a weave, to get the fondant detail for the front “rubber” section. I was going to paint the grommets silver, but kind of ran out of time. Working with all that chocolate was a little too much for me and I ended up taking a few too many breaks (even the smell of chocolate makes me sick these days- saddest thing EVER!)

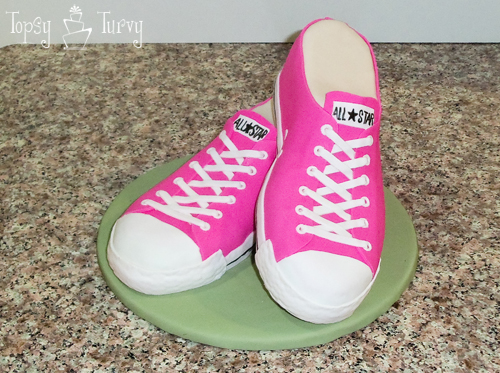
I started by carving the shoe, THEN covering the shoe with a cream fondant (same color as the inside of the real pink converse!). Then I started layering on the pink fondant tongue, then each side one at a time, then the back! Finally I added all the white fondant detail work! And finally the black edible ink! And my cousin was happy with her surprise cake, so in the end a great cake!


Jamie M.
That is so cool, I love it!!
Ashlee
Thanks so much! I am really happy with how well it turned out!
Mandi
Oh NO you did NOT make a converse cake! HOLY CRAP that is pure awesome.
Ashlee
oh yes I did!!!! It turned out really cute! I’m kind of bummed she doesn’t like the high tops, that would have been even more fun to make!
Natalie
This is one of the greatest cakes ever!! I am seriously in love! W.O.W.!!
Ashlee
Thanks so much! It’s fun making such unique cakes, especially for family and friends.
Beverly @ FlamingoToes.com
Wow!! You are amazing. That cake is so coooool!
Ashlee
Thanks so much! It was really fun to make knowing how much my sweet cousin would love it. Those are always the best cakes. I enjoy making them for family and friends so much better than strangers!
Chrissy
this is the greatest ever!! Such detail. Wish you were closer I need a cake for my daughter.
Ashlee
Thanks! I wish I’d had more time, I would have added some royal icing stitching around the edges! But in the end there is always something extra I wish I’d have time for!
skye
this is such a cute cake and the attention to detail is great! 🙂 i hate that the smell of chocolate makes you sick – hope you get to feeling better soon! 🙂
Ashlee
I know, it’s a bummer (the chocolate thing) but it won’t last forever. I wonder if it will last just until the morning sickness is over or if it will last the whole 9 months. Maybe I won’t gain quite as much weight this time around!
Anne Jensen
Wow, that looks awesome! Great job! : )
Ashlee
Thanks so much! I’m really happy for how it turned out too! Even better my cousin loved it.
allyall
Love the cake, sorry choco;ate is making you sick! Does it let you know what flavor you are likely baking or have they all caused this side effect?
Ashlee
I know, a bummer, huh. so far it’s just all the chocolate in my life. I’ll be baking a few other flavors this week so we’ll know how they effect me soon enough!
Carrie
Truly awesome Ashlee!!! you rocked that cake!!! What great skills you have!
Ashlee
Thanks! It was SUCH a fun cake to make.
somedaycrafts
That is the coolest cake I have ever seen!
Ashlee
Thanks Michelle! I am so happy with how it turned out!
Hollie
So dang cute! Love it!
Ashlee
Thanks sweetheart!! I was really happy with how it turned out! It’s fun to see all your new cakes too, can’t wait to see the rest of your parties!
kirk
SO AWSOME!!!! I love it
Ashlee
Thank you so much! this was such a fun cake to make, it’s great when it turns out as well as the plan! I’m always happy when people like my cakes! So thanks for coming and commenting!
Isla mckenna
hey, i am meant to be making my cousins 30th birthday cake and he was wanting a pair of the high top shoes as his cake…ive looked everywhere and cant find anywhere on how to make it..i can get the shape of the shoe no problem..its just the icing..its y first big cake and i dont want to mess it up! any help on the whole icing thing would be brilliant!!x..cake looks fab btw!!x
Ashlee
I started with a cake the height of the shoes I wanted to make, so start with a high cake for you high tops. Then I used a shoe print templates (make sure they are opposites) to carve straight down so I had pillars the shape of the shoe print. Then started carving away the spaces of the shoe we didn’t need. Work slowly, better to take away too little and keep going than to take away too much and regret it!
Then I took my ganache and frosted the cake! I like ganache because it holds in the cake moisture. And also when it dries it hardens a bit and you can actually rub the fondant with your warm finger and the points, and hard edges will soften. You can get the perfect cover/shape that way!
Then I covered it with a base fondant, the color of the “inside” of the shoes, for me it was a cream. Since only the TOP will be showing you don’t have to worry about not getting any ripples or creases. Just cut away any excess to maintain the right shape but you do want the whole cake sealed in fondant. Then I slowly started “building” my shoes. I started with the tongues… Then added each side one at a time. Then added the back seam, the toe cover, then the “rubber” (fondant) outer edge. Then the details, like the labels, writing, etc… Attaching the fondant pieces to each other with clear vanilla.
does that help? If you have any other questions let me know good luck!
melissa Wilds
I was wondering how many did they happen to feed? I have a friend who wants a pair just like yours in black for her daughters graduation. I need a little info & help about them. What do you charge when you make them (if you do charge0.? Thank you so much for your help.
Ashlee
I don’t really know, I made them for my cousin for a gift for her 16th birthday, It was so long ago I don’t remember what size they were. but you can carve them out of any size you want to achieve the cake size you need to feed all the guests. I charge per serving usually.