This was actually from a few years ago, but since I hadn’t shared it yet, and it’s still one of my all time favorite projects, I figured why not today! Especially since I’m getting ready to do some more tiling in the next few weeks (backsplash and fireplace). This was actually just over 6 years ago! I only had 2 kids, but I got pregnant the same month as this project! What does that say about this remodeling job??? JK! Anyway the month before we moved to Japan our upstairs toilet take cracked and flooded the upstairs while we were on a last min vacation! When we got back from vacation and found it I had just three weeks to put the house back together before we moved out and our renter moved it!
The contractor we tried to work with never showed up so I learned how to drywall, texture and tile myself! The insurance money paid for it all, including replacing the carpet in almost the entire house (gotta love open floor plans). Since we knew our renter would most likely destroy our carpet anyway we decided to put off re-carpeting until we moved back from Japan. So forward another year and we moved back in! Our renter HAD in fact ruined the carpet so we were glad we had put it off. But before we replaced all the carpet I decided rather than re-carpet the dining room I’d tile it and the kitchen instead!
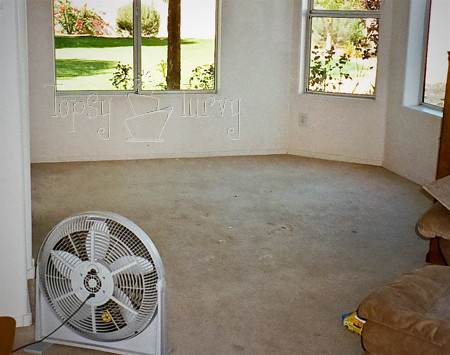
I mean WHO puts carpet in a dining room! UGH! I have never understood that, the only thing worse is carpet in a bathroom! Maybe when I’m old and don’t have kids around I’ll get it, but for now it’s just a stained, smelly, crumby mess waiting to happen! (oh and all these pictures were taken with my 35 mm camera and I got the digital CD from Costco- so the quality of the pic’s is terrible! One of these years I’m going to get all my negatives digitalized nicely so until then forgive the Costco CD fuzziness!)
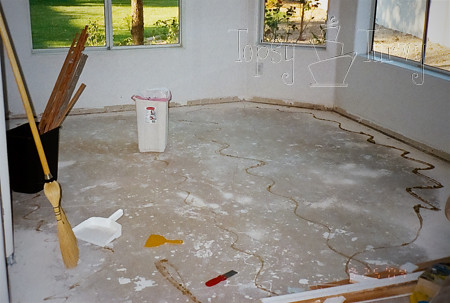
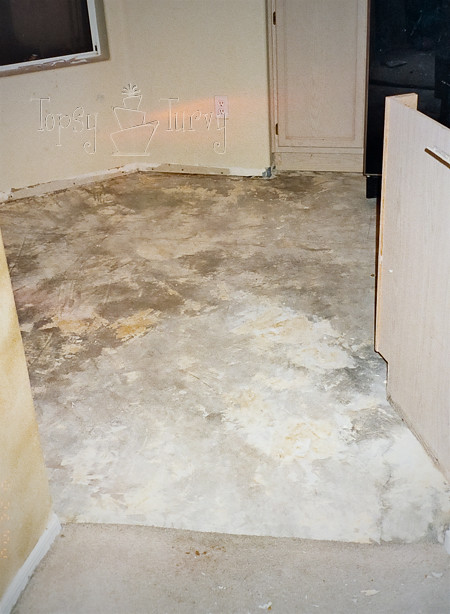
So I ripped up the carpet (dining room) and linoleum (kitchen) and got to work! Once we got the carpet ripped up there were some issues with the cement subfloor. Cracks and uneveness are a big problem when tiling. So I filled in the lower corner of the room with cement and covered over the large cracks with this cool “tape” type of fix. It’s all very technical I assure you!
The linoleum was much harder to get up, but kind of fun too! You take a box cutter and make cuts all over the floor. Pour boiling water over the floor and let it seep into the cuts. Then you use this EXTREMELY sharp tool, like a short shovel, but SHARP, and scrap the linoleum off. It’s a little dangerous and very fun! It’s a good way to out some aggression!
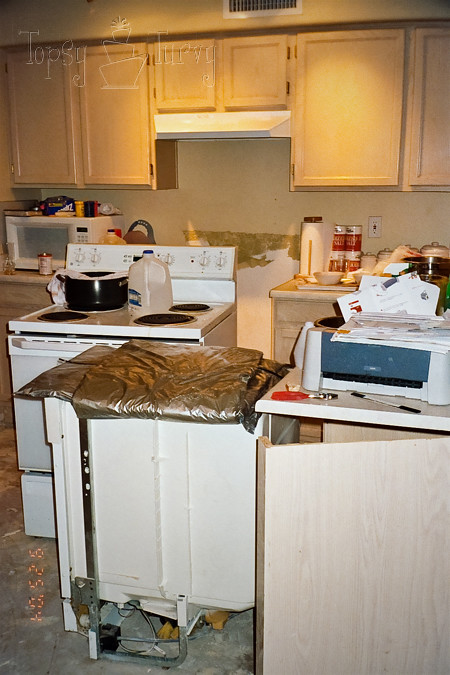
One of the things to consider when your doing flooring in a kitchen is your appliances. You don’t want to leave them where they are because if you do you’ll build the flooring right up to them getting them stuck where they are! SO you’ll want to pull them all out and make sure you put the flooring underneath so you can still slide them in and out for fixing or replacing down the line! Of course this does lift up the appliances so make sure you have room for the dishwasher to get lifted up and still fit into the space. You don’t want to get done and not be able to fit it in! For me it was TIGHT but worked!
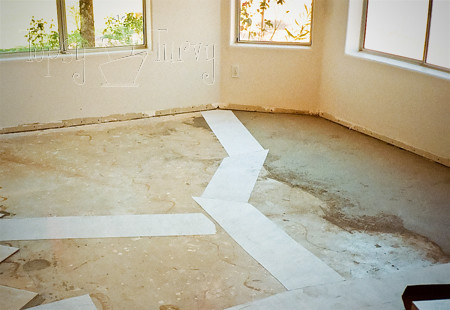
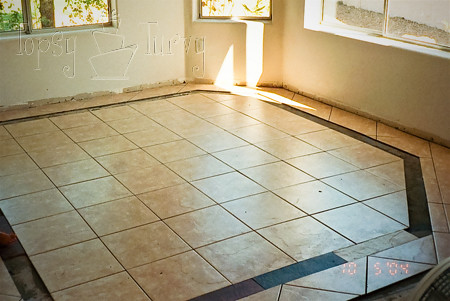
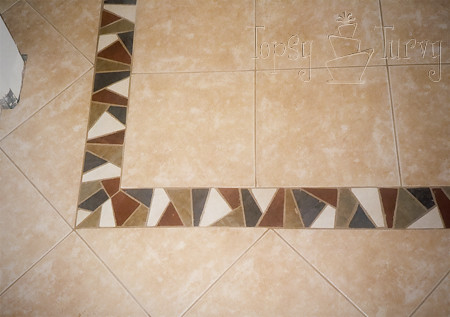
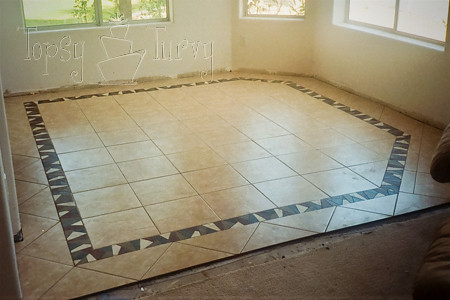
Now I wanted my floor to have a bit of a pattern. I wanted the dining room to have a rug like look. So I decided to do the center with the tiles square on, then a 4 inch border and then outside of that design the same tile as the center but at a diagonal and continuing onto the kitchen sticking with the diagonal pattern! I couldn’t find any 4 inch tall pattern than I liked, either the pattern or the colors. SO I bought full tiles in the colors I liked and decided to create my own pattern! Usually I’d do the center, then the border and finally the diagonal tiles, but the colored tiles I ordered didn’t come in time so I just measured and left the space!
Luckily it worked out okay! Once the colored tiles arrived I finalized my pattern and started cutting and then laying them down! I figured I had to include a picture of myself (6 years younger). THIS picture is the perfect example for why I don’t have long hair. It just doesn’t fit me at all!
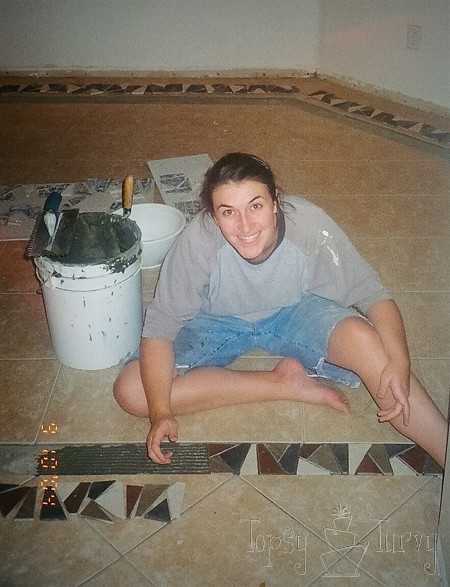
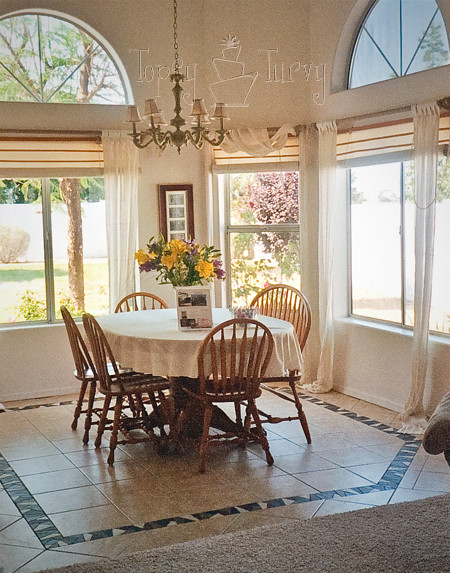
Once I finished laying down all the tile I grouted, cleaned up and sealed the grout! Here is a close up of the border I designed! What do you think? To this day I still love it!
Here is the dining room finished:
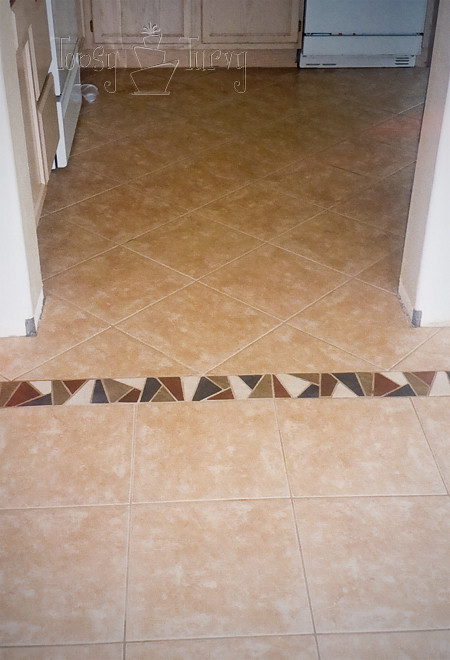
Here is the doorway between the dining room and kitchen:
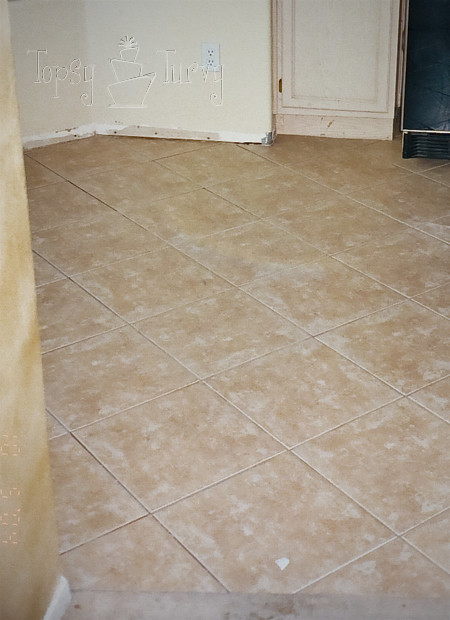
and here is the kitchen:
And finally here it is with the trim put back on, the curtains hanging the table in and flowers (staging for when we sold it!)! On of my all time favorite projects! Of course with the current remodeling projects I’m gaining a lot of favorite projects!


Tea Rose Home
Oh wow! You did such an amazing job!
Ashlee
Thanks! This is one of my favorite projects of all time!
Eda
Wooow!!! Excellent!
Ashlee
Thank you! It was such a fun project to plan out and create. I loved it!
Roeshel
Ashlee – wow! Great job, girl! I love it! We have a tile job coming up…just the motivation I need. I can do it, right? Thankfully my husband is skilled at it, so I’ll have a lot of help or just be the photographer. lol Just kidding. Time to learn. Thanks for linking your hard work to the DIY Project Parade! 🙂
Ashlee
You TOTALLY can do it! I love it, and it’s SO much fun to us a wet saw…
Abbi
Cool design! I love ceramic tile and am very impressed that you did it all yourself.
Ashlee
Thanks! It’s so much fun. I’m glad you like it.
Lisa
It looks great! I love how your decorative tile frames the table. Awesome job!
Ashlee
Thanks! That was the hope, kind of like a rug without a rug!
Rochelle
That room looks awesome! I can’t believe how well it turned out! Great job.
Ashlee
Thanks! It was so fun to come up with and do! I actually spent the year we were in Japan planning it!
Rolf Koeller
I really love what you write here, very insightful and smart. One problem though, I’m running Firefox on Fedora and some of your site structure are a little off. I know it’s not a common setup, but it’s still something to watch out for. Just tossing you a heads up.
Ashlee
Thanks for the heads up! I’ll try to get it fixed! It comes up fine on firefox for me AND Chrome. I’ll have to double check the layouts!
Remodelaholic
We love this party link and I wanted to let you know that we are planning on featuring it on our blog. We hope that you get a bunch of new visitors. If there is any chance that you could post about being featured on Remodelaholic with a link back to your post on our site, we would really appreciate it.
http://www.remodelaholic.com
Ashlee
I’d love to link back to Remodelaholic! I love your blog! I didn’t see it today, but When I do I’ll totally link it up!