I don’t have an SLR, in fact I’m saving up for one, but I just raided the fund to get my silhouette, so it’s going to be awhile. Anyway I don’t have a big heavy camera hurting my neck, but I DO love dressing things up. And a camera strap is just that for me, dressing up my camera! And while there are a ton of amazing women out there making and selling camera straps I’m not one to pay for something I can make, call me crazy.
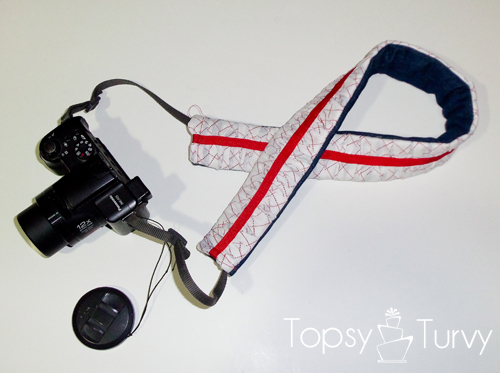
I love denim and I love red, so combining the two seemed like a happy place for me. It’s not the fanciest of the camera straps I’ve seen out there, but I am SO in love with it, some ruffling, some color, denim… It doesn’t get much better for me! And it took almost no time at all and I used fabric and supplies I had lying around! So it cost me nothing at all to make.
Supplies
2 types of fabric, one for the main body and shape and the other a thinner fabric for the ruffle
ribbon
matching thread
batting (optional)
ruffler foot (optional)
twin needles (optional)
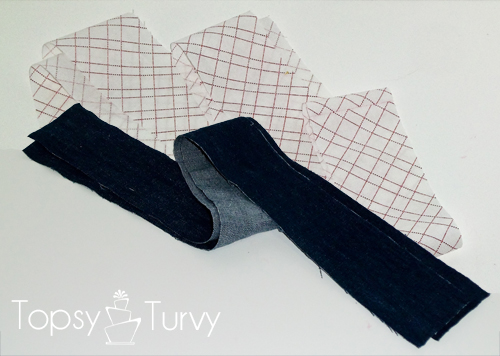
This is a GREAT project to use some long scraps for, really! I cut 2 pieces of the denim (2.75″ x 27″) and 2 pieces of the red and white checked pattern (3″ x 33″). For me I measured my camera strap and used that as my reference. I wish I’d got just a BIT wider, but I’ll save that for the SLR when I get one.
Then I sewed the two cotton pieces together lengthwise to create one LONG piece, this will be my ruffle.
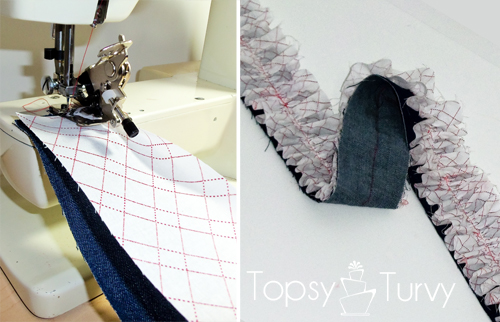
Now I invested in a good ruffler foot last year, I LOVE it and use it ALL the time. But you can use ANY method you like for ruffling this piece. Personally I like using the ruffler foot because I DON’T like sewing twice (to baste and ruffle, then to attach it) something I can sew just once! But it does take a bit of getting used to so you don’t fall short of material or have too much. Play with your ruffler foot a lot to perfect the settings you like to use.
Anyway I used my ruffler foot to attach and ruffle the cotton on top of ONE of the strips of denim.
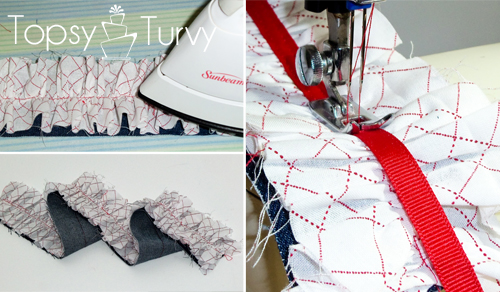
next I ironed the ruffles. Now normally I skip this step, I don’t even OWN an ironing board (I’m borrowing my mother in laws). I don’t like to do things I don’t HAVE to do, I like to cut corners where I can. But to get the right LOOK for this ironing it is important! I EVEN took the time to go upstairs, get the ironing board and bring it back down. That might not sound like much to you but I was in the beginning stages of morning sickness when I made this (and I’m JUST now making this tutorial). Of course looking at these pictures it’s clear my next project should be a new COVER for the ironing board! HA!
Anyway, this will create creases in the ruffles that will help with the overall look of the strap as well as help the strap not look so poofy in the end.
Next I attached my ribbon down the center. My second favorite extra I like to use with my sewing machine (the first is the ruffler foot) is my twin needles. I LOVE the look a twin needle can make. And adding this ribbon was the perfect time to use it (and I only had to sew it once instead of twice, SCORE!). Sew your ribbon (or ribbons if you like the layered look) down the center covering our ruffling stitch!
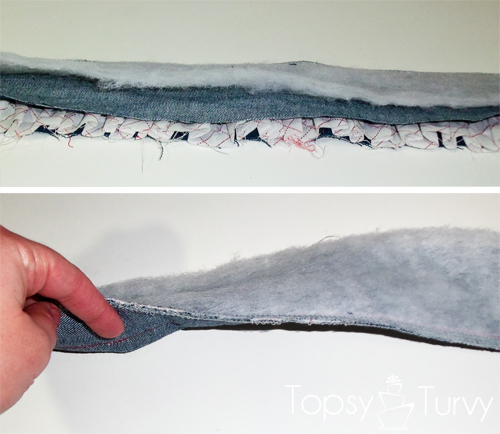
Time to start laying. We’re putting RIGHT sides together, so our ruffled layered strip is facing up and our extra denim strip is facing down and then then I added a strip of batting (this is optional- it just adds padding, but not all of us want the extra bulk). Sew down one side 1/4″ in. Now if you happen to have a serger (I do, his name is Sergio!) a GREAT way to clean up the side is to use your serger on it. I am SO glad to finally have one!
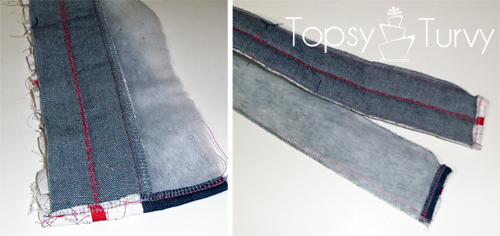
Instead of sewing down the other side at this point you want to open up your camera strap and do our edging now. I serged the ends then hemmed them, but again this is totally optional. Hem BOTH ends. The reason for this is if your sewing machine is anything like mine if you sew BOTH sides THEN try to hem it your going to have troubles getting such a tight circle to hem. How do I know this? I’ve totally made that mistake MORE than once.
NOW refold your project, and sew down the final side (serging to clean it up if you have one)
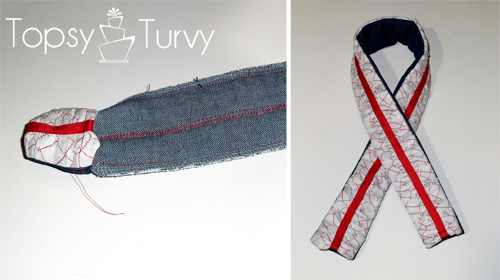
NOW come the hardest part of the WHOLE project! Seriously. Turning it inside out. This is when I realized I MIGHT have gone a BIT to narrow. I think it’s because I sew like I cut hair, I take just a BIT too much off. I THINK I’m only sewing 1/4 in seams, but really I’m sewing just a bit more, and then it’s too tight. (joke: what’s the difference between a good and bad haircut??? Answer: 2 weeks.- I’ve totally found that to be true, after 2 weeks the cut that was just a bit too short is now perfect, the cut you can’t figure out how to style all of a sudden just works)
Anyway it worked out just fine, the strap works GREAT and now, thanks to an amazing friend, I even have a camera to use it on!




Pam
That is so cute. I have been wanting to make one…might give this a try.
Ashlee
It was fun to make, there are so many different styles and tutorials out there you have a lot to choose from!