I recently used an old Window (really old, like from a 100 year old farmhouse) in a craft project. After doing some light sanding I was vacuming and nudged the frame. I’m not sure how it happened but the glass completely cracked! It’s actually a good thing it cracked when it did because it would have broken at some point, being old and brittle glass, and this way I could fix it during the project instead of later on down the road.
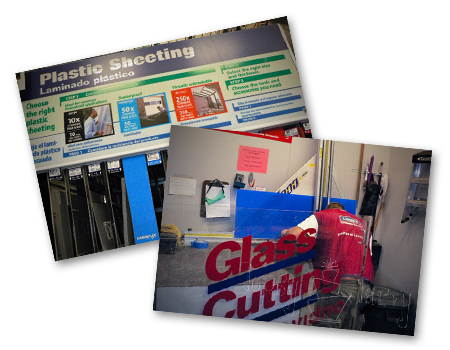
Since I was making it into a table I wanted it to be as strong as possible, knowing my kids will be pretty rough with it, if not climbing all over it. SO I decided to replace it with plastic sheeting instead of glass. I went to Lowes to get it. They have a terrific selection. I went with one that is not only 10 times stronger than glass but nice and thick so it’s strong and not too flexible. The nice thing about Lowes is that they had a cutting center right there for me. Last time I got some plastic sheeting (for a picture frame I was mailing) I had to cut it myself at home… It was a DISASTER. So this cutting station was a dream come true.
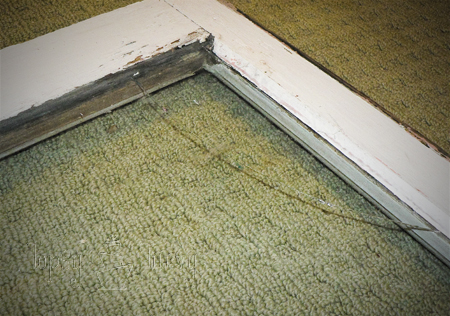
The window is actually 2 paned and one of the panes had obviously been replaced once before. It was very easy to get out. I scrapped and peeled off all the silicone, and took out the glazing points. After that the glass came RIGHT out.
The broken pane was MUCH harder. I mean a real pain in the neck. It wasn’t sealed in, it was built in. You can see here the difference. On the left it’s nice and cut away. On the right the wood is actually built over the glass. I had to cut down the red line on three sides of the glass to get it out.

To do this I turned to my handy Dremel. Equipet with a cutting circle I set to work.

It was pretty thick, and I actually went through a few of the cutting wheel. It would have helped if the wheel had been just a bit bigger. I had to go over the cut area a few times to get it deep enough.

I thought it would slide right out after I got the three sides cut away. But NO. It had been built SO tight (that’s a good thing, you want your window tight) that the glass was really wedged into that fourth side. So back to the dremel! I used the cutting wheel to try to widen the gap down there. It took quite a while but I finally got all the glass out!

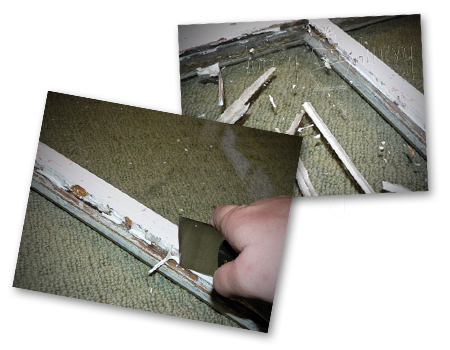
THEN I realized (when trying to fit in the plastic) that since the old window was much thinner I actually had to widen the side of the window that the “glass” is supposed to slide into. You can see here, the brown is the gap now, and the red dashed line is how much wider that opening needs to be so the “glass” can slide into that 4th side~

I knew that my normal cutting wheel wouldn’t be good enough for this one, so I got out my Reinforced wheel! MUCH better! It still took a bit of time, but it did the job, and did it well!

FINALLY it was ready to install my new “glass”. Same window, just painted. I actually squeezed some of the silicone into the gap first,but I forgot to take a picture of it. I wanted the window panes to be as secure as possible. Then I peeled off the protective plastic, slid the glass into the 4th side and set it down into the rest of the frame! Voila! Perfect fit!

Since you install the glass on the back side of what will be a table It needed to be VERY secure. So I used Glazing Points first. You take these metal… points, and place them on the “glass”. Then using something strong and flat slide them into the wood to secure the “glass” in place. This works great on picture frames that don’t have the bendy (I know it’s not a word, but you know what I’m talking about!) metal parts too.

And finally seal it in with silicone. I know my kids are going to attempt climbing on my new table so I asked for and got the STRONGEST stuff out on the market today. But if you want to be prettier they do have paint-able silicone so you can blend it in better. After squeezing a nice thick bead down all three sides (the 4th side doesn’t have a ledge to hid it from the other side, another reason I squeezed the silicone into the gap before sliding the “glass” in) you’ll want to smooth it down.

They have all sorts of tools for making this look nice, but honestly I just use my finger… I like getting my hands into a project, I get a better feel for it that way, the right pressure and getting it even and stuff. Using plastic tools and I tend to hesitate, or bump it or make a mistake of some kind. Anyway, smooth it out, clean up the excess and let it dry~

And there you go! New “glass” window pane’s installed in my 100 year old window frame!


Marcin
Awesome job! A lot of people would just go the route of replacing their old windows, but nothing can compare to those original windows and the look and feel they give for an older home!
Ashlee Marie
Agreed!
Grace Turner
That’s cool that you were able to replace the glass in your own window with plexiglass. My husband and I need to replace the glass in one of our windows after a neighbor kid threw a baseball through it. We’ll have to see if we can get someone to come repair the glass for us.
Ashlee Marie
I was just turning the window into a table so it didn’t need to match other glass or be something we looked through. With double pane windows I’d call someone too, they are totally different now than they used to be.