
It’s easy to make this Queen Anne’s lace bracelet. It’s crochet with thread which keeps it delicate and it’s easy to make in multiple colors.
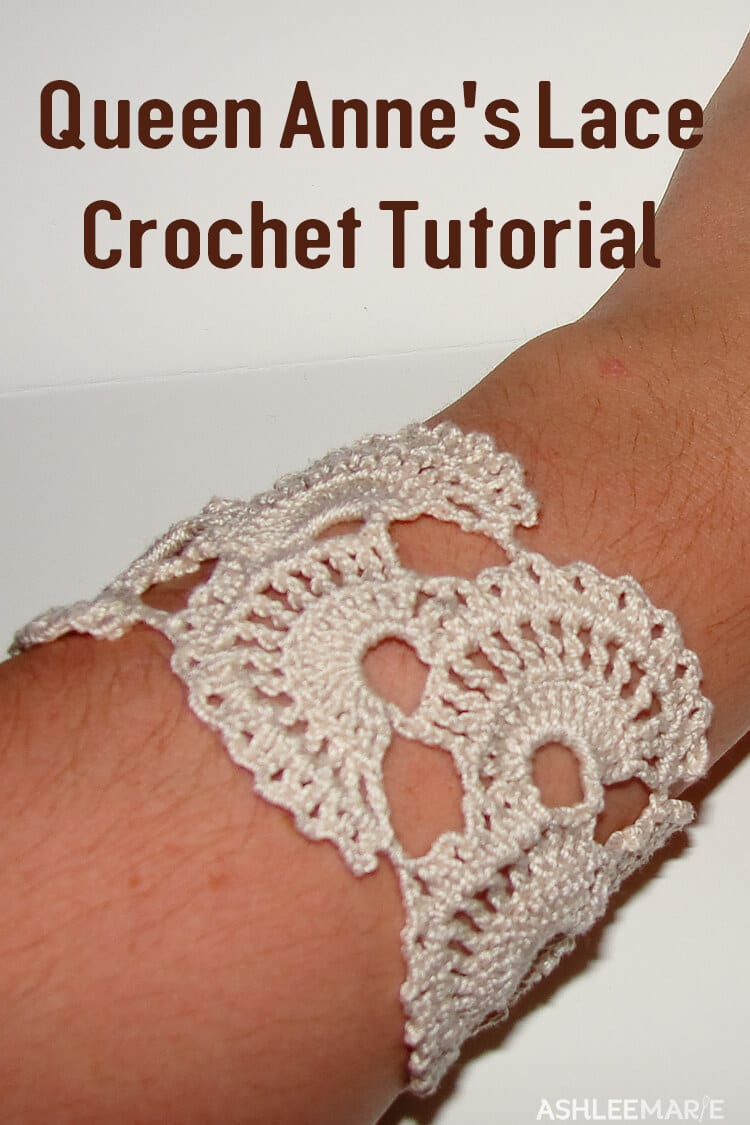
I’ve been seeing this queen anne’s lace pattern on all sorts of pieces lately, scarfs mostly, but also some bookmarks as well as a headband.
Then I saw this silver bracelet and fell in love! Since mine isn’t metal it’s not a cuff, as it wouldn’t hold it’s shape. So I made it a full circle!
It took a half dozen tries to figure out a pattern and size that would work. It was worth it!
I’ve made it in 4 colors so far, and wear one of them all the time! I love them! Black, cream, red and now this brown one.
The pattern itself is pretty quick and easy, the last few rows, connecting the ends creating the circle is the tricky part, but I feel great about how I do it. I hope it’s easy for you to follow!
Buy the Ad-Free pattern pdf here!
Queen Anne’s Lace bracelet
Material:
crochet thread
hook 1.25
stitches used:
chain (ch)
slip stitch (sl st)
single crochet (sc)
double crochet (dc)
treble crochet (tr)
fan 1
ch 8, join with sl st to form a ring
row 1- working in the ring- *1sc ch3* (counts as first tr), 13 tr (14)
row 2- turn, work *1sc, ch3* in first tr (counts as first tr), *ch1, tr* in each tr around (14, with 13 ch1 spaces)
row 3- turn, work *1sc, ch2* in the first space (counts as first dc), *ch2, 1dc in same space, 1dc in next space* ten times. ch5, skip three spaces, 1dc in last tr (3rd chain)
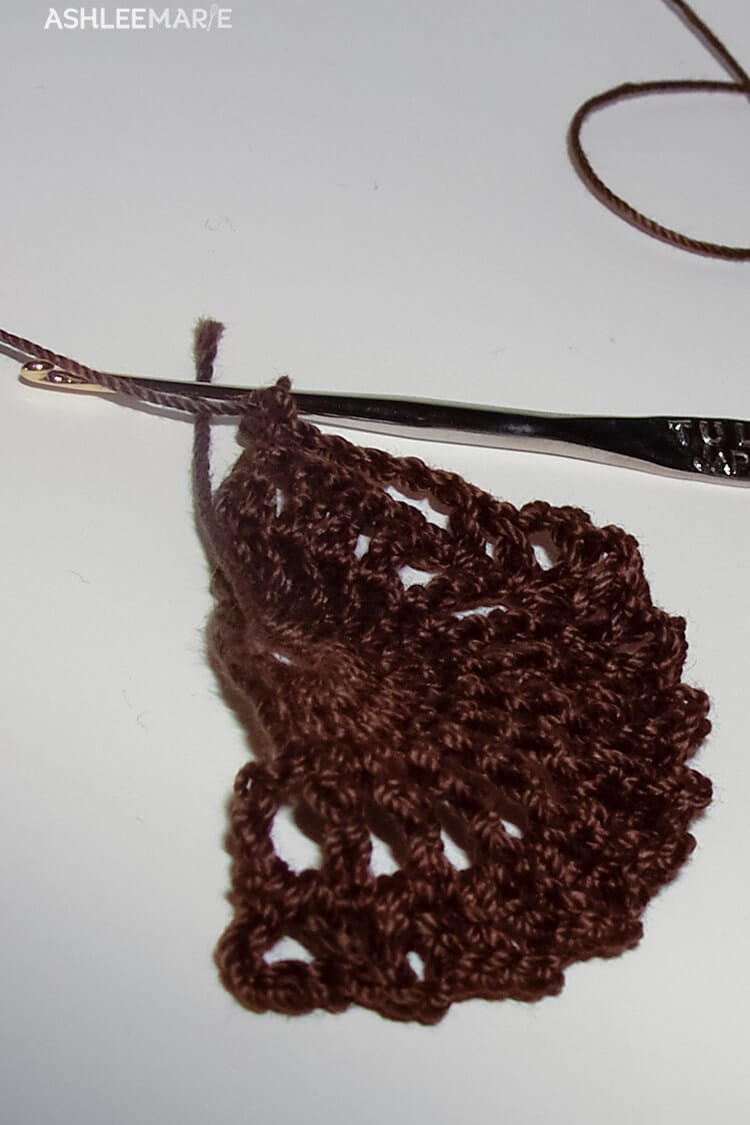
fan 2
row 4- turn, working in the ch5 space, *1sc ch3* (counts as first tr), 13 tr (14 total) then skip 1 picot of 3rd row and 1dc into next ch2 picot space
row 5- (same as row 2) turn, work *1sc, ch3* in first tr (counts as first tr), *ch1, tr* in each tr around (14, with 13 ch1 spaces)
row 6- (same as row 3) turn, work *1sc, ch2* in the first space (counts as first dc), *ch2, 1dc in same space, 1dc in next space* ten times. ch5, skip three spaces, 1dc in last tr (3rd chain)
fan 3
row 7- (same as row 4) turn, working in the ch5 space, *1sc ch3* (counts as first tr), 13 tr (14 total) then skip 1 picot (from row 6) and 1dc into next ch2 picot space
row 8- turn, work *1sc, ch3* in first tr (counts as first tr), *ch1, tr* in each tr around (14, with 13 ch1 spaces) skip next picot (from row 6) and 1 dc into next ch2 picot space (7 picot’s from the left)
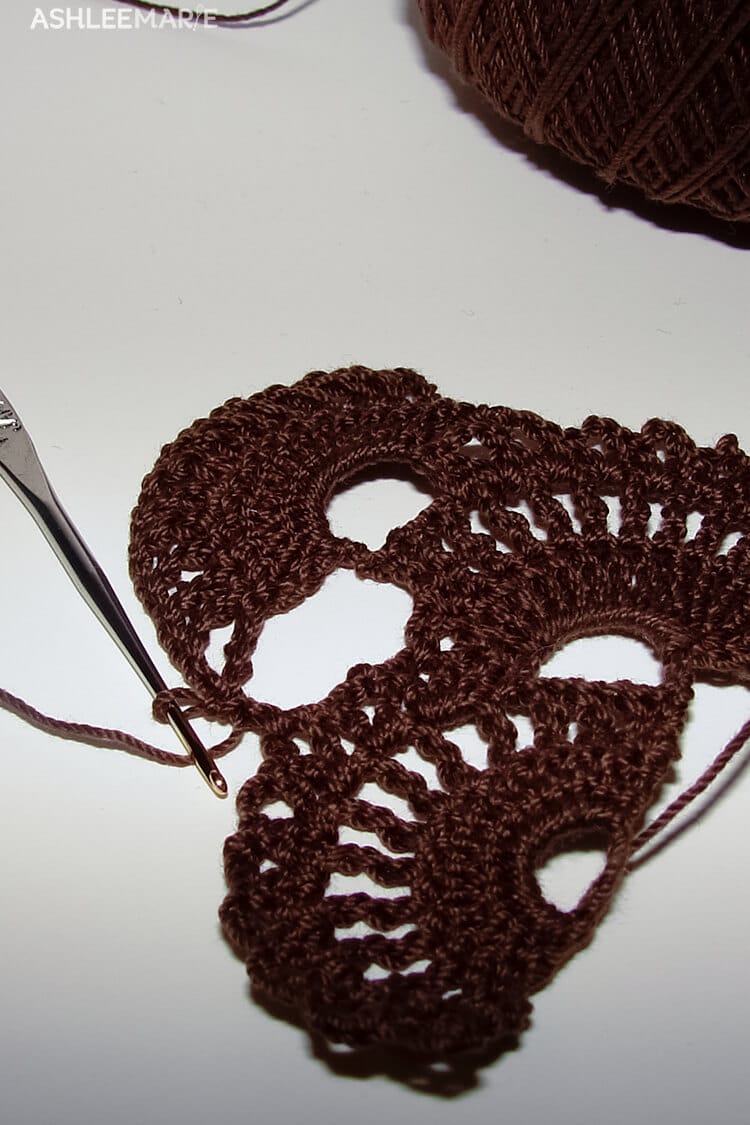
row 9- (same as rows 3 and 6) turn, work *1sc, ch2* in the first space (counts as first dc), *ch2, 1dc in same space, 1dc in next space* ten times. ch5, skip three spaces, 1dc in last tr (3rd chain)
Repeat fan 3 (rows 7-9) until you have 8 fans (if for some reason this is too tight for you then add more fan’s here- but always in pairs, so add rows 10 and 11)
fan 9
row 25- (same as row 4) turn, working in the ch5 space, *1sc ch3* (counts as first tr), 13 tr (14 total) then skip 1 picot (from row 6) and 1dc into next ch2 picot space
row 26- (same as row 8 ) turn, work *1sc, ch3* in first tr (counts as first tr), *ch1, tr* in each tr around (14, with 13 ch1 spaces) skip next picot (from row 6) and 1 dc into next ch2 picot space (7 picot’s from the left)
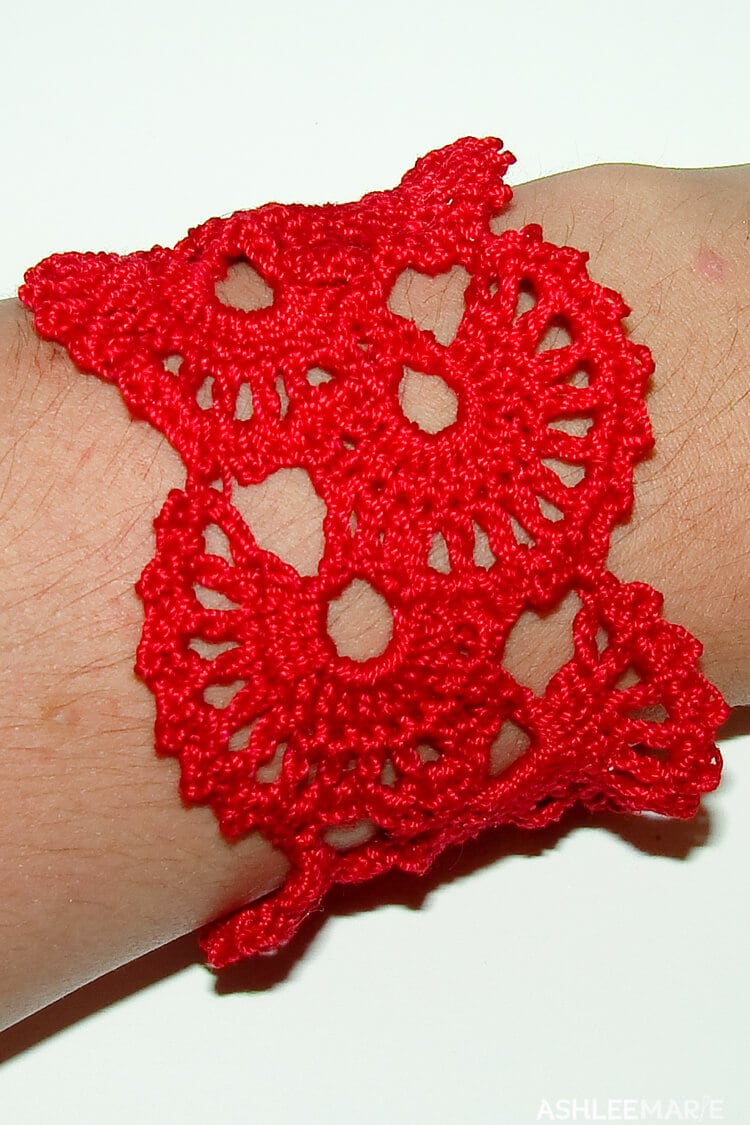
row 27- turn, work *1sc, ch2* in the first space (counts as first dc), *ch2, 1dc in same space, 1dc in next space* six times. ch1, dc in sc of row 3 from first shell (connecting it into a circle). ch1, dc in same ch space from row 26, dc in next space. *ch2, 1dc in same space, 1dc in next space* three times. ch5, skip three spaces, 1dc in last tr (3rd chain)
shell 10
row 28- (same as row 4) turn, working in the ch5 space, *1sc ch3* (counts as first tr), 13 tr (14 total) then skip 1 picot (from row 6) and 1dc into next ch2 picot space
row 29- turn, work *1sc, ch3* in first tr (counts as first tr). dc in the sc from row 1 in the first shell (connecting the circle a second time). *ch1, tr* in each tr around (14, with 13 ch1 spaces) skip next picot (from row 6) and 1 dc into next ch2 picot space (7 picot’s from the left)
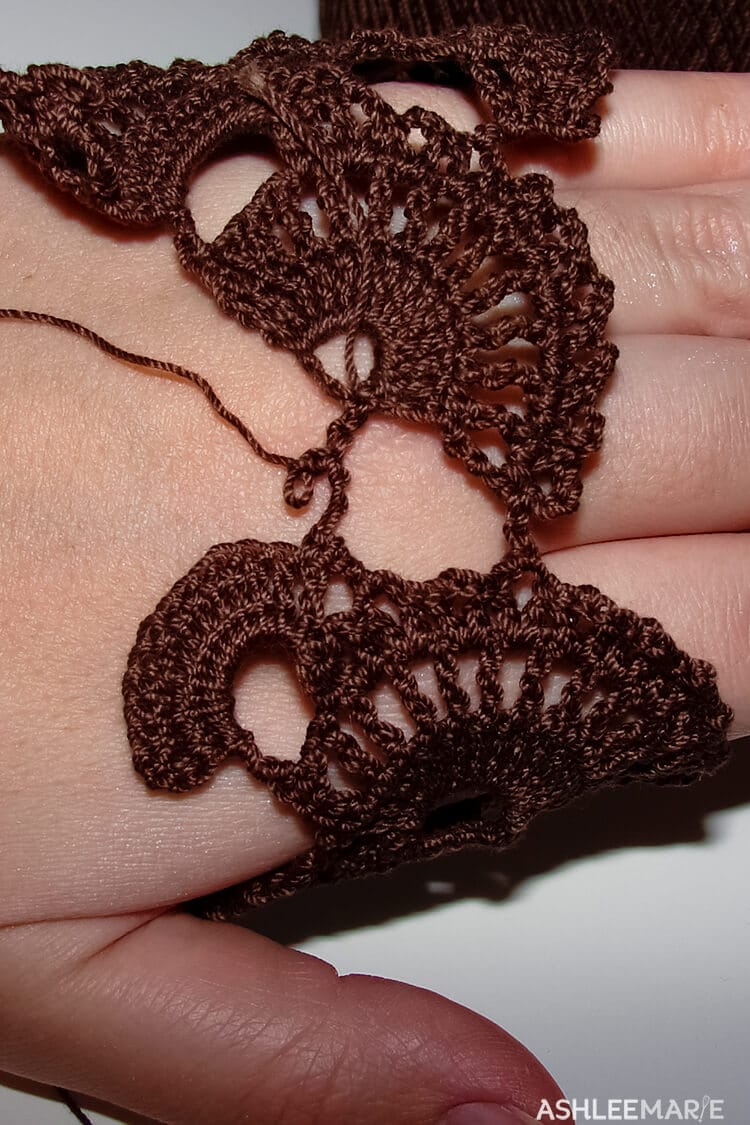
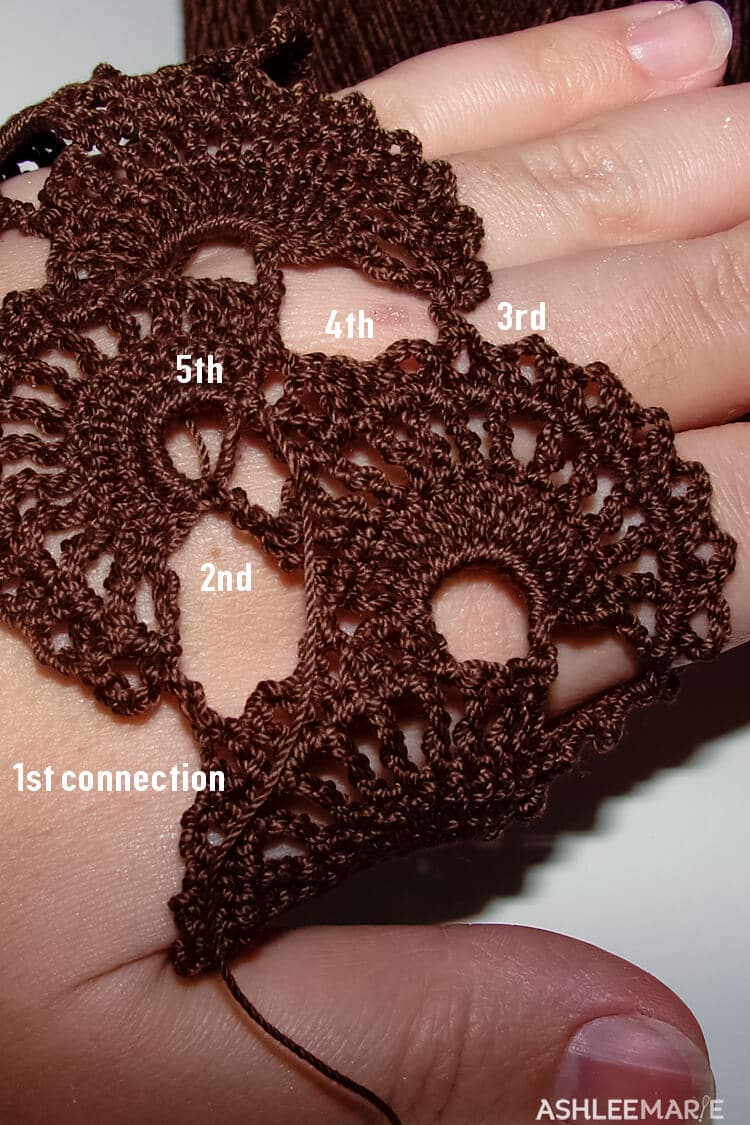
row 30- turn, work *1sc, ch2* in the first space (counts as first dc), *ch2, 1dc in same space, 1dc in next space* six times. ch1, dc in sc of row 6 from second shell (connecting the circle a third time). ch1, dc in same ch space from row 29, dc in next space. ch2, 1dc in same space, 1dc in next space. ch1, dc in sc of row 2 from first shell (connecting the circle a 4th time). ch1, dc in same ch space from row 29, dc in next space. ch2, 1dc in same space, 1dc in next space. sc in the bottom of the last tr in row 1 of the first circle (connecting the circle a fifth and FINAL time). finish off and weave in ends.
There it is!!! I hope you all love it as much as I do!!! I’ll be tickled if any of you try it! Don’t forget to link up your pinterest projects to our link party! Also Check out Holly’s shrinky dink bracelets, Amanda’s dog biscuits, and tomorrow is Rebecca’s turn!








Amanda Joy
I have the cuff pinned as well. I wondered if I starched the piece, if I could wear it as a cuff as well?
Ashlee
Probably??? I’ve used stiffy for a few other thread crochet projects, but I’m not the biggest fan of cuffs anyway so I didn’t bother trying. I’m sure you could though!
terry
bonsoir,
j’aurais avant tout voulut lui faire mes compliments pour le bracelet en dentelle ,il est super …mais est ce qu’il existe un video ….je prefere la pratique à la théorie…merci beaucoup
Ashlee
thank you, but no, I don’t do video, just write patterns. I’m so sorry.
June
I love your Queen Ann’s Lace bracelet! It must be nice to have the talent that you do. I would give anything if I knew how to crochet but, have tried it & I am all “fingers”!!!
Ashlee
I tried ones years ago and couldn’t get it, then I tried again a few years later it it just clicked! If you find anyone on etsy who can crochet for you you can send them this pattern to have them make one for you
Cheryl
I love it! I still don’t think my skills can do this but I want one!
Ashlee
now you HAVE to come up and visit me and we’ll crochet together and I’ll help you make one!
Affordable Wonders
Hi I’ve made similar bracelets and have used Fabric Stiffener to turn them into cuffs. Works great just water down a little saturate your piece then wrap around soda can or water bottle etc and let dry 🙂
Love this bracelet will be making a few myself 🙂
Ashlee
I’ve used stiffy before on thread crochet stuff and liked it, but I’m not the biggest fan of cuffs, and like it soft and comfortable anyway so that’s why I didn’t bother going that way. But if you do let me know!
holly ll
It is gorgeous! I love all of those colors. I really need to learn how to crochet!
Ashlee
Thanks Holly! I love your bracelets as well! I’ve never tried printable shrinky dink material, I’m going to have to get some to play with.
Rebecca Smith
This is beautiful Ashlee!! I love lace and how amazing that you can actually MAKE THAT!
Ashlee
Thank you so much!!! I think the challenge has gone really well this time!
Janny
This is great! I saw that bracelet on pinterest and loved it! I bet you could make it stiff with starch or something too. Thanks for this pattern.
Ashlee
I’m sure you could, I like softer bracelets to cuffs myself so I didn’t bother trying.
Brittany
Beautiful!
Ashlee
Thank you!
Celia
Hermoso, voy a tratar de realizarla. Graciassssss
Ashlee
Thank you and good luck!
Merri
What size thread?
Ashlee
10, normal, easy to find and buy thread! I’ll add it to the pattern, thanks for asking!
Megan Brooke
Wow, this is too cute! You’re a pro crocheter! I tried learning once, but it just never caught on. :/ Really love the brown one!
Ashlee
Thanks! I’ve been doing it for quite awhile, but I like working with thread more than yarn most of the time, i love the small detailed work! I agree, the brown and tan are my favorites, but the black and red get worn more with my wardrobe!
Tahira
I really need to learn how to crochet!
Ashlee
I agree, everyone should learn how in my opinion!!! There are so many fun things out there, and it doesn’t take long!
elenor
thank you so much for figuring out the pattern and sharing it with us! I already knew the picture from etsy and i really loved it. now i can try to make one myself! your pictures were also very helpful, thanks! the tip with wrapping it around a waterbottle is also very clever! i found your pin on pinterest!
greetings!
elenor
Ashlee
Thanks so much! I’m not into stiff jewelry, that why my version goes all the way around, but the water bottle trick is great if you want to create a cuff like the picture!
Steff
I have a question about this pattern. I just decided to try it out and i just started but i don’t understand something in the instructions. At the beginning after you make the ring of ch8, the next instruction says “working in the ring” do you mean working inside the big lumen of the ring or in the stitches that make up the ring?
Ashlee
inside the big lumen of the ring. Not in the stitches. There will be lots of room left over, but as you work the rest of the pattern you’ll see that it matches up just fine! Have fun and good luck!
Steff
thank you, i’ll give it another try tomorrow 🙂
Ashlee
It’s definitely one of those patterns that doesn’t make a lot of sense until you try it, at least for me… I played with a bit before attempting my first bracelet. the really tricky part is connecting the ends! Let me know if you have any other questions! Have fun!
Steff
I just finished the bracelet ^_^ it came out perfect! i did it in a dark red/ burgundy and yes connecting those last ends were a bit tricky but once i took my time and read carefully, lol it’s was simple enough. It was my first time using this small thread since i’m a beginner using the large yarn but i’m very very happy with the results 🙂 thank you for the pattern and the help!
Ashlee
I’m so glad it worked out for you! I’m SO glad that you were able to work out the connecting parts! I always get nervous with writing patterns! I know what I MEAN, but am always nervous it won’t make sense to anyone else!
sherri
i made this today in gold it turned out beautiful, thanks for the pattern
Ashlee
I’m SO glad! I’ve been wanting to try the metallic thread. Do you love it?
Verna
I pinned the cuff to see if I could copy it, now I don’t have to. Thanks. I will be making a few of these.
Ashlee
I hope you like it! I wish I knew how they got theirs in silver… So lovely!
Megan@BlueStarVermont.com
What a wonderful bracelet. I would love to make this when I need a fun break from sewing my aprons. I am pinning this to Pinterest to help spread work of your wonderful work there. Thanks! Megan
Ashlee
Thanks so much! Let me know what you think when you take that break!
emy
What method did you use to stiffen the cuff?
Ashlee
I didn’t… If you read the post the stiff one is the INSPIRATION piece, my bracelet is soft and loose
Susan Jakobsen
Thank you so much for sharing the pattern. I am going to make this, and post a picture here when I am done.
It is really pretty. I crochet earrings with thread, and have ventured into making bracelets. But, if I do make this, it will only be for my family.
Ashlee
Thanks so much! I hope you don’t find it too hard! I gets a little tricky at the end!