So we did a lot of remodeling this summer. I have a lot of posts coming up. Since there is still a mess everywhere while I’m working on more of the remodeling but I figured if I didn’t start posting soon you all would think I’d fall off the face of the earth! This project was actually in one of the few rooms that didn’t get changed. Okay, it lost a wall, and a fireplace, but other than that… not too much change. Anyway…
Here is the BEFORE. This was my old corner office. When we decided to stay with my in laws for an extedned period of time and remodel the basement my Sister in law, who had been downstairs with us, moved upstairs. So we gained 2 extra rooms. One of them became my office, so this space could be come the dining room!
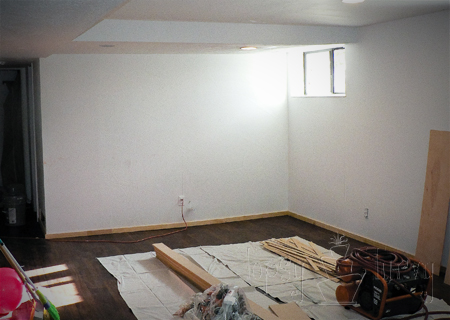
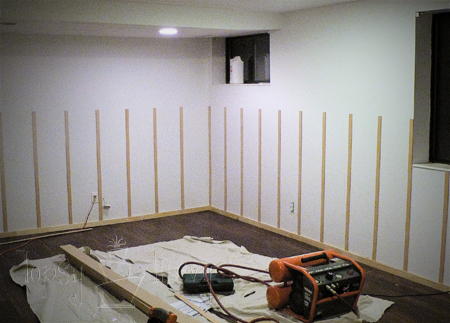
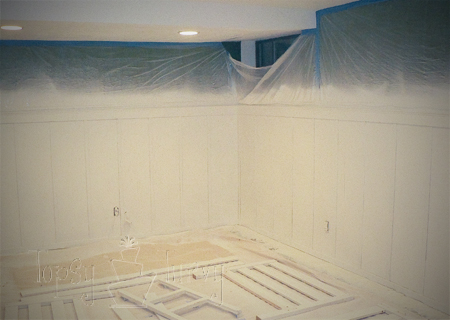
Ahhhh Empty, just how my husband would like it all the time. I’m so glad that yellow is gone (it’s still in my new office, ugh…) But I couldn’t want to get started. You can see the new flooring and trim already in. And my wood already cut and on the ground. I used the nail gun I got from CSN tools, and I couldn’t be happier with it. I also got a Miter saw!!! Eeeek! I love new tools, and this one was my birthday present! I rented an air compressor, but after one use I knew I needed one for myself and got one (another birthday present! Back in September, yup, that how long ago this project was done.)
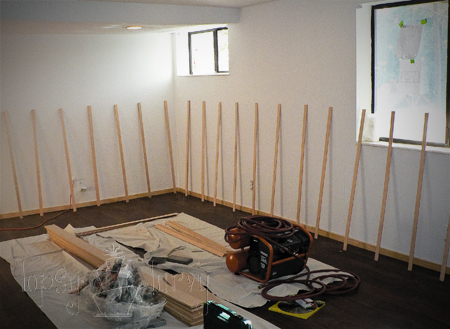
I got 1/4 inch thick 4′ x 8′ compressed wood board from Home Depot (my all time favorite store EVER, I think I should get a job there, seriously!). First I had them cut the sheet in half, so I had two 4′ x 4′ sections. Then (getting special permission, I LOVE my home depot) they cut 1 1/2 inch strips for me. So I played around with how far apart I wanted them to be before I started nailing anything up. I also made sure to skip the plugs on the wall and stuff like that.
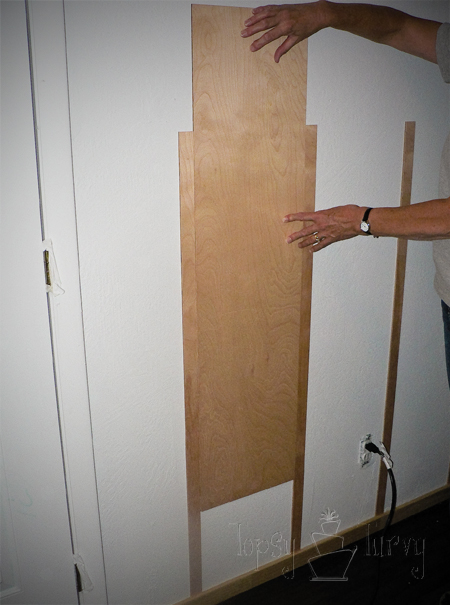
Turns out the left over piece from cutting was the perfect width for me (I wish I could say I planned it, but I simply got lucky…) It’s about 13 inches. For the picture I had a helper, but I did this project (all my projects) around midnight, so I didn’t have a helper when I was actually doing it! So I nailed up the first piece (using a level) and after that held up the board, the next strip and nailed it into place. I went around the room like that.
I’m tickled with how well it turned out already! Since I had all my strips cut from the same piece they are all the same height, but it turned out that the flooring and trim isn’t perfectly flat!!! AAAAAAHHHHH. Something I didn’t consider for a second.
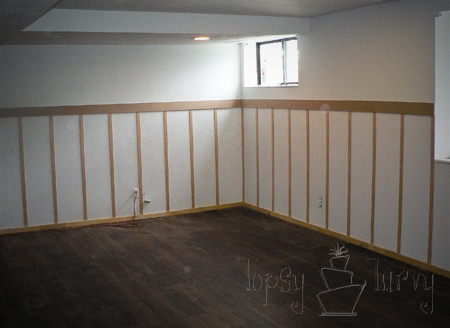
So when I added the 1/2 inch thick 4 inch side top strip there were some gaps along some of the tops of the narrow strips. Luckily I had some left over strips and I cut very small (VERY small) narrow pieces to fit into those gaps. It worked great, none of the sections were too big, the shadow from the large piece hids it pretty great. The paint will do the rest.
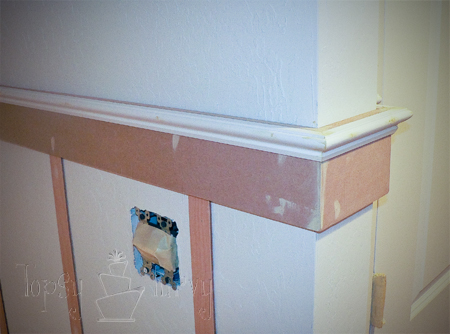
I wanted a very simple look, but still some bling, so I added some very small decorative trim along the top. It keeps it simple and yet pretty, and also gives me a larger shelf up there. I was nervous with how it would turn out, and I shouldn’t have. It’s GORGEOUS!!! now time for filling in nail holes and corners. Letting it dry and sanding it down!
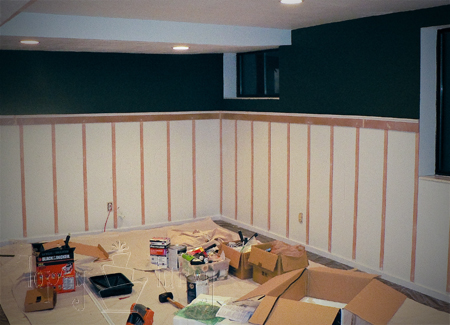
Time for paint!!!!! One of the reasons I wanted to do the board and batten is so I could use high gloss trim paint on the lower sections of our walls. My kids tend to draw on the walls… a LOT, and high gloss paint is very durable and much easier to clean artwork off of it. But to contrast that I decided to go with a flat paint up top. My husband is STILL very skeptical of the flat paint (we’ve had issues with flat paint before, it is almost impossible to clean). But I’m still glad I went with it.
And time to paint the rest! I got another tool (can’t have too many) and went with a paint sprayer. I actually used a few different machines and the two that didn’t work got returned. (sorry sears). It was so worth it. I got two coats of the high gloss done in an entire room in just a few hours, including drying. It was quick and easy.

And I look SOOOO hot afterwards. Don’t you think I should go for white mascara more often, right? And that mustache? GORGEOUS!!! Confession. When I finished this, around 3 am, I decided just to hop into bed rather that take a shower so my husband could see how awesome I looked the next morning! (He and the kids were still living in the cabin at this point).
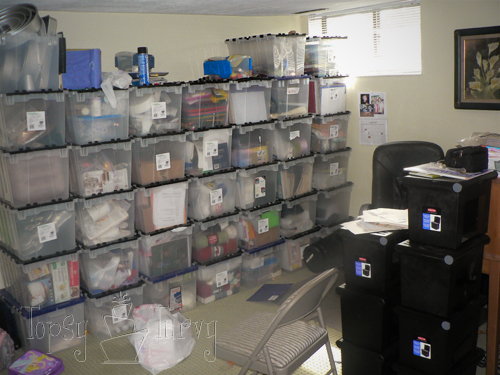
And another confession… The next day, when I was taking a nap, my husband decided to put up shelves and stack all my paints, tools, equipment up for me. He was cleaning for me, and while I totally appreciate him being so helpful… He stacked them along my picture wall, so instead of being able to show you this same corner I’m going to have to show you other images from this room.
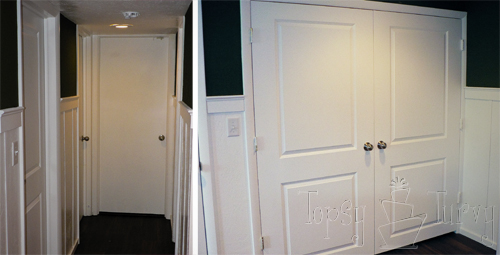
Here is the narrow hall leading to the kids room and ours (what will be the kids rooms, when we finally get our new master finished) and the bathroom and food storage room. And the second picture is actually the double doors from my laundry “room”

And here is our “front” door (it’s my in-laws, back door, backyard door, but our front door now). And the other door leads to my office and our new master bedroom. (just to the right of this is my new mantel… pictures coming soon!!!!). For now we have the kids coats, backpacks and shoes over against this wall. I’m not in love with it being here, but for now with the 4 kids in one small bedroom we don’t really have another place for the coats. I’m hoping we can move this stuff to the kids rooms once they are separated and everyone has more closet space… well see.
So all of this has been done for months now, literally, I finished in September, but I’ve been HOPING to finish all the projects so I could get RID of the shelf with the tools, paints and equipment so I could get a better AFTER shot. But I’m still so far behind on all the projects I need to get done first it’s either now or FOREVER away… And I have a few other projects that I’ve finished but waiting to post until after this (you can see the board and batten in the kitchen pictures, so I couldn’t post the kitchen first…). So I’m taking the plunge, starting to post remodeling projects, and maybe SOMEDAY I’ll be able to edit this post and add a better AFTER picture!


Michell Kaul
LOL! Love the photo!! Great Job! That looks amazing!
Ashlee
Thanks! I considered adding some white to my hair, but to get it that bright I’d have to fry my black hair way too much. So we’re sticking with black and red for now!
Korrie@RedHenHome
It looks fabulous! I am getting ready (mentally, that is) to do this in my basement family room. I love the bling-y trim you put on top of the 4-inch header board. Is that one piece of trim, or did you stack multiple pieces? Any pictures of what it looks like by itself (or hints of what to look for?)?
Ashlee
It is so worth, it and I did the nailing in one night, the painting in another. It was super fast. I added 1/2 in trim directly to the top of the 4 inch trim. So it is stacked I guess??? I just went to the best store in the world, home depot, and grabbed some nice 1/2 inch trim that was what I was looking for. decorative and small, you can go even more simple with just a quarter round, but I wanted just a bit of bling. It comes in super long, like 12 ft (or maybe just 8 ft) strips already. I hope that helps! It was white already, so look in that section, although don’t get confused with the outside trim, it’s like some weird woodish vinyl or something. This is just normal pre primed trim.
Shelley Smith
I LOVE it! Nice work! I can’t believe how open and fresh it all looks… totally like a pottery barn wall treatment 🙂
Ashlee
Thank you so much! I’m so happy with how it looks! With our short ceilings I was worried it would be too much, but I love it!
Meredith Simpson
What sprayer do you use??? shoot me an email – I didn’t see it listed. I would love to k now. It all looks amazing!
Ashlee
Wagner Paint Crew Airless Paint Sprayer from Home Depot.
Steph @MisplacedBrit
WOW! Well done you! What a FANTASTIC job you did here… I realise the post is an old one, but I figured it’s just as good to be reminded about something you did great ages ago too… Not only what you’ve pulled off today!
Ashlee
awww thanks! Since it’s in my main room I see it every day and I still love it!