I saw this idea at Instructables and fell in love. I’ve been wanting to do this for my kids and my son’s birthday theme was the perfect time! So first you make your 2 story wall around whatever space you want. I went big, but I usually do. Then fill it in with all the shapes you are interested in using keeping them just one dot apart each. You don’t want to waste space by leaving them too far apart.
Next take these, I got my food grade silicone here, I used the copy flex so I could pour it into my lego’s. I think I’ll order some of the silicone plastique for my cake decorating. It was just SO much fun!. So you mix equal parts of the two together.
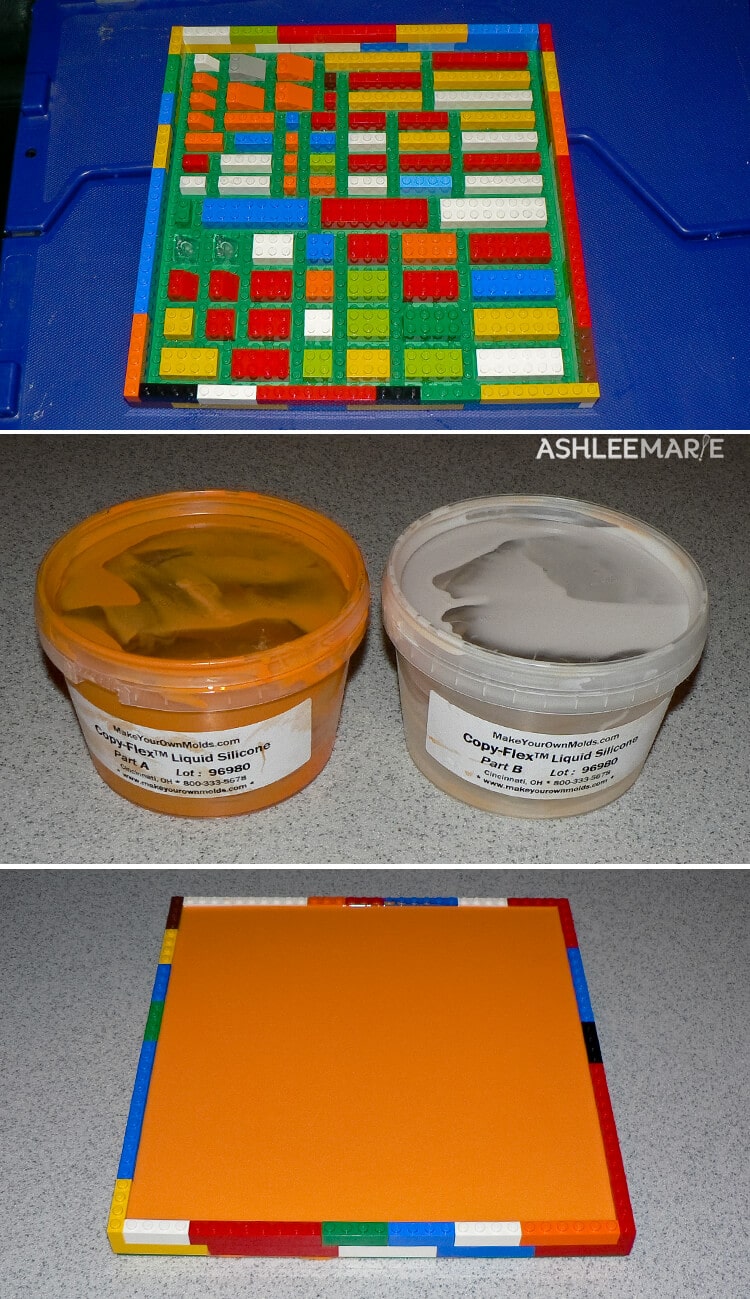
And pour it in. I ended up using 2 full pounds to fill in my huge board! It says it only takes 4 hours to cure, but it was still tacky on the back, so I just left it overnight!
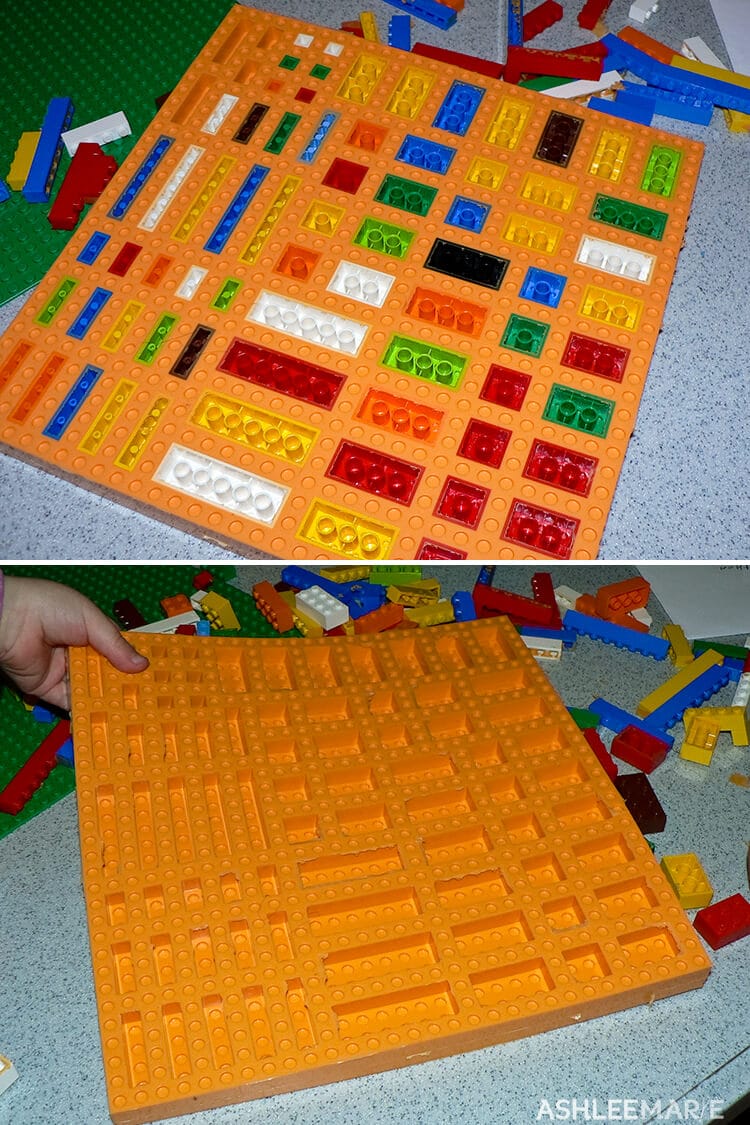
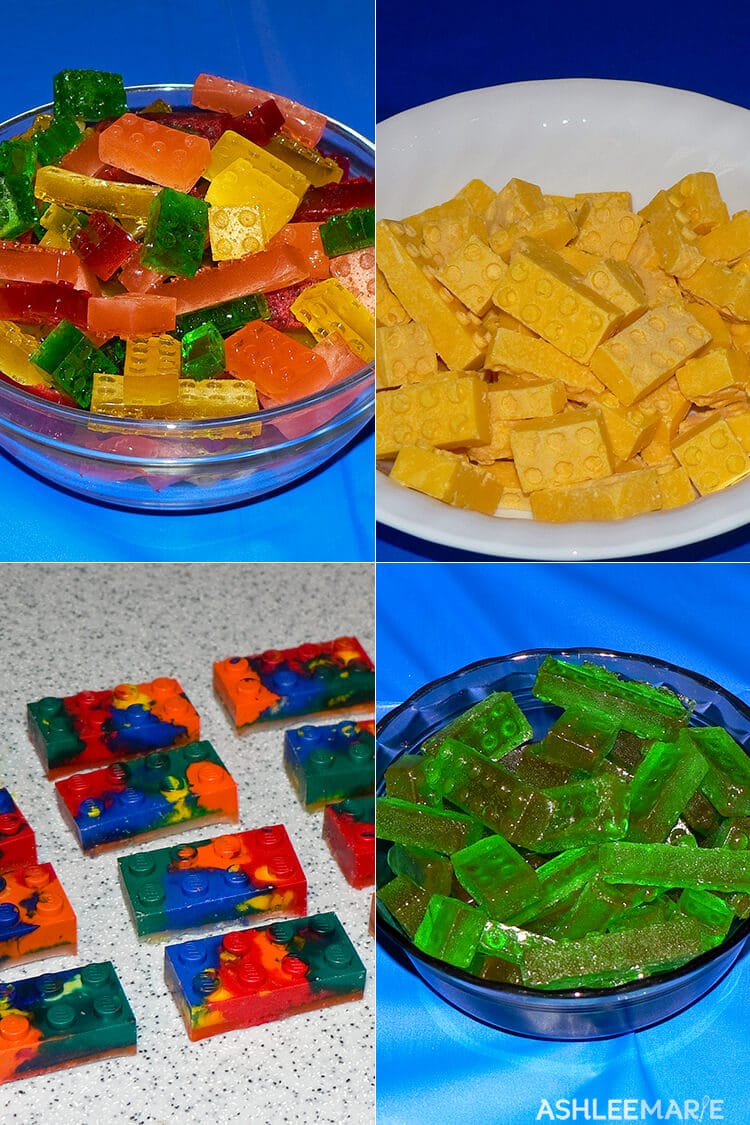
Then peel off the silicone and there you go. The Lego’s that remained in the mold popped RIGHT out. I let my 2 year old and 4 year old help with that part. They loved it, and I have to say I did too, there is something SO fun about peeling the Lego’s out of this thing. Since the plastic is food grade there is SO many things you can do with it. Watch over the next few entries as I talk about all the different things I made using my new mold!


Tara
This is genius! Is that silicone stuff expensive? Pretty please share it here. http://trophyw.blogspot.com/2011/08/lego-birthday-party-ideas.html
Ashlee
It is very expensive, but because I’ve now used it for 4 lego parties (with more to come I’m sure) it’s been SO worth it!
Melissa R Wheeler
WOW you are “All that and a bag of LEGOS” I cant believe you did all that. I would just buy a mold bcs i am so Inpatient. I love your creativity and heart! U are a good mama
Ashlee
oh you found the mold already! Great! The material was expensive for sure, but SO worth it. I’m not sure where you could by a silicone lego mold that didn’t cost as much and was much smaller.
c
Lego.com or the lego store has some if not all the molds… around 10 bucks but they are small maybe 8×8 in size I think the person one only has 6 ppl in it… I would love to do this with duplos
Ashlee
back when I made this mold the lego store didn’t offer any molds, and I still use it cause 1. I have it and 2. I never make that small of a batch so I’d end up spending $50 in molds anyway
SFHandyman
Looks great! I love the double size tray you made. I’d already spent so much money experimenting with everything that I just went with the smaller plate I already had. I’d love it if you’d post a photo of the tray and link to this in the comments on the Instructable.
Kyle
SFHandyman
Ashlee
Eeeek!!! The originator of THE mold is commenting on my post! I’m tickled! I went and posted pictures and a comment. I have LOVED my mold, used it for 4 parties already with more to come (I have three boys after all). Thank you thank you thank you! Best instructables EVER! The double size tray was expensive but SO worth it! I’ve thought about other molds, but in the end all you really need is legos 🙂
Olinda
Please, let us know where we can buy one lego mold like that.
Ashlee
the whole post is about how to make your own lego mold because that’s how you get one, by making it. You can’t buy one, lego doesn’t sell the rights. now the official lego corporation does have some of their own molds but they are small and very expensive.
JCLCsMama
How many pounds of the copyflex liquid silicone did it take to make the mold you made? I’d like to order it, but it depends on how much I’d need if I can afford it or not. Thanks!
Ashlee
like I said in the post I used the full 2 lbs and it fit PERFECTLY, any less would have been to little! so $50, but I’ve used it over and over and over again! I wish I’d ordered more…
garfied girl
were did you find the copyflex silicone @ what store or website
Ashlee
the link is right in the post http://www.makeyourownmolds.com/
Ashlie
What size lego plate did you use? A 10×10? I’ve already done two lego parties without this so I’m thinking this would’ve made a huge difference in quality and quantity 🙂 thanks for this post!
Ashlee Prisbrey
I love mine, my son actually broke my plate, so I haven’t used it in awhile. i bought this plate for it.
Elijah
does the legos it make have the botom clips just like real legos? please awnser iv been looking and cant find one that does
Ashlee
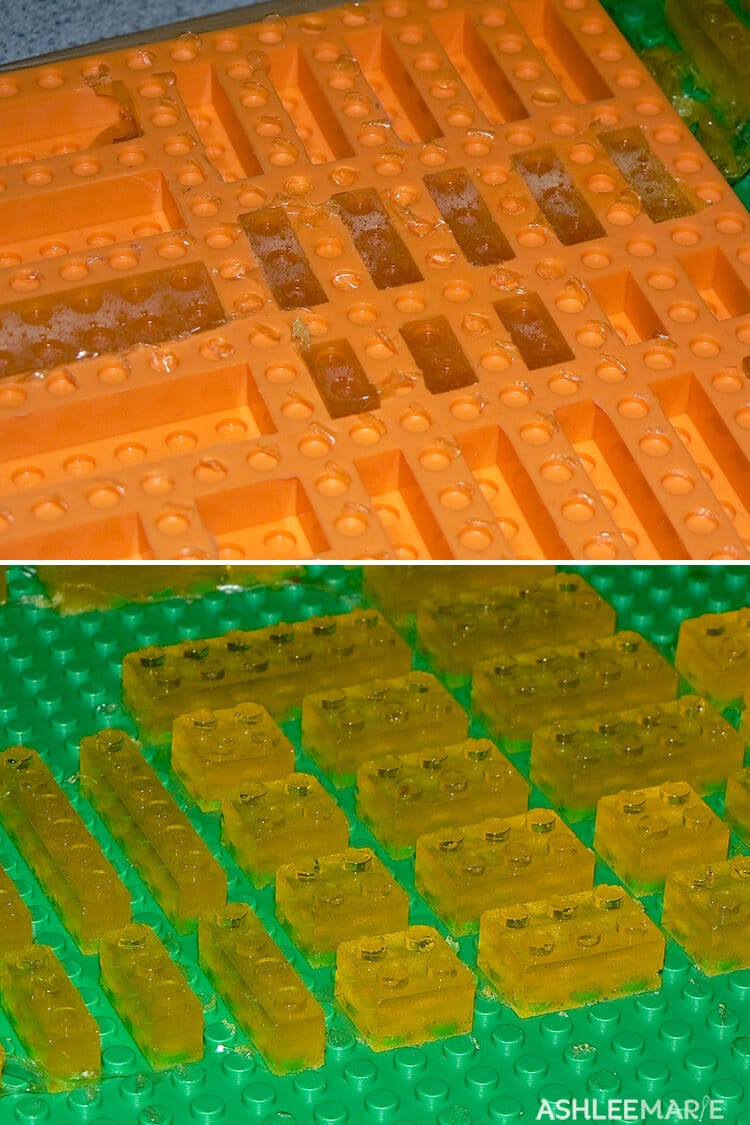
only if you put the plate back on after you pour in whatever your working with. the mold is upside down, if that makes sense, so if you don’t put the plate back on then whatever your molding will have a flat surface. Something like the gelatin candies it works great with, the crayons and sucker are too hot to put the plate on, the chocolate candies you could do it with too, but I didn’t have a lot of luck with them. Does that help???
Joanne
On the website for the CopyFlex, it says to use their anchor-it product first on what you are making a mold of. Did you use this or just pour the CopyFlex straight onto the legos? Did you use any of their other products? Just trying to get an idea of what all needs to be purchased to make this correctly. I used another product over the weekend that was more of a putty and failed. The cure time was too quick and I couldn’t push the material over the lego board quick enough. Hoping the pourable stuff works much better.
Ashlee
I didn’t, since Lego’s lock so well, I just poured the CopyFlex straight onto the Legos. This worked great!
Brian Boulnois
Hi i come across your page as i been trying to find a guide in how to make the lego mold of different bricks so i can then make candy out of them. I seen on Instructables which you got a link to how to make the mold, how every reading the last comments on your page it seems you can pour the copyflex straight out the tub it comes on to the bricks and let it harden, or i have completely got that wrong???
Fan from the UK
Ashlee
like it says in the post, mix the two parts together FIRST, THEN pour it over the legos. let it set then pull it out.