He’re the Lego head cake tutorial I shared last week at U-Create! I hope you enjoy it!
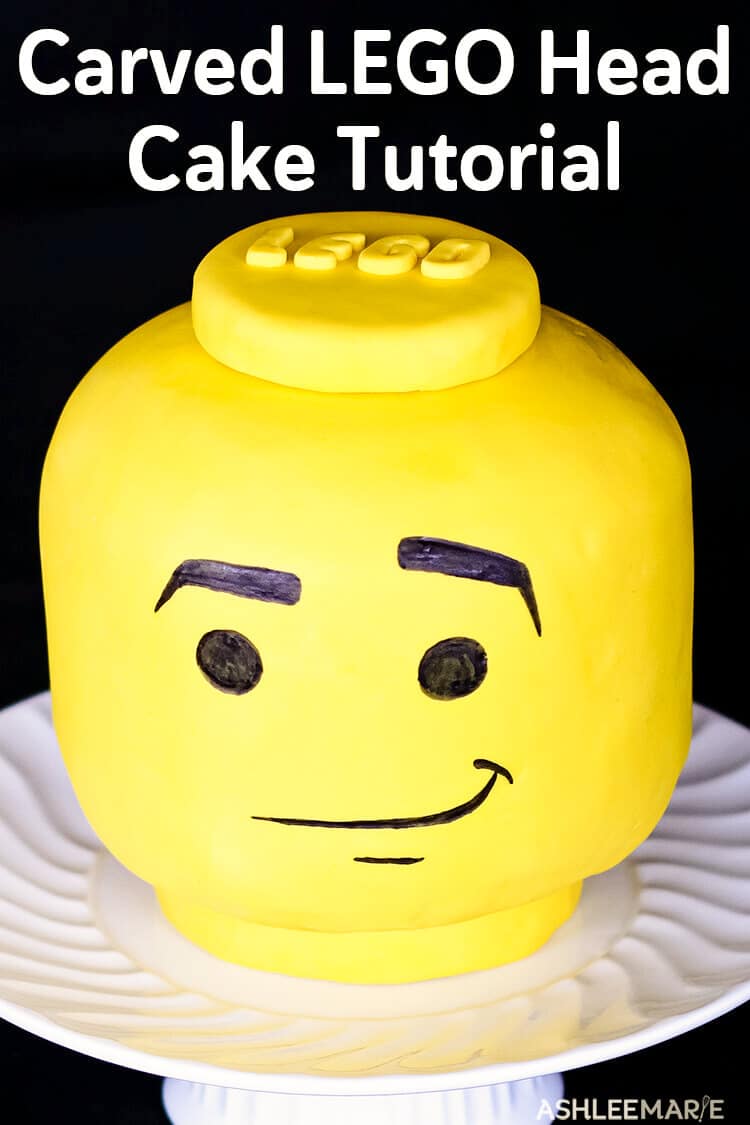
I made this same cake for my son’s 8th birthday last year and I get emails every week asking for instructions on how to make it! It’s a pretty easy cake, with a great impact and you can personalize it with any Lego face, or facial expression you want! So let’s get started!
Cake circles! This is where it all begins… kind of boring, but an important preparation. My head was a 6 inch cake so I took a 6 inch cake circle and cut it down by an inch all around creating a 4 inch circle. I cut FIVE of these circles.

Then I took off another half inch around and cut THREE 3 inch circles! Here I have the three stack of 3 inch on the left, and FOUR of the 4 inch stack on the right (one of the 4 inch circles is for later, so don’t lose it!)
Cover them with foil (I have a video tutorial for covering cake boards if you aren’t sure how to do this)
And now roll out your yellow fondant and cover your cake board! I buy my fondant pre-colored when I want a nice BRIGHT color. For more muted and pastel colors I color it myself. Here are some tips and tricks with preparing the fondant. Roll it out to just under 1/4 inch thick. Cover your foil covered cake board with something sticky, either piping gel, or even light corn syrup works well! Mold it around the boards and cut along the bottom.
Cover both, keeping the bottom edge as smooth as you can, after I cut my bottom edge I lift it up and take my finger and smooth it underneath all the way around.
Now for the logo on top. You have two options- If you want to go the quick and easy route (and more expensive) you can buy a fondant alphabet set and cut out the letters, they are the right size…
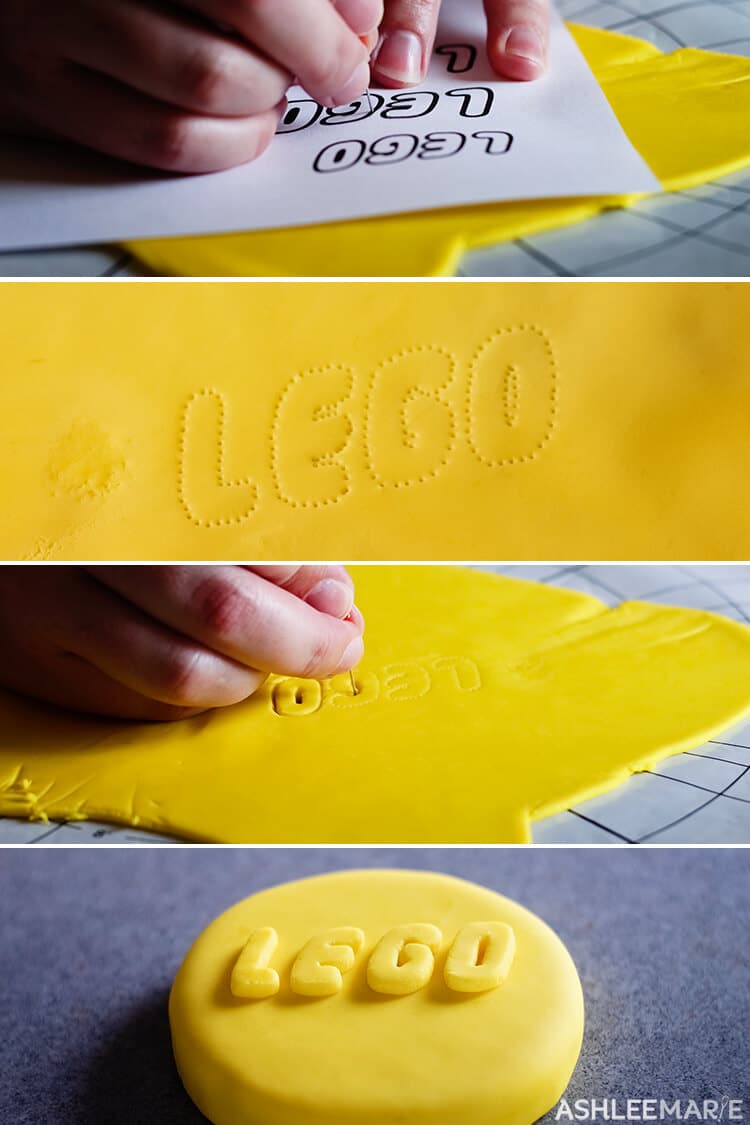
BUT I like taking a bit of extra time (and less expense) and making the lettering as close to the correct logo/font as I can! I downloaded this Legothick font and printed off a few different sizes and picked the size I felt fit the 3 inch circle the best. I rolled out my fondant again, closer to 1/8 inch, and placed my printed paper on top. Taking a straight pin I pushed the pin through the paper into the fondant along the lines.
You’ll leave an impression in the fondant you can use for cutting out. This will take patience, the fondant is soft and easily messed up, so just be patient!
I tried a few different tools to cut this out as smoothly as I could. All sorts of expensive fondant tools I won and everything (don’t use a knife it will cut your mat) and I ended up with the straight pin again! I just slowly carved the excess fondant away (but not TOO slow, like don’t leave the fondant on the counter and take a break, it will dry out)
I placed the cut out letters back onto my printed paper, to let them dry a bit in the right formation/angle! Pretty darn perfect!
Once they dry a bit use some clear vanilla or even some of the piping gel to stick it onto the fondant top (the 3 inch circle, NOT the 4 inch circles)

Now for the cakes! I used two 6 inch cakes, each about 3 inches tall (how I bake tall cakes). Using a serrated knife prepare the cake for carving by cutting off the top crusty part so your working with a clean surface/blank slate.
Now we’re going to created the rounded corners. I took the same serrated knife and cut off the corner at about a 45 degree angle, all the way around leaving a nice 4 inch flat circle for the base to sit on.
Next, cleaning your knife often, carve the smallest bit from the corner edges to round it just a bit, and soften the edges a bit.
Since this is the bottom its going to be hard to frost once it’s right side up so I actually frosted the rounded bottom edge, then placed that one last 4 inch circled (covered with foil) on the bottom! I like to use ganache, it seals in the moisture and has an amazing rich flavor. Since it dries quite dense you don’t have to worry about it squishing out when you put the fondant on it. Let the ganache cool down and to create a thicker frosting I like to whip it up in my bosch.
Flip it over, fill it with more ganache and place the next prepared layer on top. Now we’re going to repeat the carving to create the rounded corner again.
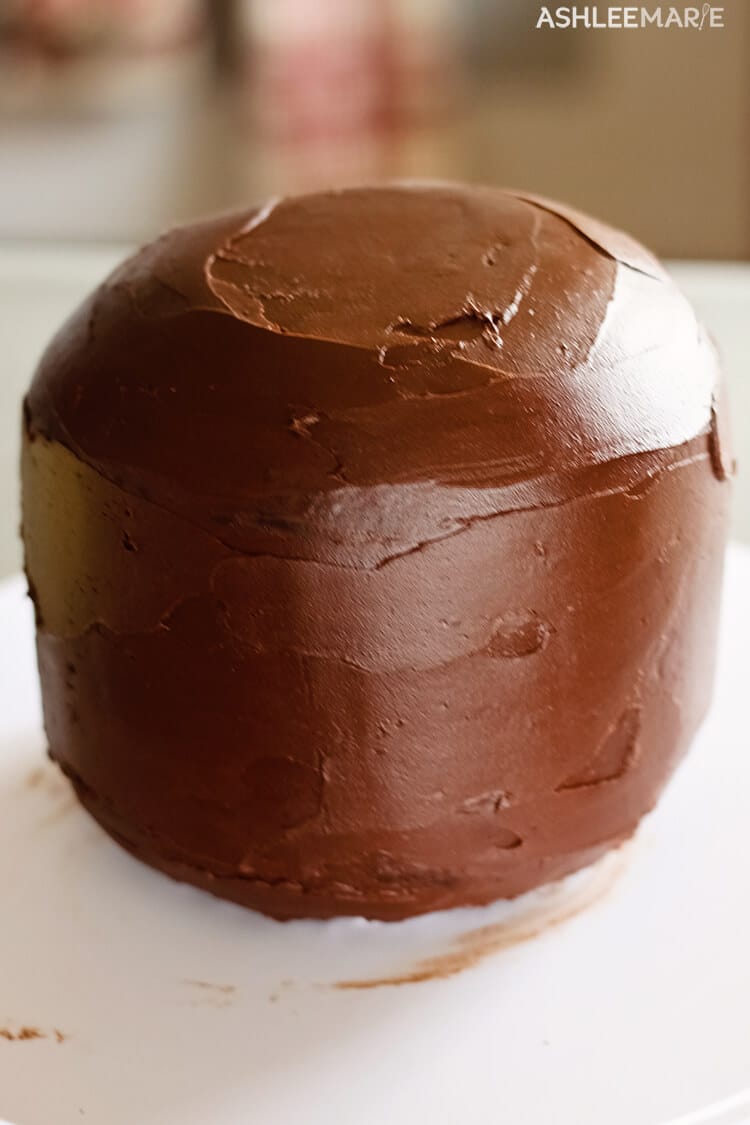
Once your done with the carving frost the rest of the cake, make sure to fill in around the seam well!
Then let it dry, it will become more matte and lose the high gloss when it’s ready to go!
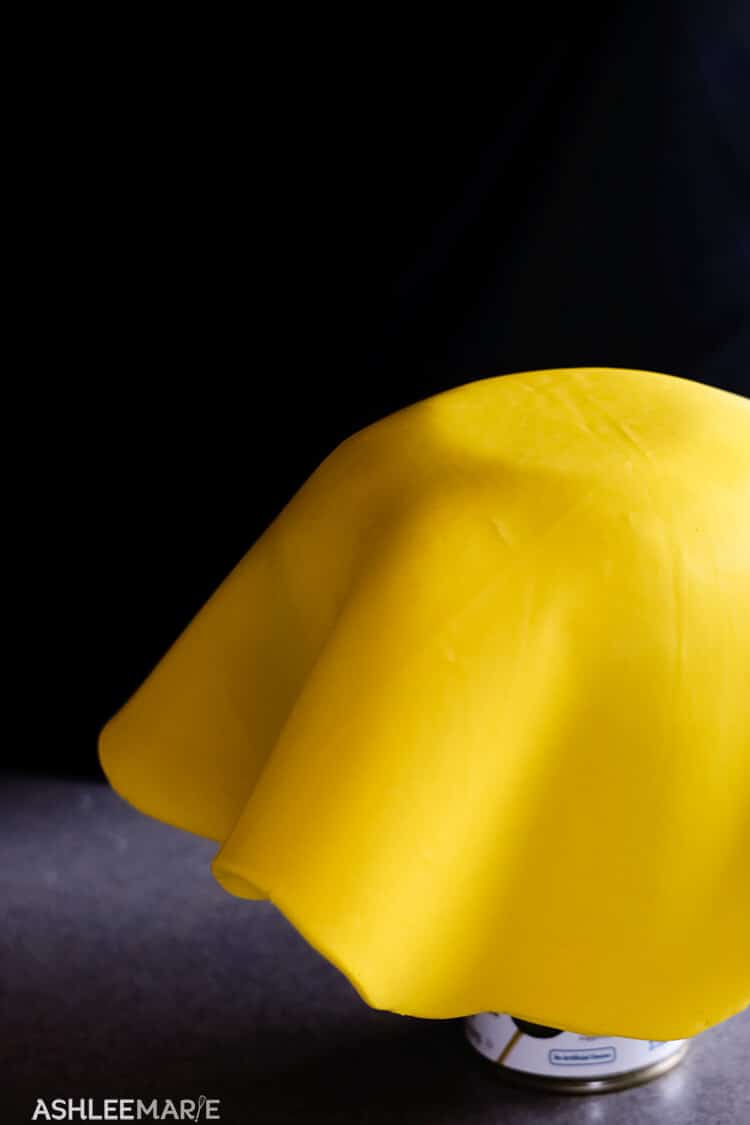
Time to cover it with fondant!!! Roll out the fondant into a circle 1/4 inch thick. Since our cake is 6 inches around and about 6 inches tall you want close to an 18 inch circle. I like to fold my mat in half (fondant out) and lay the center of the fondant directly onto the center of the to of the cake, then peel off the fondant and let it start to hang down the sides.
With our fondant so thick it’s also very heavy so we want to work as quickly as you can, but don’t panic, you don’t have to work at warp speed! I start by using a fondant smoother (if it sticks to your fondant use a bit of powdered sugar to keep things dry and sliding easily) to make sure the top if flat, with no air bubbles.
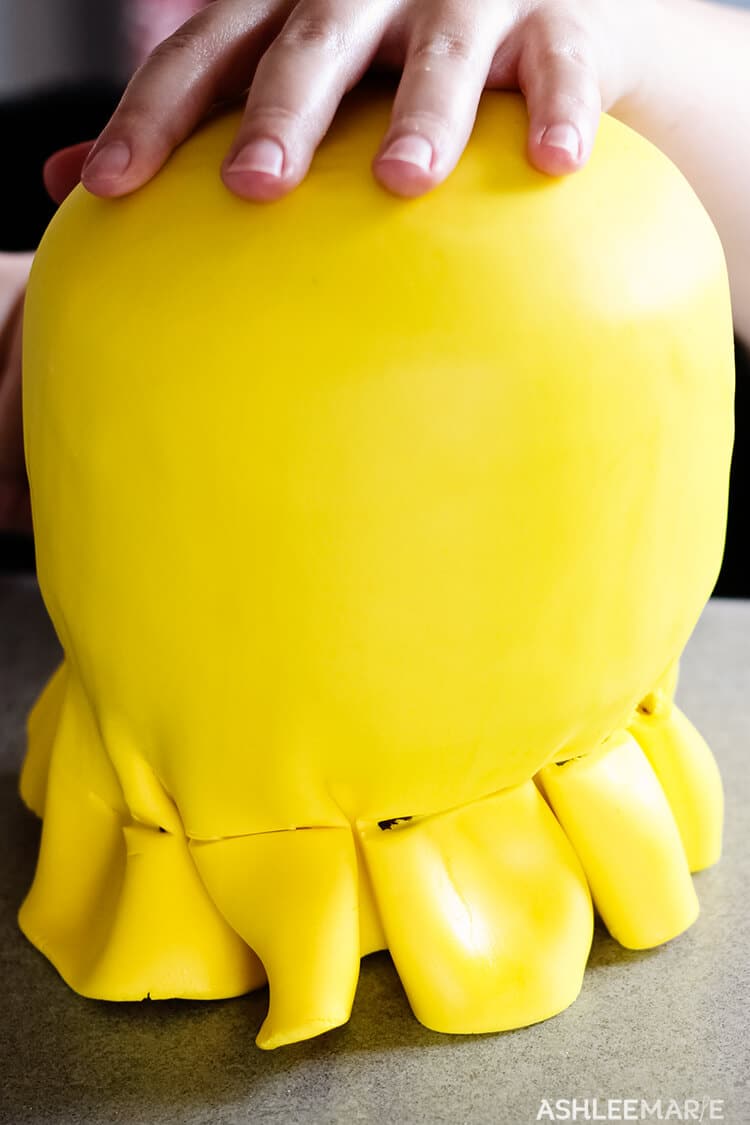
Now we’re going to work our way down. With your fondant thick it will press together without wrinkles as well as stretch a bit without ripping to help mold the fondant into shape. Don’t just work one side at a time, work a bit of one side, rotate, work more, rotate, work more, rotate, etc.. work your way down and around as evenly as possible. When you get it smooth down the sides take a sharp knife and cut along the bottom so the excess weight is gone and now we can work on smoothing it underneath!
There are a FEW creases here and there, but overall it smoothed together really well. As you work your way around the ganache will warm up a bit and help adhere to the fondant and hold it into place.
Keep a warm wet rag next to you because as you smooth the fondant into place you will get some ganache on you hand, keep your hands clean otherwise you’ll end up with a chocolate streak on your fondant (which if you do you either 1- get your finger wet and wipe it off, the water will change the look of the fondant a bit, becoming glossy and sticky in the one spot, but it will dry, or 2- make it the back of the cake!)
Now I used my plastic fondant smoother and just smooth out any bumps, imperfections, etc.. the ganache underneath warms and softens when rubbed and will just smooth right out! I LOVE working with ganache under fondant!
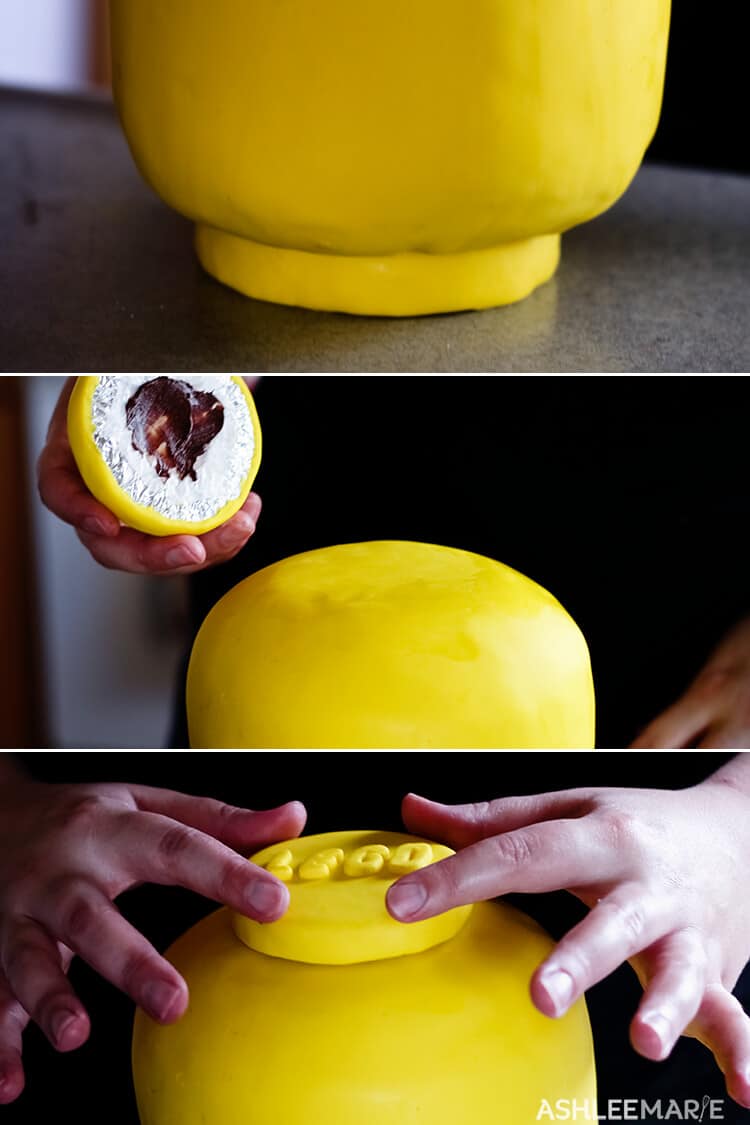
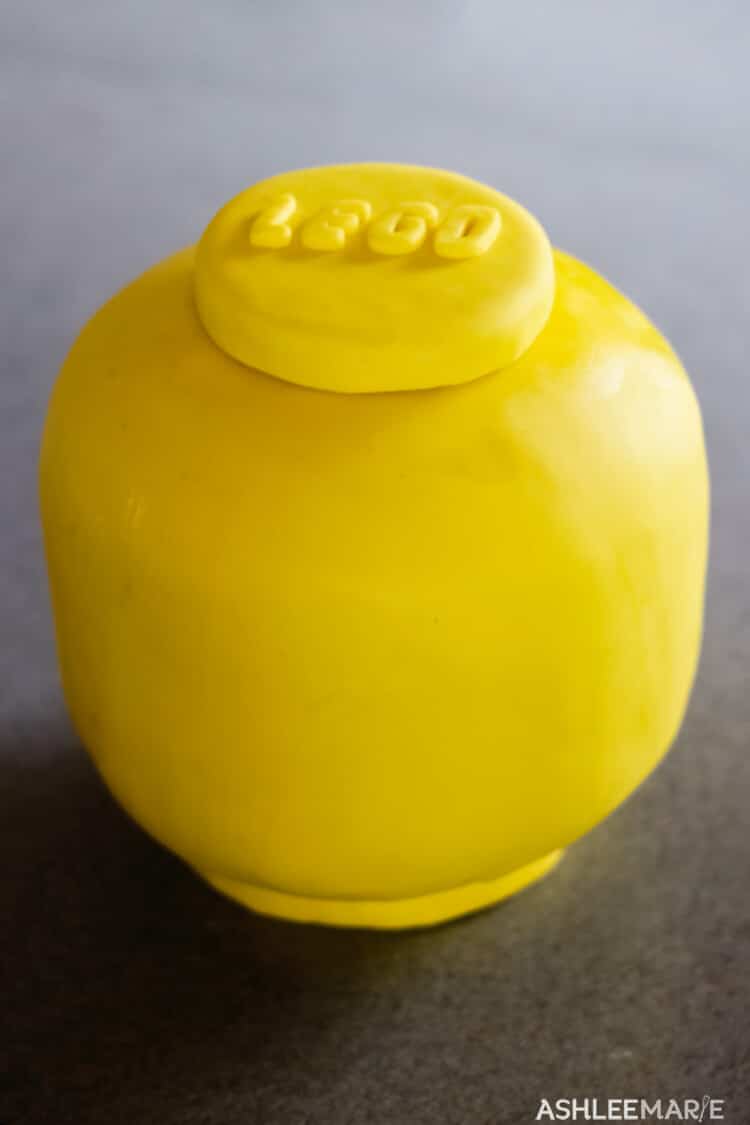
Now for assembling the cake and adding our final details! Place the cake onto your 4 inch tall fondant covered base! I stuck the two together with a bit of the ganache (it’s great super glue, but don’t use too much, you don’t want it squishing out!)
Add your top the same way, a bit of ganache dabbed on the bottom of the 3 inch wide top piece!
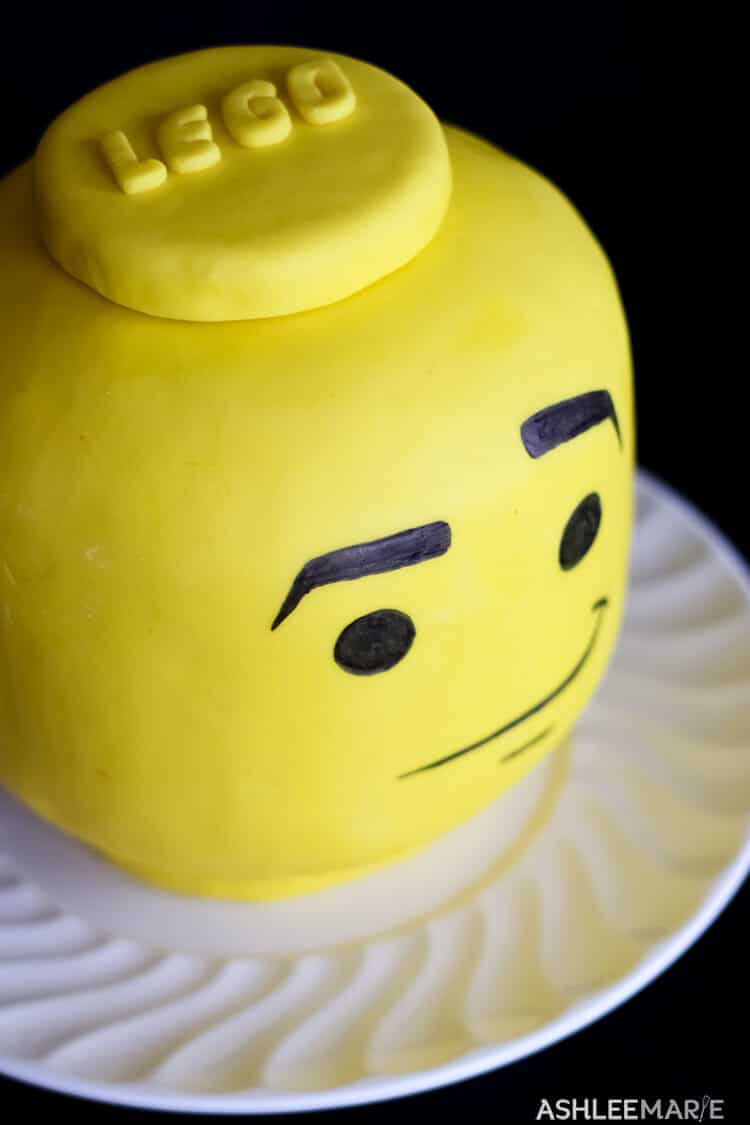
BEFORE you add the top pick the FRONT of your piece, make sure the lettering is facing the right way! You don’t want your LEGO logo crooked, and you definitely want your face on the prettiest side of the cake!
All Lego Cakes


Julie
This is the simplest, most wonderful tutorial. Thank you so much!
Ashlee
awww thank you so much! I love this cake!
Kalli UK
Hi Ashlee, I absolutely LOVE this cake – and will be attempting it for my son’s Lego party next month, even though I am terrified at how it is going to turn out. Really battle with fondant – but will be using all your tips and advice. Thanks for the tutorial, x
Ashlee
I would say that most people have trouble with fondant because they 1. use bad fondant (wilton is bad, i like satin ice or Massa) or the roll it too thin and get ripples, rips and pleats. Have fun!!!!
Sarah
Hi! This cake is amazing!! Could you tell me how many your 6″ version feeds please? xx
Ashlee
a 6 inch cake usually feeds 12, since this is 2 full cakes stacked I would get 24 servings out of it.
lea smye
what a brilliant idea for getting the lettering right!! i have a lego cake coming up and will definitely be utilizing this technique. thanks so much!
Ashlee
thank you so much! I use this technique for odd shapes all the time
Sarah
Thank you from Australia for this cake tutorial and for the chocolate cake recipe Ashlee. It was so helpful and my 3 year old son absolutely loved his cake. I used the chocolate cake recipe from the chocolate cake and ganache recipe but I halved the amounts for 4 small 6 inch cake tins.
The cake was perfect – seriously moist and delicious. I watched the tutorial on youtube – something I don’t normally do but found you to be a great teacher. Thanks again, your work is greatly appreciated.
Joanna
Hi! Just wondering how much fondant did you use for this recipe? My son just watched your video tutorial and showed it to me and told me he’d reaaaallly like to have this as his birthday cake in January. Thanks very much!
Ashlee Marie
I’d guess about 2 lbs. I like to have more than feel like I’m trying to stretch it too far so I away’s get the 5 lbs buckets.