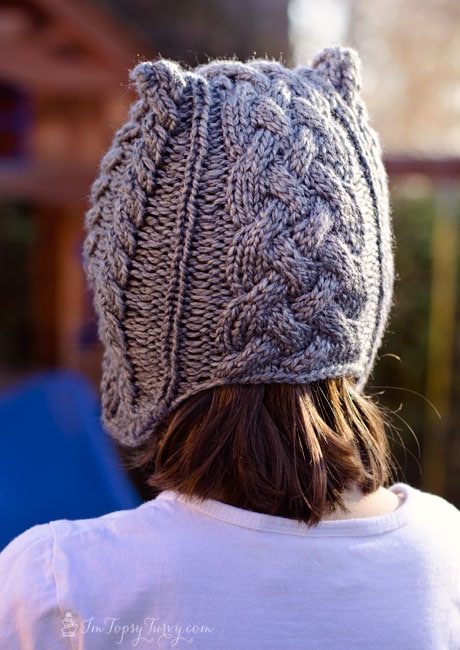
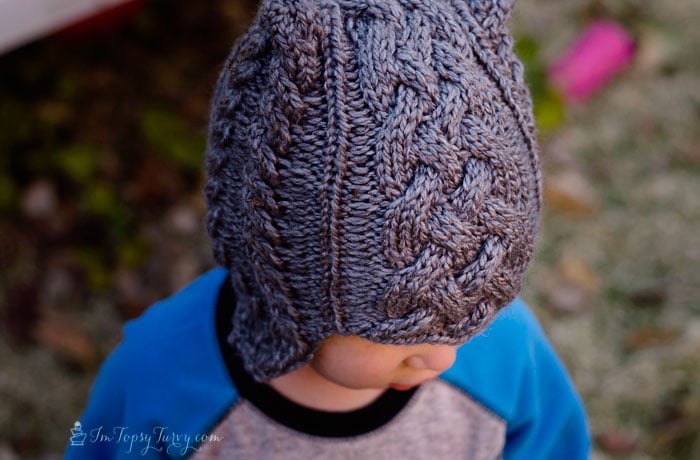
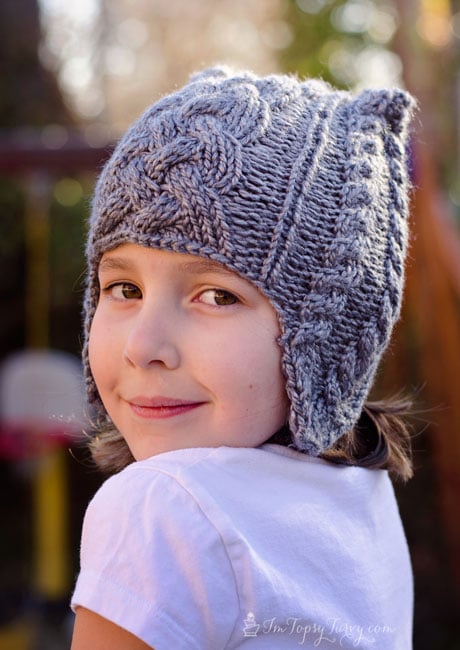
A square cable knit beanie using a kitcheneer stitch for a seamless bind off matching up the cable pattern beautifully across the top.
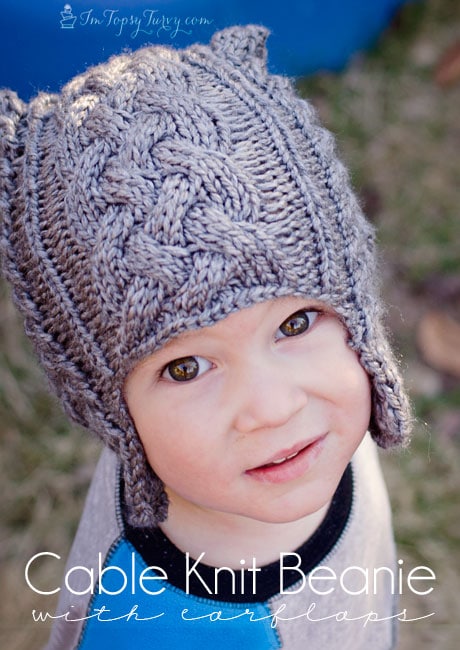
I am SO excited about this pattern! I haven’t been inspired in awhile for a knit or crochet pattern so when I started getting an idea for this I couldn’t put my needles down until I got it right!
I hope you like it as much as I do! I’m working on a few different sizes, baby and infant, for you guys too!
I love cables, earflaps and squared off beanies so this pattern includes all of them. The big one for me is I usually start my knit beanies bottom up, but because I wanted to add earflaps to this I needed to start top down.
The next question, do you make it flat then do a seam down the sides? or work it in the round the seam the top.
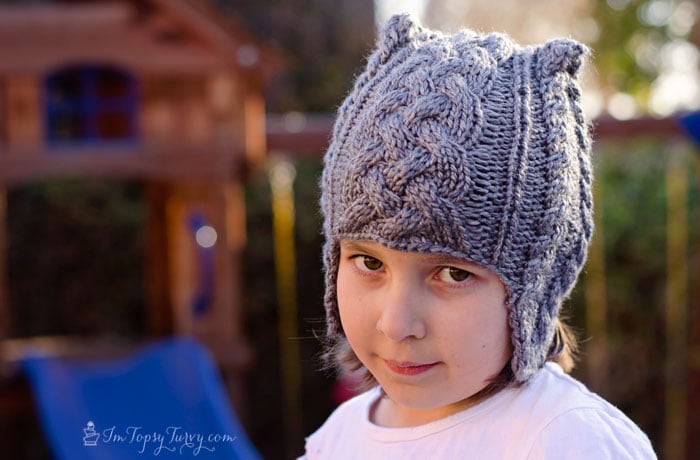
I decided to work in the round and seam the top. But then the question is how do you seam it? just simply stitch it together? NOT ME!!!
I like trying to make it as seamless as I can, so I decided to learn the kitcheneer stitch! I love it, but it isn’t perfect (the pattern throws it off, but overall I’m really happy with it.
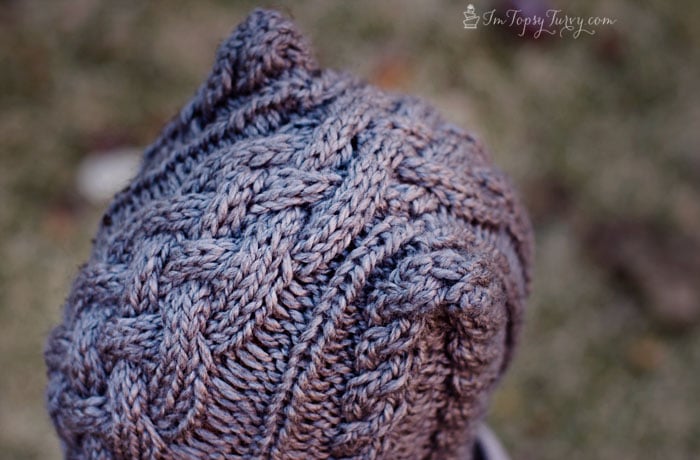
The kitcheneer stitch is different than the three needle bind off but both would work. The three needle bind off leaves a seam on the inside of your work, while the kitcheneer stitch leaves it seamless (for the most part, the pattern does jiggle over a bit), a nice and smooth inside!
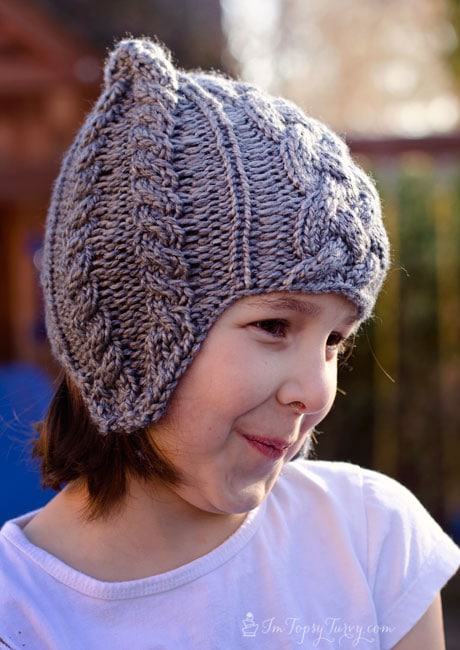
You can end it with a single crochet around, but I felt it bulked it up a bit (I made like 4 hats perfecting this, one had the crochet around), it also curled the ears out a bit. So I didn’t do it. I also considered adding short braids to the bottoms, but I didn’t want to make it too busy.
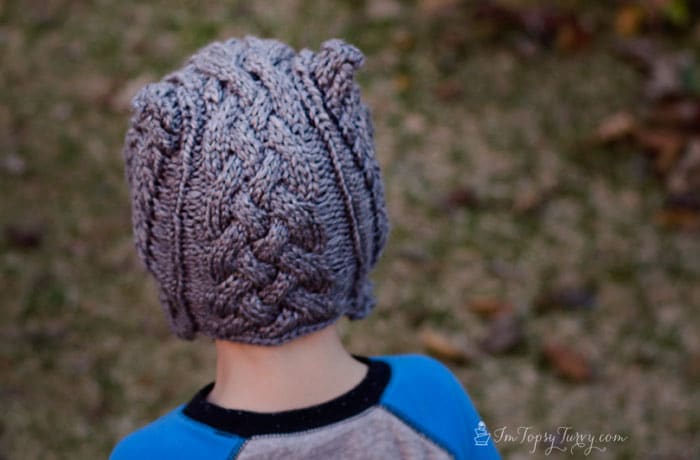
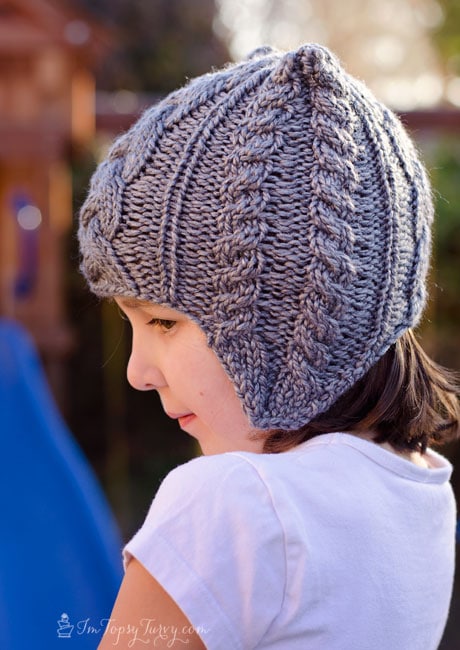
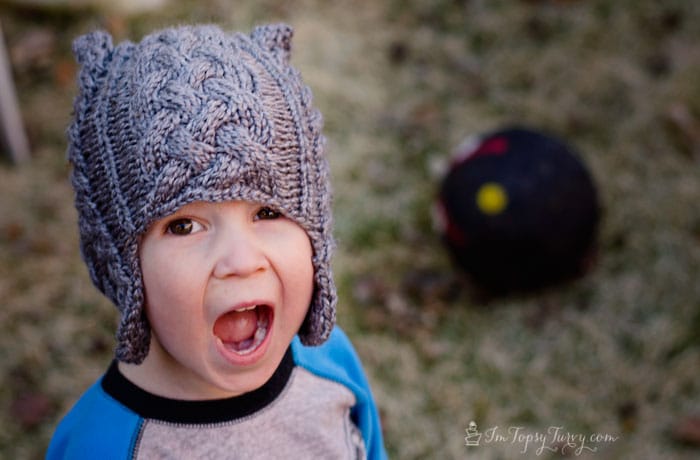
The baby did NOT like it, he has decided he doesn’t want to model for me anymore, BUT Princess LOVED IT!!!!! And the same hat fit them both!!
Crazy how close in head size toddlers and kids are, huh? I might just have to come up with an adult pattern too, I might need one for next winter, maybe a bright pink?
Buy the Ad-Free pattern pdf here!
Cable Knit Beanie with earflaps
Child
Materials:
Chunky yarn
size 10 double pointed needles
6.5 mm crochet hook
cable needle
Abbreviations:
K- Knit
P- Purl
CB4 – Slip 2 sts to cable needle and hold in BACK, k2, then k2 from cable needle
CF4 – Slip 2 sts to cable needle and hold in FRONT, k2, then k2 from cable needle
CB6 – Slip 3 sts to cable needle and hold in BACK, k3, then k3 from cable needle
CF6 – Slip 3 sts to cable needle and hold in FRONT, k3, then k3 from cable needle
K2tog – insert the right needle into two stitches and knit two together (decrease)
SSK – slip one knitwise, slip another knitwise, insert left needle into front of both slipped stitches and knit (decrease)
K3tog – insert the right neede into three sitches and knit three together (decrease)
SSSK – slip one knitwise, slip another knitwise, slip a third knitwise, insert left needle into front of both slipped stitches and knit (decrease)
Provisional cast on – crochet a chain, then put your starting needle through the back loops to start your project, then later taking out the chain so you have open loops to knit the other way (usually knitting together)
kitcheneer or three needle cast off – for binding off the top
Gauge:
10 stitches per 2 inches
We’re going to start with the provisional cast on:
crochet chain 70, join in a circle, tie off
weave knitting needle through back loops all the way around
spread your stitches among 3-4 needles
Row 1 – [K15], P2, K1, P2, K4, P2, K4, P2, K1, P2, [K15], P2, K1, P2, K4, P2, K4, P2, K1, P2, (70)
Row 2 – [K3, (CF6) twice] P2, K1, P2, CB4, P2, CF4, P2, K1, P2, [K3, (CF6) twice] P2, K1, P2, CB4, P2, CF4, P2, K1, P2, (70)
Row 3 – [K15], P2, K1, P2, K4, P2, K4, P2, K1, P2, [K15], P2, K1, P2, K4, P2, K4, P2, K1, P2, (70)
Row 4 – [K15], P2, K1, P2, K4, P2, K4, P2, K1, P2, [K15], P2, K1, P2, K4, P2, K4, P2, K1, P2, (70)
Row 5 – [K15], P2, K1, P2, K4, P2, K4, P2, K1, P2, [K15], P2, K1, P2, K4, P2, K4, P2, K1, P2, (70)
Row 6 – [(CB6) twice, K3] P2, K1, P2, CB4, P2, CF4, P2, K1, P2, [(CB6) twice, K3] P2, K1, P2, CB4, P2, CF4, P2, K1, P2, (70)
Row 7 – [K15], P2, K1, P2, K4, P2, K4, P2, K1, P2, [K15], P2, K1, P2, K4, P2, K4, P2, K1, P2, (70)
Row 8 – [K15], P2, K1, P2, K4, P2, K4, P2, K1, P2, [K15], P2, K1, P2, K4, P2, K4, P2, K1, P2, (70)
Repeat rows 1- 8 four times (5 repeats altogether) or until length desired. End on a row 3 or 7.
Row 40 (or whatever you end on) – cast off 15, P2, K1, P2, K4, P2, K4, P2, cast off 21, P2, K4, P2, K4, P2, K1, P2,
first ear flap
yarn still attached – switching to rows, not rounds
(wrong side) row 1 – K2, P1, K2, P4, K2, P4, K2, (17)
row 2 – P2, CB4, P2, CF4, P2, K1, P2, (17)
row 3 – K2, P1, K2, P4, K2, P4, K2, (17)
row 4 – K1, K2tog, K3, P2, K4, P2, SSK, K1 (15)
row 5 – P2, K2, P4, K2, P5 (15)
row 6 – K1, K2tog, K2, P2, CF4, P1, SSK, K1 (13)
row 7 – P2, K1, P4, K2, P4 (13)
row 8 – K1, k2tog, K1, P2, K4, SSK, K1 (11)
row 9 – P6, K2, P3 (11)
row 10 – K1, K2tog, P2, K3, SSK, K1 (9)
row 11 – P5, K2, P2 (9)
row 12 – K1, K2tog, SSSK (3), SSK K1, casting off while you go,
fasten off
second ear flap
add yarn
(wrong side) row 1 – K2, P4, K2, P4, K2, P1, K2 (17)
row 2 – P2, K1, P2, CB4, P2, CF4, P2 (17)
row 3 – K2, P4, K2, P4, K2, P1, K2 (17)
row 4 – K1, K2tog, P2, K4, P2, K3, SSK, K1 (15)
row 5 – P5, K2, P4, K2, P2 (15)
row 6 – K1, K2tog, P1, CB4, P2, K2, SSK, K1 (13)
row 7 – P4, K2, P4, K1, P2 (13)
row 8 – K1, k2tog, K4, P2, K1, SSK, K1 (11)
row 9 – P3, K2, P6 (11)
row 10 – K1 K2tog, K3, P2, SSK, K1 (9)
row 11 – P2, K2, P5 (9)
row 12 – K1 K2tog K3tog SSK K1 (5) casting off while you go, fasten off
To close the top you can use the three needle bind off (remember to work a three needle bind off RIGHT sides together) or the kitcheneer stitch (WRONG sides together)
Take apart the knot holding the crochet chain in a circle, then take apart that starting knot. Slowly pull out the chain (from the starting side), while doing that weave your knitting needles into the loops that are left when you pull the chain out
Even out the stitches onto two needles, 35 stitches on each. Make sure to center your pattern on each needle.
Kitcheneer stitch:
(see a great video on kitcheneer stitch with knit and pearl here)
Wrong sides together, Right sides out
Use a long piece of yarn, about 3 times longer than the width of the hat, with a tapestry needle to weave together.
Attach:
Front Needle: go into stitch purlwise (pull through leaving a small tail)
Back Needle: go into stitch knitwise (pull tight)
Leading to Knit stitches:
FN: go into stitch knitwise, pull that stitch off needle, go into next stitch purlwise
BN: go into stitch purlwise, pull that stitch off needle, go into next stitch knitwise
Leading to Purl stitches:
FN: go into stitch knitwise, pull that stitch off needle, go into next stitch purlwise
BN: go into stitch knitwise, pull that stitch off needle, go into next stitch purlwise
Work your way across. Weave in all your ends and your ready to go!




Chris
Just adorable! It looks like an owl’s body, hmm, wondering if the cables could be adjusted to make an owl’s face.
Ashlee
I’ve seen a ton of cable’s turned into owls in various patterns, so it probably could!
Carrie
Yay!!! Does this mean we’ll see more knit/crocheting? :). Im still not quite decided on the square hats though… Is there an easy way to take them off??? Or maybe if I enlarged them I might like them better. That would be easier than taking them off.
Can’t wait for the bigger patterns!!!
:)arrie
Ashlee
It’s my first post in over a year, inspiration comes and goes for me, I can’t force, hopefully though I’ll be inspired to create a few more!, as for the square hat, that’s just the look I was going for, I’m sure ravelry has a ton of free cabled hats without the points I’m thinking about adding pom poms to this one for princess!
Vanessa Barker
This is SO CUTE!
Ashlee
Thanks so much!
Annette
That is so adorable, I can crochet, but now I’ll have to learn how to knit!
Ashlee
I crochet for years before I learned how to knit, but I do love it now, it didn’t come quite as naturally for me though.
Aurielle
I am perplexed on how you go from 58 in a circle to 70 and can find no explanation or video anywhere. Please help!
Ashlee
I’m so sorry, I think something must have been written wrong (it’s since been fixed) thx for bringing it to my attention.
cat
I’m loving this, definitely gonna give it a go. Yr blog has totally inspired me. But I have to ask, what do you snap yr photos with? They’re suh fab quality. Cheers!
Ashlee
thx! I use a Nikon 610 with a 50mm lens for most of my blog pictures, I used to have a D5100. My sister sometimes takes pictures for me and she uses a full frame cannon.
Katherine
I’d love this in adult size!
Ashlee
I love knit cables, I should work on an adult version!
Maria
Don’t understand the beginning of the hat could you make a vedio. Thank you
Ashlee
yes I’m working on creating videos. for now here is a video from another site on the provisional cast one
http://verypink.com/2011/02/15/provisional-cast-on/
Hannah
I’m a beginner so I have a question about the pattern. it never says anything about rounds but then at one point it says switch from rounds to rows. Does that mean I start working in the round at the beginning of the pattern? Sorry if it says in the pattern and I missed it.
Ashlee
yes it’s rounds from the beginning
Erin
I really love this pattern, but I don’t crochet. Could I start this simply by casting on 70 and joining in the round?
Ashlee
this is the way you need to start to be able to go back later and stitch the top closed with a three needle bind off so the top doesn’t have a seem. It’s not really crochet to just use a chain, and its worth learning. IMO