This post has been sponsored by 7UP®, all thoughts and opinions are my own
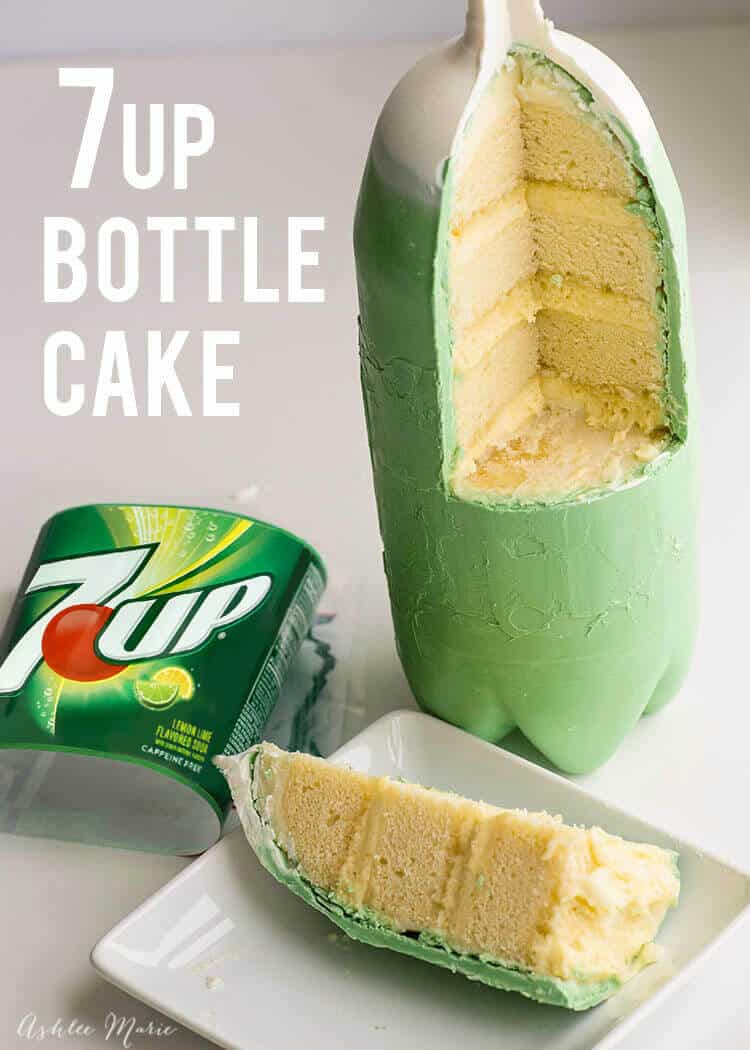
You KNOW I love fun and unique cakes – so when I was given the opportunity to work with 7UP® I IMMEDIATELY went to this soda bottle cake idea! It’s totally backwards from other shaped/carved cakes I make – in that it’s built from the OUTSIDE in, versus inside out.
The really fun part of all of this is surprising my kids! They came home from a weekend with their dad and were like – “what treats did you make” (they know me well) and I was like – I made a cake, it’s in the fridge… and they said “where is it???” They could NOT figure it out (granted it was the younger 3 looking) and when they did they seriously couldn’t get over it!
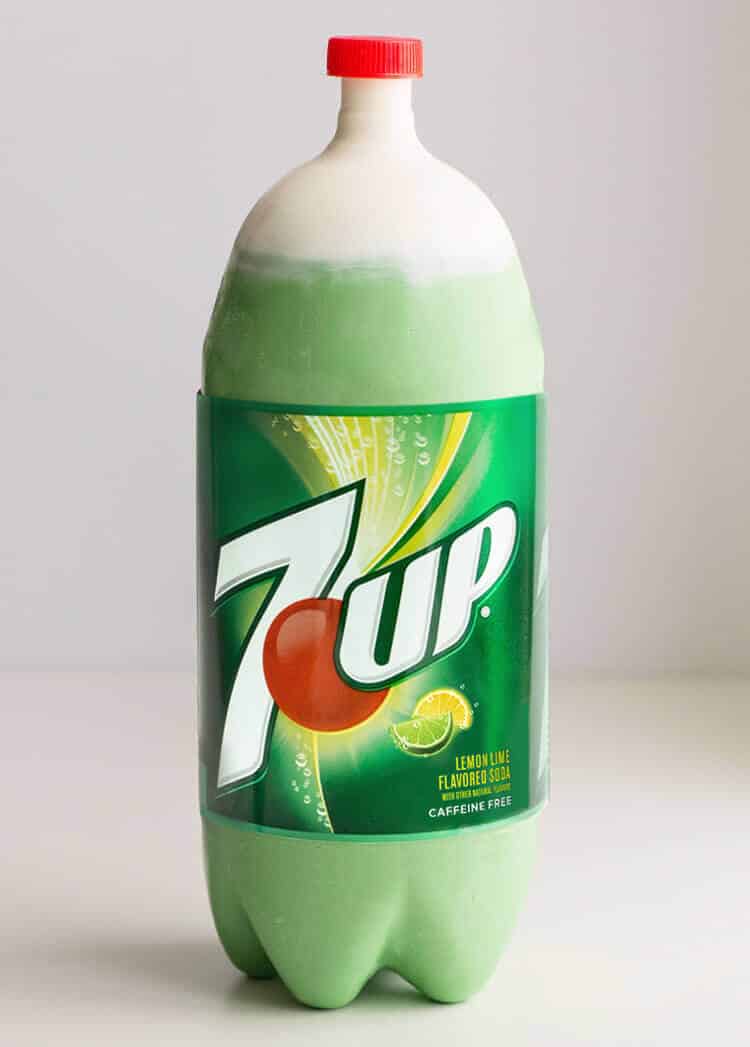
So imagine how much fun this could be at a party! I mean seriously! obviously if it was right next to a bottle full of soda you can easily tell the difference, but if you had a few of these sitting together??? (And kept the drinking soda out of sight for a bit) It could be so much fun.
AND not only does it LOOK cool – but it seriously tastes JUST LIKE 7UP!!!! The cake – a classic 7UP cake, and the buttercream (made with a concentrated 7UP syrup) def has the 7UP flavor – but the real winner is the MOUSSE! Seriously it still blows me away how perfect the flavor is!
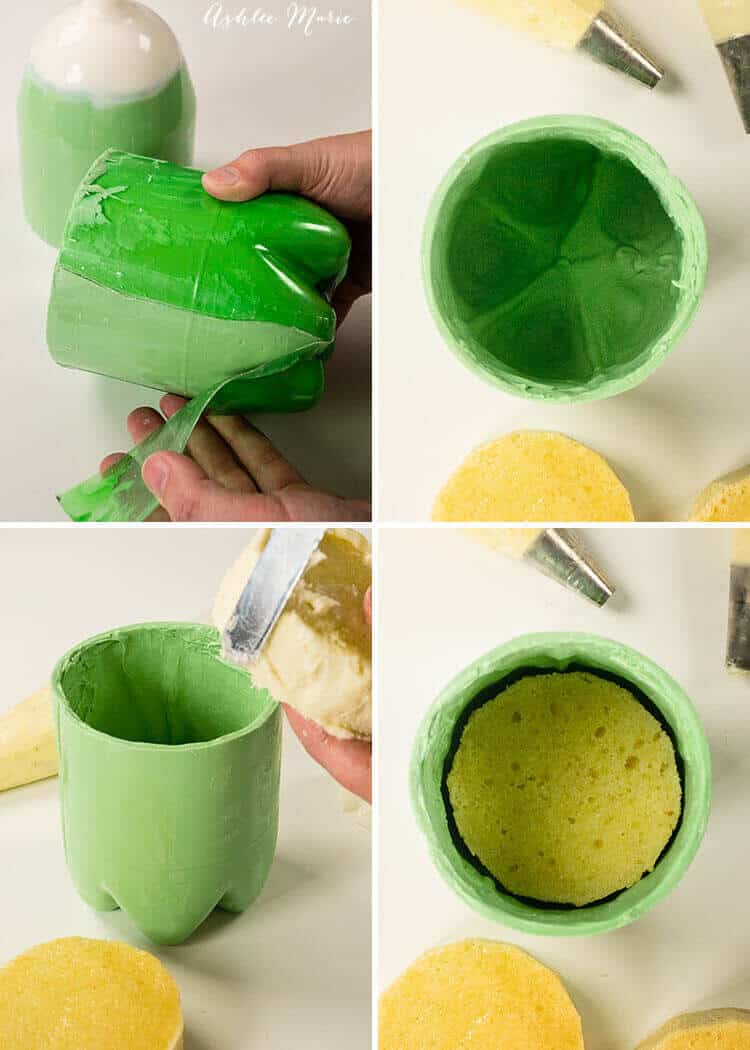
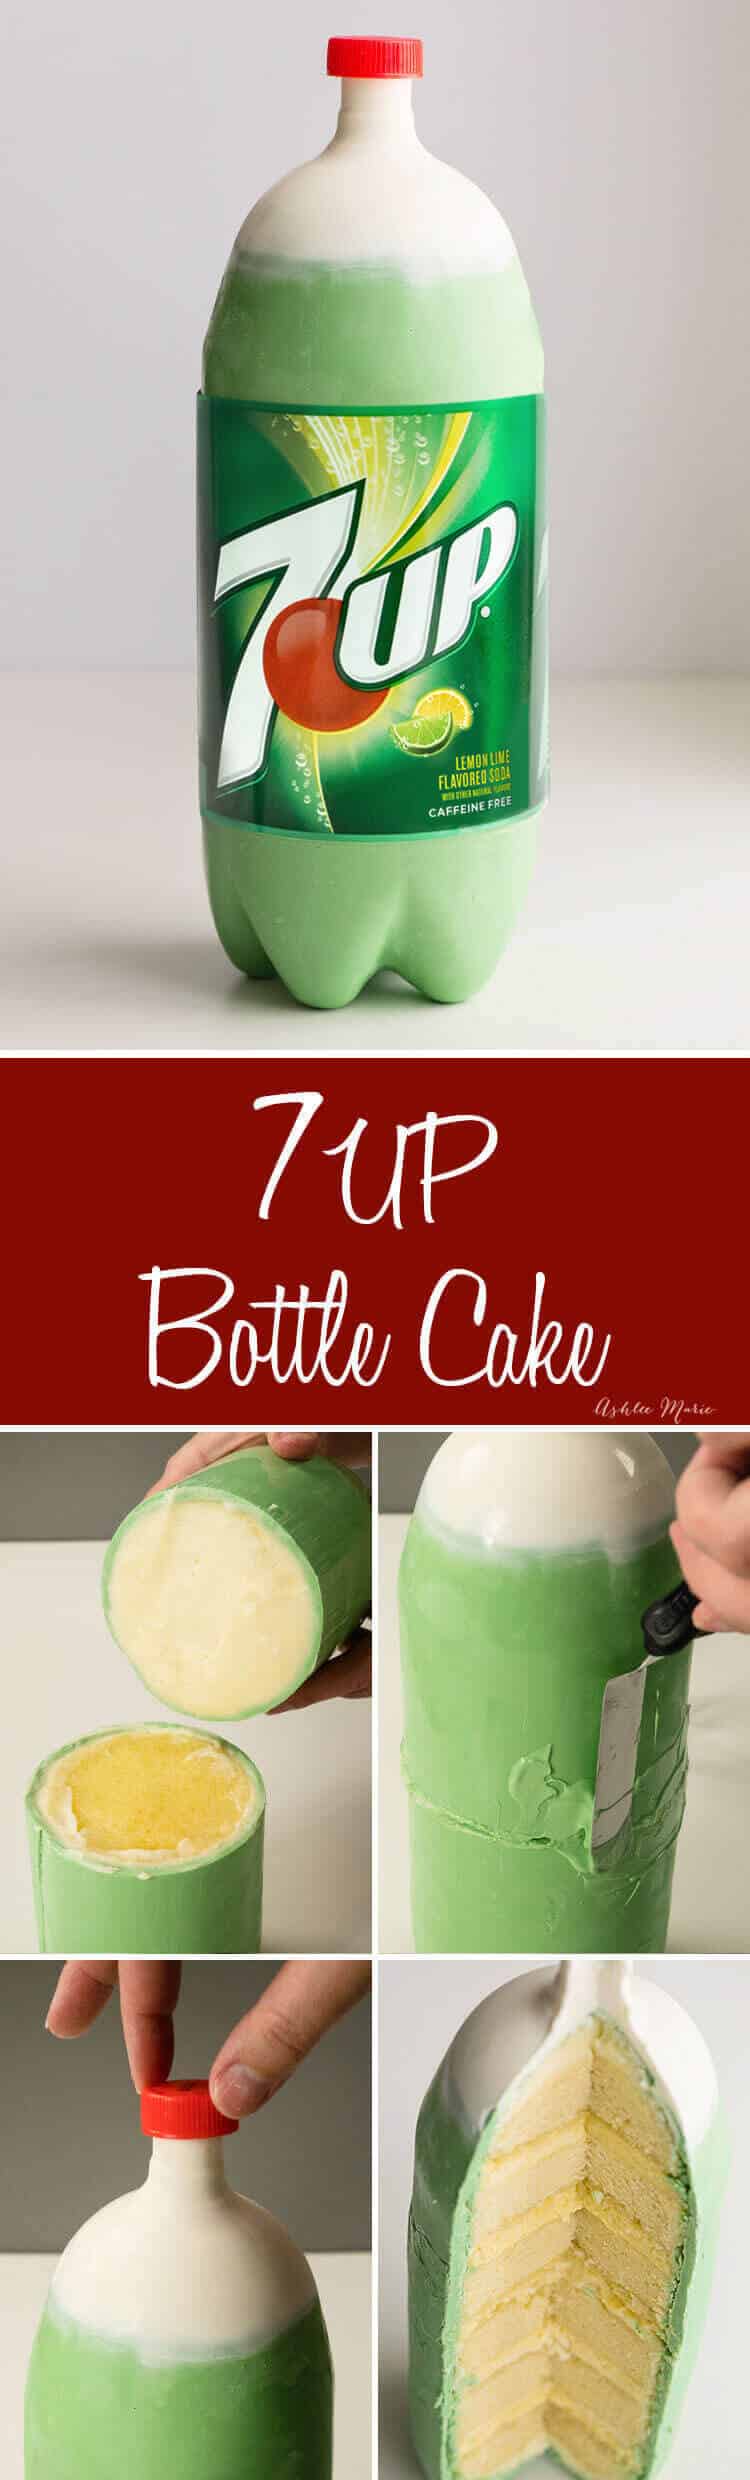
So to get started you need to create your chocolate shell – now you can go all green, the bottle is green after all, or create a line, like I did, with white chocolate first (mark with a pen where the soda line is if you want to do this). So first take off the wrapper NICELY and save it, I admit when I was standing in the soda aisle at Target I got nervous and I bought three bottles just in case I messed up – but no worry! It worked perfectly!
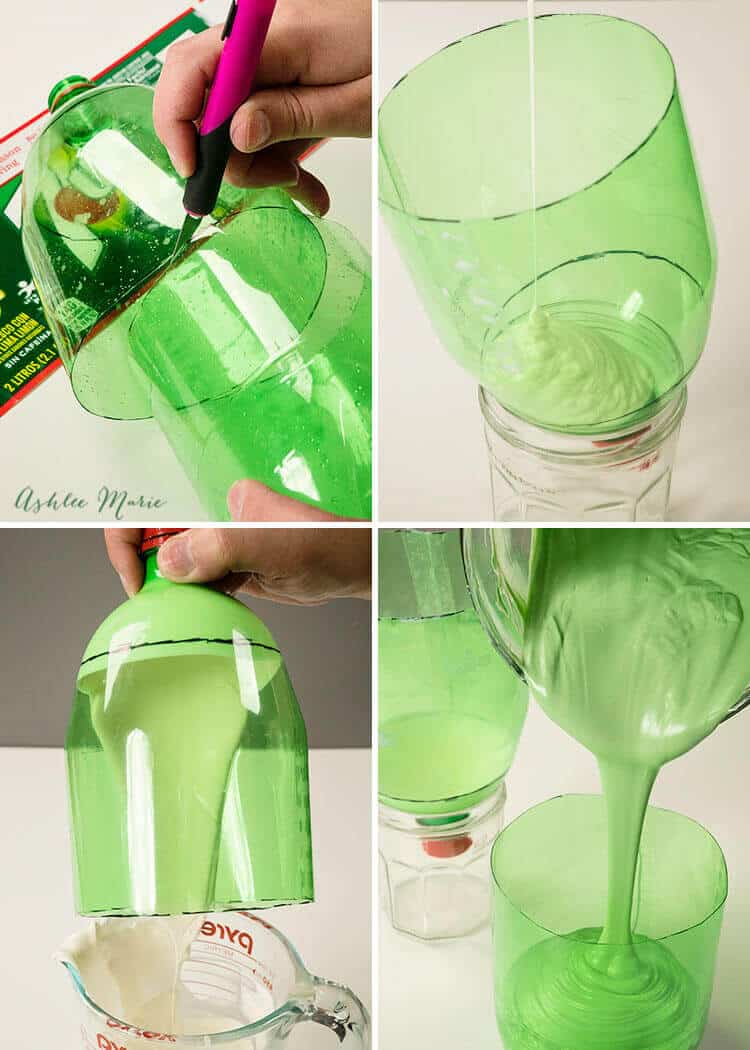
Pour out the soda into a saucepan (put 1 Cup aside for the cake). Now cut the bottle in half. Clean and DRY the inside (water and chocolate do NOT mix) and melt some white chocolate – pour some into the top, roll it around and pour the extra out – use a spatula to scrap the white off anywhere below the line you drew. Now let it set – aka get hard again.
Next up the green, I mixed some regular green, with some bright green (more yellowish) and some white to tone it down to get the color I wanted. Then pour it into both halves, roll it around and pour out the excess – just like the white. I let it set and then did it again – for a nice thick coating.
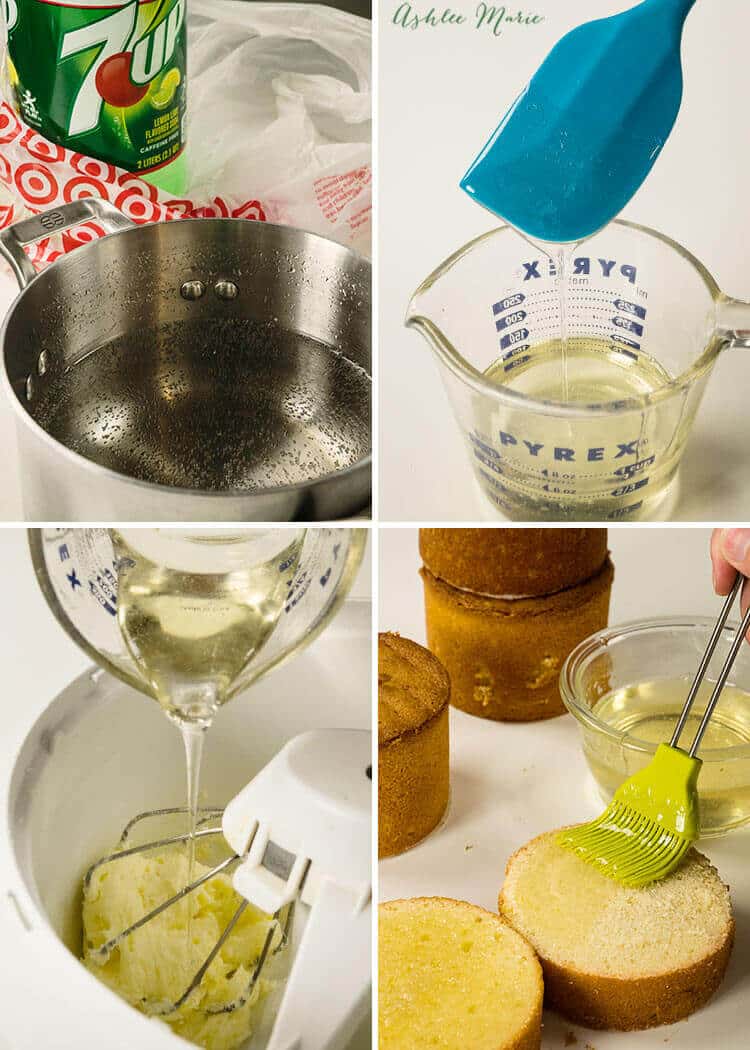
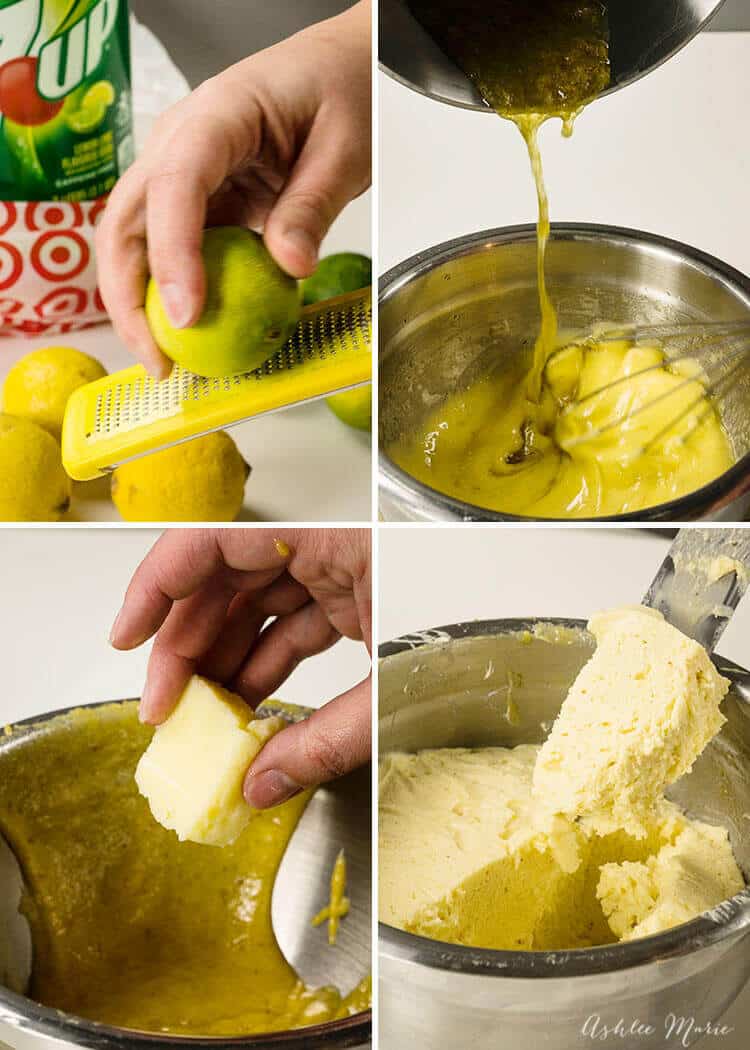
In the meantime simmer the soda in a saucepan over the stove (minus the 1 C you put aside for the cake) – it will reduce from 7 1/2 cups to 1 1/4 cup over time and get nice and thick (watch it near the end, you don’t want it to overcook – it will turn into candy, vs a syrup if you over boil it). We’re going to use this syrup in the mousse, the frosting AND you can brush whatever is left on the cakes to boost the flavor!
Now the mousse – basically it’s a 7UP curd, just like my lemon curd, and then stir in some stabilized whipped cream and voila – now it’s a mousse! I only used about half the mousse on the cake (and ate the rest)- but you can use all mousse and skip the frosting if you want. You DEF want to make the mousse early – as it needs time to set.
In fact I made all the components the day before so the chocolate shell, mousse, and cake had time to set/cool. The frosting can be made the day of, or made the day before with the rest and refrigerated overnight (just give it time to come back to room temperature before using)
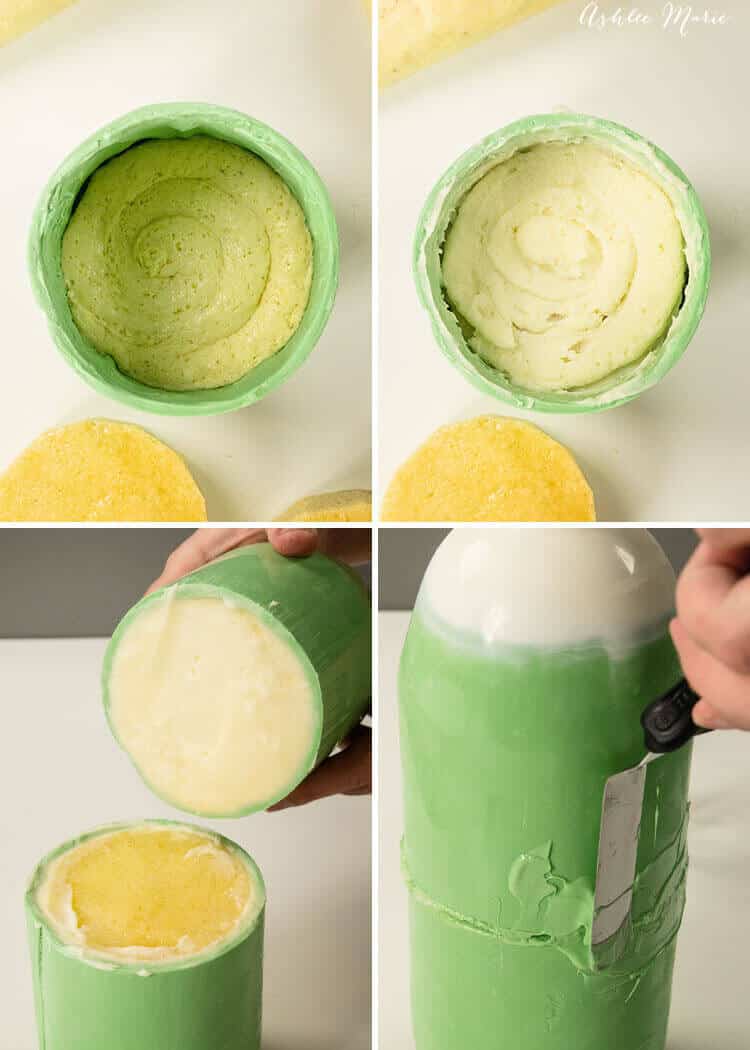
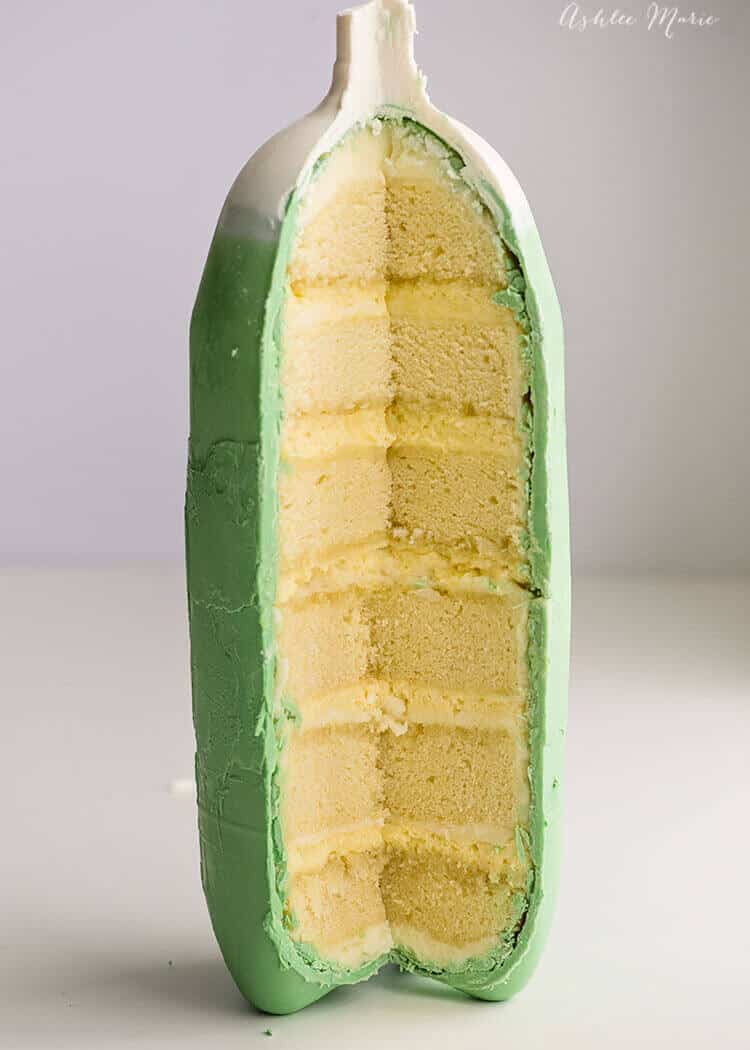
So now we’re ready to put it all together – first off CAREFULLY cut the plastic bottle off. Now fill the bottom with some of the frosting and place the first cake down inside – for the top cake and the bottom cake I did a little carving of the edges to round them out so they’d fit nicely (see the inside shot)
Now just layer away! Cake, mousse, frosting, or frosting mousse… whatever – I did add a thin layer of frosting to the outside of each cake layer before sliding it into the chocolate shell.
Fill both halves up – you might end differently than I did – cake on the bottom and frosting on top, but try to make sure you don’t end with like frosting/frosting – that could make the center really unstable – cake/cake would be okay, but you can always trim your layers a little more if you need to.
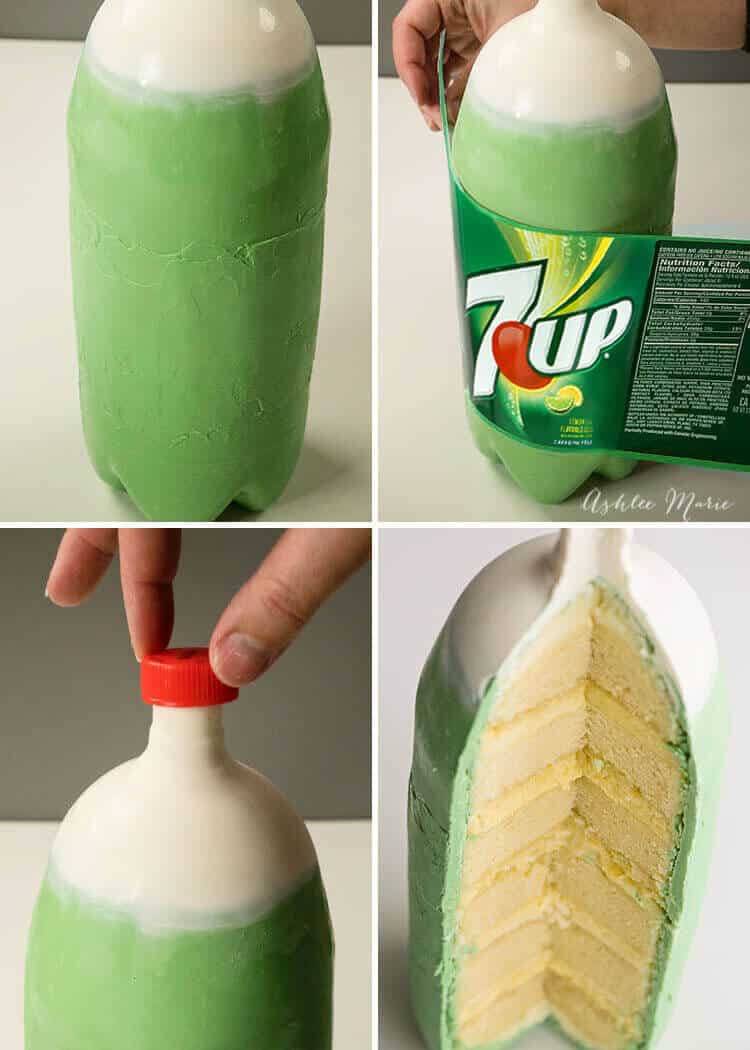
Next up take some of the SAME chocolate and melt it again – spread it around, and into, the crack. This “glues” the cake halves together! I just slathered it on – so it looked super messy – then I boiled some water in a pan and placed my metal spatula inside it – after a few seconds of warming up the spatula I pulled it out, DRIED IT OFF , then pressed it around the chocolate – it melts the top messy layer and allows you to smooth it out a bit.
FINALLY take the 7UP wrapper and wrap it around the cake – and tape it together! Top with the lid (or use red fondant) and you are ready to serve!
To cut it I warmed up the knife (in boiling water) and cut through the chocolate first then cut through the cake. I’d recommend cutting the top half and serving it first, then the bottom half – as that chocolate seam will be an easy place it cut/break
And that’s that! I have to say I was a little curious how the chocolate shell would hold up but it did really well! I’m totally interested in using this technique again with something else fun – any suggestions?

7UP bottle cake recipes
Ingredients
7UP cake
- 1 ½ cup unsalted butter softened
- 3 cups granulated sugar
- 5 lrg eggs room temperature
- 1 teaspoon vanilla extract
- 1 teaspoon lemon extract I prefer lemon emulsion
- 1 Tbsp lemon zest around one lemon
- 2 tsp lime zest around one lime
- 3 cups all-purpose flour sifted
- ½ teaspoon salt
- ¼ cup heavy whipping cream
- 1 cup 7UP soda
7UP syrup
- 2 quart bottle 7UP minus the 1 C used in the cake
7UP mousse
- 2 Tbsp lemon zest 2 lemons
- 4 tsp lime zest 2 limes
- ¼ C 7UP syrup
- 2 lrg eggs
- 1 lrg egg yolk
- ½ C granulated sugar
- 2 Tbsp butter
- Pinch salt
- 2 Tbsp water
- 1 tsp unflavored gelatin powder
- 1 C heavy whipping cream
- ¼ C granulated sugar
- 1 tsp vanilla
7UP buttercream
- 1 C butter
- 3 Tbsp 7UP syrup
- 1 lbs powdered sugar
- Pinch salt
Instructions
7UP cake
- Preheat oven to 325 F.
- In a large bowl, cream together butter and sugar.
- Mix in the eggs one at a time.
- Mix in the vanilla extract and lemon extract, lemon zest and lime zest.
- Gradually add in the flour and salt and mix until combined.
- Mix in the heavy whipping cream and 7UP until well combined and batter is fluffy.
- pour into 4 inch round cake pans - (it make 5 using a 3 inch tall pan) or in a 9x13 pan (you'll have to cut the circles out later)
- bake until the center is set - the 9x13 pan will take about 40 mins - for the 4x3 round pans - beause there is so much batter and height its a little tricky - I baked it at 425 in a water bath (4 inch pans placed inside another pan with water in it) for 40 mins, then pulled the pans out of the waterbath and baked at 410 for another 30 mins - to try to cook the inside and outside evenly
- let cool or freeze - level the top and bottom and cut each cake in half - I also ended up cutting the outer edge to fit into the chocolate shell - you'll need SIX 4 inch circles each about 1 1/4 inch tall
- brush with the 7UP syrup for an even stronger flavor
7UP syrup
- take the remaining soda (about 7 1/2 cups) and boil in a saucepan uncovered
- it will boil down and get thick, pull off the stove when it's down to about 1 1/4 C
7UP mousse
- in a saucepan bring to a simmer the lemon zest, lime zest and 1/4 C syrup
- in another bowl beat the eggs and sugar
- while stirring pour the hot syrup mixture into the eggs to temper them - them pour the egg mixture back into the sauce pan and cook over medium/low heat until thick.
- strain into a clean bowl and add the butter and pinch of salt - stir until the butter is melted
- cover with plastic and let cool in fridge
- pour the gelatin into the water and let bloom, then microwave 30 seconds until melted - set aside and let cool
- beat the cream, sugar and vanilla until soft peaks form, while beating pour the gelatin mixture in
- beat until stiff peaks form
- stir into the lemon/lime curd and refrigerate
7UP frosting
- beat the butter until fluffy
- add the 7UP syrup and beat until incorporated.
- add half the powdered sugar and the salt and beat - adding the rest of the powdered sugar until your happy with the thickness - not too thick as its for frosting not decorating
Nutrition


Bonni Phelps
That is absolutely amazing. I have to try this. I have a cherry cola chocolate cake recipe that might do well.
Ashlee Marie
that would totally be amazing!
Tracey
This looks so great! I wish you had a video. Parts of it confused me. What a fun cake for a party!
Ashlee Marie
great suggestion!
Pavlova
WOW!!!!! That is amazing!!!
Ashlee Marie
Thank you so very much!!!
Michele
I LOVE your idea! Do you think substituting ginger ale for the 7-Up would be good?
Ashlee Marie
you can substitute out any soda, personal preference on the flavor. i’m not a ginger ale gal myself but people who love it will love it!