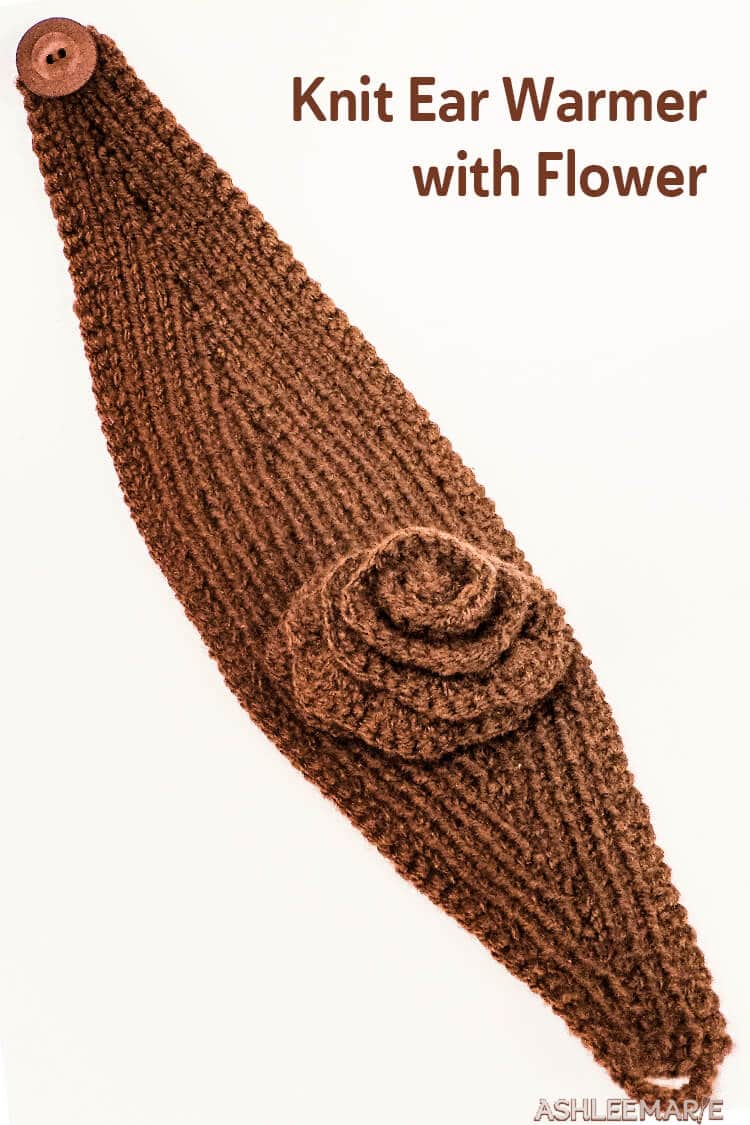
Easy knit pattern to make these ear warmers – perfect for winter. Add a crochet rose for a simple decoration.
Last winter I saw these everywhere. But I just can’t bring myself to pay for one! Not when I know how to knit myself! But finding a pattern was tough.
I knew I could make one up if I wanted to, but it’s easier to start with one. Eventually, after mixing a few different patterns I found what worked for me.
Now remember everyone has a different gauge so if you need to adjust it to fit your gauge then do that! This is more of a guide than a pattern. I’m a more intuitive knitter, changing and “fixing” patterns as I go.
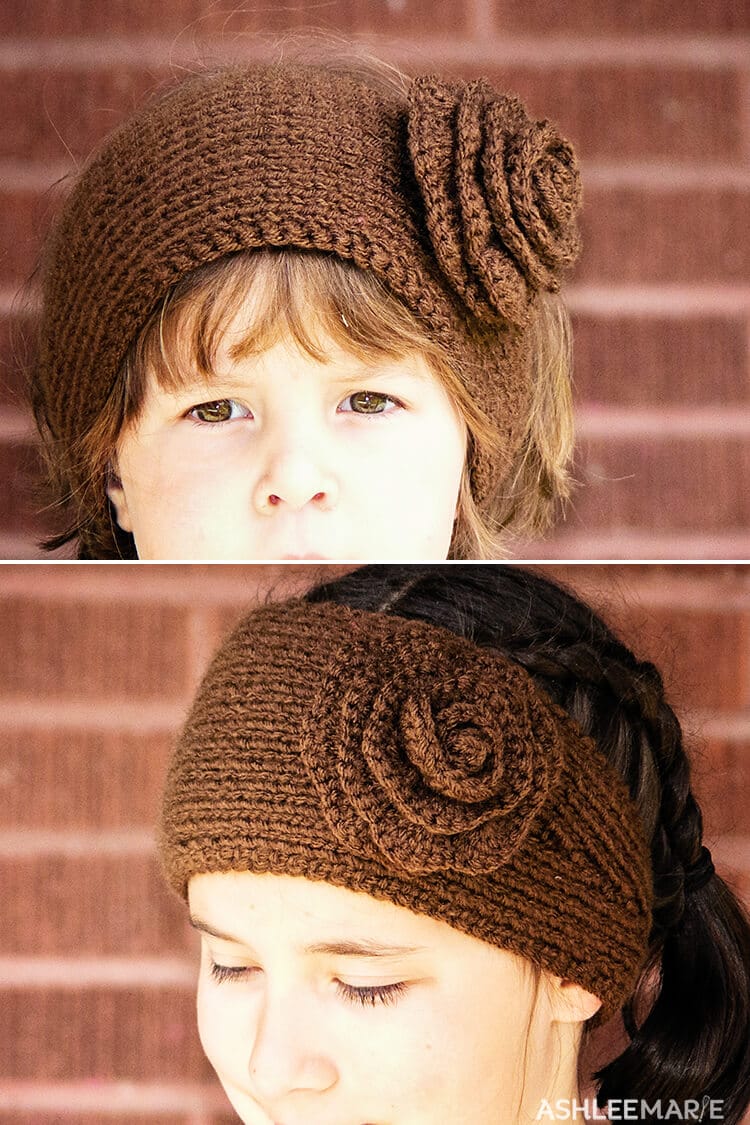
So if something doesn’t make sense to email me and I’ll try to clarify! Hopefully this “guide” will make sense to you and it will click as you work on it! This fit my daughters and me just fine. The knit stretches a bit so it’s kind of one size fits all!
Buy the Ad-Free pattern pdf here!
Headband Earwarmer
Materials:
Size 6 or 8 knitting needles (I went with size 8 needles)
Favorite medium weight yarn (about a skein)
Size J Crochet Hook (optional)*
Button
Gauge:
7 stitches per 2 inches
Finished Size:
22″-24″ long (your preference) and 4″ wide at widest part
We’ll be working a Knit/Purl rib pattern across ever row.
Cast on 7 stitches.
row 1: Knit/purl/knit/purl cont…
row 2: next row purl/knit/purl/ cont…
repeat until you have 4 rows.
Now we’re going to start our increase. Well increase every odd row, and repeat the rib pattern on every even row. Now after every other increase you’ll have two knit’s or two purls in a row. Don’t worry about it. It will be fixed on your next increase. row
Row 5: Repeat your rib pattern until the center stitch. Use your favorite increase here. then repeat the rib pattern
Row 6: rib pattern
Row 7: rib pattern until you get to the center. when you hit the double knit (or purl) in the center pick up the loop between stitches and purl (or knit) to continue the pattern.
Row 8: rib pattern
Repeat 5-8 until the patterns is about 4 inches across. Make sure your repeating a nice knit/purl pattern all the way across (no double stitch in the center- It will be an odd number of stitches on your needle).
Now the decrease will be the same length as the increase so figure out how long you want your headband. When it’s half as long as you want it to be notice how long you’ve been stitching the 4 inch wide center. (in my case about 3 inches) and finish the center by adding the same length again (another 3 inches).
Time to start the decrease.
Row 1 (of decrease): repeat the pattern until you get to the center stitch. Decrease by knitting (or purling) together the center and the next stitch (creating whatever the second stitch is eg. if your center stitch is a knit your middle will be a purl and purl together). Repeat the rib pattern.
Row 2: Rib pattern across (there will be a double knit/purl in the center- even number of stitches)
Row 3: Rib pattern to the center, knit (or purl) the double stitches together.
Row 4: Rib pattern across (back to an odd number of stitches)
When you get back to 7 stitches bind off leaving one stitch on the needle. At this point I transfered that stitch to a crochet hook and Worked a chain of 6. I’m sure there is a way to do a chain on knitting needle, but the crochet hook is the quickest.
At this point you can attach it with a single crochet to the other side of the bottom edge. OR if you want a more decorative edge you can crocheting around the edge. I used a single crochet around the edge all the way back around the button hole back to where I started the crocheting. Secure the end and weave in the tail!
Add a button to the first side and try it on! Decorate however you’d like. I like this crochet flower!
Crochet Flower
J Hook (or whatever your preference to get the size you’d like)
Yarn (same color or other)
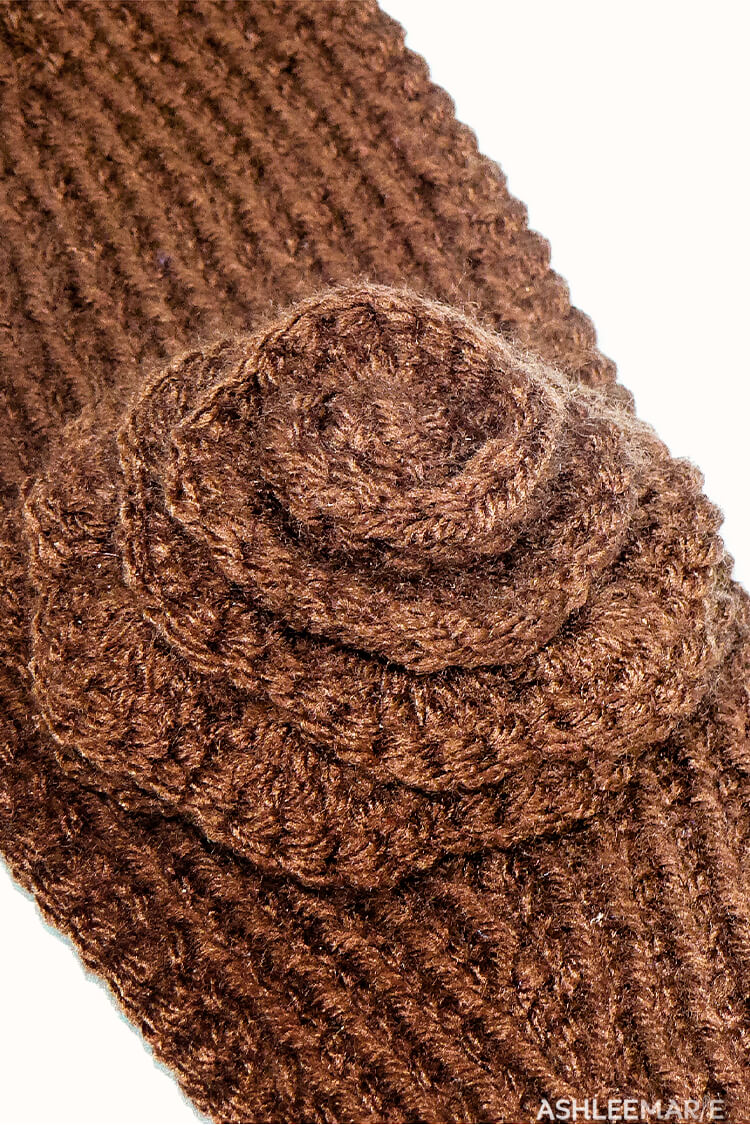
This flower can be as tight or as loose as you’d like it, so the size depends on that.
Chain 53
Row 1: DC in 5th Chain from hook *CH 1, skip 1 (DC-CH-DC) in next ch (V stitch made). repeat from * across to end, turn.
Row 2: CH 3 (counts as DC) 5 DC in CH space, *SC in next CH-1 space, 6 DC in next CH-1 space (shell stitch made). Repeat from *, ending in 6 DC in last CH-1 space. Fasten off, but leave a good LONG tail for anchoring the flower. 10 inches or so.
Finishing
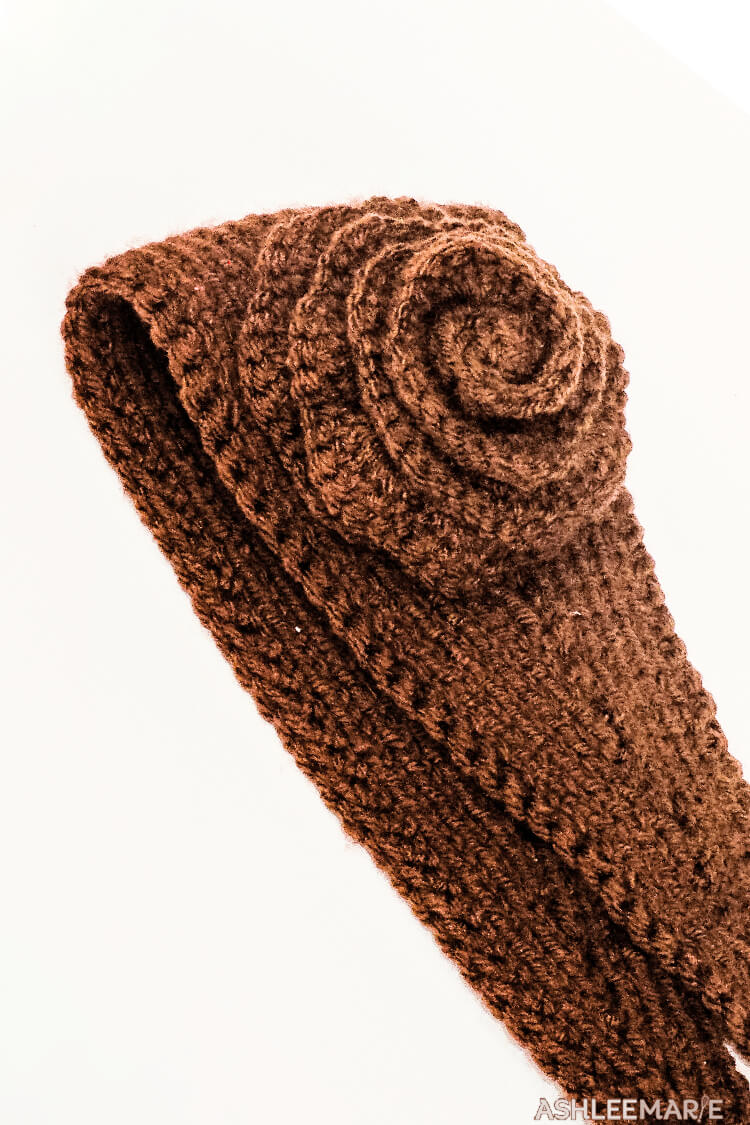
Threading the tail onto the needle and weave it into the base of the last stitch. Starting at that end, roll the first shell tighly to form the center bud. Stitch this one tightly. Keep rolling and stitching as you see fit. You can roll loosely or tightly depending on your preference.


Catherine
Wish I could knit! This turned out excellent. 🙂
Ashlee
Thanks! I keep getting requests for a crochet one. Eventually I’ll get to it!
Kassi @ Truly Lovely
I love these!!! I’ve been looking all over for an easy tutorial and yours seems like the one! Thanks! Stopping by from CSI!
Ashlee
I hope it’s clear enough! It’s the first pattern I’ve written, so you never know!
BryAnne
Dear Ashlee, sorry about the broken wrist, bummer, i hope you heal quickly, i was so excited to find this pattern and take a stab at knitting. Unfortunately i am having alot of difficulty with the increase and i make bug gaps. I saw on earlier posts the possibility of doing a video, it would be a big help to a beginner once you are well again. I am so excited to learn to make this headband! With the deepest gratitude, Bree!
Ashlee
Wow! My broken wrist was actually WAY back in July of 2010~ It’s healed up nicely, although it starts to hurt when the barametor changes, I guess that’s forever now! I’m now down and out with morning sickness, so that video tutorial is going to have to wait even longer! I get gaps sometimes too, but keep working and they should stretch themselves out. I’ll move it back to the top of my to do list for when I’m feeling better. Thanks for the reminder!
bev devine
Hello Ashlee,
I take it you are Amerian. So it takes size 8 U.S. size needle? Is that right? One of my friends bought this hair band at a local craft market so we’ve all decided to get on the net and do one too. Great to keep ears warm when walking my little dog. Thanks.
Ashlee
yes, US size 8, sorry if there was any confusion.
bev devine
Thankyou for replying to me. I also love your purple jumper. I made your purple ear warmer last night – took 2 hours and I love it. Winter is starting to set in here although we’ve been having some lovely sunny days lately. (Abnormal for this time of year – but I don’t care). I’ll be knitting a flower tonight for my warmer. Then I’m doing one in every colour for me and friends. They are a big hit over here. Sorry for waffling on.
Luv Aussie Bev
Ashlee
YAY! So glad you like them! I wish it was getting cooler here, we’ve been above 105 for a few days now, GAH.
Nityakalyani
Hi – the hair band looks lovely. Can you share the knitting pattern of the flower as I do not know to crochet. Your help will be appreciated
Ashlee
Thanks! I love making them, BUT I don’t have a knit pattern for the flower. I’ve just barely learned to knit this last year, so I’m still pretty basic. A cable is as fancy as I get. I’m sure you could use ANY flower pattern you already know how to make.
Pat Tibesar
Hi I love your knitted earwarmer want to make some but do not understand the pattern at all . Could you send me a better written pattern ,like row1 row 2 and so on . Thanks Pat
Ashlee
Emailed you
Becca
I have been looking all over for a pattern like this! Thank you. I am new to knitting and I’m having trouble understanding the pattern. I can do the first four rows (easy) but I am having trouble with the rib pattern. Do you have a video? I am very excited to make this. Thank you again.
Ashlee
I’ve been asked that a few times, but I don’t have a video… yet. I’ve been meaning to do one. Thanks for the reminder!
Chrystal
I am also having problems with the pattern after the first 4 rows. I saw you emailed someone a more detailed pattern, with each row listed, could you possibly send me that? I find it easier to follow a pattern when I have each row listed. Thank you!!
Ashlee
I didn’t email anyone a row by row pattern, But I’ll forward you the email I sent her. Because everyone makes it to fit their own head there isn’t really a row by row pattern to send. It’s all by how wide you want it as you make it.
Laurie Giddings
I don’t know why I am having trouble with this pattern!? It is the increase. I just don’t feel confident that I am doing it correctly. I am frustrated! I love the end result and it seems like I am one of the few who doesn’t “get it”. Any advise?
Ashlee
your not the only one. I get as many questions as I get people who had no problem with the pattern. I left the style of increase up to you. since we all knit our own way (tight, loose, etc..) I left the increase up to you. There are tons of different ways to increase and decrease so pick the one that works for you. I tried one way and it left gaps for me I didn’t like, so I moved on to a different style of increase. I think I tried 3 before I found the style that worked for me and that I liked. FYI even the style I ended up going with looked a bit gap-ish at first, it wasn’t until I had gone a few rows that I could look back and see that it looked okay. Does that help at all??? I did a google search on knit increase and tried a few that I found that way…
Mimi
Thanks for sharing your pattern!! My daughter asked me to make this for her so I started it last night. I had to do a search for a M1 because I have always just done a simple KFB for an increase but that didn’t work with this one. For those interested: https://www.youtube.com/watch?v=gRnmLOT0H8M&feature=related Has a great M1 with the loop below that does NOT leave a hole in the project. It has worked like a charm with this pattern. I also crocheted the flower and this is where I am kind of stuck. Is there a way we are supposed to put it together? I haven’t figured out what leaving the long tail purpose is lol I am sure its something simple my brain just isn’t comprehending 🙂
Ashlee
If you scroll past the last picture there is an explanation. Maybe I should move it to ABOVE the picture so it doesn’t get overlooked! Here is what I said
“Finishing
Threading the tail onto the needle and weave it into the base of the last stitch. Starting at that end, roll the first shell tighly to form the center bud. Stitch this one tightly. Keep rolling and stitching as you see fit. You can roll loosely or tightly depending on your preference.”
Kim
I really love this headband. I am not having difficulty with the increase so much, as the next row when I have two purls or knits in the center. I’m not an expert by any stretch of the imagination, but I’m really struggling with this. I loose the rib effect. Any suggestions?
Ashlee
you do lose the ribbing effect until the next increase. Don’t worry, in the end it works out. The center increase rows will look like this (obviously the even rows are opposite)
knit
knit knit
knit purl knit
knit purl purl knit
knit purl knit purl knit… etc
It will be the same on the decrease side
knit purl knit purl knit
knit purl purl knit
knit purl knit
knit knit
knit
Nisha Thomas
Hi!
love your pattern! Though i’m having trouble with the ribbing effect. The first half of the stitches is fine the ribbing is smooth and unbroken… but once i finish the increase and continue ribbing it comes broken with a vertical stitch every two rows down…… can you please tell me where i’m going wrong? from a distance it looks like its completely ribbed but close up i can see these stitches cutting the ribbing…. unlike your continous ribbing in your photo. Thanks!
Ashlee
Ummm I’m not sure. A vertical stitch every 2 rows doesn’t make any sense to me. I really need to get a video made. Would that help do you think?
Karisa
This is such an adorable headband! I just wanted to let you know that I’ve included this in our knitting roundup on the FaveCrafts Blog: http://www.favecrafts.com/blog/fc/link-love-free-knitting-patterns/
Please let me know if you’re ever interested in publishing your tutorials/patterns with FaveCrafts!
Ashlee
thanks so much! if you could link to me instead of the feature on ucreate that would be wonderful.
cris
I love this headband/ear warmer! I had first seen one of these at a local “home show” and feel in love with it, but didn’t want to fork over $30 for something I was sure I could easily knit once I found the perfect pattern on Ravelry and I found yours! Thanks for sharing!
I do have one question… You said to use your favorite yarn, but I wanted to make sure I get the right dimensions and wanted to use similar weighted yarn. What weight yarn do you usually use to make these headbands?
Ashlee
I used worsted weight… I never really knew about weight differences or paid attention until I got more into ravelry! I like to go with a soft yarn, sometimes even using the yarn for babies so it’ super soft around my ears!
cris
Thanks Ashlee. I’m about to cast-on to make a few of these for xmas gifts. Thanks for the suggestion of using yarns for babies! That’s a great idea!
Ashlee
I hope it went well!!! I am about to start another one myself (for videoing)!
Caroline
Hi Ashlee,
Please make a video tutorial as soon as possible! I love the design except, as being a beginner to knitting, am very confused with the ribbing…. >.< If you could send me a more detailed way for the increasing parts, that would be so extremely helpful!! For example, for the first increase, do I knit four then increase? or do I knit three then increase?
Thanks! Totally cute stuff!! 🙂
Ashlee
I have the video scheduled, but since my computer crash I lost my video editing software so I’m working on it.
one way to do it:
first increase row: k, p, kfb, p k
2nd increase row: p, k, p, p, k, p
3rd increase row: k, p, k, kfb, p, k
4th increase row: p, k, p, k, p, k, p
another way is to knit or purl in the bar between the stitches
first increase row: k, p, k bar, k stitch, p k
2nd increase row: p, k, p, p, k, p
3rd increase row: k, p, k, p bar, k stitch, p, k
4th increase row: p, k, p, k, p, k, p
Machel Y
This headband is so cute! I am very new at knitting, so some of this is hard for me to understand. On the first row sure what you meant by knit/ purl/ knit/ purl. I tried it and I keep getting it all messed up. Any idea what i’m doing wrong?
Ashlee
a standard rib pattern, have the yarn in the back and knit, then pull the yarn to the front and purl, pull the yarn to the back and knit, etc…
Leasa Sieve
Have you posted a video for the flower ear band? It would be helpful. Thanks so much for posting the pattern, it is the best one i’ve found.
Ashlee
I haven’t posted a video yet, when I do I’ll let everyone know! I have plans for it, but my video editing software isn’t working right now- Grrr
Maria Santos
Is it possible to gett this pattern in a PDF? It is really cute and very easy….thanks for sharing.
Ashlee
I don’t know how to do that, but I’m working on it. I’d like to be able to do my recipes and patterns on pdf form.
Pam
Thank you for sharing your pattern; that really is very generous of you. I was having trouble with the increases and staying in the rib pattern, so I do appreciate your December 2011 and January 2012 psots.
Ashlee
Thanks! I’m guessing I should go back into the pattern and add a few of those notes to help people out!
Iryna
Thank you very much for the pattern! I found it through Ravelry.
Ashlee
Thanks for dropping by and I’m glad you like it!