This is a sponsored posts, all opinions are 100% my own
I love the Muppets, I always have, I own EVERY movie they have made and my kids love watching them too! The latest movie, Muppets Most Wanted is no exception, it’s HILARIOUS! Mrs. Piggys is, of course, a favorite. I have always had a thing for pigs, and she’s just great, a strong woman who goes after what she wants, and she wants it all. Gotta love her!
But this movie is all about Kermit and his Doppelganger, Constantine, the worlds number 1 criminal! It’s seriously so cute! My kids have already watched the Blu Ray 4 times since it came in the mail (on sale August 12th, yay)! And I have found my self singing the songs all weekend! I think my favorite scenes are with the singing prisoners, Tina Fey is brilliant as always…
Oh no wait… Ty Burrell and Sam the Eagle, Aaaaaaah, their song is AWESOME, and I love their scenes together. Seriously brilliant, and he’s always so funny, such great comedic timing. And of course Ricky Gervais is fantastic. I love the blooper reel, he just keeps laughing through scene after scene!

Makes me think about how fun it would be to be a part of a Muppet film (any film would be fun, but how much more fun would this be!!!). My husband and I played a game, name the most celebrities (I won). You know they all had a blast!
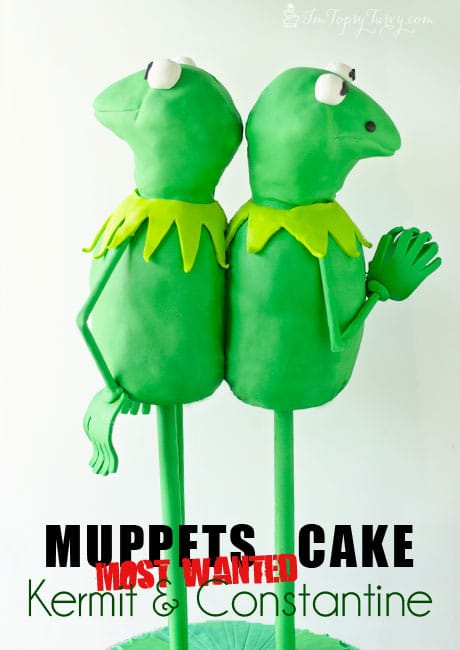
SOOO I decided to make a cake and I let me my kids help me design it! I debated doing a wedding cake (yet another Piggie and Kermit wedding, love her dress!). They all voted for Kermit, but I couldn’t just do Kermit… We had to have Constantine there too. So we did both!
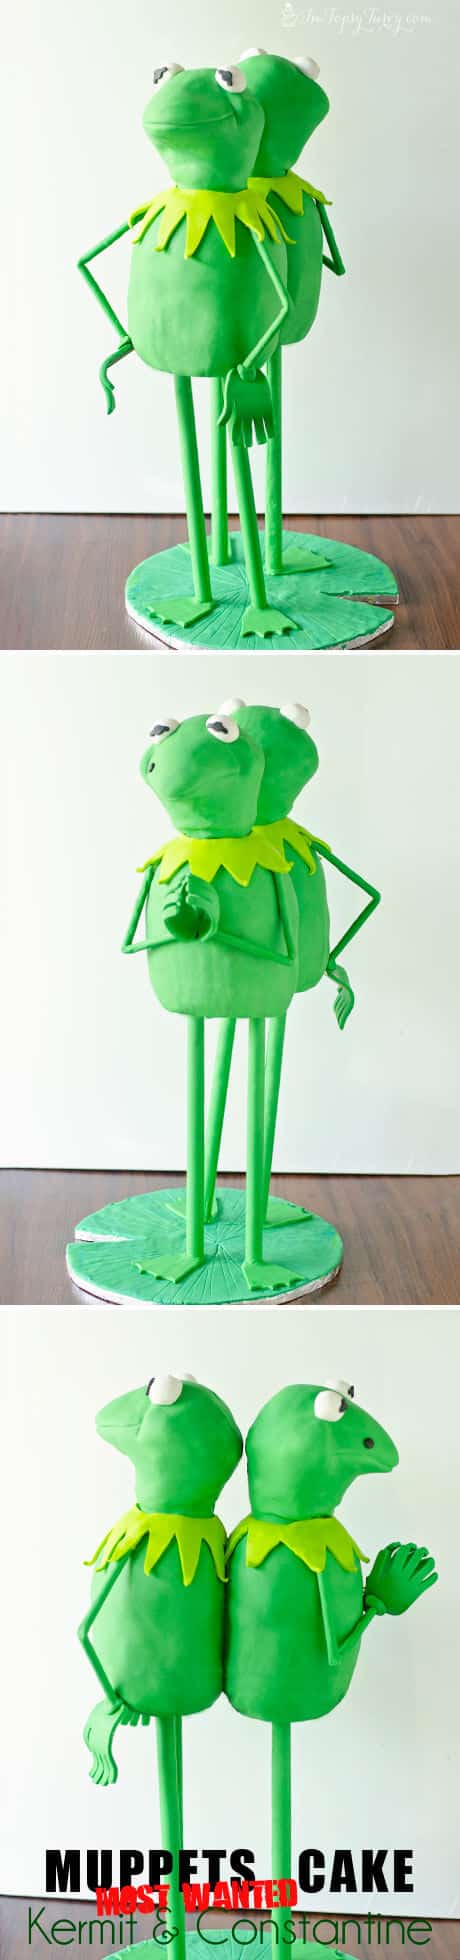
For a challenge I decided to make them standing. Yup, standing on those skinny legs with a heavy body. So the issue became how to make it stand! I decided by connecting them so that two legs becomes 4 so we would have more stability. I put them back to back so each side of the cake is a different view.
Structure
Supplies
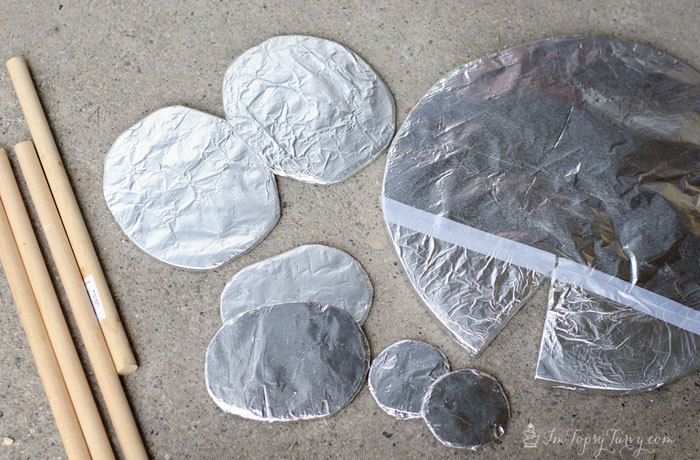
Wooden circle with a notch – lily-pad base
4 dowels 12 inches long
2 wooden ovals (3 1/2 x 4 1/2 inches) – bottom
4 dowels 3 1/2 inches tall
1 wooden figure 8 (two ovals together 6×10 inches) – waist
2 dowels 3 1/2 inches tall
2 wooden circles (2 1/2 inch) – neck
foil
tape
20 nails
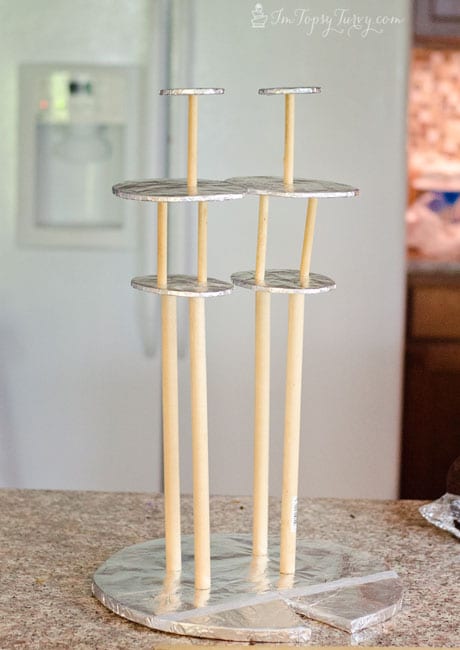
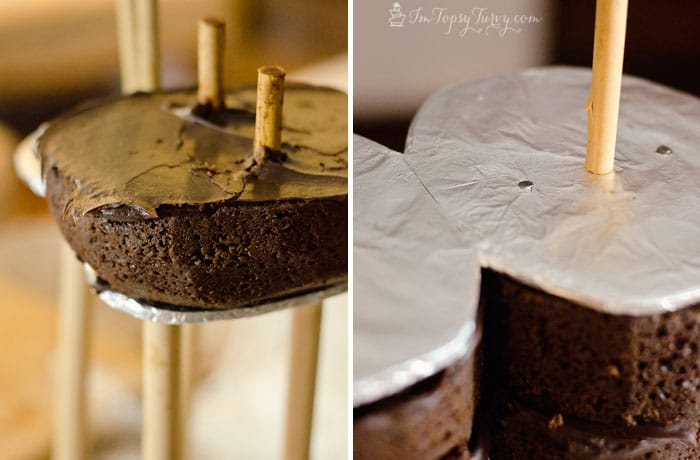
Cover the wooden flat shapes with foil, tape them down. The structure is like the bones of our frogs. Nail the lily pad, legs and bottom together, along with the middle dowels. the rest (the waist, upper dowels and neck) we’ll attach later. But you can see it all together here…
Supplies –
Cakes -(for each frog, so double)
2 eight inch cakes (totaling 3 1/2 inches tall)
wonder mold pan (cut it to 3 1/2 inches tall)
4 inch cake
6 inch cake
half a ball pan cake
2 batches of ganache
5 lbs green fondant
4 paper straws
8 pin
some yellow fondant
some white fondant
some black fondant
vodka or clear vanilla
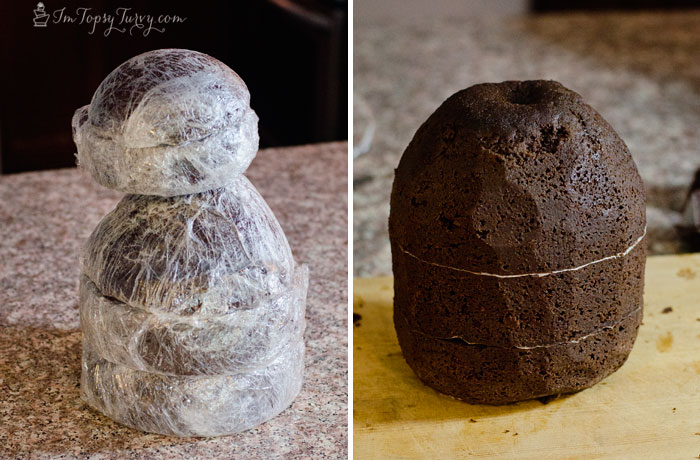
On the left is how I’ll stack the cakes (although I forgot the 4 inch cake “neck”), and on the right is the 2 eight inch and wonder mold’s stacked and carved into a body shape.
Slide it down the dowels add ganache, and add the second cake. Do this for both bodies and add the waist board and nail it to the dowels (notice the next dowel tier is already attached).
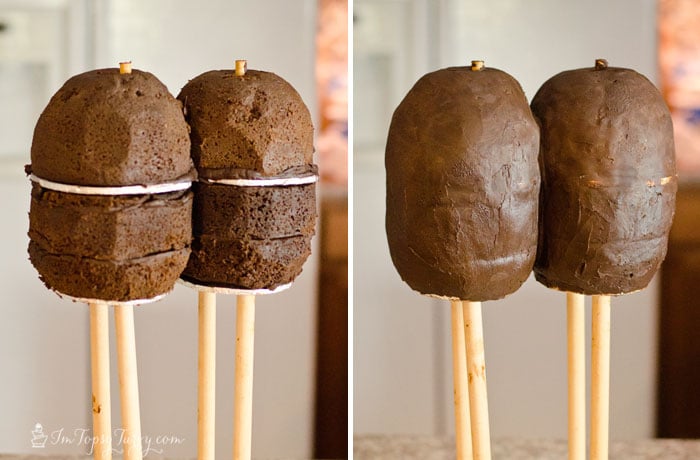
Slide the wondermold cake down now! Frost with Ganache, let it set and smooth it down.
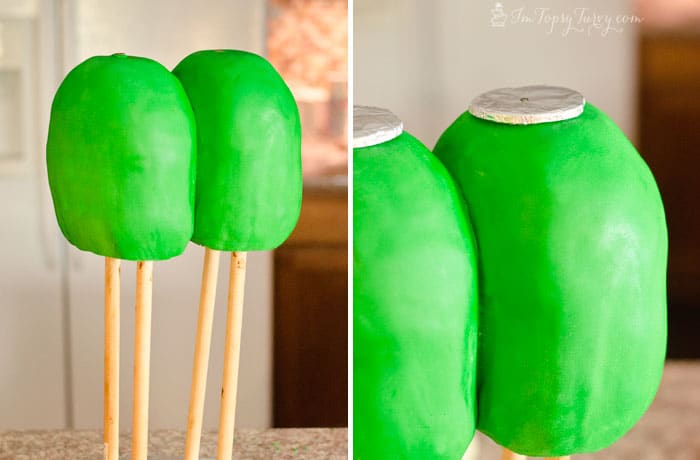
Cover both bodies with fondant (I used one piece and wrapped it around, but you could use 2 pieces if that’s easier for you. Attach the “neck” circles and we’re ready to add the heads!
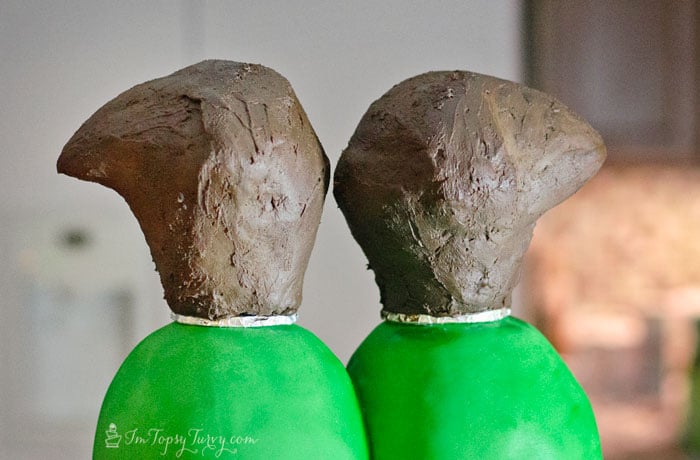
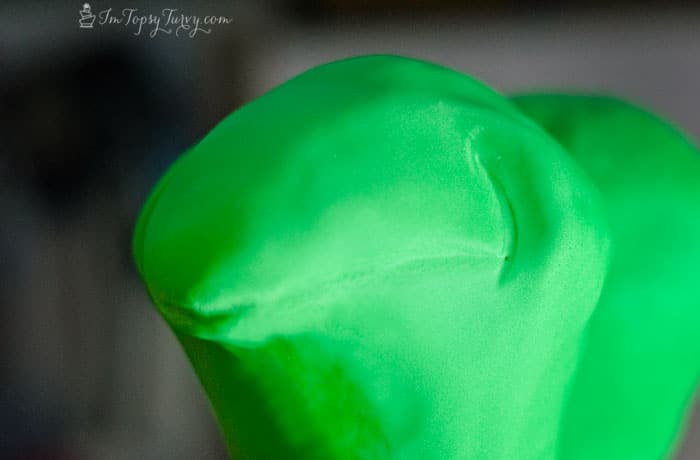
This is where things changed a bit, Constantine has more of a sneer (left) while Kermit is happier (right). So I tried to carve them differently. Also they both have strong cheeks, with deep crease lines. They have a triangle shaped head, rounded.
Carving is a bit of a learning curve. The best advice I can give is to “glue” the pieces together with ganache. Then freeze the cake. Carve frozen and just a little at a time. Don’t go for the big cuts right away. You can always cut more, you can’t cut less. Once your happy with the shape cover it with ganache and let it set!
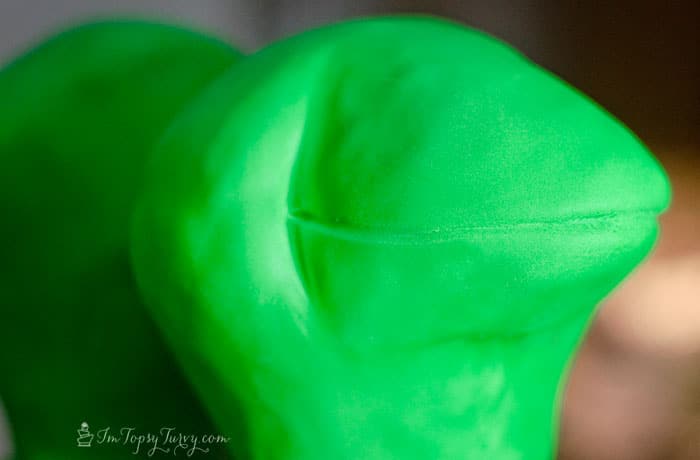
Next up, covering the heads with fondant, and using a dull tool mark the smile lines and cheek lines. Do this while the fondant is fresh and still soft so you won’t crack or rip the fondant.
For Constantine this is the time to create that sneer (and of course the cheek lines too). The sneer shape is awesome, watch the movie a few times before you create it, he has a great sneer. In fact I spent most of the movie trying to figure out how someone’s hand could create that sneer.
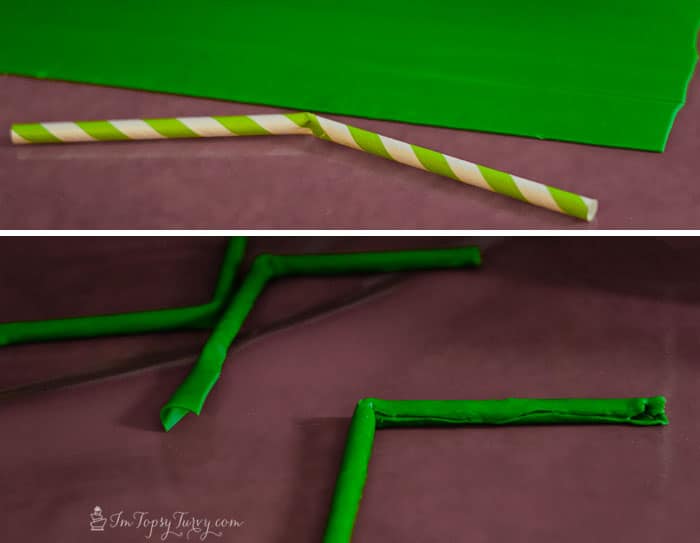
For the arms, I needed something lightweight, so I went with paper straws. I bend them in the middle, then I covered them with green fondant (use vodka/clear vanilla to make the fondant tacky and stick) and let them dry.
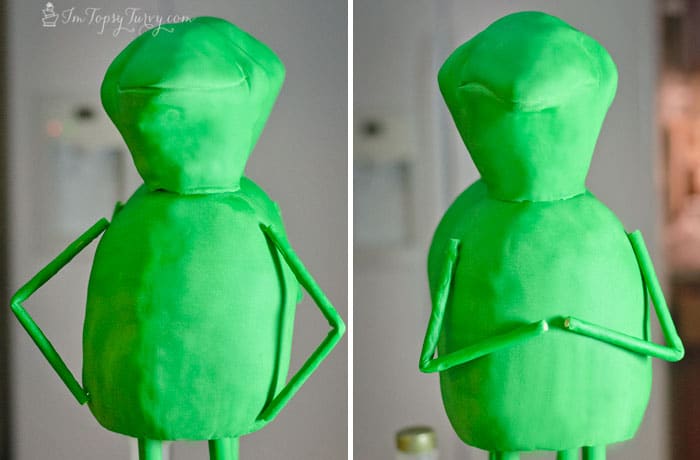
I used pin’s to attach the arms, Kermit’s by his side, and Constantine’s in front of his body.
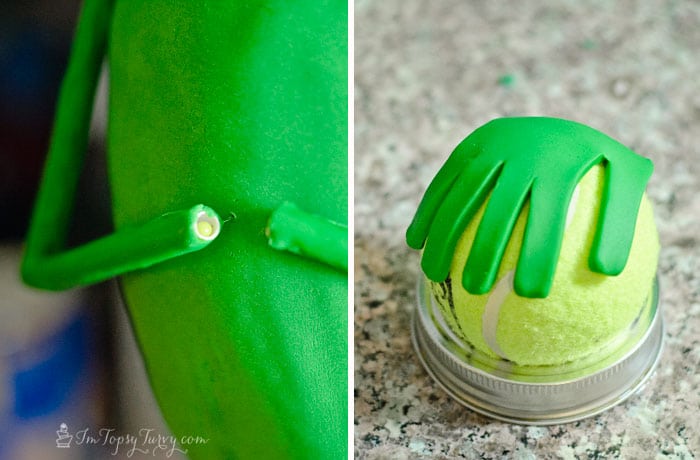
On the left you can see the pin head in the straw, and the pin going into the body. I rolled out some fondant and cut the hand shape, then dried them. Constantines around some tennis balls, and Kermit’s around a rolling pin.
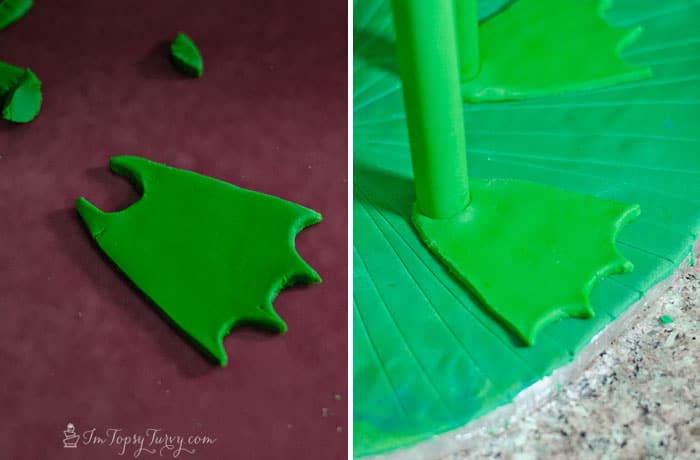
I covered the legs with thin green fondant, then rolled out some thick green fondant and cut a flipper shape for the feet! (you can see I already covered the board and drew lines for the lily pad)
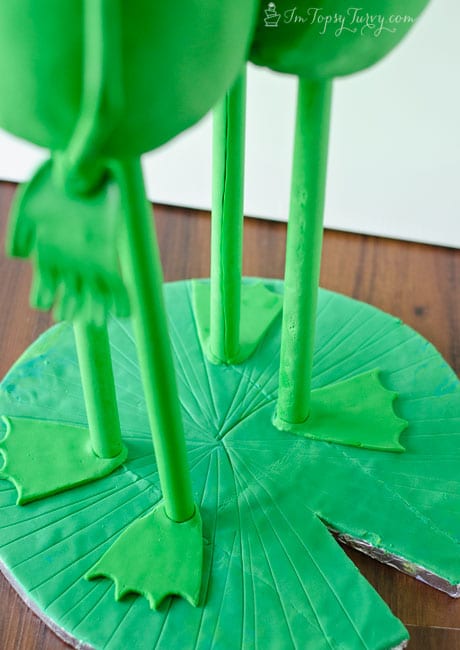
And here you can see the leg’s finished! I let the hands dry overnight before I attached them. And they are the most sensitive and tricky piece’s so wait to attach them until just before the unveiling.
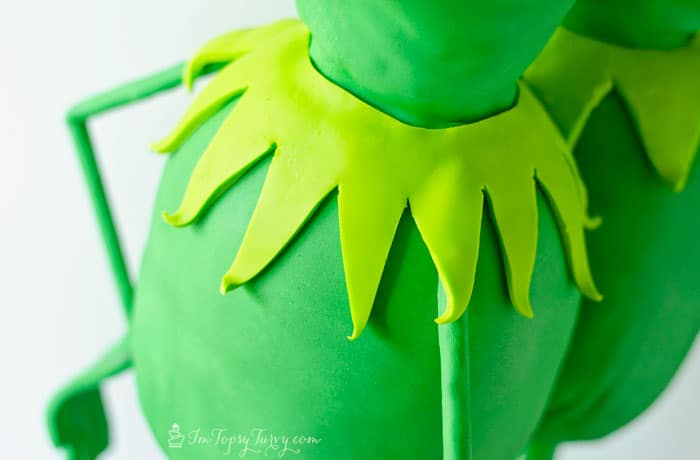
The collars, Add some yellow fondant to the green fondant and cut the collars. Notice Kermit’s collar has longer points and narrower. Use the vodka/clear vanilla to stick the collar to the body, but leave it of the points, I like to let them curl a bit, add’s some depth.

Here you can see Constantine’s collar (wider and shorter points) and you can see his hands. He’s EVIL hands, bwahahaha. I used a fresh fondant blog to attach the hands at the wrists and toothpicks to hold them in place.
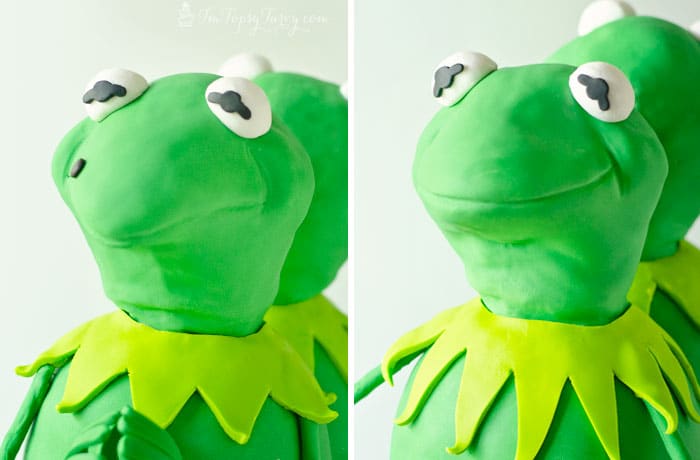
Add white large eyes and cut out the “pupil” shape. Notice Constantine’s eyes are more angled in, more “EVIL”. And Kermit’s are angled out, it’s a happier look. Don’t forget to add Constantine’s mole! (I used brown fondant, cause I have every color there is, but you can use black since you’ll have some for the eyes.
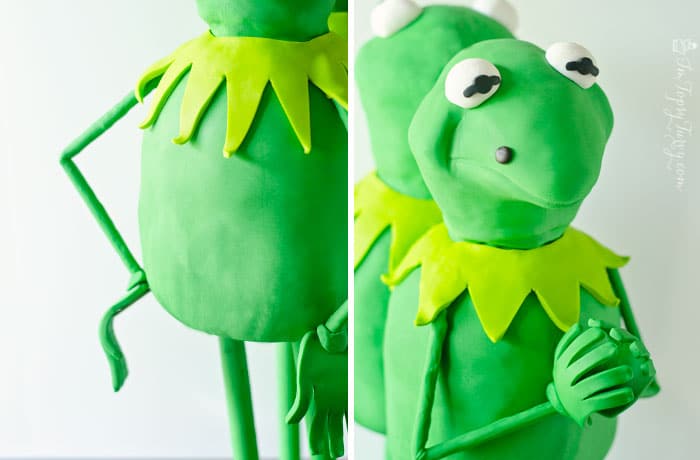
You can see Kermit’s hands here, I wanted them to look puppet like so I was very careful with how I set them up for drying. I attached these the same way, a bit of fresh fondant, vodka and toothpicks (placed into the hand, along the palm then into the cake)
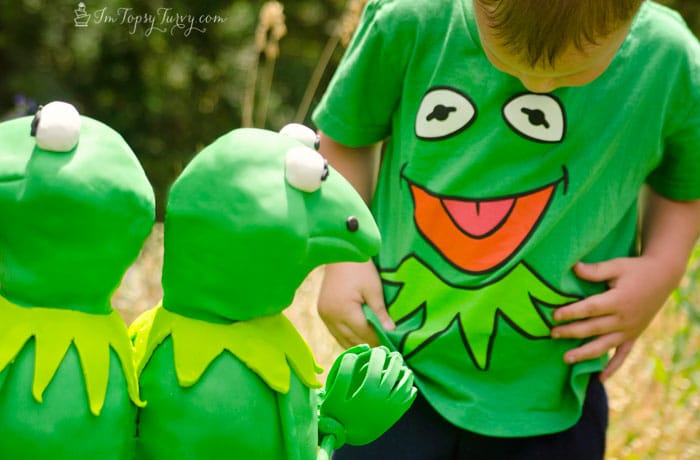
And the unveiling of the cakes!!!! Baby Boy LOOOOOVED them! All the kids were tickled by it. Even my husband loved them. I am so happy with how it turned out, I love the back to back, there is no real back to the cake, every side and angle is wonderful! I put them on a turn table so we could easily see whatever side we want.
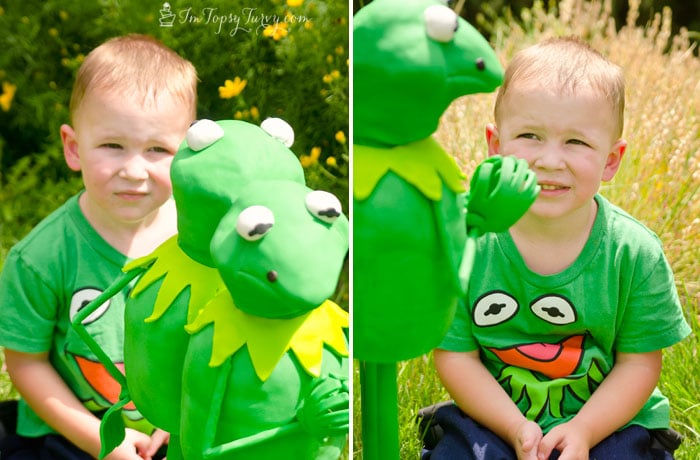
Baby Boy loved both, not that you can tell with these faces, but he really was thrilled!
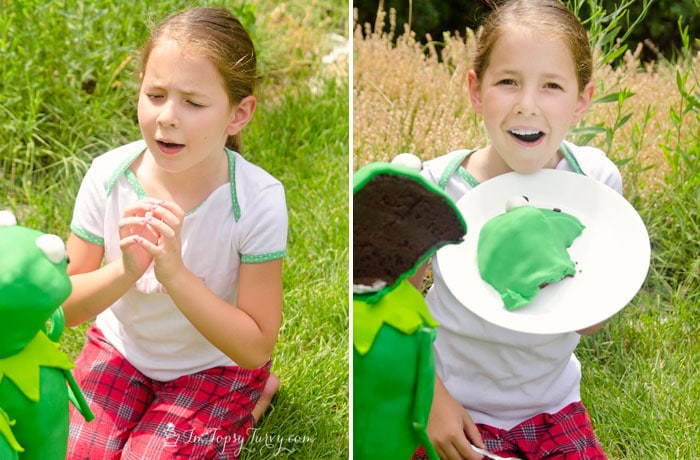
Princess loved them too, especially Constantine and his evil smirk. So when it came time to cut into the cake she wanted the first piece! We went with HUGE pieces cause, well why not, I have enough cake for 100 servings and only 7 of us… anyone want to have cake come on by anytime the next few days!
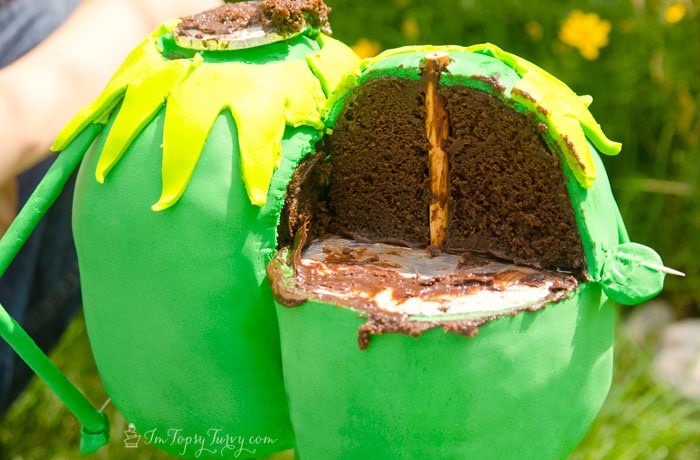
And just to prove that it’s all real cake… I do get questions about it all the time! Don’t forget Muppets Most Wanted is available on Blu-ray Combo Pack and Digital HD August 12th at Disney.com Adults and kids alike will laugh and and have a ball watching it together!
Follow the Muppets on social media!
Facebook: https://www.facebook.com/muppets
Twitter: https://twitter.com/MuppetsStudio
Pinterest: https://www.pinterest.com/Disney/muppet-mania/


Natalie @ A Turtle's LIfe for Me
That is crazy good! I own a bakery and have been decorating cakes for 12 years and would be scared to death to attempt this! It is fantastic!
Ashlee
Thank you so much! I’ve only been cake decorating for 9 years, and not constantly (since I’m a stay at home mom) but I do love pushing what I can do and coming up with fun new ideas!